
vs2015开发Windows服务
工作已经很久,时隔这么长时间写这篇文章是给自己以后做参考。也不至于以后长时间不写Windows服务而忘记整个开发过程。windows服务开发,基础的就不说了,直接上过程。
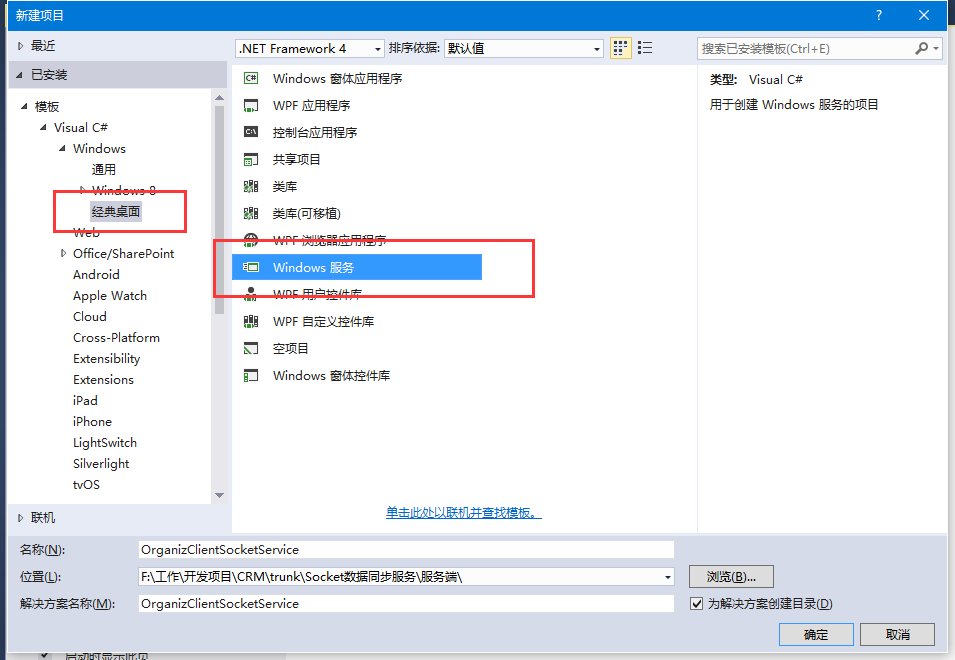
1、新建windows服务项目,我这里选择的是Framework4.0,没有选择高版本是为了防止在服务在一些低版本系统上无法正常运行。
2、添加Windows服务的安装程序。
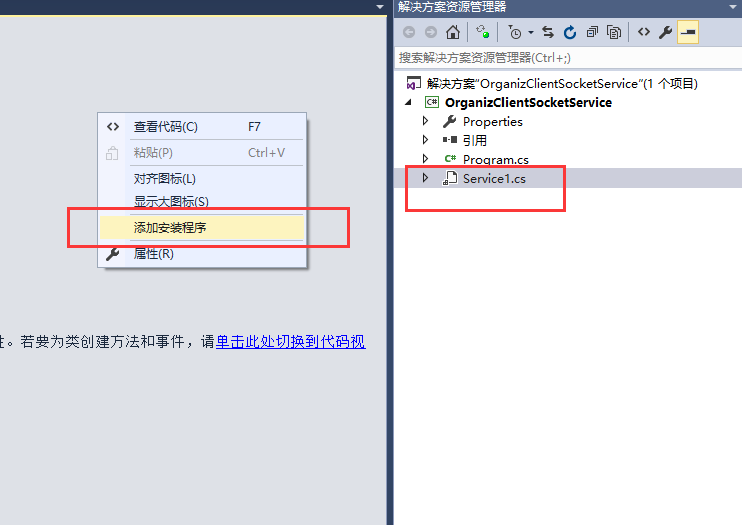
在默认Service1设计器界面空白处点击右键->添加安装程序,系统会自动新建一个带有默认配置的安装程序类,如下图:
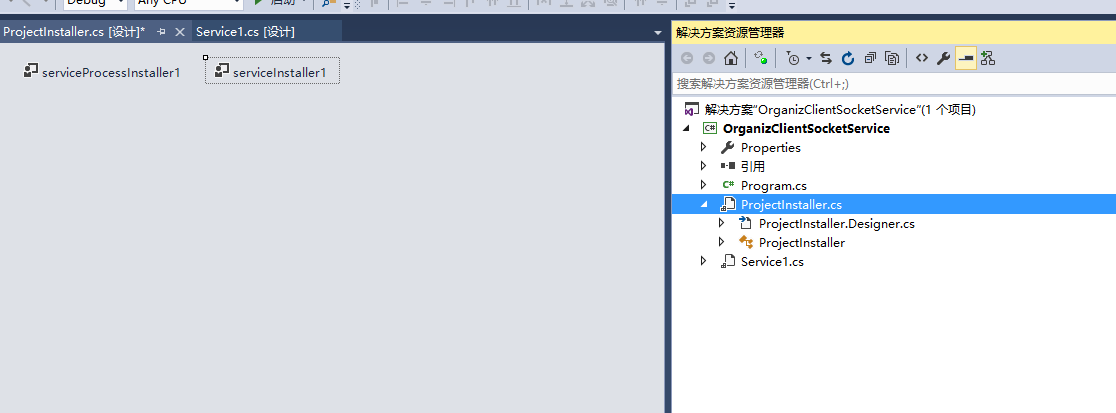
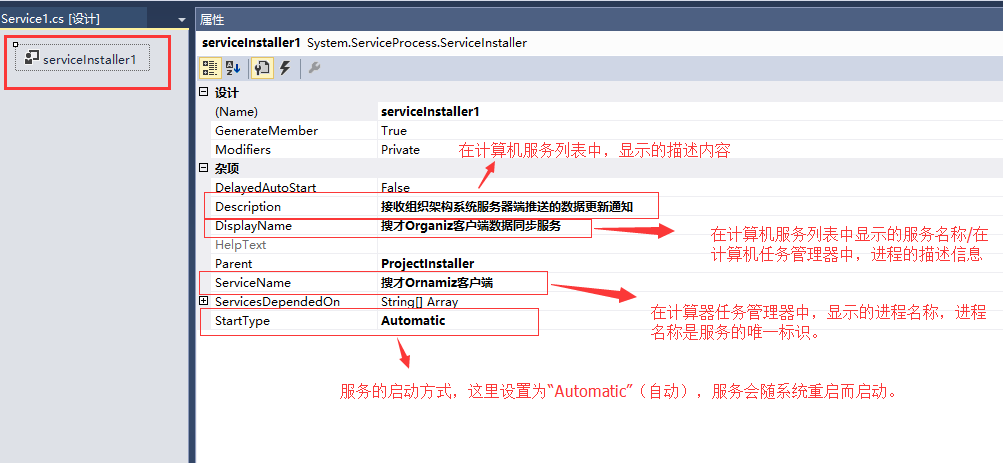
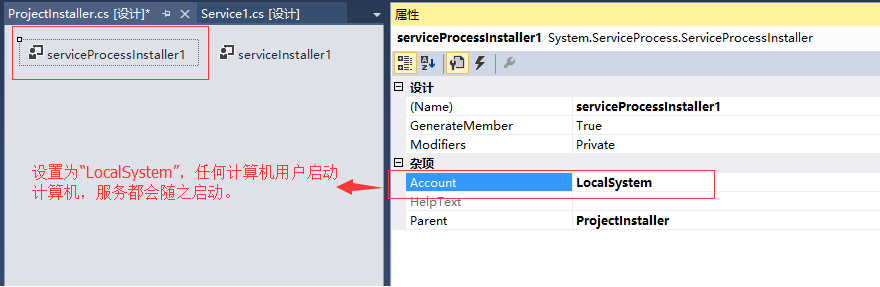
新建完安装程序后,需要给默认的serviceInstaller1和serviceProcessInstaller1做一些基本的属性设置。如下图:
以上工作完成,安装程序配置完毕。
注意:如果不给服务添加安装程序,后面是没法把服务安装至windows系统里的。
3、添加应用程序配置文件(如果有需要的话)。
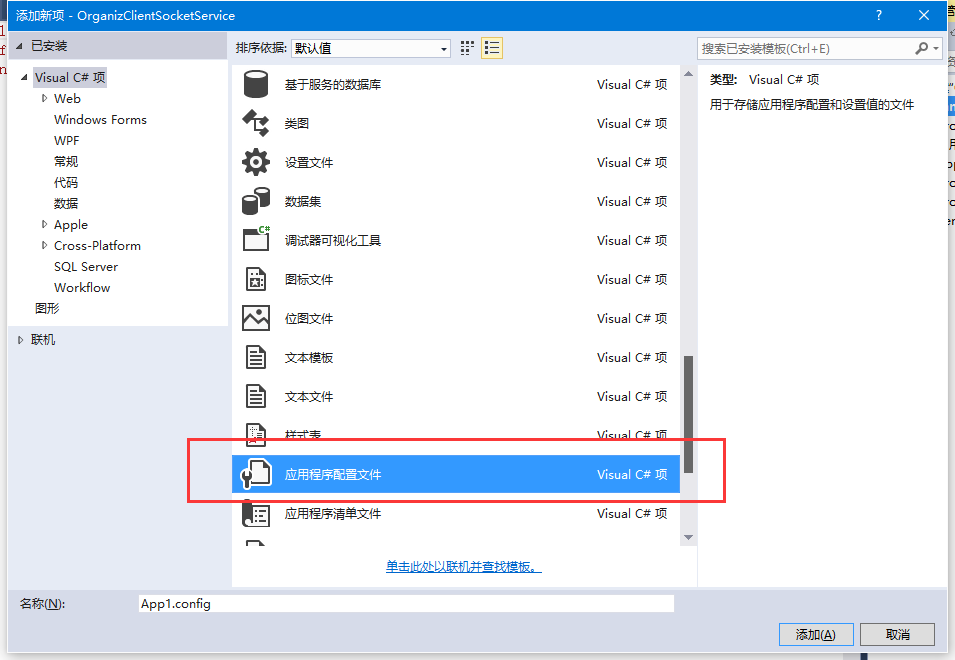
如果项目有需要,一些应用程序的配置参数可以设置在此文件里(例如:数据库连接字符串)。
4、编写windows服务主代码
using System;
using System.Collections.Generic;
using System.ComponentModel;
using System.Data;
using System.Diagnostics;
using System.Linq;
using System.ServiceProcess;
using System.Text;

using System.IO;

namespace OrganizClientSocketService
{
    public partial class Service1 : ServiceBase
    {
        public Service1()
        {
            InitializeComponent();

            System.Timers.Timer timer = new System.Timers.Timer();
            timer.Elapsed += new System.Timers.ElapsedEventHandler(TimedEvent);
            timer.Interval = 5000;//每5秒执行一次
            timer.Enabled = true;
        }

        //定时执行事件
        private void TimedEvent(object sender, System.Timers.ElapsedEventArgs e)
        {
            //业务逻辑代码
        }

        protected override void OnStart(string[] args)
        {
            this.WriteLog("搜才Organiz客户端数据同步服务:【服务启动】");
        }

        protected override void OnStop()
        {
            this.WriteLog("搜才Organiz客户端数据同步服务:【服务停止】");
        }
        protected override void OnShutdown()
        {
            this.WriteLog("搜才Organiz客户端数据同步服务:【计算机关闭】");
        }

        #region 记录日志
        /// <summary>
        /// 记录日志
        /// </summary>
        /// <param name="msg"></param>
        private void WriteLog(string msg)
        {

            //string path = @"C:\log.txt";

            //该日志文件会存在windows服务程序目录下
            string path = AppDomain.CurrentDomain.BaseDirectory + "\\log.txt";
            FileInfo file = new FileInfo(path);
            if (!file.Exists)
            {
                FileStream fs;
                fs = File.Create(path);
                fs.Close();
            }

            using (FileStream fs = new FileStream(path, FileMode.Append, FileAccess.Write))
            {
                using (StreamWriter sw = new StreamWriter(fs))
                {
                    sw.WriteLine(DateTime.Now.ToString() + "   " + msg);
                }
            }
        }
        #endregion
    }
}
5、编译生成,安装windows服务至Windows系统。
完成开发后,对整各项目进行编译生成。在windows服务开发文件夹“\bin\Debug”下,就是我们需要安装的服务,建议把里面的所有文件拷贝至系统里的某个目录进行安装。
我是把整个个文件夹里的文件拷贝到c:\WindowService文件夹下。然后打开目录C:\Windows\Microsoft.NET\Framework64\v4.0.30319,拷贝里面的InstallUtil.exe文件至c:\WindowService文件夹下)。
注意:我的系统是windows10,64位系统,我的服务也将安装至64位系统下,所以我是进入C:\Windows\Microsoft.NET\Framework64\v4.0.30319目录拷贝InstallUtil.exe文件。各位安装的时候,根据你安装的目标系统,来觉得是拷贝哪个framework哪个版本,具体是64位的还是32位的也由你系统决定。
做好以上工作后就可以安装了,打开cdm就可执行安装了(一定要以管理员身份运行哟,要不然安装时会报“Windows服务安装异常:System.Security.SecurityException: 未找到源,但未能搜索某些或全部事件”)。
以下是安装命令、启动服务命令、停止服务命令、卸载服务命令:
安装命令:C:\WindowService\InstallUtil.exe C:\WindowService\OrganizClientSocketService.exe
启动服务命令:net start 搜才Organiz客户端数据同步服务
关闭服务命令:net stop 搜才Organiz客户端数据同步服务
卸载服务命令:C:\WindowService\InstallUtil.exe -u C:\WindowService\OrganizClientSocketService.exe

 浙公网安备 33010602011771号