

gRPC 是一个高性能、开源和通用的 RPC 框架,面向移动和 HTTP/2 设计。目前提供 C、Java 和 Go 语言版本,分别是:grpc, grpc-java, grpc-go. 其中 C 版本支持 C, C++, Node.js, Python, Ruby, Objective-C, PHP 和 C#。
gRPC 基于 HTTP/2 标准设计,带来诸如双向流、流控、头部压缩、单 TCP 连接上的多复用请求等特。这些特性使得其在移动设备上表现更好,更省电和节省空间占用。
环境部署:
1、查看centos版本:

2、安装grpc的提前准备(g++, autoconf等)
yum install -y gcc-c++ autoconf libtool
yum groupinstall -y "Development Tools"
3、下载grpc源码和相关子模块
git clone https://github.com/grpc/grpc.git
cd grpc
git submodule update --init
4、编译安装protobuf(grpc需要用到的组件)
网上有很多方法是使用curl的方式直接从github上使用脚本下载,但是新版(libprotoc 3.6.1)好像不支持修改文件autogen.sh,当然这一步完全可以借助third_party/protobuf/README.txt来部署protobuf,这里我采用直接从github上下载的方式部署:
https://github.com/protocolbuffers/protobuf/releases/

直接终端命令:(在目录third_party下)
wget https://github.com/protocolbuffers/protobuf/releases/download/v3.6.1/protobuf-all-3.6.1.tar.gz
解压后:
mv protobuf-all-3.6.1 protobuf
cd protobuf
./autogen.sh
./configure
make
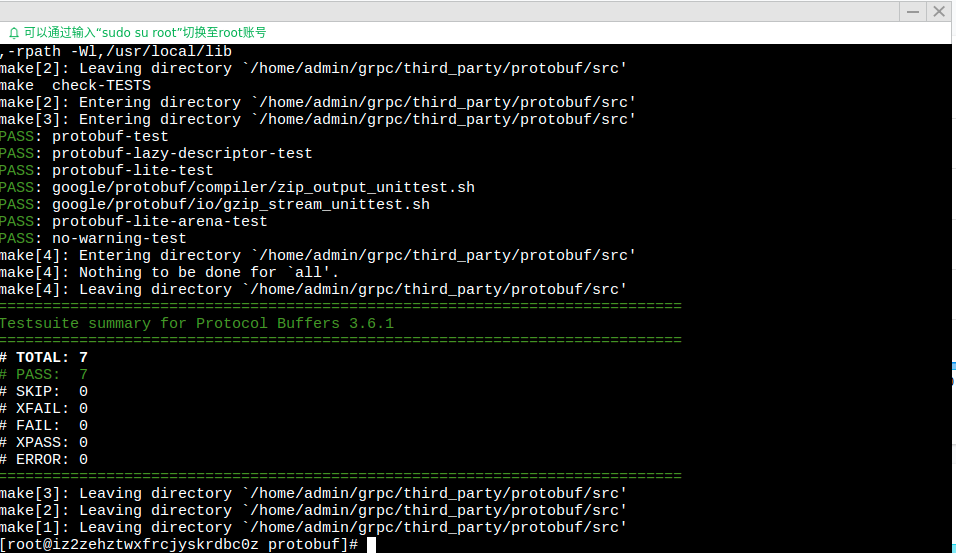
make check
make install
如果make check成功,则显示:
上述操作如果出现了错误,可以查看同级目录下的config.log里面的日志。比如gcc的版本过低等问题。
之后我们可以使用命令:
protoc --version

来验证protobuf是否安装成功,如果出现:
command not found
则需要添加环境变量或者将生成的protoc二进制拷贝到/usr/bin/目录下。
5、编译安装grpc
首先在进到如下的目录下:

然后分别执行命令:
1 make
2 make install
6、demo测试
官方自带有个HelloWorld的Demo,可以编译这个Demo看是否我们已经安装成功了。

执行:
make
如果报错:

则需要如下两条语句:
export PKG_CONFIG_PATH=$PKG_CONFIG_PATH:/usr/local/lib/pkgconfig
pkg-config --libs protobuf grpc++ grpc
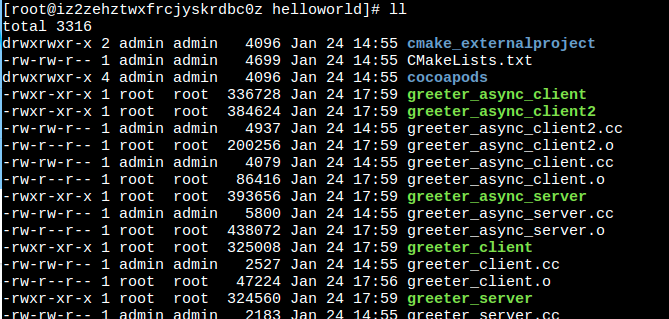
此时再次make发现:
然后分别启动服务器和客户端
./greeter_server
./greeter_clien
效果:(说明部署成功)

补充:
gcc升级到5.3.1:(centos7.3下)
yum install centos-release-scl

yum install devtoolset-4-toolchain

scl enable devtoolset-4 bash

gcc --version
上述内容参考:
http://blog.dreamlikes.cn/archives/555
https://www.jianshu.com/p/efc9167e7044
【grpc配置问题汇总】
1、grpc默认是使用动态库,如果使用静态库编译的话,编译能通过,但是运行时,会报错:
[admin@iz2zehztwxfrcdbc0z worker]$ ./worker_server 127.0.0.1:21111 127.0.0.1:8001
E0304 13:59:33.725495889    3454 uri_parser.cc:46]           bad uri.scheme: '127.0.0.1:21111'
E0304 13:59:33.725607759    3454 uri_parser.cc:52]                            ^ here
E0304 13:59:33.725615018    3454 resolver_registry.cc:80]    don't know how to resolve '127.0.0.1:21111' or 'dns:///127.0.0.1:21111'
E0304 13:59:33.725665096    3454 resolver_registry.cc:80]    don't know how to resolve 'dns:///127.0.0.1:21111' or 'dns:///dns:///127.0.0.1:21111'
E0304 13:59:33.725687178    3454 channel.cc:99]              channel stack builder failed: {"created":"@1551679173.725672811","description":"resolver creation failed","file":"src/core/ext/filters/client_channel/resolving_lb_policy.cc","file_line":160}
Register fail, error_code: 2, error_message: lame client channel
参考github上的相似问题:https://github.com/grpc/grpc/issues/11366
即需要自己初始化grpc,直接调用grpc_init()
就我们的helloworld例子来说,代码应该变成:
server端:greeter_server.cc
 1 #include <iostream>
 2 #include <memory>
 3 #include <string>
 4 #include <grpc/grpc.h>
 5 #include <grpc++/server.h>
 6 #include <grpc++/server_builder.h>
 7 #include <grpc++/server_context.h>
 8 #include <grpc++/server_credentials.h>
 9 #include <grpc++/status.h>
10 #include "helloworld.pb.h"
11
12 using grpc::Server;
13 using grpc::ServerBuilder;
14 using grpc::ServerContext;
15 using grpc::Status;
16 using helloworld::HelloRequest;
17 using helloworld::HelloReply;
18 using helloworld::Greeter;
19
20 class GreeterServiceImpl final : public Greeter::Service {
21     Status SayHello(ServerContext* context, const HelloRequest* request, HelloReply* reply) override {
22         std::string prefix("Hello ");
23         reply->set_message(prefix + request->name());
24         return Status::OK;
25     }
26 };
27
28 void RunServer() {
29     std::string server_address("0.0.0.0:50051");
30     GreeterServiceImpl service;
31     ServerBuilder builder;
32     builder.AddListeningPort(server_address,
33     grpc::InsecureServerCredentials());
34     builder.RegisterService(&service);
35     std::unique_ptr<Server> server(builder.BuildAndStart());
36     std::cout << "Server listening on " << server_address << std::endl;
37     server->Wait();
38 }
39
40 int main(int argc, char** argv) {
41     grpc_init();
42     RunServer();
43     grpc_shutdown();
44     return 0;
45 }
client端:greeter_client.cc
 1 #include <iostream>
 2 #include <memory>
 3 #include <string>
 4 #include <grpc/grpc.h>
 5 #include <grpc++/channel_arguments.h>
 6 #include <grpc++/channel_interface.h>
 7 #include <grpc++/client_context.h>
 8 #include <grpc++/create_channel.h>
 9 #include <grpc++/credentials.h>
10 #include <grpc++/status.h>
11 #include "helloworld.pb.h"
12
13 using grpc::ChannelArguments;
14 using grpc::ChannelInterface;
15 using grpc::ClientContext;
16 using grpc::Status;
17 using helloworld::HelloRequest;
18 using helloworld::HelloReply;
19 using helloworld::Greeter;
20
21 class GreeterClient {
22   public:
23     GreeterClient(std::shared_ptr<ChannelInterface> channel) : stub_(Greeter::NewStub(channel)) {}
24
25     std::string SayHello(const std::string& user) {
26         HelloRequest request;
27         request.set_name(user);
28         HelloReply reply;
29         ClientContext context;
30         Status status = stub_->SayHello(&context, request, &reply);
31         if (status.IsOk()) {
32             return reply.message();
33         } else {
34             return "Rpc failed";
35         }
36     }
37     void Shutdown() { stub_.reset(); }
38   private:
39     std::unique_ptr<Greeter::Stub> stub_;
40 };
41
42 int main(int argc, char** argv) {
43     grpc_init();
44     GreeterClient greeter(
45     grpc::CreateChannel("localhost:50051", grpc::InsecureCredentials(),
46         ChannelArguments()));
47     std::string user("world");
48     std::string reply = greeter.SayHello(user);
49     std::cout << "Greeter received: " << reply << std::endl;
50     greeter.Shutdown();
51     grpc_shutdown();
52 }

 浙公网安备 33010602011771号