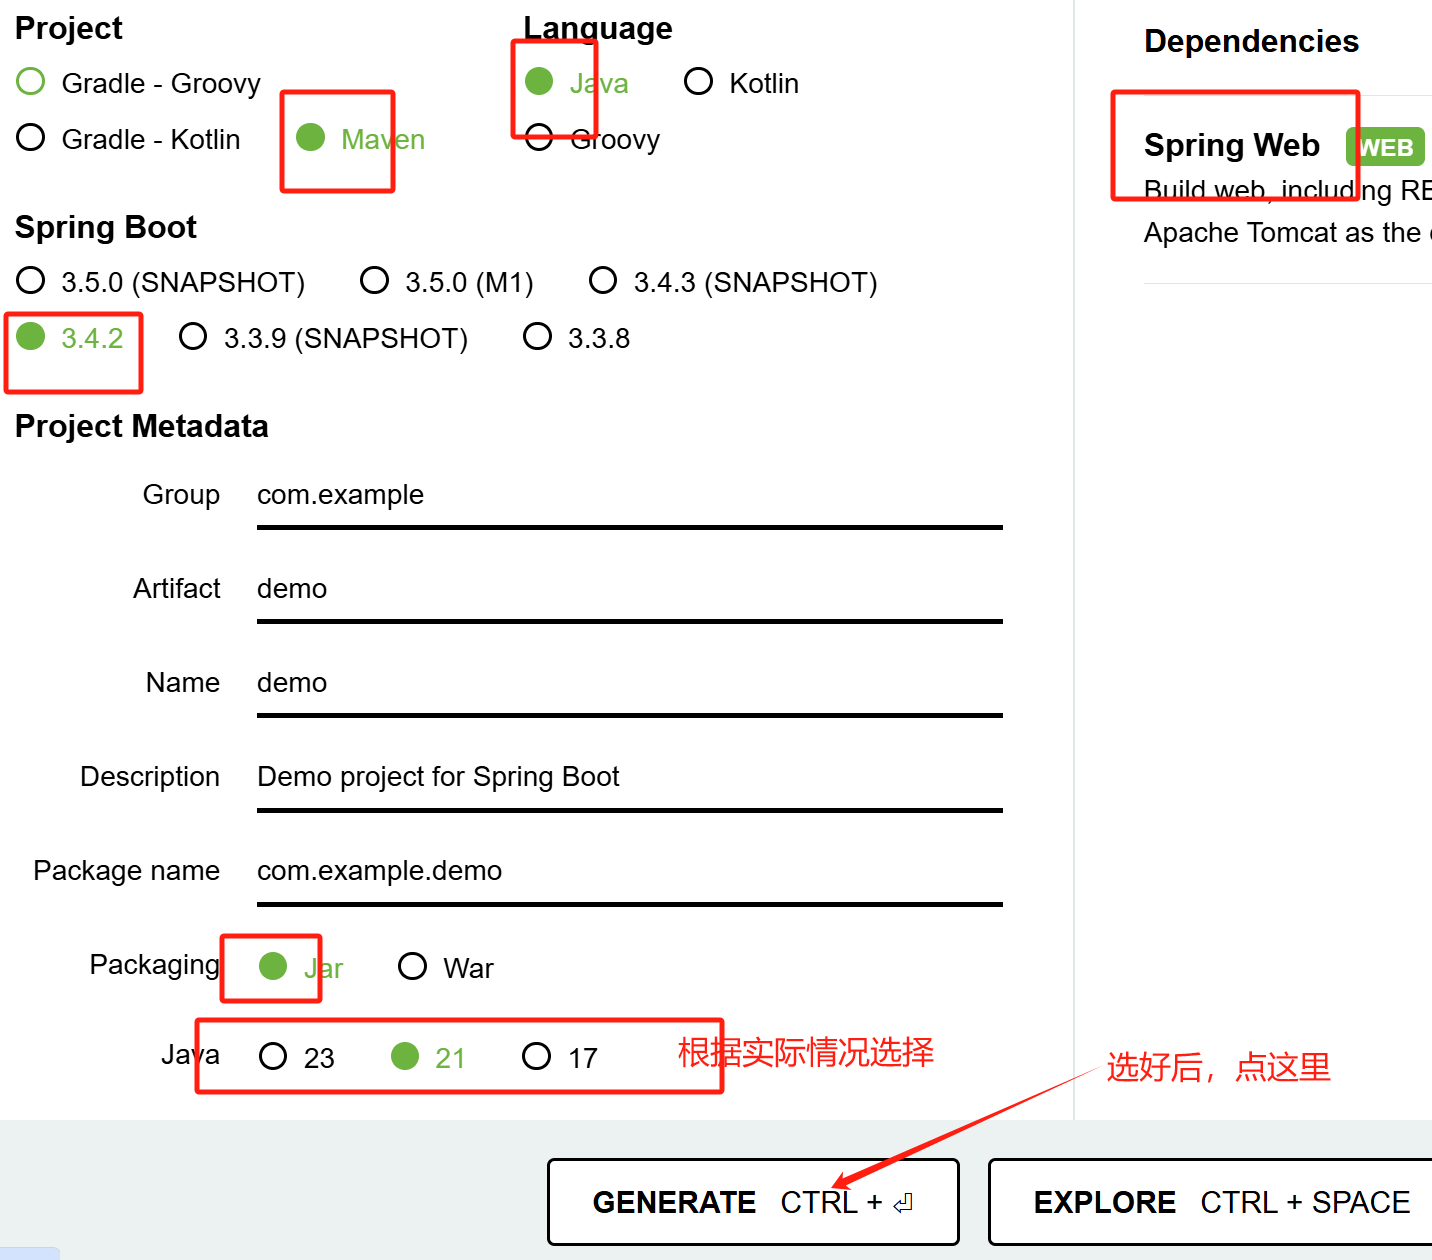
使用Spring Initializr方式构建Spring Boot项目
按教材
下例选用IntelliJ IDEA 2024.3.3付费版
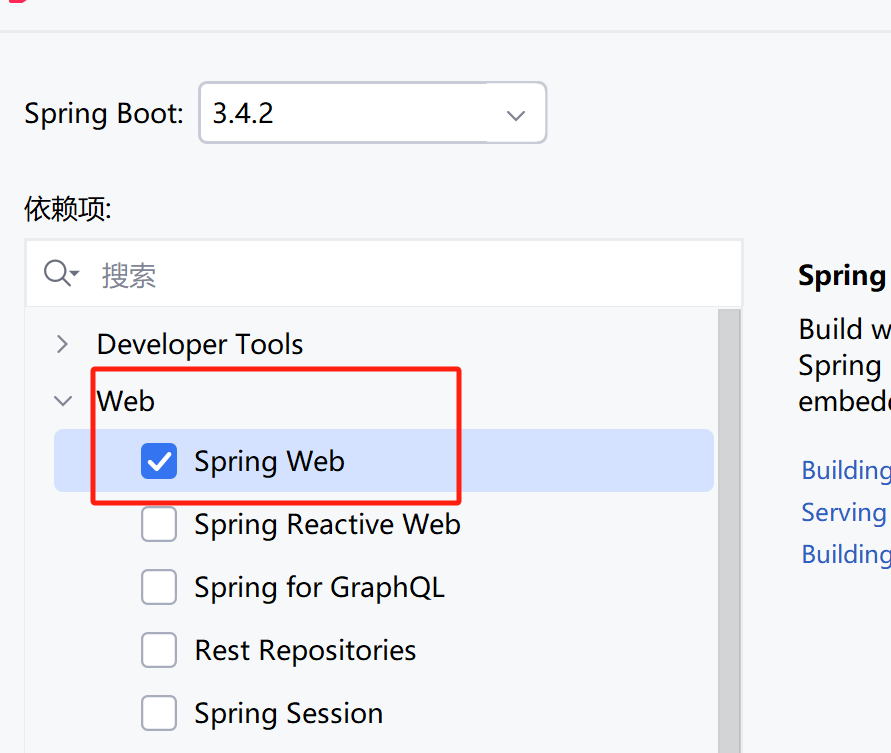
创建项目
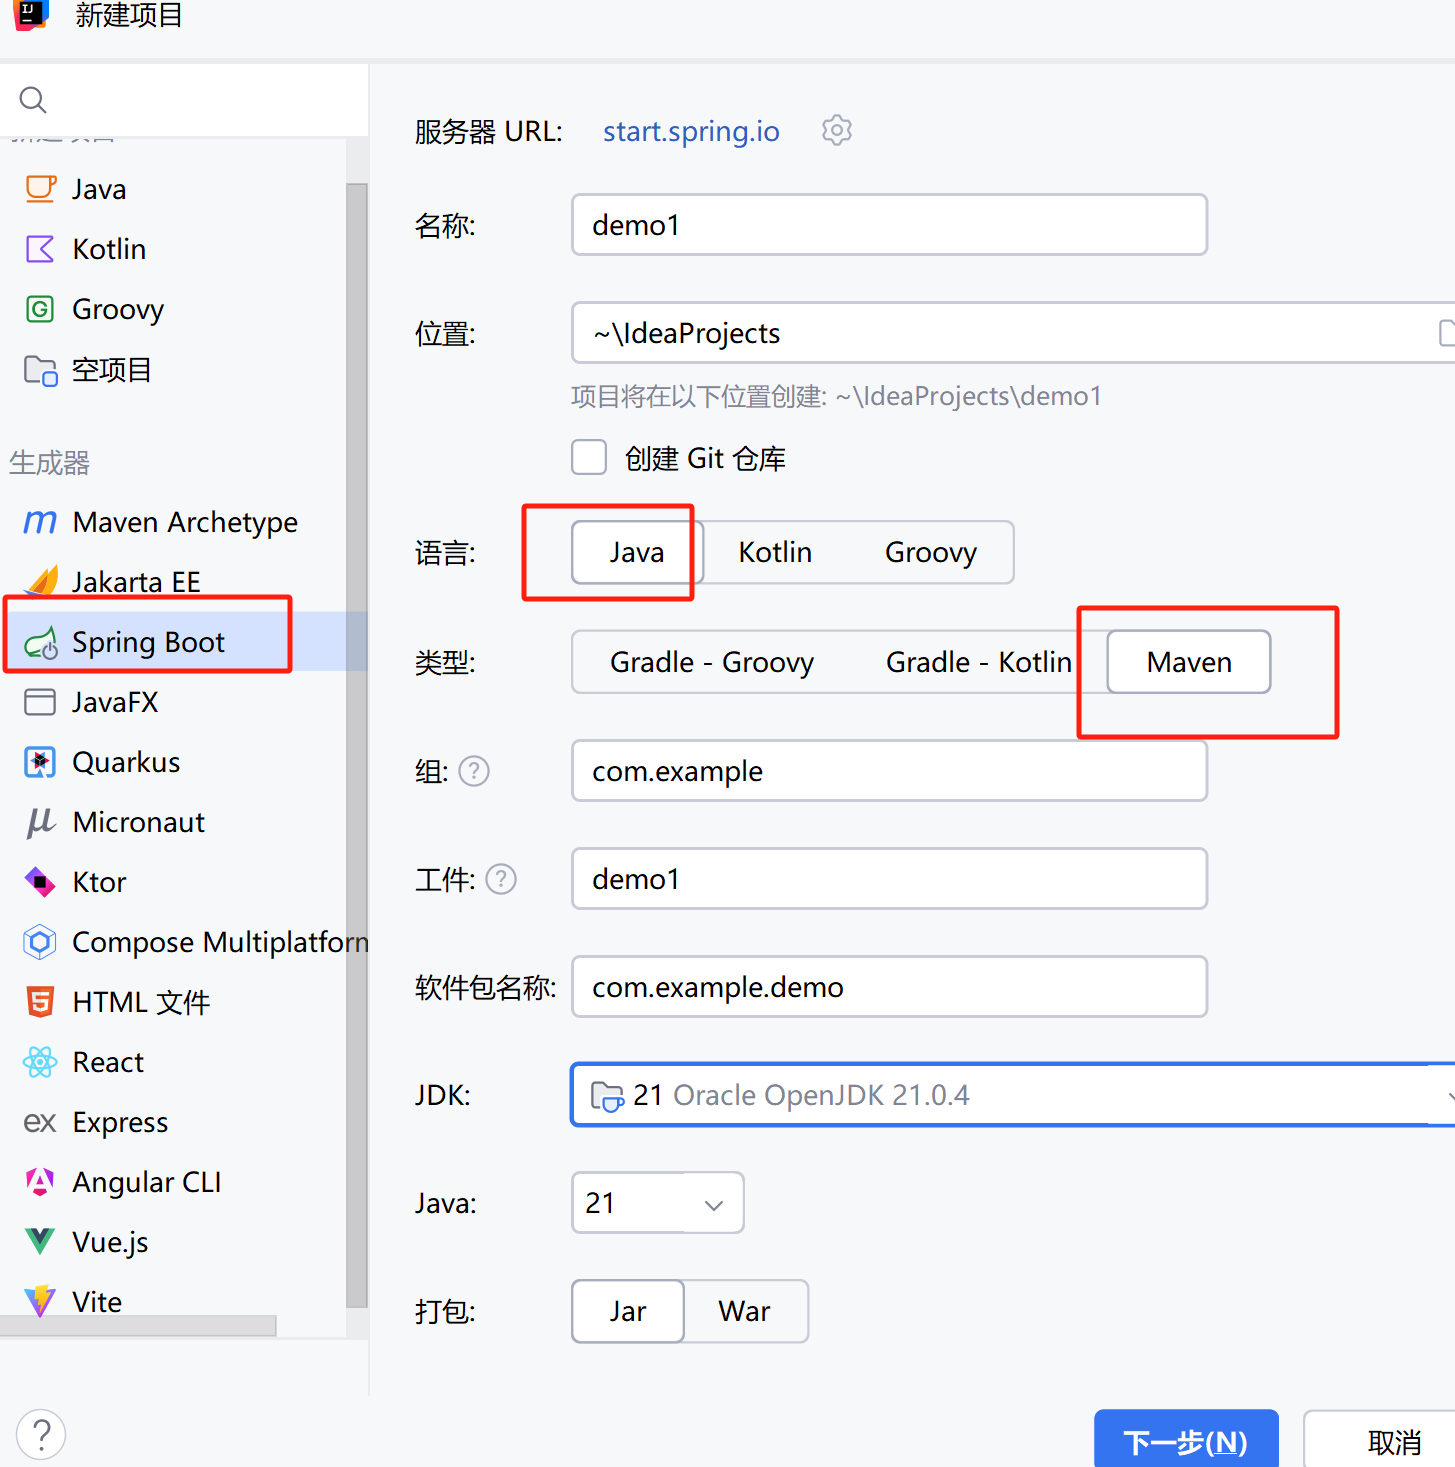
JDK版本根据实际情况。
配置Maven
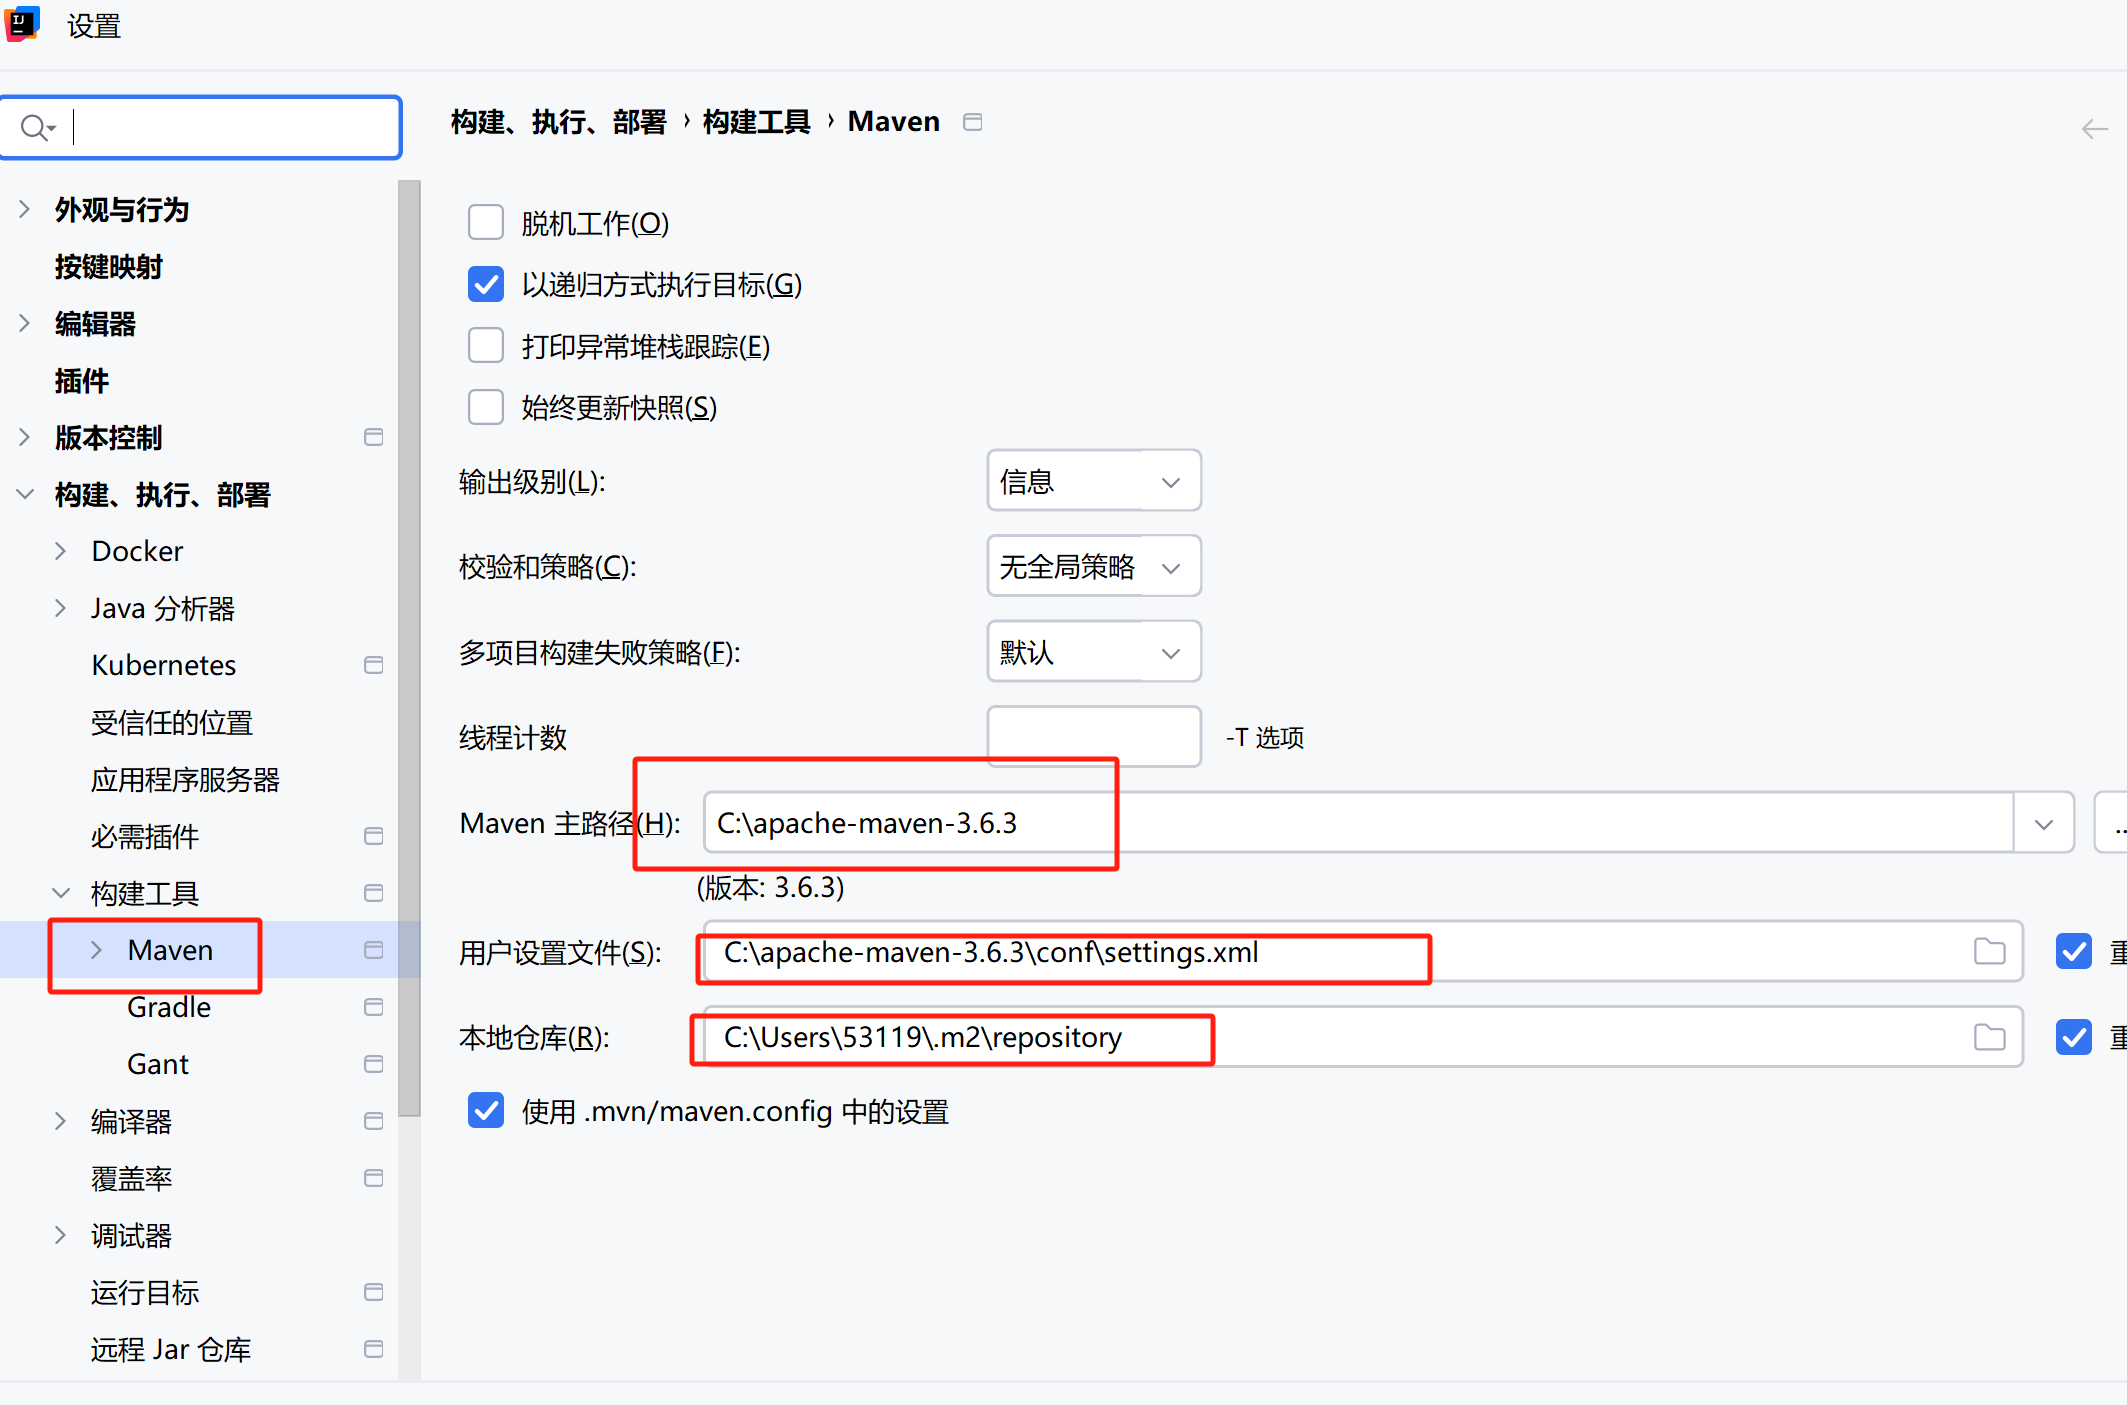
出于版本、兼容性等考虑。建议首先配置maven。根据实际路径配置地址。maven类似一个“代购”,代替我们下载依赖包,这些依赖包被存在本地仓库,本地仓库地址可在settings.xml中重新设置。
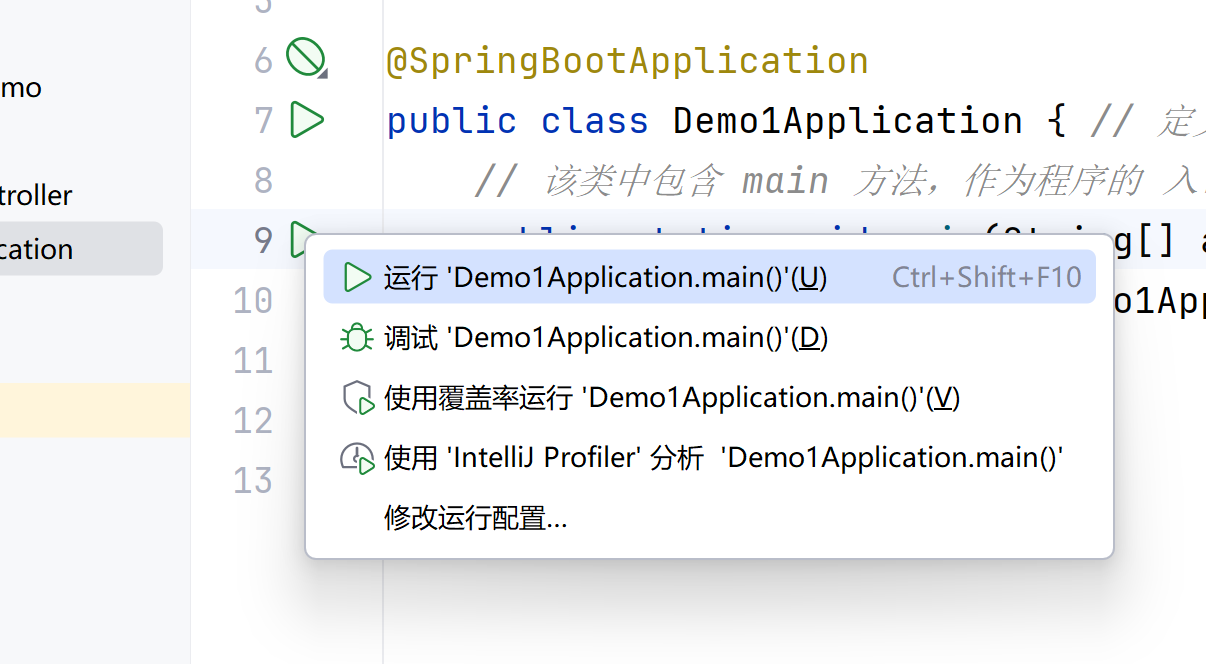
启动类简析
package com.example.demo; // 这段代码位于 com.example.demo 这个包下

import org.springframework.boot.SpringApplication;
import org.springframework.boot.autoconfigure.SpringBootApplication;

@SpringBootApplication
public class Demo1Application { // 定义了一个 主类 Demo1Application,
    // 该类中包含 main 方法,作为程序的 入口,用来启动整个 Spring Boot 应用
    public static void main(String[] args) {
        SpringApplication.run(Demo1Application.class, args);
    }
}@SpringBootApplication是一个 核心注解,它相当于 三个注解的组合:
@Configuration   // 标识该类是一个配置类,替代了传统的 XML 配置文件
@EnableAutoConfiguration   // 启用 Spring Boot 自动配置功能
@ComponentScan   // 允许 Spring 扫描该包及子包中的组件(如 Controller、Service 等)
pom.xml简析
该文件描述了项目的基本信息、依赖等
    <dependencies>
        <dependency>
            <groupId>org.springframework.boot</groupId>
            <artifactId>spring-boot-starter-web</artifactId>
            <!--引入 Spring Boot Web 依赖,用于开发 Web 应用(包含 Tomcat、Jackson、Spring MVC 等)-->
        </dependency>

        <dependency>
            <groupId>org.springframework.boot</groupId>
            <artifactId>spring-boot-starter-test</artifactId>
            <scope>test</scope>
            <!--spring-boot-starter-test:Spring Boot的测试依赖,scope=test表示仅用于测试,不会随正式构建一起打包-->
        </dependency>
    </dependencies>
创建Spring MVC控制器
package com.example.demo.controller;
import org.springframework.web.bind.annotation.RequestMapping;
import org.springframework.web.bind.annotation.RestController;
// 告诉 springboot 这是一个控制器,控制器用来处理 http 请求
@RestController
public class HelloController {
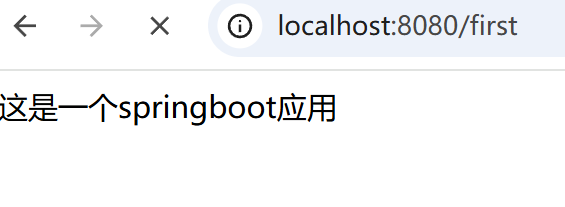
// 将"/first"地址的请求绑定到本方法
@RequestMapping("first")
public String index() {
System.out.println("张三,你好"); // 控制台输出(后台日志,用户不可见)
return "张三,你好"; // 返回给浏览器的字符串(用户可见内容)
}
}运行
只有免费版IDEA
下例选用IntelliJ IDEA Community Edition 2024.2
创建项目
将压缩包解压后,以IDEA项目打开,其它同上。

 浙公网安备 33010602011771号