初试Vuex
vuex是一个便于多个组件共享数据的一个东西。
①环境准备
vue create test_vuex
cd test_vuex
②安装Vuex
npm install vuex@next --save
运行后报错:
npm ERR! code ERESOLVE
npm ERR! ERESOLVE unable to resolve dependency tree
npm ERR!
npm ERR! While resolving: test_vuex@0.1.0
npm ERR! Found: vue@2.6.14
npm ERR! node_modules/vue
npm ERR!   vue@"^2.6.11" from the root project
npm ERR!
npm ERR! Could not resolve dependency:
npm ERR! peer vue@"^3.0.2" from vuex@4.0.2
npm ERR! node_modules/vuex
npm ERR!   vuex@"4.0.2" from the root project
npm ERR!
npm ERR! Fix the upstream dependency conflict, or retry
npm ERR! this command with --force, or --legacy-peer-deps
npm ERR! to accept an incorrect (and potentially broken) dependency resolution.
npm ERR!
npm ERR! See C:\Users\mdzz\AppData\Local\npm-cache\eresolve-report.txt for a full report.

npm ERR! A complete log of this run can be found in:
npm ERR!     C:\Users\mdzz\AppData\Local\npm-cache\_logs\2022-02-11T10_10_02_737Z-debug.log
用npm i vuex报类似错误。
改用
cnpm i vuex
运行成功,结果如下:
-
√ Installed 1 packages
√ Linked 2 latest versions
√ Run 0 scripts
peerDependencies WARNING vuex@latest requires a peer of vue@^3.0.2 but vue@2.6.14 was installed
√ All packages installed (2 packages installed from npm registry, used 1s(network 1s), speed 144.32KB/s, json 3(84.35KB), tarball 70.8KB)
③改用更低版本的Vuex
首先,查看依赖:
>npm ls
test_vuex@0.1.0 D:\2022_1_15_VUE\test_vuex
+-- _@vue_devtools-api@6.0.6@@vue@ extraneous
+-- _vuex@4.0.2@vuex@npm:vuex@4.0.2 extraneous
+-- @vue/cli-plugin-babel@4.5.15
+-- @vue/cli-plugin-eslint@4.5.15
+-- @vue/cli-service@4.5.15
+-- @vue/devtools-api@6.0.6 extraneous -> .\node_modules\_@vue_devtools-api@6.0.6@@vue\devtools-api
+-- babel-eslint@10.1.0
+-- bindings@1.5.0 extraneous
+-- core-js@3.21.0
+-- eslint-plugin-vue@6.2.2
+-- eslint@6.8.0
+-- file-uri-to-path@1.0.0 extraneous
+-- nan@2.15.0 extraneous
+-- vue-template-compiler@2.6.14
+-- vue@2.6.14
`-- vuex@4.0.2 extraneous -> .\node_modules\_vuex@4.0.2@vuex
卸载vuex@4.0.2:
npm uninstall vuex
重新安装3.6.2版本(https://www.npmjs.com/package/vuex/v/3.6.2):
npm i vuex@3.6.2 --save
④参考官方教程目录结构,创建文件,配置并启用Vuex
https://v3.vuex.vuejs.org/zh/guide/structure.html
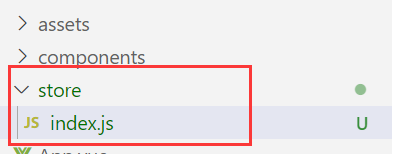
index.js:
import Vue from 'vue'
import Vuex from 'vuex'
// 应用vuex插件
Vue.use(Vuex)

// 用于响应组件中的动作
const actions = {}

// 用于操作state
const mutations = {}

// 用于存储数据
const state = {}

// 创建并暴露store
export default new Vuex.Store({
    actions,
    mutations,
    state
})
main.js:
import Vue from 'vue'
import App from './App.vue'
import store from './store'

Vue.config.productionTip = false

new Vue({
  render: h => h(App),
  store,
}).$mount('#app')
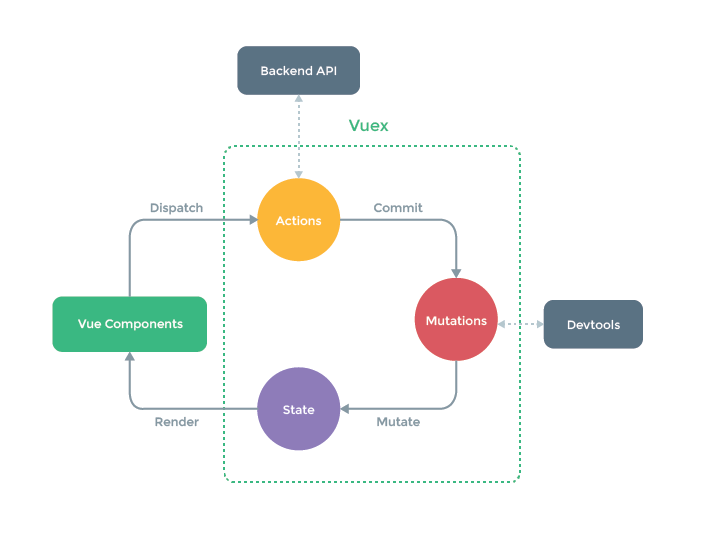
⑤编写HelloWorld程序
一个重要的图:
例子程序效果图:

index.js:
import Vue from 'vue'
import Vuex from 'vuex'
// 应用vuex插件
Vue.use(Vuex)

// 用于响应组件中的动作(业务逻辑放这里)
const actions = {
    increaseX(context, val) {
        if (isNaN(val)) {
            alert('请输入数字')
            return
        }
        context.commit('INCREASE_X', val)
    }
}

// 用于操作state
const mutations = {
    INCREASE_X(state, val) {
        state.x += val;
    }
}

// 用于存储数据
const state = {
    x: 100,
}

// 创建并暴露store
export default new Vuex.Store({
    actions,
    mutations,
    state
})
HelloWorld.vue:
<template>
  <div>
    <h1>输出store中的x的值{{$store.state.x}}</h1>
    <input type="text" v-model.number="val">
    <button @click="increaseX">让x加{{val}}</button>
  </div>
</template>

<script>
export default {
  name: 'HelloWorld',
  data() {
    return {
      val: 2,
    }
  },
  methods: {
    increaseX() {
      this.$store.dispatch('increaseX', this.val)
    }
  },
  mounted() {
    console.log(this.$store)
  },
}
</script>

 浙公网安备 33010602011771号