
springBoot整合Swagger2
一 关于 Swagger
Swagger能成为最受欢迎的REST APIs文档生成工具之一,有以下几个原因:
- Swagger 可以生成一个具有互动性的API控制台,开发者可以用来快速学习和尝试API。
- Swagger 可以生成客户端SDK代码用于各种不同的平台上的实现。
- Swagger 文件可以在许多不同的平台上从代码注释中自动生成。
- Swagger 有一个强大的社区,里面有许多强悍的贡献者
二 Swagger的缺点
Swagger是一个非常强大的文档工具,但是对代码侵入性太高,这点等会截图下来,大家就可以看到的,这个点是缺陷,也导致了很多公司并没有使用他,当然使用他并没有什么坏处
三:综合分析swagger
在开发中我们构建RESTful风格Api时候就可能需要面对不同的开发前端,例如微信小程序,app,web,安卓,ios等,那么我们就需要一份开发文档给前端人员进行调用,在之前笔者是采用showdoc进行构建的,就是石墨文档,还有自己内部的服务器进行写文档的,这个给笔者开发带了很大的麻烦,一个上午的时间只可以写四个文档,对每个参数进行说明,
同时,在开发过程中如果代码修改,参数类型发生改变,还有请求类型发送改变,那么就需要去重新修改文档,这个给开发效率造成了很大的麻烦,swagger是一个很好的开发工具,
四 springboot整合swagger
1 pom.xml依赖引入
  <dependencies>
        <dependency>
            <groupId>org.springframework.boot</groupId>
            <artifactId>spring-boot-starter-data-elasticsearch</artifactId>
        </dependency>
<!--这个es的依赖是我整合时候es使用的,这个可以删除,如果删除就是需要练习者进行自己创建数据源 -->
        <dependency>
            <groupId>org.springframework.boot</groupId>
            <artifactId>spring-boot-starter-web</artifactId>
        </dependency>

        <dependency>
            <groupId>io.springfox</groupId>
            <artifactId>springfox-swagger2</artifactId>
            <version>2.2.2</version>
        </dependency>
        <dependency>
            <groupId>io.springfox</groupId>
            <artifactId>springfox-swagger-ui</artifactId>
            <version>2.2.2</version>
        </dependency>

        <dependency>
            <groupId>org.springframework.boot</groupId>
            <artifactId>spring-boot-starter-test</artifactId>
            <scope>test</scope>
        </dependency>
    </dependencies>
2 controller配置:
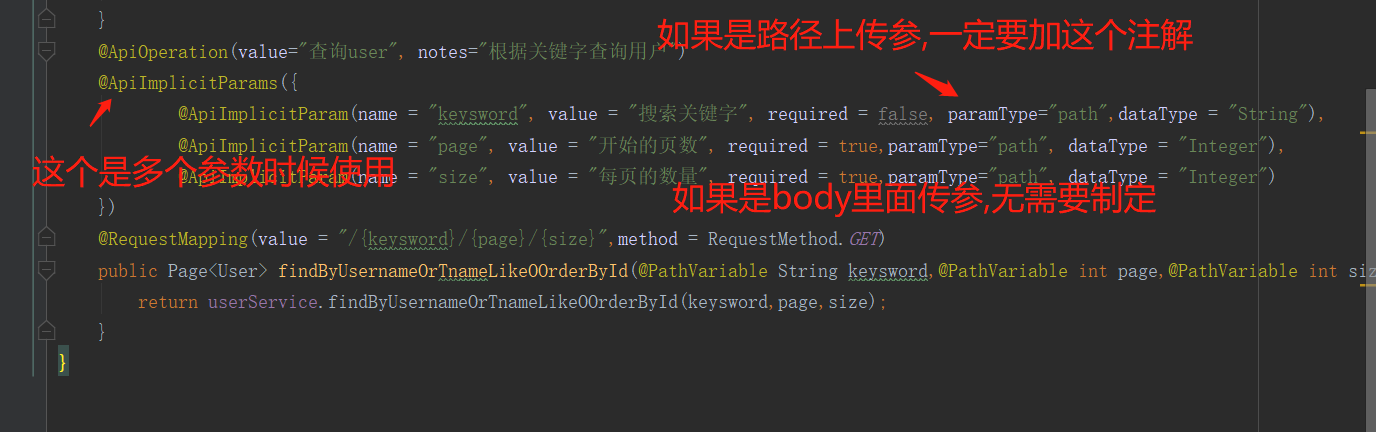
package com.cxy.es.controller;

import com.cxy.es.pojo.User;
import com.cxy.es.service.UserService;
import io.swagger.annotations.Api;
import io.swagger.annotations.ApiImplicitParam;
import io.swagger.annotations.ApiImplicitParams;
import io.swagger.annotations.ApiOperation;
import org.springframework.beans.factory.annotation.Autowired;
import org.springframework.data.domain.Page;
import org.springframework.web.bind.annotation.*;
@Api(value="用户controller",tags={"用户操作接口"})
@RestController
@CrossOrigin
@RequestMapping("/user")
public class UserController {
    @Autowired
    private UserService userService;
    @ApiOperation(value="创建用户", notes="根据User对象创建用户")
    @ApiImplicitParam(name = "user", value = "用户详细实体user", required = true, dataType = "User")
    @RequestMapping(value="",method=RequestMethod.POST)
    public String save(@RequestBody User user) {
        userService.save(user);
        return "a";
    }
    @ApiOperation(value="查询user", notes="根据关键字查询用户")
    @ApiImplicitParams({
            @ApiImplicitParam(name = "keysword", value = "搜索关键字", required = false, dataType = "String"),
            @ApiImplicitParam(name = "page", value = "开始的页数", required = true, dataType = "Integer"),
            @ApiImplicitParam(name = "size", value = "每页的数量", required = true, dataType = "Integer")
    })
    @RequestMapping(value = "/get/{keysword}/{page}/{size}",method = RequestMethod.GET)
    public Page<User> findByUsernameOrTnameLike(@PathVariable String keysword,@PathVariable int page,@PathVariable int size){
        return userService.findByUsernameOrTnameLike(keysword,page,size);
    }
    @ApiOperation(value="查询user", notes="根据关键字查询用户")
    @ApiImplicitParams({
            @ApiImplicitParam(name = "keysword", value = "搜索关键字", required = false, paramType="path",dataType = "String"),
            @ApiImplicitParam(name = "page", value = "开始的页数", required = true,paramType="path", dataType = "Integer"),
            @ApiImplicitParam(name = "size", value = "每页的数量", required = true,paramType="path", dataType = "Integer")
    })
    @RequestMapping(value = "/{keysword}/{page}/{size}",method = RequestMethod.GET)
    public Page<User> findByUsernameOrTnameLikeOOrderById(@PathVariable String keysword,@PathVariable int page,@PathVariable int size){
        return userService.findByUsernameOrTnameLikeOOrderById(keysword,page,size);
    }
}
此处数据方法对象,使用这应该进行修改,也可以直接返回一个数据即可
@ApiOperation
@ApiImplicitParams
@ApiImplicitParam
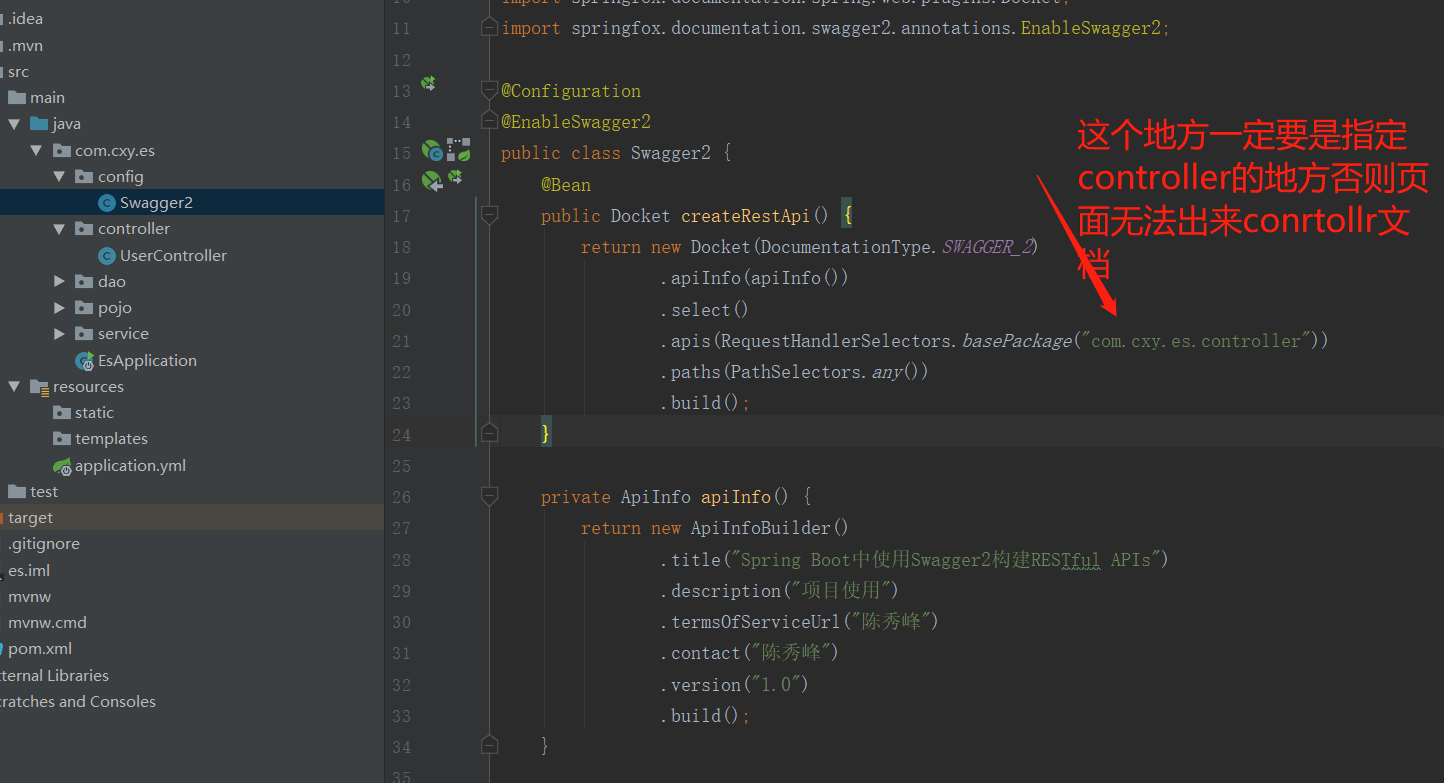
3 配置swagger
package com.cxy.es.config;

import org.springframework.context.annotation.Bean;
import org.springframework.context.annotation.Configuration;
import springfox.documentation.builders.ApiInfoBuilder;
import springfox.documentation.builders.PathSelectors;
import springfox.documentation.builders.RequestHandlerSelectors;
import springfox.documentation.service.ApiInfo;
import springfox.documentation.spi.DocumentationType;
import springfox.documentation.spring.web.plugins.Docket;
import springfox.documentation.swagger2.annotations.EnableSwagger2;

@Configuration
@EnableSwagger2
public class Swagger2 {
    @Bean
    public Docket createRestApi() {
        return new Docket(DocumentationType.SWAGGER_2)
                .apiInfo(apiInfo())
                .select()
                .apis(RequestHandlerSelectors.basePackage("com.cxy.es.controller"))
                .paths(PathSelectors.any())
                .build();
    }

    private ApiInfo apiInfo() {
        return new ApiInfoBuilder()
                .title("Spring Boot中使用Swagger2构建RESTful APIs")
                .description("项目使用")
                .termsOfServiceUrl("陈秀峰")
                .contact("陈秀峰")
                .version("1.0")
                .build();
    }

}
4 启动
package com.cxy.es;


import org.springframework.boot.SpringApplication;
import org.springframework.boot.autoconfigure.SpringBootApplication;

@SpringBootApplication

public class EsApplication {

    public static void main(String[] args) {
        SpringApplication.run(EsApplication.class, args);
    }

}
然后再在浏览器输入:
http://localhost:8009/swagger-ui.html#/
![]()
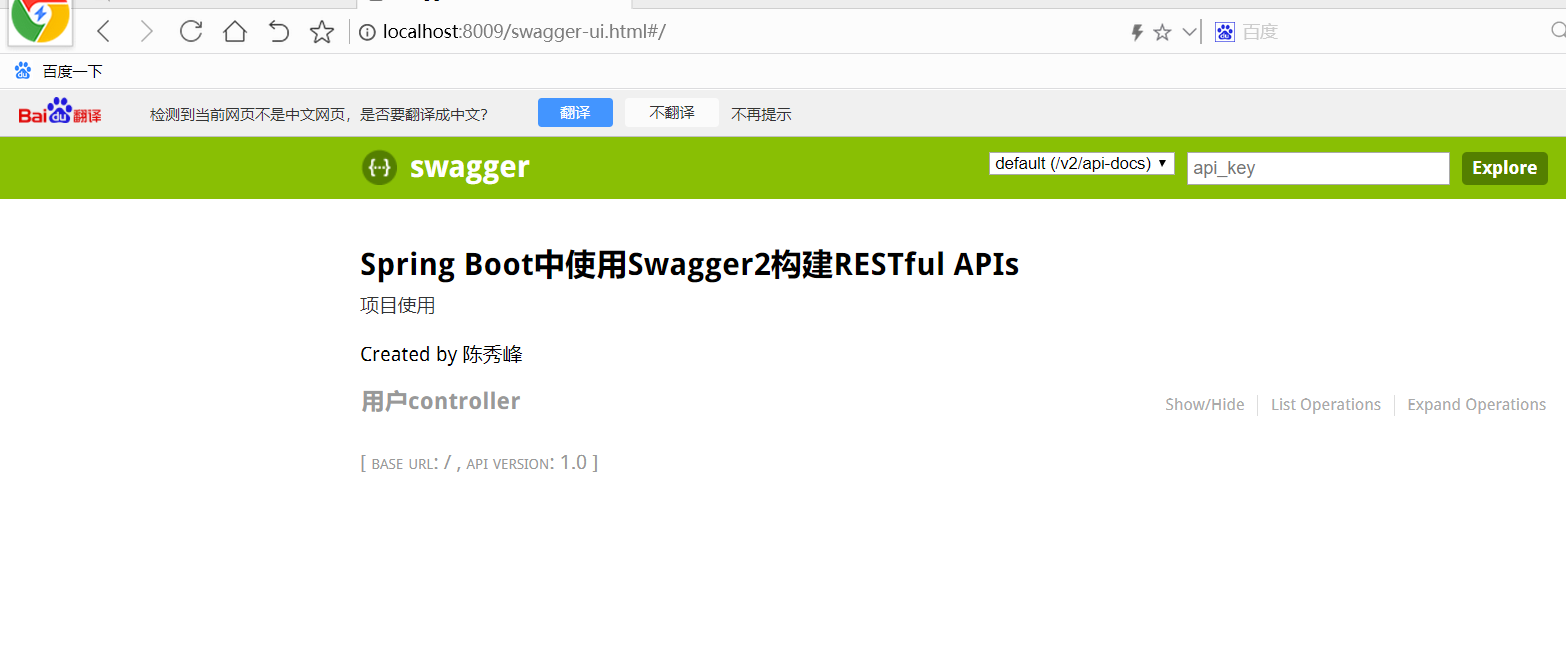
点击用户controller之后就可以看到所写的接口
注意事项看截图:
坑1
![]()
坑2
笔记转移,由于在有道云的笔记转移,写的时间可能有点久,如果有错误的地方,请指正

 浙公网安备 33010602011771号