kafka stream及interceptor(四)
一、 Kafka Streams
官网地址:https://kafka.apache.org/30/documentation/streams/
1.1. 概述
1.1.1. Kafka Streams
1.1.2. Kafka Streams特点
- 高扩展性,弹性,容错
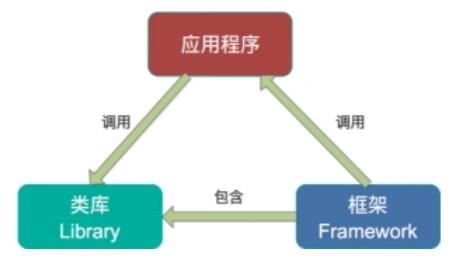
- 无需专门的集群一个库,而不是框架
- 100%的Kafka 0.10.0版本兼容,易于集成到现有的应用程序
-
-
- 毫秒级延迟
- 并非微批处理
- 窗口允许乱序数据
- 允许迟到数据
-
1.1.3. 为什么要有Kafka Streams
1.2、stream演示
1.2.1、 创建一个输入topic和一个输出topic
bin/kafka-topics.sh --create --bootstrap-server 192.168.32.123:9092 --topic streams-plaintext-input --partitions 1 --replication-factor 1
bin/kafka-topics.sh --create --bootstrap-server 192.168.32.123:9092 --topic streams-wordcount-output --partitions 1 --replication-factor 1 --config cleanup.policy=compact
1.2.2、运行WordCount程序
要导入pom包
        <dependency>
            <groupId>org.springframework.kafka</groupId>
            <artifactId>spring-kafka</artifactId>
        </dependency>

        <dependency>
            <groupId>org.apache.kafka</groupId>
            <artifactId>kafka_2.12</artifactId>
            <version>2.1.1</version>
        </dependency>
        <dependency>
            <groupId>org.apache.kafka</groupId>
            <artifactId>kafka-clients</artifactId>
            <version>2.1.1</version>
        </dependency>
        <dependency>
            <groupId>org.apache.kafka</groupId>
            <artifactId>kafka-streams</artifactId>
            <version>2.1.1</version>
        </dependency>
public final class WordCountDemo {

    public static void main(final String[] args) {
        final Properties props = new Properties();
        props.put(StreamsConfig.APPLICATION_ID_CONFIG, "streams-wordcount");
        props.put(StreamsConfig.BOOTSTRAP_SERVERS_CONFIG, "192.168.32.123:9092");
        props.put(StreamsConfig.CACHE_MAX_BYTES_BUFFERING_CONFIG, 0);
        props.put(StreamsConfig.DEFAULT_KEY_SERDE_CLASS_CONFIG, Serdes.String().getClass().getName());
        props.put(StreamsConfig.DEFAULT_VALUE_SERDE_CLASS_CONFIG, Serdes.String().getClass().getName());

        // setting offset reset to earliest so that we can re-run the demo code with the same pre-loaded data
        // Note: To re-run the demo, you need to use the offset reset tool:
        // https://cwiki.apache.org/confluence/display/KAFKA/Kafka+Streams+Application+Reset+Tool
        props.put(ConsumerConfig.AUTO_OFFSET_RESET_CONFIG, "earliest");

        final StreamsBuilder builder = new StreamsBuilder();

        final KStream<String, String> source = builder.stream("streams-plaintext-input");
       //统计次数
        final KTable<String, Long> counts = source
                .flatMapValues(value -> Arrays.asList(value.toLowerCase(Locale.getDefault()).split(" ")))
                .groupBy((key, value) -> value)
                .count();
         //输出
        // need to override value serde to Long type
        counts.toStream().to("streams-wordcount-output", Produced.with(Serdes.String(), Serdes.Long()));

        final KafkaStreams streams = new KafkaStreams(builder.build(), props);
        final CountDownLatch latch = new CountDownLatch(1);

        // attach shutdown handler to catch control-c
        Runtime.getRuntime().addShutdownHook(new Thread("streams-wordcount-shutdown-hook") {
            @Override
            public void run() {
                streams.close();
                latch.countDown();
            }
        });

        try {
            streams.start();
            latch.await();
        } catch (final Throwable e) {
            System.exit(1);
        }
        System.exit(0);
    }
}
./bin/kafka-console-producer.sh --bootstrap-server 192.168.32.123:9092 --topic streams-plaintext-input
./bin/kafka-console-consumer.sh --bootstrap-server 192.168.32.123:9092 --topic streams-wordcount-output --from-beginning --formatter kafka.tools.DefaultMessageFormatter --property print.key=true --property print.value=true --property key.deserializer=org.apache.kafka.common.serialization.StringDeserializer --property value.deserializer=org.apache.kafka.common.serialization.LongDeserializer


由上面可知,他可以实时统计出出现的次数
二、Kafka producer拦截器(interceptor)
2.1. 拦截器原理
Producer拦截器(interceptor)是在Kafka 0.10版本被引入的,主要用于实现clients端的定制化控制逻辑。对于producer而言,interceptor使得用户在消息发送前以及producer回调逻辑前有机会对消息做一些定制化需求,比如修改消息等。同时,producer允许用户指定多个interceptor按序作用于同一条消息从而形成一个拦截链(interceptor chain)。Intercetpor的实现接口是org.apache.kafka.clients.producer.ProducerInterceptor,其定义的方法包括:
2.2. 拦截器案例

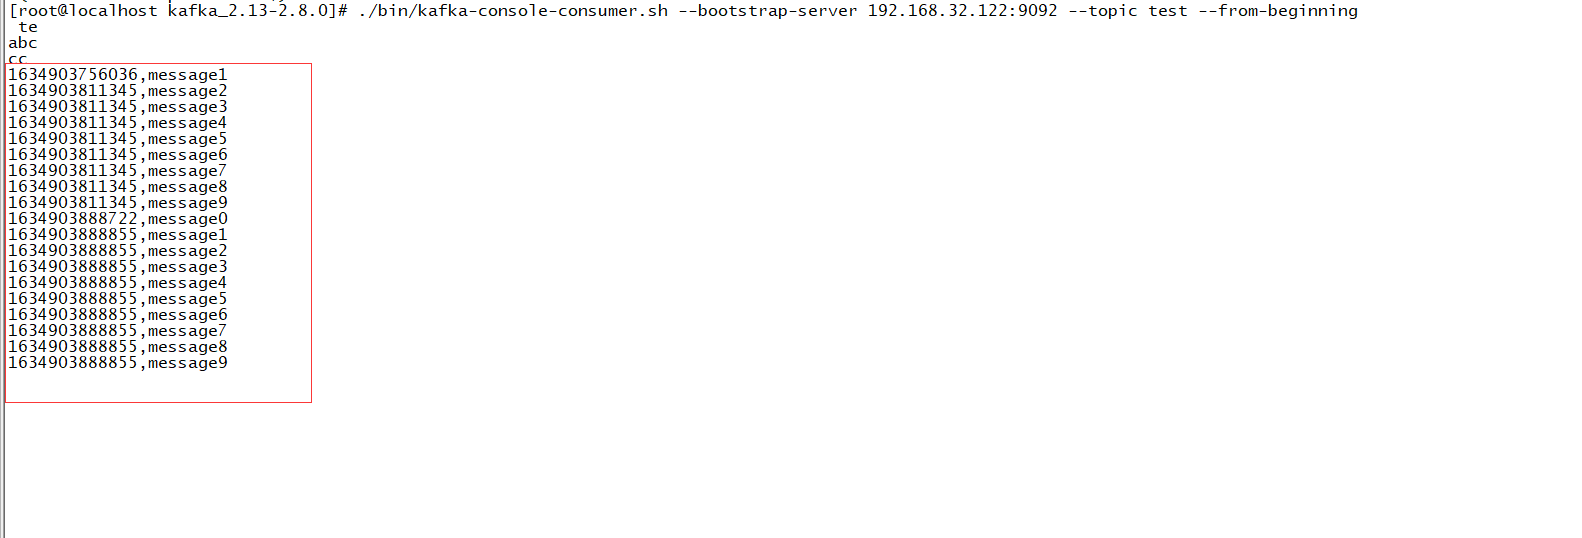
1.增加时间戳,按前面说的实现ProducerInterceptor方法
//增加时间戳
public class TimeInterceptor implements ProducerInterceptor<String, String> {
    //获取配置信息和初始化数据调用
    @Override
    public void configure(Map<String, ?> configs) {

    }

    @Override
    public ProducerRecord<String, String> onSend(ProducerRecord<String, String> record) {
        // 创建一个新的record,把时间戳写入消息体的最前部
        return new ProducerRecord(record.topic(), record.partition(), record.timestamp(), record.key(),
                System.currentTimeMillis() + "," + record.value().toString());
    }

    @Override
    public void onAcknowledgement(RecordMetadata metadata, Exception exception) {

    }

    @Override
    public void close() {

    }
}
2.统计发送消息成功和发送失败消息数,并在producer关闭时打印这两个计数器
public class CounterInterceptor implements ProducerInterceptor<String, String> {
    private int errorCounter = 0;
    private int successCounter = 0;

    @Override
    public void configure(Map<String, ?> configs) {

    }


    @Override
    public ProducerRecord<String, String> onSend(ProducerRecord<String, String> record) {

        return record;
    }

    @Override
    public void onAcknowledgement(RecordMetadata metadata, Exception exception) {
        // 统计成功和失败的次数
        if (exception == null) {
            successCounter++;
        } else {
            errorCounter++;
        }
    }

    @Override
    public void close() {
        // 保存结果
        System.out.println("Successful sent: " + successCounter);
        System.out.println("Failed sent: " + errorCounter);
    }
}
3.producer主程序
public class InterceptorProducer {

    public static void main(String[] args) throws Exception {
        // 1 设置配置信息
        Properties props = new Properties();
        props.put("bootstrap.servers", "192.168.32.122:9092");
        // 默认为1;当为all时候值为-1,表示所有的都需要同步(一致性最高相对性能也会有所降低)
        props.put("acks", "all");
        props.put("retries", 0);
        props.put("batch.size", 16384);
        props.put("linger.ms", 1);
        props.put("buffer.memory", 33554432);
        props.put("key.serializer", "org.apache.kafka.common.serialization.StringSerializer");
        props.put("value.serializer", "org.apache.kafka.common.serialization.StringSerializer");

        // 2 构建拦截链
        List<String> interceptors = new ArrayList<>();
        interceptors.add("com.study.kafka.interceptor.TimeInterceptor");
        interceptors.add("com.study.kafka.interceptor.CounterInterceptor");
        props.put(ProducerConfig.INTERCEPTOR_CLASSES_CONFIG, interceptors);

        String topic = "test";
        Producer<String, String> producer = new KafkaProducer<>(props);

        // 3 发送消息
        for (int i = 0; i < 10; i++) {

            ProducerRecord<String, String> record = new ProducerRecord<>(topic, "message" + i);
            producer.send(record);
            // message0 , -> 123129374927,message0
            // 成功:
            // 失败:
        }

        // 4 一定要关闭producer,这样才会调用interceptor的close方法
        producer.close();
    }
}

三、 Kafka 自定义分区器
3.1. 默认分区器DefaultPartitioner
- org.apache.kafka.clients.producer.internals.DefaultPartitioner
- 如果消息的 key 为 null,此时 producer 会使用默认的 partitioner 分区器将消息随机分布到 topic 的可用 partition 中。如果 key 不为 null,并且使用了默认的分区器,kafka 会使用自己的 hash 算法对 key 取 hash 值,使用hash 值与 partition 数量取模,从而确定发送到哪个分区。注意:此时 key 相同的消息会发送到相同的分区(只要 partition 的数量不变化)。
ProducerRecord
ProducerRecord来表示,其字段如下所示:public class ProducerRecord<K, V> { //该消息需要发往的主题 private final String topic; //该消息需要发往的主题中的某个分区,如果该字段有值,则分区器不起作用,直接发往指定的分区 //如果该值为null,则利用分区器进行分区的选择 private final Integer partition; private final Headers headers; //如果partition字段为null,则使用分区器进行分区选择时会用到该key字段,该值可为空 private final K key; private final V value; private final Long timestamp;
Partitioner接口
Partitioner接口中有一个最主要的方法:
/**
     * Compute the partition for the given record.
     *
     * @param topic The topic name
     * @param key The key to partition on (or null if no key)
     * @param keyBytes The serialized key to partition on( or null if no key)
     * @param value The value to partition on or null
     * @param valueBytes The serialized value to partition on or null
     * @param cluster The current cluster metadata
     */
int partition(String topic, Object key, byte[] keyBytes, Object value, byte[] valueBytes, Cluster cluster);
这里重点关注一下最后一个参数Cluster cluster,目前只需要理解cluster代表了Kafka的元数据信息,从该cluster字段能够获取到我们需要的信息,在这里我们只关注从cluster能够根据指定topic,获取该topic所对应的分区的信息。
DefaultPartitioner
KafkaProducer类的partition 方法中:
/**
     * computes partition for given record.
     * if the record has partition returns the value otherwise
     * calls configured partitioner class to compute the partition.
     */
    private int partition(ProducerRecord<K, V> record, byte[] serializedKey, byte[] serializedValue, Cluster cluster) {
        Integer partition = record.partition();
        return partition != null ?
                partition :
                partitioner.partition(
                        record.topic(), record.key(), serializedKey, record.value(), serializedValue, cluster);
    }
如上代码所示:首先判断ProducerRecord中的partition字段是否有值,即是否在创建消息记录的时候直接指定了分区,如果指定了分区,则直接将该消息发送到指定的分区,否则调用分区器的partition方法,执行分区策略。如果用户配置了分区器,则使用用户指定的分区器,否则使用默认的分区器,即DefaultPartitioner,下面我们看一下,该默认实现是如何进行分区选择的。
public class DefaultPartitioner implements Partitioner {

    private final ConcurrentMap<String, AtomicInteger> topicCounterMap = new ConcurrentHashMap<>();

    /**
     * Compute the partition for the given record.
     *
     * @param topic The topic name
     * @param key The key to partition on (or null if no key)
     * @param keyBytes serialized key to partition on (or null if no key)
     * @param value The value to partition on or null
     * @param valueBytes serialized value to partition on or null
     * @param cluster The current cluster metadata
     */
    public int partition(String topic, Object key, byte[] keyBytes, Object value, byte[] valueBytes, Cluster cluster) {
        /* 首先通过cluster从元数据中获取topic所有的分区信息 */
        List<PartitionInfo> partitions = cluster.partitionsForTopic(topic);
        //拿到该topic的分区数
        int numPartitions = partitions.size();
        //如果消息记录中没有指定key
        if (keyBytes == null) {
            //则获取一个自增的值
            int nextValue = nextValue(topic);
            //通过cluster拿到所有可用的分区(可用的分区这里指的是该分区存在首领副本)
            List<PartitionInfo> availablePartitions = cluster.availablePartitionsForTopic(topic);
            //如果该topic存在可用的分区
            if (availablePartitions.size() > 0) {
                //那么将nextValue转成正数之后对可用分区数进行取余
                int part = Utils.toPositive(nextValue) % availablePartitions.size();
                //然后从可用分区中返回一个分区
                return availablePartitions.get(part).partition();
            } else { // 如果不存在可用的分区
                //那么就从所有不可用的分区中通过取余的方式返回一个不可用的分区
                return Utils.toPositive(nextValue) % numPartitions;
            }
        } else { // 如果消息记录中指定了key
            // 则使用该key进行hash操作,然后对所有的分区数进行取余操作,这里的hash算法采用的是murmur2算法,然后再转成正数
            //toPositive方法很简单,直接将给定的参数与0X7FFFFFFF进行逻辑与操作。
            return Utils.toPositive(Utils.murmur2(keyBytes)) % numPartitions;
        }
    }

    //nextValue方法可以理解为是在消息记录中没有指定key的情况下,需要生成一个数用来代替key的hash值
    //方法就是最开始先生成一个随机数,之后在这个随机数的基础上每次请求时均进行+1的操作
    private int nextValue(String topic) {
        //每个topic都对应着一个计数
        AtomicInteger counter = topicCounterMap.get(topic);
        if (null == counter) { // 如果是第一次,该topic还没有对应的计数
            //那么先生成一个随机数
            counter = new AtomicInteger(ThreadLocalRandom.current().nextInt());
            //然后将该随机数与topic对应起来存入map中
            AtomicInteger currentCounter = topicCounterMap.putIfAbsent(topic, counter);
            if (currentCounter != null) {
                //之后把这个随机数返回
                counter = currentCounter;
            }
        }
        //一旦存入了随机数之后,后续的请求均在该随机数的基础上+1之后进行返回
        return counter.getAndIncrement();
    }
总结
生产者发送消息时整个分区路由的步骤如下:
- 判断消息中的
partition字段是否有值,有值的话即指定了分区,直接将该消息发送到指定的分区就行。 - 如果没有指定分区,则使用分区器进行分区路由,首先判断消息中是否指定了
key。 - 如果指定了
key,则使用该key进行hash操作,并转为正数,然后对topic对应的分区数量进行取模操作并返回一个分区。 - 如果没有指定
key,则通过先产生随机数,之后在该数上自增的方式产生一个数,并转为正数之后进行取余操作。
上述第4点需要注意一下,如果该topic有可用分区,则优先分配可用分区,如果没有可用分区,则分配一个不可用分区。这与第3点中key有值的情况不同,key有值时,不区分可用分区和不可用分区,直接取余之后选择某个分区进行分配。
3.2、自定义分区器
/**
 * 定义Kafka分区器
 */
public class MySamplePartitioner implements Partitioner {
    private final AtomicInteger counter = new AtomicInteger(new Random().nextInt());
    private Random random = new Random();

    //我的分区器定义
    @Override
    public int partition(String topic, Object key, byte[] keyBytes, Object value, byte[] valueBytes, Cluster cluster) {
        List<PartitionInfo> partitioners = cluster.partitionsForTopic(topic);
        int numPartitions = partitioners.size();

        /**
         * 由于按key分区,在这里我们规定:key值不允许为null。
         * 在实际项目中,key为null的消息*,可以发送到同一个分区,或者随机分区。
         */
        int res = 1;
        if (keyBytes == null) {
            System.out.println("value is null");
            res = random.nextInt(numPartitions);
        } else {
//            System.out.println("value is " + value + "\n hashcode is " + value.hashCode());
            res = Math.abs(key.hashCode()) % numPartitions;
        }
        System.out.println("data partitions is " + res);
        return res;
    }

    @Override
    public void close() {

    }

    @Override
    public void configure(Map<String, ?> map) {

    }
}
public class TestProducer {
    public static void main(String args[]) {
        Properties props = new Properties();
        props.put("bootstrap.servers", "192.168.32.122:9092,192.168.32.123:9092,192.168.32.124:9092");
        props.put("acks", "all");
        props.put("key.serializer", "org.apache.kafka.common.serialization.StringSerializer");
        props.put("value.serializer", "org.apache.kafka.common.serialization.StringSerializer");

        //org.apache.kafka.clients.producer.internals.DefaultPartitioner
        props.put("partitioner.class", "com.study.kafka.partition.MyPartitioner");

        Producer<String, String> producer = new KafkaProducer<>(props);

        for (int i = 0; i < 10; i++) {
            producer.send(new ProducerRecord<String, String>("market_topic1",
                    "" + i,
                    "message" + i));

            //Thread.sleep(1000L);
        }

        producer.close();
        System.out.println("done...");
    }
}
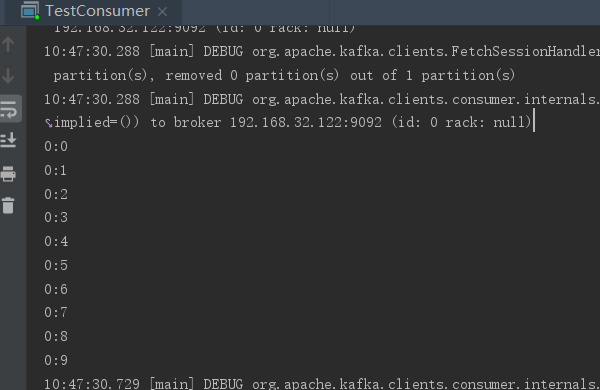
public class TestConsumer {
    public static void main(String args[]) {
        Properties props = new Properties();
        props.setProperty("bootstrap.servers", "192.168.32.122:9092,192.168.32.123:9092,192.168.32.124:9092");
        props.setProperty("group.id", "test111111111111111");
        props.setProperty("enable.auto.commit", "true");
        props.setProperty("auto.offset.reset", "earliest");
        props.setProperty("auto.commit.interval.ms", "1000");

        props.setProperty("key.deserializer", "org.apache.kafka.common.serialization.StringDeserializer");
        props.setProperty("value.deserializer", "org.apache.kafka.common.serialization.StringDeserializer");
        KafkaConsumer<String, String> consumer = new KafkaConsumer<>(props);

        consumer.subscribe(Arrays.asList("market_topic1"));

        while (true) {
            ConsumerRecords<String, String> records = consumer.poll(100);
            for (ConsumerRecord<String, String> record : records) {
                System.out.println(record.partition() + ":" + record.offset());
            }
        }
    }
}

 浙公网安备 33010602011771号