
Spring Boot:使用Redis存储技术
综合概述
Redis是一个开源免费的高性能key-value数据库,读取速度达110000次/s,写入速度达81000次/s。Redis支持丰富的数据类型,如Lists, Hashes, Sets 及 Ordered Sets 数据类型。Redis的所有操作都是原子性的,要么成功执行要么失败完全不执行。另外还可以通过MULTI和EXEC指令包起来支持事务。此外,Redis还具备丰富的特性 ,比如支持发布/订阅(publish/subscribe)模式,可以充当简单的消息中间件,还支持通知, key过期设置主从复制等等特性。
Redis主要以下三个特点:
1.支持数据的持久化,可以将内存中的数据保存在磁盘中,重启的时候可以再次加载进行使用。
2.支持丰富的数据类型,除了支持简单的key-value类型,同时还提供list,set,zset,hash等数据结构的存储。
3.支持数据的备份,即主从(master-slave)模式模式的数据备份。
接下来,我们就用一个简单的案例来说明在Spring Boot中如何使用Redis技术。
实现案例
首先,需要安装Redis,教程很多,这里不再赘述。可以参考:Redis安装教程。
生成项目模板
为方便我们初始化项目,Spring Boot给我们提供一个项目模板生成网站。
1. 打开浏览器,访问:https://start.spring.io/
2. 根据页面提示,选择构建工具,开发语言,项目信息等。

3. 点击 Generate the project,生成项目模板,生成之后会将压缩包下载到本地。
4. 使用IDE导入项目,我这里使用Eclipse,通过导入Maven项目的方式导入。

添加相关依赖
清理掉不需要的测试类及测试依赖,添加 Redis相关依赖。
<!-- spring boot redis -->
<dependency>
    <groupId>org.springframework.boot</groupId>
    <artifactId>spring-boot-starter-data-redis</artifactId>
</dependency>
<!-- lettuce pool -->
<dependency>
    <groupId>org.apache.commons</groupId>
    <artifactId>commons-pool2</artifactId>
</dependency>
Spring Boot框架中已经集成了redis,在1.x.x的版本中默认使用jedis客户端,而在2.x.x版本中默认使用的lettuce客户端。
两种客户端的区别如下:
- Jedis和Lettuce都是Redis Client
- Jedis 是直连模式,在多个线程间共享一个 Jedis 实例时是线程不安全的,
- 如果想要在多线程环境下使用 Jedis,需要使用连接池,
- 每个线程都去拿自己的 Jedis 实例,当连接数量增多时,物理连接成本就较高了。
- Lettuce的连接是基于Netty的,连接实例可以在多个线程间共享,
- 所以,一个多线程的应用可以使用同一个连接实例,而不用担心并发线程的数量。
- 当然这个也是可伸缩的设计,一个连接实例不够的情况也可以按需增加连接实例。
- 通过异步的方式可以让我们更好的利用系统资源,而不用浪费线程等待网络或磁盘I/O。
- Lettuce 是基于 netty 的,netty 是一个多线程、事件驱动的 I/O 框架,
- 所以 Lettuce 可以帮助我们充分利用异步的优势。
我的项目是使用的是Spring Boot 2.1.5.RELEASE,所以采用lettuce来进行配置。
pom.xml
<?xml version="1.0" encoding="UTF-8"?>
<project xmlns="http://maven.apache.org/POM/4.0.0" xmlns:xsi="http://www.w3.org/2001/XMLSchema-instance"
    xsi:schemaLocation="http://maven.apache.org/POM/4.0.0 http://maven.apache.org/xsd/maven-4.0.0.xsd">
    <modelVersion>4.0.0</modelVersion>
    <parent>
        <groupId>org.springframework.boot</groupId>
        <artifactId>spring-boot-starter-parent</artifactId>
        <version>2.1.5.RELEASE</version>
        <relativePath/> <!-- lookup parent from repository -->
    </parent>
    <groupId>com.louis.springboot</groupId>
    <artifactId>demo</artifactId>
    <version>0.0.1-SNAPSHOT</version>
    <name>demo</name>
    <description>Demo project for Spring Boot</description>

    <properties>
        <java.version>1.8</java.version>
    </properties>

    <dependencies>
        <dependency>
            <groupId>org.springframework.boot</groupId>
            <artifactId>spring-boot-starter</artifactId>
        </dependency>
        <!-- web -->
        <dependency>
                <groupId>org.springframework.boot</groupId>
                <artifactId>spring-boot-starter-web</artifactId>
         </dependency>
        <!-- swagger -->
        <dependency>
            <groupId>io.springfox</groupId>
            <artifactId>springfox-swagger2</artifactId>
            <version>2.9.2</version>
        </dependency>
        <dependency>
            <groupId>io.springfox</groupId>
            <artifactId>springfox-swagger-ui</artifactId>
            <version>2.9.2</version>
        </dependency>
        <!-- spring boot redis -->
        <dependency>
            <groupId>org.springframework.boot</groupId>
            <artifactId>spring-boot-starter-data-redis</artifactId>
        </dependency>
        <!-- lettuce pool -->
        <dependency>
            <groupId>org.apache.commons</groupId>
            <artifactId>commons-pool2</artifactId>
        </dependency>
    </dependencies>

    <build>
        <plugins>
            <plugin>
                <groupId>org.springframework.boot</groupId>
                <artifactId>spring-boot-maven-plugin</artifactId>
            </plugin>
        </plugins>
    </build>

</project>
添加相关配置
1.添加swagger 配置
添加一个swagger 配置类,在工程下新建 config 包并添加一个 SwaggerConfig 配置类。
SwaggerConfig.java
package com.louis.springboot.demo.config;
import org.springframework.context.annotation.Bean;
import org.springframework.context.annotation.Configuration;

import springfox.documentation.builders.ApiInfoBuilder;
import springfox.documentation.builders.PathSelectors;
import springfox.documentation.builders.RequestHandlerSelectors;
import springfox.documentation.service.ApiInfo;
import springfox.documentation.spi.DocumentationType;
import springfox.documentation.spring.web.plugins.Docket;
import springfox.documentation.swagger2.annotations.EnableSwagger2;

@Configuration
@EnableSwagger2
public class SwaggerConfig {

    @Bean
    public Docket createRestApi(){
        return new Docket(DocumentationType.SWAGGER_2).apiInfo(apiInfo())
                .select()
                .apis(RequestHandlerSelectors.any())
                .paths(PathSelectors.any()).build();
    }

    private ApiInfo apiInfo(){
        return new ApiInfoBuilder()
                .title("Swagger API Doc")
                .description("This is a restful api document of Swagger.")
                .version("1.0")
                .build();
    }

}
2.修改application.properties文件名为application.yml,在其中添加Redis配置信息。
application.yml
spring:
  redis:
    database: 0  # Redis数据库索引(默认为0)
    host: localhost # Redis服务器地址
    port: 6379  # Redis服务器连接端口
    password:   # Redis服务器连接密码(默认为空)
    lettuce:
      pool:
       max-active: 8  # 连接池最大连接数(使用负值表示没有限制) 默认 8
       max-wait: -1   # 连接池最大阻塞等待时间(使用负值表示没有限制) 默认 -1
       max-idle: 8    # 连接池中的最大空闲连接 默认 8
       min-idle: 0    # 连接池中的最小空闲连接 默认 0
3.添加一个Redis配置类,使用@EnableCaching注解来开启缓存。
RedisConfig.java
package com.louis.springboot.demo.config;

import java.lang.reflect.Method;

import org.springframework.cache.annotation.CachingConfigurerSupport;
import org.springframework.cache.annotation.EnableCaching;
import org.springframework.cache.interceptor.KeyGenerator;
import org.springframework.context.annotation.Bean;
import org.springframework.context.annotation.Configuration;

@Configuration
@EnableCaching
public class RedisConfig extends CachingConfigurerSupport{

    @Bean
    public KeyGenerator keyGenerator() {
        return new KeyGenerator() {
            @Override
            public Object generate(Object target, Method method, Object... params) {
                StringBuilder sb = new StringBuilder();
                sb.append(target.getClass().getName());
                sb.append(method.getName());
                for (Object obj : params) {
                    sb.append(obj.toString());
                }
                return sb.toString();
            }
        };
    }
}
编写业务逻辑
编写一个简单的用户实体类,包含用户名和密码。
User.java
package com.louis.springboot.demo.model;

import java.io.Serializable;

public class User implements Serializable {

    private static final long serialVersionUID = 1L;

    private String username;
    private String password;

    public User(String username, String password) {
        super();
        this.username = username;
        this.password = password;
    }

    public String getUsername() {
        return username;
    }
    public void setUsername(String username) {
        this.username = username;
    }
    public String getPassword() {
        return password;
    }
    public void setPassword(String password) {
        this.password = password;
    }

    @Override
    public String toString() {
        return "{username:" + getUsername() + ", password:" +getPassword() + "}";
    }
}
编写一个业务控制器,分别编写测试字符串和对象的存取接口,另外还通过@Cacheable(value="user-key")注解给方法开启缓存,这样就可以缓存方法返回的结果,只有当缓存不存在的时候采用执行方法返回新的用户对象。
RedisController.java
package com.louis.springboot.demo.controller;

import java.util.concurrent.TimeUnit;

import org.springframework.beans.factory.annotation.Autowired;
import org.springframework.cache.annotation.Cacheable;
import org.springframework.data.redis.core.RedisTemplate;
import org.springframework.data.redis.core.StringRedisTemplate;
import org.springframework.data.redis.core.ValueOperations;
import org.springframework.web.bind.annotation.GetMapping;
import org.springframework.web.bind.annotation.RestController;

import com.louis.springboot.demo.model.User;

@RestController
public class RedisController {

    @Autowired
    private StringRedisTemplate stringRedisTemplate;
    @Autowired
    private RedisTemplate redisTemplate;

    @GetMapping("/testString")
    public String testString()  {
        stringRedisTemplate.opsForValue().set("name", "louis");
        String name = stringRedisTemplate.opsForValue().get("name");
        return "the value of key 'name' is : " + name ;
    }

    @GetMapping("/testObject")
    public String testObject()  {
        StringBuilder result = new StringBuilder();
        User user = new User("louis", "123");
        ValueOperations<String, User> operations = redisTemplate.opsForValue();
        operations.set("sys.user", user);
        operations.set("sys.user.timeout", user, 1, TimeUnit.SECONDS);    // 设置1秒后过期
        result.append("过期前:").append("\n");
        result.append("sys.user=" + operations.get("sys.user")).append("\n");
        result.append("sys.user.timeout=" + operations.get("sys.user.timeout"));
        try {
            Thread.sleep(1000);
        } catch (InterruptedException e) {
            e.printStackTrace();
        }
        result.append("\n").append("过期后:").append("\n");
        result.append("sys.user=" + operations.get("sys.user")).append("\n");
        result.append("sys.user.timeout=" + operations.get("sys.user.timeout"));
        return result.toString();
    }

    @GetMapping("/getUser")
    @Cacheable(value="user-key")
    public User getUser() {
        User user = new User("louis", "123");
        System.out.println("用户对象缓存不存在,返回一个新的用户对象。");
        return user;
    }
}
编译运行测试
1. 右键项目 -> Run as -> Maven install,开始执行Maven构建,第一次会下载Maven依赖,可能需要点时间,如果出现如下信息,就说明项目编译打包成功了。

2. 右键文件 DemoApplication.java -> Run as -> Java Application,开始启动应用,当出现如下信息的时候,就说明应用启动成功了,默认启动端口是8080。

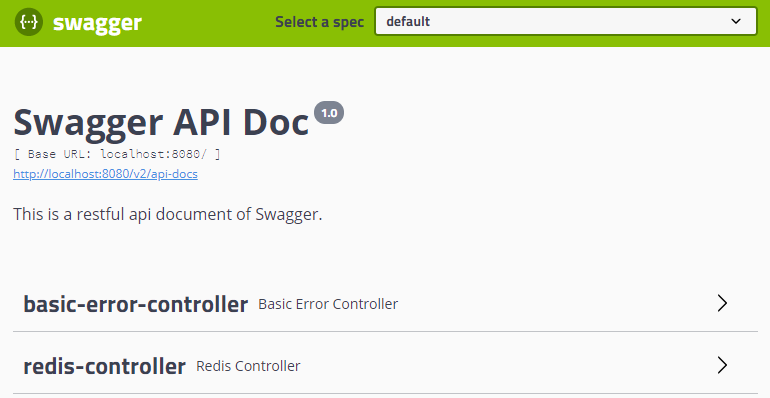
3. 打开浏览器,访问:http://localhost:8080/swagger-ui.html,进入swagger接口文档界面。
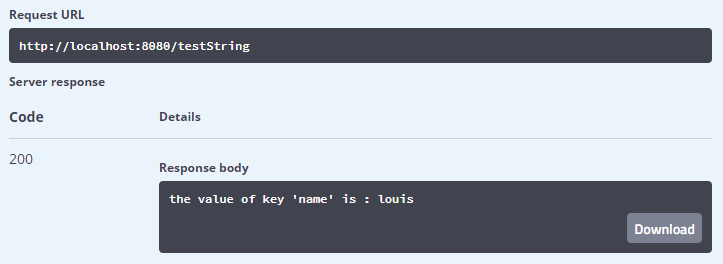
4.调用testString接口,如果能出现如下图所示结果就说明成功了。
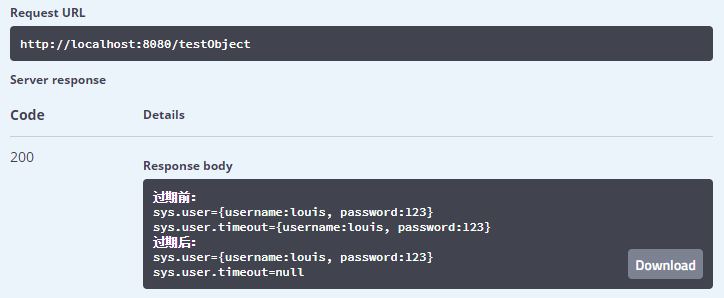
5.调用testObject接口,如果能出现如下图所示结果就说明成功了。
6.调用getUser接口,此时因为是第一次调用此方法,所以没有key值为“user-key”的缓存,所以会执行方法并将返回结果进行缓存。在执行getUser方法的时候控制台输出了我们添加的提示信息如下。
用户对象缓存不存在,返回一个新的用户对象。
7.然后再次调用getUser接口,发现getUser没有再次被执行,控制台也没有输出上一步的提示信息,那是因为在方法调用之前,应用从key值为“user-key”的缓存中获取成功,所以并不需要继续执行getUser方法的内容了。
参考资料
官方网站:https://redis.io/documentation
百度百科:https://baike.baidu.com/item/Redis/6549233?fr=aladdin
菜鸟教程:https://www.runoob.com/redis/redis-tutorial.html
相关导航
源码下载
码云:https://gitee.com/liuge1988/spring-boot-demo.git
作者:朝雨忆轻尘
出处:https://www.cnblogs.com/xifengxiaoma/
版权所有,欢迎转载,转载请注明原文作者及出处。

 浙公网安备 33010602011771号