nginx

nginx命令
-v : 打印版本号
-V : 打印版本号及配置项
-t : 检查配置文件 (出现OK为正确状态)
-T : 测试文件并启动
-q : 打印错误日志
-s : 操作进程
	stop   : 停止
	quit   : 退出
	reopen : 重启
	reload : 重载
-p : 指定nginx工作目录
-e : 指定错误日志路径
-c : 指定配置文件路径
-g : 设置一个全局的nginx
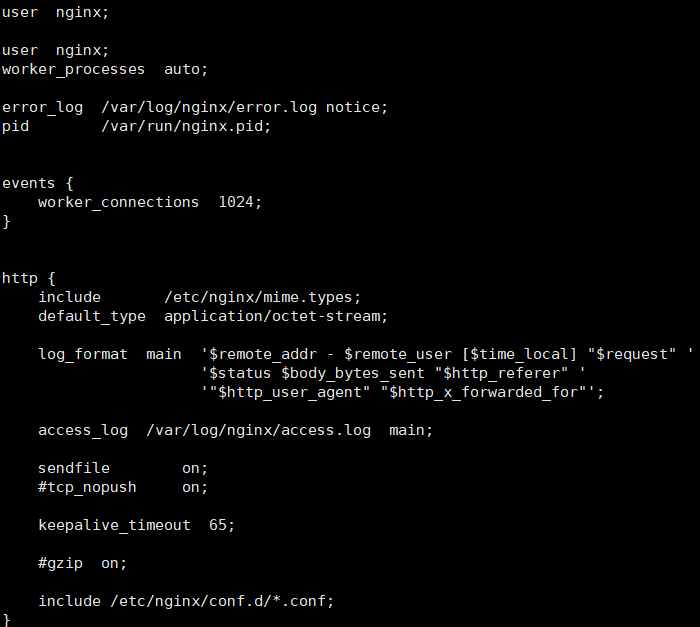
nginx配置文件
全局配置
1、user : 指定Nginx的启动用户
2、worker_processes : 定义Nginx的worker进程数
	auto === CPU数量
3、error_log : 错误日志路径
4、pid : pid的存放文件路径
5、events : 模块配置
	5.1、worker_connections :每一个worker进程最多同时接入多少个请求
	5.2、use : 指定Nginx的网络模型
6、http : web服务的模块
	6.1、include : 加载外部的配置项
	6.2、default_type : 如果找不到文件的类型,则按照指定默认类型处理
	6.3、log_format : 定义日志格式
			log_format json '{"@timestamp":"$time_iso8601",'
                  '"host":"$server_addr",'
                  '"service":"nginxTest",'
                  '"trace":"$upstream_http_ctx_transaction_id",'
                  '"log":"log",'
                  '"clientip":"$remote_addr",'
                  '"remote_user":"$remote_user",'
                  '"request":"$request",'
                  '"http_user_agent":"$http_user_agent",'
                  '"size":$body_bytes_sent,'
                  '"responsetime":$request_time,'
                  '"upstreamtime":"$upstream_response_time",'
                  '"upstreamhost":"$upstream_addr",'
                  '"http_host":"$host",'
                  '"url":"$uri",'
                  '"domain":"$host",'
                  '"xff":"$http_x_forwarded_for",'
                  '"referer":"$http_referer",'
                  '"status":"$status"}';
    		access_log /var/log/nginx/access.log json ;
    6.4、sendfile : 高效读取文件
    6.5、keepalive_timeout : 长连接保持连接的
    		HTTP 1.0 短链接
    		HTTP 1.1 长连接
    6.6、server : 网址模块
    	6.6.1、listen : 监听的端口
    	6.6.2、server_name : 定义域名
    	6.6.3、location : 访问路径
    		6.6.3.1、root : 指定网址路径
    		6.6.3.2、index : 指定网址的索引文件
nginx 虚拟主机
1、基于多IP的方式
[root@web01 conf.d]# cat game2.conf
server {
    listen 80;
    server_name 192.168.15.7;
    location / {
	root /opt/Super_Marie;
        index index.html;
    }
}
server {
    listen 80;
    server_name 172.16.1.7;
    location / {
        root /opt/tank;
        index index.html;
    }
}

2、基于多端口的方式
[root@web01 conf.d]# cat game3.conf
server {
    listen 80;
    server_name 192.168.15.7;
    location / {
        root /opt/Super_Marie;
        index index.html;
    }
}
server {
    listen 81;
    server_name 192.168.15.7;
    location / {
        root /opt/tank;
        index index.html;
    }
}

3、基于多域名的方式
[root@web01 conf.d]# cat game4.conf
server {
    listen 80;
    server_name www.game.com;
    location / {
        root /opt/Super_Marie;
        index index.html;
    }
}
server {
    listen 80;
    server_name www.game1.com;
    location / {
        root /opt/tank;
        index index.html;
    }
}

nginx日志
网站状态码是500的比例
网站的访问来源
网站排错

$remote_addr  : 客户端IP
$http_x_forwarded_for  : 真实的客户端IP(在反向代理中生效)
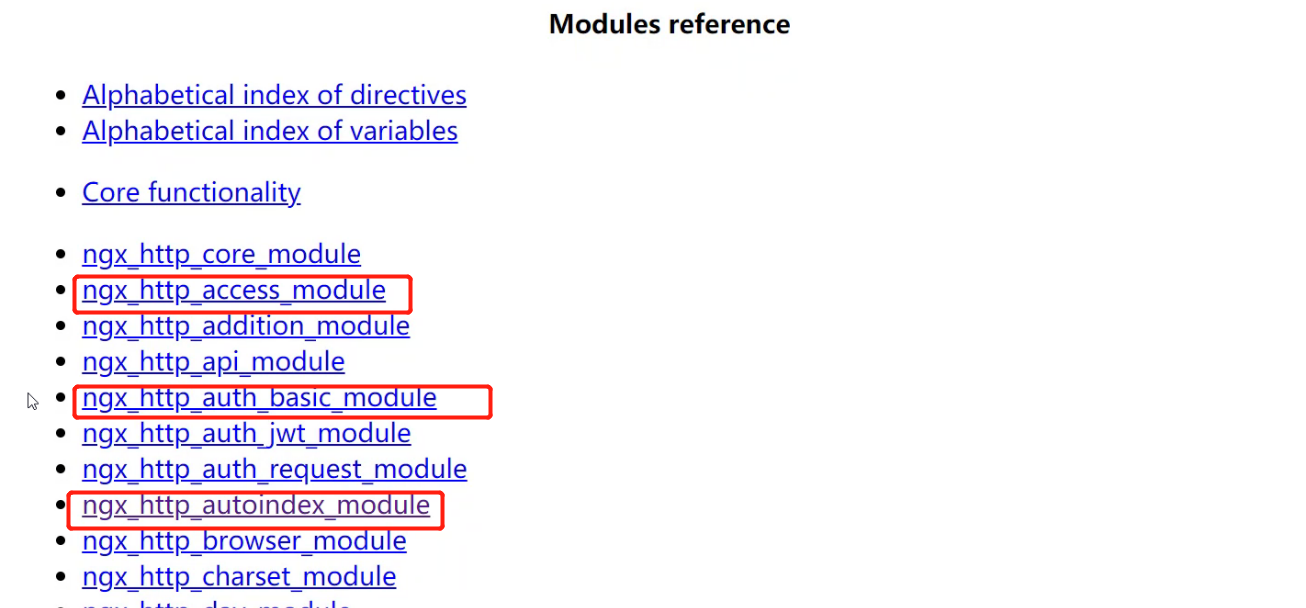
nginx模块
-
访问控制模块
-
ngx_http_access_module
允许或者拒绝某些IP访问 deny : 拒绝 allow :允许 案例1:允许192.168.15.1访问,不允许其他IP访问 allow 192.168.15.1; deny all; 案例2:允许192.168.15.0这个网段访问,不允许其他网段访问 allow 192.168.15.0/24; deny all; 案例3:只允许通过VPN来访问 allow 172.16.1.81; deny all; -
ngx_http_auth_bashic_module
访问之前需要登录 1、安装httpd-tools [root@web01 ~]# yum install httpd-tools -y 2、生成用户名密码文件 [root@web01 ~]# htpasswd -c /etc/nginx/auth chenyang New password: Re-type new password: Adding password for user chenyang 3、将文件路径加入Nginx配置 [root@web01 ~]# vim /etc/nginx/conf.d/game4.conf auth_basic "Welcome To Login"; auth_basic_user_file /etc/nginx/auth; 4、重启Nginx [root@web01 ~]# nginx -t nginx: the configuration file /etc/nginx/nginx.conf syntax is ok nginx: configuration file /etc/nginx/nginx.conf test is successful [root@web01 ~]# systemctl restart nginx -
ngx_http_autoindex_module
展示目录索引。
autoindex on;
autoindex_exact_size on;
autoindex_localtime on;
autoindex_format json;
-

-
状态监控模块
监控Nginx运行状态。 [root@web01 conf.d]# cat game5.conf server { listen 80; server_name 192.168.15.7; location / { stub_status; } } -
访问连接控制模块
1、控制Nginx连接数

	1、安装ab测试命令
	yum install httpd-tools -y

	2、ab 参数
		-n : 总共需要访问多少次
		-c : 每次访问多少个

[root@web01 conf.d]# cat game5.conf
# limit_req_zone $remote_addr zone=one:10m rate=1r/s;
limit_conn_zone $remote_addr zone=addr:10m;
server {
    listen 80;
    server_name 192.168.15.7;
    # limit_req zone=one burst=5;
    limit_conn addr 1;
    location / {
        root /opt/Super_Marie;
	index index.html;
    }
}

2、控制Nginx访问量

	1、连接池
		limit_req_zone $remote_addr zone=one:10m rate=1r/s;
		声明连接池       变量          名称  连接池的大小  速率
	2、限制数

案例1:要求每秒只能有一个访问。
[root@web01 conf.d]# cat game5.conf
limit_req_zone $remote_addr zone=one:10m rate=1r/s;
server {
    listen 80;
    server_name 192.168.15.7;
    limit_req zone=one burst=5;
    location / {
        root /opt/Super_Marie;
	index index.html;
    }
}

 浙公网安备 33010602011771号