
flask 在视图函数里操作数据库 --
在视图函数里操作数据库
在视图函数里操作数据的方式和在python shell中的联系基本相同,只不过需要一些额外的工作。比如把查询结果作为参数 传入模板渲染出来,或是获取表单的字段值作为提交到数据库的数据。接下来,我们将把前面学习的所有数据库操作知识运用到一个简单的笔记程序中。这个程序可以用来创建、编辑和删除笔记,并在主页列出所有保存后的笔记。
1、Create
为了支持输入笔记内容,需要先创建一个用于填写笔记的表单,如下所示:
from flask_wtf import FlashForm
from wtforms import TextAreaField, SubmitField
from wtforms.validators import DataRequired

class NewNoteForm(FlaskForm):
    body = TextAreaField('Body', validators=[DataRequired()])
    submit = SubmitField('Save')
然后创建了一个new_note视图,负责渲染创建笔记的模板,并处理表单的提交,如下所示:
@app.route('/new', methods = ['GET', 'POST'])
def new_note():
    form = NewNoteForm()
    if form.validate_on_submit():
        body = form.body.data
        note = Note(body = body)
        db.session.add(note)
        db.session.commit()
        flash('Your note is saved.')
        return redirect(url_for('index'))
    return render_template('new_note.html', form = form)
先来看下form.validate_on_submit()返回True时的处理代码,当表单被提交并且通过验证时,我们获取表单body字段的数据,然后创建新的Note实例,将表单中body字段的值作为body参数传入,最后添加到数据库会话中并提交会话。这个过程接收用户通过表单提交的数据并保存到数据库中,最后我们使用flash()函数发送提交消息并重定向到index视图。
表单在new_note.html模板中渲染,这里使用我们之前学的form_field渲染表单字段,传入rows和cols参数来定制<textarea>输入框的大小:
new_note.html:
% block content %}
<h2>New Note</h2>
<form method="post">
    {{ form.csrf_token }}
    {{ form_field(form.body, rows=5, cols=50) }}
    {{ form.submit }}
</form>
{% endblock %}
index视图用来显示主页,目前它的所有作用就是渲染主页对应的模板:
@app.route('/index')
def index():
    return render_template('index.html')
index.html:
{% extends 'base.html' %}

{% block content %}
    <h1>Notebook</h1>>
    <a href="{{ url_for('new_note') }}">New Note</a>
{% endblock %}
添加macros.html:
{% macro form_field(field) %}
    {{ field.label }}<br>
    {{ field(**kwargs) }}<br>
    {% if field.erros %}
        {% for error in field.errors %}
            <small class="error">{{ error }}</small><br>
        {% endfor %}
    {% endif %}
{% endmacro %}
添加base.html:
<!DOCTYPE html> <html lang="en"> <head> {% block head %} {% block metas %} <meta charset="utf-8"> {% endblock metas %} <title>{% block title %} Database - HelloFlask {% endblock title %}</title> <link rel="stylesheet" type="text/css" href="{{ url_for('static', filename='favicon.ico') }}"> {% block styles %} <link rel="stylesheet" type="text/css" href="{{ url_for('static', filename='style.css') }}"> {% endblock styles %} {% endblock head %} </head> <body> <nav> {% block nav %} <ul> <li><a href="{{ url_for('index') }}">Home</a></li> </ul> {% endblock %} </nav> <main> {% for message in get_flashed_messages() %} <div class="alert"> {{ message }} </div> {% endfor %} {% block content %}{% endblock %} </main> <footer> {% block footer %} <small> © 2019 <a href="https://www.cnblogs.com/xiaxiaoxu/" title="xiaxiaoxu's blog">夏晓旭的博客</a> / <a href="https://github.com/xiaxiaoxu/hybridDrivenTestFramework" title="Contact me on GitHub">GitHub</a> / <a href="http://helloflask.com" title="A HelloFlask project">Learning from GreyLi's HelloFlask</a> </small> {% endblock %} </footer> {% block scripts %}{% endblock %} </body> </html>
app.py里面引入redirect,url_for,flash等模块
#encoding=utf-8


from flask import Flask, render_template, flash, url_for, redirect
from flask_sqlalchemy import SQLAlchemy

app = Flask(__name__)
db = SQLAlchemy(app)
import os
app.secret_key = os.getenv('SECRET_KEY','secret string')

import os

app.config['SQLALCHEMY_DATABASE_URI'] = os.getenv('DATABASE_URL', 'sqlite:///' + os.path.join(app.root_path, 'data.db'))
app.config['SQLALCHEMY_TRACK_MODIFICATIONS'] = False


class Note(db.Model):
    id = db.Column(db.Integer, primary_key=True)
    db.Column()
    body = db.Column(db.Text)
    def __repr__(self):
        # %r是用repr()方法处理对象,返回类型本身,而不进行类型转化
        return '<Note %r>' % self.body

import click

@app.cli.command()
def initdb():
    db.create_all()
    click.echo('Initialized database.')


from flask_wtf import FlaskForm
from wtforms import TextAreaField, SubmitField
from wtforms.validators import DataRequired

class NewNoteForm(FlaskForm):
    body = TextAreaField('Body', validators=[DataRequired()])
    submit = SubmitField('Save')

@app.route('/new', methods = ['GET', 'POST'])
def new_note():
    form = NewNoteForm()
    print "form.validate_on_submit():",form
    print "form.validate_on_submit():",form.validate_on_submit()
    if form.validate_on_submit():
        print "pass"
        body = form.body.data
        note = Note(body = body)
        db.session.add(note)
        db.session.commit()
        flash('Your note is saved.')
        return redirect(url_for('index'))
    return render_template('new_note.html', form = form)


@app.route('/index')
def index():
    return render_template('index.html')


if __name__ == '__main__':
    print app.config
    app.run(debug = True)
访问127.0.0.1:5000/index:点击create note,输入内容,提交,页面提示消息


2、Read
上面为程序实现了添加笔记的功能,在创建笔记页面单击保存后,程序会重定向到主页,提示的消息告诉你刚刚提交的笔记已经保存了,这时无法看到创建后的笔记。为了在主页列出所有保存的笔记,需要修改index视图,
app.py: 在属兔函数中查询数据库记录并传入模板
@app.route('/index')
def index():
    form = NewNoteForm
    notes = Note.query.all()
    return render_template('index.html', notes=notes, form=form)
在新的index视图中,我们使用Note.query.all()查询所有note记录,然后把这个包含所有记录的列表作为notes变量传入模板,接下来在模板中显示。
修改index.html: 处理视图函数中传进来的notes,notes|length是过滤器相当于python的len(notes),取notes的长度
{% extends 'base.html' %}

{% block content %}
    <h1>Notebook</h1>>
    <a href="{{ url_for('new_note') }}">New Note</a>
    <h4>{{ notes|length }} notes:</h4>
    {% for note in notes %}
        <div class="note">
            <p>{{ note.body }}</p>
        </div>
    {% endfor %}
{% endblock %}
在模板中,遍历这个notes列表,调用Note对象的body属性(note.body)获取body字段的值。通过length过滤器获取笔记的数量。
渲染后的index页面:

3、Update
更新一条笔记和创建一条新笔记的代码基本相同,首先是定义编辑笔记的表单类:
class EditNoteForm(FlaskForm):
    body = TextAreaField('Body', validators = [DataRequired()])
    submit = SubmitField('Update')
这个类和创建新笔记的类NewNoteForm的不同是提交字段的标签参数(作为<input>的value属性),因此这个表单的定义也可以动过继承来简化:
class EditNoteForm(NewNoteForm):
    submit = SubmitField('Update')
app.py增加edit_note视图更新笔记内容:
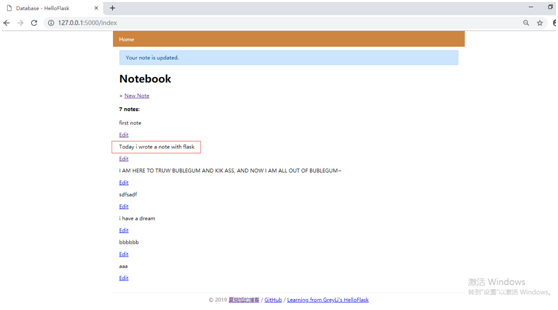
@app.route('/edit/<int:note_id>', methods=['GET', 'POST'])
def edit_note(note_id):
    form = EditNoteForm()
    note = Note.query.get(note_id)
    if form.validate_on_submit():
        note.body = form.body.data
        db.session.commit()
        flash('Your note is updated.')
        return redirect(url_for('index'))
    form.body.data = note.body
    return render_template('edit_note.html', form = form)
这个视图通过URL变量note_id获取要被修改的笔记的主键值(id字段),然后我们就可以使用get()方法获取对应的Note实例,当表单被提交且通过验证时,将表单中body字段的值赋值给note对象的body属性,然后提交数据库会话,这样就完成了更新操作,然后flash一个提示消息并重定向到index视图。
需要注意的是,在GET请求的执行流程中,我们添加了下面这行代码:
form.body.data = note.body
因为要添加修改笔记内容的功能,那么当打开修改某个笔记的页面时,这个页面的表单中必然要包含原有的内容。
如果手动创建HTML表单,那么可以通过将note记录传入模板,然后手动为对应字段中填入笔记的原有内容,如:
<textarea name=”body”>{{ note.body }}</textarea>
其他input元素则通过value属性来设置输入框中的值,如:
<input name=”foo” type=”text” value=”{{ note.title }}”>
使用input元素则可以省略这些步骤,当我们渲染表单字段时,如果表单字段的data属性不为空,WTForms会自动把data属性的值添加到表单字段的value属性中,作为表单的值填充进去,不用手动为value属性赋值。因此,将存储笔记原有内容的note.body属性赋值给表单字段的data属性即可在页面上的表单中填入原有的内容。
模板的内容基本相同
edit_note.html:
{% extends 'base.html' %}
{% block title %}Edit Note{% endblock %}

{% block content %}
    <h2>Edit Note</h2>
    <form method="post">
        {{ form.csrf_token }}
        {{ form_field(form.body, rows=5, cols=50) }}
        {{ form.submit }}<br>
    </form>
{% endblock %}
最后再主页笔记列表中的每个笔记内容下边添加一个编辑按钮,用来访问编辑页面
index.html:
{% extends 'base.html' %}

{% block content %}
    <h1>Notebook</h1>>
    <a href="{{ url_for('new_note') }}">New Note</a>
    <h4>{{ notes|length }} notes:</h4>
    {% for note in notes %}
        <div class="note">
            <p>{{ note.body }}</p>
            <a class="btn" href="{{ url_for('edit_note', note_id=note.id) }}">Edit</a>
        </div>
    {% endfor %}
{% endblock %}
访问:127.0.0.1:5000/index

点击edit

生成edit_note视图的URL时,我们传入当前note对象的id(note.id)作为URL变量note_id的值。
4、Delete
在程序中,删除的实现也比较简单,不过有一个误区,通常的考虑是在笔记的内容下添加一个删除链接:
<a href=”{{ url_for(‘delete_note’, note_id=note.id) }}”>Delete</a>
这个链接指向用来删除笔记的delete_note视图:
@app.route('/delete/<int:note_id>')
def delete_note(note_id):
    note = Note.query.get(note_id)
    db.session.delete(note)
    db.session.commit()
    flash('Your note is deleted.')
    return redirect(url_for('index'))
虽然这看起来很合理,但这种方式会使程序处于CSRF攻击的风险之中。之前学过,防范CSRF攻击的基本原则就是正确的使用GET和POST方法。像删除这类修改数据的操作绝对不能通过GET请求来实现,正确的做法是为删除操作创建一个表单,继承自NewNoteForm(重写submit字段),如下所示:
class DeleteNoteForm(FlaskForm):
    submit = SubmitField('Delete')
这个表单类只有一个提交字段,因为我们只需要在页面上显示一个删除按钮来提交表单。删除表单的提交请求由delete_note视图处理
@app.route('/delete/<int:note_id>', methods=['POST'])
def delete_note(note_id):
    form = DeleteForm()
    if form.validate_on_submit():
        note = Note.query.get(note_id)  # 获取对应记录
        db.session.delete(note)  # 删除记录
        db.session.commit()  # 提交修改
        flash('Your note is deleted.')
    else:
        abort(400)
    return redirect(url_for('index'))
在delete_note视图的app.route()中,methods列表仅填入了POST,这会确保该视图仅监听POST请求。
和编辑笔记的视图类似,这个视图接收note_id(主键值)作为参数。如果提交表单且验证通过(唯一需要被验证的是CSRF令牌),就是用get()方法查询对应的记录,然后调用db.session.delete()方法删除并提交数据库会话。如果验证出错则使用abort()函数返回400错误响应。
因为删除按钮要在主页的笔记内容下添加,我们需要在index视图中实例化DeleteNoteForm类,然后传入模板。在index.html模板中,渲染这个表单:
index.html:
{% extends 'base.html' %}

{% block content %}
    <h1>Notebook</h1>>
    <a href="{{ url_for('new_note') }}">New Note</a>
    <h4>{{ notes|length }} notes:</h4>
    {% for note in notes %}
        <div class="note">
            <p>{{ note.body }}</p>
            <a class="btn" href="{{ url_for('edit_note', note_id=note.id) }}">Edit</a>
            <form method="post" action="{{ url_for('delete_note', note_id=note.id) }}">
                {{ form_delete.csrf_token }}
                {{ form_delete.submit(class='btn') }}
            </form>
        </div>
    {% endfor %}
{% endblock %}
我们将表单的action属性设置为删除当前笔记的URL。构建URL时,URL变量note_id的值通过note.id属性获取,当单机提交按钮时,会将请求发送到action属性中的URL。添加删除表单的主要目的就是防止CSRF攻击,所以不要忘记渲染CSRF令牌字段form.csrf_token。
修改index视图,传入删除表单类,因为index模板中需要用的表单是删除的表单:
@app.route('/index')
def index():
    #form = NewNoteForm()
    form_delete = DeleteNoteForm()
    notes = Note.query.all()
    return render_template('index.html', notes=notes, form_delete = form_delete)
在HTML中,<a>标签会显示为链接,而提交按钮会显示为按钮,为了让编辑和删除笔记的按钮显示相同的样式,我们为这两个元素使用了同一个CSS类“.btn”
static/style.css:
body {
    margin: auto;
    width: 1100px;
}

nav ul {
    list-style-type: none;
    margin: 0;
    padding: 0;
    overflow: hidden;
    background-color: peru;
}

nav li {
    float: left;
}

nav li a {
    display: block;
    color: white;
    text-align: center;
    padding: 14px 20px;
    text-decoration: none;
}

nav li a:hover {
    background-color: #111;
}

main {
    padding: 10px 20px;
}

footer {
    font-size: 13px;
    color: #888;
    border-top: 1px solid #eee;
    margin-top: 25px;
    text-align: center;
    padding: 10px;

}

.alert {
  position: relative;
  padding: 0.75rem 1.25rem;
  margin-bottom: 1rem;
  border: 1px solid #b8daff;
  border-radius: 0.25rem;
  color: #004085;
  background-color: #cce5ff;
}

.note p{
    padding:10px;
    border-left:solid 2px #bbb;
}

.note form{
    display:inline;
}

.btn{
    font-family:Arial;
    font-size:14px;
    padding:5px 10px;
    text-decoration:none;
    border:none;
    background-color:white;
    color:black;
    border:2px solid #555555;
}

.btn:hover{
    text-decoration:none;
    background-color:black;
    color:white;
    border:2px solid black;
}
作为替代,也可以考虑用JavaScript创建监听函数,当删除按钮按下时,提交对应的隐藏表单。
访问127.0.0.1:5000/index


 浙公网安备 33010602011771号