
SocketIO+FastAPI实现终端命令行窗口
SocketIO+FastAPI实现终端命令行窗口
要实现什么样的功能:
- 像PuTTY和Xshell一样的远程终端功能
- 可同时连接多台机器
- 一台机器可同时打开多个终端窗口
- 窗口调整大小是后端也应该对应调整换行
前置
采用如下技术
| 所需框架 | 子模块 | 用途 |
|---|---|---|
| vue3 | 前端框架 | |
| vue-router | 路由跳转 | |
| vuex | 存储终端链接、确保路由跳转不断开连接 | |
| element-plus | el-tabs | 实现多个终端窗口间切换 |
| xterm.js | 前端展示终端窗口 | |
| socket.io-client | 前端连接后端的websocket框架 | |
| FastAPI | 后端框架 | |
| socketio | websocket后端框架 | |
| paramiko | SSHClient | 实现SSH功能 |
以上的框架就足够满足需求了
框架间拼接
后端框架拼接
后端框架采用FastAPI,FastAPI集成了对WebSocket的支持,但是需要自己手动实现的地方太多,前端框架使用SocketIO,那后端能不能也采用SocketIO框架呢,显然是可以的,但是除了实现本文章的终端需求外,还要再添加登录、注册、权限管理等等功能,http方式的请求也要处理。
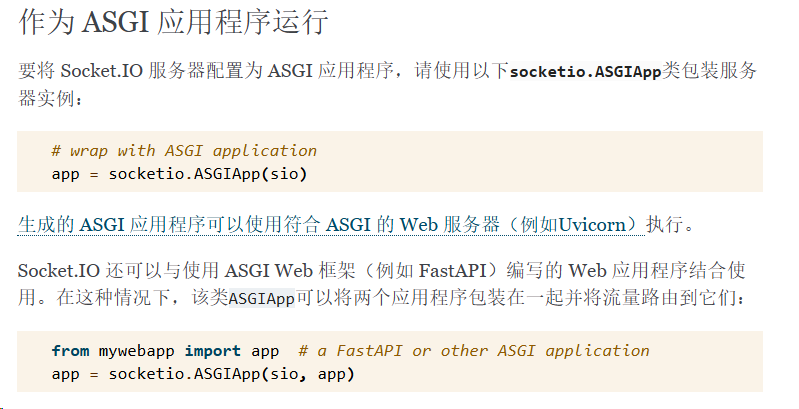
那如何将socketIO嵌入到FastAPI里边呢?答案是没找到解决方案。但是!找到了把FastAPI嵌入SocketIO里边的案例。
import socketio
from fastapi import FastAPI
import uvicorn

sio = socketio.AsyncServer(
    async_mode="asgi",
    cors_allowed_origins='*',
    cors_credentials=True,
    logger=False, engineio_logger=False)

app = FastAPI(title=f"fast",
              description=f"后端",
              docs_url="/docs",
              openapi_url="/openapi")

combined_asgi_app = socketio.ASGIApp(sio, app)

uvicorn.run(app=combined_asgi_app, host='0.0.0.0', port=8890, workers=1)
在socketio.AsyncServer的代码注释中看到
This class implements a fully compliant Socket.IO web server with support
for websocket and long-polling transports, compatible with the asyncio
framework.
这个AsyncServer兼容asyncio 框架
有兴趣的朋友可以阅读ASGI的文档https://asgi.readthedocs.io/en/latest/introduction.html
反正甭管了,现在FastAPI和SocketIO配合的好好的
SocketIO还提前预定了几个事件:

我们可以在连接时候进行权限认证,断开连接时候进行销毁终端窗口
"""
open_terminals = {
    'sid1': paramiko.SSHClient(),
    'sid2': paramiko.SSHClient(),
}
"""
open_terminals = {}
namespace = '/terminal'

@sio.on('connect', namespace=namespace)
async def connect(sid, environ, auth):
    if validate_user_ws(auth) is False:
        # 验证不通过
        # print(f'{sid} 验证不通过 {auth}')
        await sio.disconnect(sid=sid, namespace=namespace)

@sio.on('disconnect', namespace=namespace)
async def disconnect(sid):
    if open_terminals.get(sid):
        open_terminals[sid].close()
    # print(f'{sid}退出连线!')
接下来可以通过paramiko.SSHClient()的方式创建一个客户端
大体步骤为
1:创建终端
2:存储终端信息
3:监听前端发过来的字符
4:while True 反复监听终端的输出,一旦有输出,通过SocketIO的emit立马返回给前端
5:其他类型的错误也要断开连接并通知前端
def receive_output(channel):
    # 获取终端的输出
    output = ''
    while channel.recv_ready():
        try:
            output += channel.recv(1024).decode('utf-8')
        except UnicodeDecodeError as e:
            output += str(channel.recv(1024))
    return output

@sio.on('connect_terminal', namespace=namespace)
async def connect_terminal(sid, data):
    """
    sid: 连接的sid
    data: 连接信息 可以传输用户名和密码 {'username': 'root', 'password': '123456'}

    """
    global open_terminals, open_client
    try:
        # 1:创建终端
        client = paramiko.SSHClient()
        client.set_missing_host_key_policy(paramiko.AutoAddPolicy())
        try:
            client.connect(
                hostname='localhost', username=data['username'], password=data['password'],
                auth_timeout=10)
            # 2:存储终端信息
            open_client[sid] = client
            open_terminals[sid] = client.invoke_shell()

            await sio.emit('reply_connect_terminal', '连接成功')
            # 4:while True 反复监听终端的输出,一旦有输出,通过SocketIO的emit立马返回给前端
            while True:
                try:
                    # 判断对应sid的终端会话是否存在
                    if open_terminals.get(sid) and open_client.get(sid):
                        res = receive_output(open_terminals[sid])
                        if len(res):
                            # print(f'返回长度: {len(res)} 返回内容:|||{res}|||')
                            await sio.emit('reply_cmd_res', data=res, to=sid, namespace=namespace)
                        else:
                            await asyncio.sleep(0.1)
                    else:
                        break
                except Exception as e:
                    # 5:其他类型的错误也要断开连接并通知前端
                    await sio.emit('reply_cmd_res', data=f'连接已断开: {e}', namespace=namespace)
                    print(traceback.format_exc())
                    client.close()
                    # 删除发生报错的指定的会话终端
                    del open_terminals[sid]
                    del open_client[sid]
                    break
        except paramiko.ssh_exception.AuthenticationException:
            await sio.emit('reply_cmd_res', data='用户名或密码错误', to=sid, namespace=namespace)
        except Exception as e:
            print('链接错误')
            print(traceback.format_exc())

    except Exception as e:
        print(traceback.format_exc())
        await sio.emit('reply_connect_terminal', f'错误:{e}')
以上过程类似于打开了一个终端,啥也没干,但此时终端已经有返回了,如果程序运行在windows机器上此时会通过
await sio.emit('reply_cmd_res', data=res, to=sid, namespace=namespace)
前端返回以下内容
Microsoft Windows [版本 10.0.19045.3086]
(c) Microsoft Corporation。保留所有权利。

C:\Users\user>
做完了上述步骤,似乎还有一条没有实现就是3:监听前端发过来的字符
@sio.on('send_cmd', namespace=namespace)
async def send_cmd(sid, cmds):
    global open_terminals, open_client
    if open_terminals.get(sid) and open_client.get(sid):
        try:
            open_terminals[sid].send(cmds)
        except Exception as e:
            await sio.emit('reply_cmd_res', data=f'连接已断开: {e}', namespace=namespace)
            print(traceback.format_exc())
            open_client[sid].close()
            open_terminals[sid] = None
            open_client[sid] = None
    else:
        await sio.emit('reply_cmd_res', data='尚未连接该机器', namespace=namespace)
open_terminals[sid] 实际就是client.invoke_shell()返回的Channel
我们使用Channel的send方法接收前端传过来的字符,并将字符发送到终端会话。
而在步骤4中,我们已经对终端会话进行监听并返回前端。
目前为止后端已经实现了创建、删除、监听和返回的基本功能
并向前端约定了以下几个接口:
| 事件名 | 备注 | 数据类型 | |
|---|---|---|---|
| connect_terminal | 前端发送 | 创建终端并监听 | dict: |
| send_cmd | 前端发送 | 监听字符输入 | str |
| reply_connect_terminal | 前端接收 | 返回终端是否创建成功 | str |
| reply_cmd_res | 前端接收 | 终端监听内容 | str |
至于connect 和disconnect 是SocketIO定义的
connect中的auth参数,根据自己的需求可以设置不同的验证手段
小功告成!
前端框架拼接
使用Vue3 + element-plus + vuex + vue-router + xterm 来实现前端的展示
至于以上框架的安装这里就不提了
那么我需要实现以下需求:
1:连接后端
2:报错处理
3:实现一个黢黑的控制台窗口
4:可以接收后端的返回,并显示在控制台窗口上
5:可以向后端发送websocket请求,将按键的内容发送到后端
6:当关闭窗口时通知后端
好了,先来实现vuex store部分,我们选择将连接保存在state中,然后创建窗口和连接websocket在actions里边实现
import { io } from "socket.io-client";
import { createStore } from "vuex";
import {getXtrem} from "@/utils/trem.ts";

const store = createStore({
    state: {
        token: undefined | "" | null,
        terminals: [],
        terminalSocket: undefined,
        // 命令列表
        terminalCmds: [],
        // 连接状态
        terminalIsInitialized: false,
    },
    actions: {
        async initTerminal(content, config) {
            const socket = io(`ws://${config.ip}:${config.port}/terminal`, {
                autoConnect: false,
                withCredentials: false,
                auth: content.state.token,
                // path: process.env.NODE_ENV === "production" ? "/api/socket.io/" : "/socket.io/"
                path: "/socket.io/"
            })

            await socket.connect()
            const terminalInfo = {
                tid: config.tid,
                id: config.id,
                ip: config.ip,
                name: config.host,
                terminalIsInitialized: false,
                terminal: getXtrem(),
                terminalSocket: socket,
                terminalXtermRef: `terminalXterm${config.tid}`
            }
            content.state.terminals.push(terminalInfo)
            // 绑定事件
            socket.on("connect_error", (err) => {
                // the reason of the error, for example "xhr poll error"
                console.log(err.message);
                // some additional description, for example the status code of the initial HTTP response
                console.log(err.description);
                // some additional context, for example the XMLHttpRequest object
                console.log(err.context);
            });
            socket.on('reply_cpu_status', (data) =>{
                content.state.cpuInfo = data
            })
            socket.on('reply_connect_terminal', (data) => {
                console.log('连接成功', data)
                if (data == '连接成功') {
                    content.state.terminals.filter((item) => {
                        if (item.tid == config.tid) {
                            item.terminalIsInitialized = true
                        }
                    })
                }
            })
            socket.on('reply_cmd_res', (data) =>{
                if (data) {
                    terminalInfo.terminal.write(data)
                }
            })
            console.log(content.state.terminals)
            await socket.emit('connect_terminal', {username: config.user, password: config.password})
            return terminalInfo
        },

        // async getTerminalByTid(content, tid: Number){
        //     return content.state.terminals.filter(item => item.tid == tid)
        // },

        async writeTerminal(content, kw) {
            content.state.terminal.write(kw)
        },

        async connect_terminal(content, data: any) {
            await socket.emit('connect_terminal', data)
        },

        async send_cmd(content, {terminalSocket, data}) {
            await terminalSocket.emit('send_cmd', data)
        },
        async terminalDestroy(content, terminalSocket) {
            await terminalSocket.emit('terminal_destroy', terminalSocket.id)
            store.state.terminals = store.state.terminals.filter(item => item.terminalSocket.id !== terminalSocket.id)
        },
        async terminalWidthChange(content, {terminalSocket, width, height}) {
            await terminalSocket.emit('terminal_width_change', {width, height})
        },

        getTerminalByTid(content, tid: Number) {
            const info = content.state.terminals.filter(item => item.tid == tid)
            return info.length ? info[0]: null
        },
    }
})


export default store;
我们接下来element-plus官网来挑个组件,看看有符合的组件没有

这个el-tabs不错,还带着关闭按钮,到时候只需要把Tab 1 content的内容替换成xtrem的命令窗口就完事了
那还等什么,直接把这个代码复制下来,删点无关的逻辑,加上自己的
<template>
  <el-tabs
    v-model="editableTabsValue"
    type="card"
    editable
    class="demo-tabs"
    @edit="handleTabsEdit"
  >
    <el-tab-pane
      v-for="item in store.state.terminals"
      :key="item.tid"
      :label="item.ip + ' (' + (item.tid+1) + ')'"
      :name="item.tid"
    >
      <div class="terminal-container" :ref="item.terminalXtermRef"></div>
    </el-tab-pane>
  </el-tabs>
</template>

<script lang="ts" setup>
import { ref, onMounted } from 'vue'
import type { TabPaneName } from 'element-plus'

const editableTabsValue = ref(0)

function handleTabsEdit(targetName: TabPaneName | undefined, action: 'remove' | 'add') {
  if (action === 'add') {
    // 创建一个终端
    // 将标签页切换到刚打开的终端
  } else if (action === 'remove') {
    // 1.通知后端销毁终端
    // 2.将标签页切换到最后一个打开的终端
  }
}

onMounted(() => {
    // 连接后端websocket
    // 监听前端按键
})
</script>

<style>
</style>
这个就是大体逻辑,接下来,把store的给补到这个里边
<template>
  <el-tabs
      v-model="editableTabsValue"
      type="card"
      editable
      @edit="handleTabsEdit"
  >
    <template #add-icon>
      <el-icon>
        <Plus/>
      </el-icon>
    </template>
    <el-tab-pane
        v-for="item in store.state.terminals"
        :key="item.tid"
        :label="item.ip + ' (' + (item.tid+1) + ')'"
        :name="item.tid"
    >
      <div :ref="item.terminalXtermRef"></div>
    </el-tab-pane>
    <div v-if="store.state.terminals.length == 0"> 暂未有打开的命令行,请切换至机器页面选择命令行</div>
  </el-tabs>
</template>
<script lang="ts" setup>
import {ref, watch, onMounted, getCurrentInstance, onUnmounted, toRaw, reactive} from 'vue'

import "xterm/css/xterm.css";
import store from "@/store/index.ts";
import {useRouter} from "vue-router";
import type {TabPaneName} from 'element-plus'

const route = useRouter()
const { proxy } = getCurrentInstance()
const domInstance = getCurrentInstance()

const termWidth = ref(0)
const editableTabsValue = ref(0)

function handleWinwosSize() {
  store.state.terminals.forEach(terminalInfo=> {
    // 获取终端窗口div的大小,单位为像素
    var width = domInstance.refs[terminalInfo.terminalXtermRef][0].offsetWidth
    var height = domInstance.refs[terminalInfo.terminalXtermRef][0].offsetHeight
    if (width && height) {
      // 终端字体大小为14px,反复尝试,平均每个字符高18px、宽8.8px可以让后端的返回不会让元素溢出
      var cols = Math.floor(width / 8.8);
      var rows = Math.floor(height / 18);
      // 前端更改xterm窗口大小
      terminalInfo.terminal.resize(cols, rows);
      // 通知后端更改终端窗口大小
      terminalInfo.terminalSocket.emit('terminal_width_change', {'width': cols, 'height': rows})
    }
  })
}

onMounted(() => {
  // 监听前端窗口大小变化事件
  window.addEventListener('resize', handleWinwosSize);
  // 将store存储的所有打开的窗口渲染
  store.state.terminals.forEach(terminalInfo=> {
    terminalInfo.terminal.open(proxy.$refs[terminalInfo.terminalXtermRef][0])
  })
  // 如果是新建窗口,会在url中传递主机的id,并新建一个终端;如果是页面切换则不新建终端
  const host_id = route.currentRoute.value.query.id
  if (host_id) {
    let terminalInfo = await store.dispatch("initTerminal", {
      id: host_id,
      host: name,
      ip: ip, port: port,
      user: ssh_user,
      password: ssh_passwd,
      tid: store.state.terminals.length })
    terminalInfo.terminal.open(proxy.$refs[terminalInfo.terminalXtermRef][0])
    // 绑定按键事件全部发送到store的actions
    terminalInfo.terminal.onData((data) => {
      store.dispatch('send_cmd', {terminalSocket: terminalInfo.terminalSocket, data: data})
    })
    handleWinwosSize()
    return
  }
})

onUnmounted(() => {
  window.removeEventListener('resize', handleWinwosSize)
})

function handleTabsEdit(targetName: TabPaneName | undefined, action: 'remove' | 'add') {
  if (action === 'remove') {
    // 关闭指定标签页
    store.dispatch('getTerminalByTid', targetName).then(terminalInfo => {
      if (terminalInfo) {
        // 断开指定标签页的websocket链接
        store.dispatch('terminalDestroy', terminalInfo.terminalSocket)
      }
    })
    editableTabsValue.value = store.state.terminals[store.state.terminals.length - 1].tid
  }
}
</script>
<style>
</style>
至此,前端也完成了。

 浙公网安备 33010602011771号