

spring boot 源码探索(三)
4、ApplicationArguments applicationArguments = new DefaultApplicationArguments(args);
listeners.starting()执行完后,接着执行new DefaultApplicationArguments对象。该对象对args参数封装,创建一个PropertySource,来存放args参数。
public DefaultApplicationArguments(String[] args) {
        Assert.notNull(args, "Args must not be null");
        this.source = new Source(args);
        this.args = args;
    }
private static class Source extends SimpleCommandLinePropertySource {

        Source(String[] args) {
            super(args);
        }

    }
Source继承SimpleCommandLinePropertySource、SimpleCommandLinePropertySource最后继承PropertySource抽象类。
4、ConfigurableEnvironment environment = prepareEnvironment(listeners, applicationArguments);
environment 代表程序的运行环境,这里prepareEvironment方法是准备运行环境,listeners 和args 参数传进去。prepareEvironment内容:
private ConfigurableEnvironment prepareEnvironment(SpringApplicationRunListeners listeners, ApplicationArguments applicationArguments) {

        ConfigurableEnvironment environment = getOrCreateEnvironment(); //创建environment对象
        configureEnvironment(environment, applicationArguments.getSourceArgs()); //配置运行环境参数
        listeners.environmentPrepared(environment); //广播监听

       if (isWebEnvironment(environment) && !this.webEnvironment) {
            environment = convertToStandardEnvironment(environment);
        }
        return environment;
    }
首先调用getOrCreateEnvironment 创建一个运行环境environment。根据webEnvironment 判定,创建enviroment类型,这里在initialize的时候webEnvironment 已经是true。所以创建了一个standardServletEnvironment 的environment对象。
private ConfigurableEnvironment getOrCreateEnvironment() {
   if (this.environment != null) {
      return this.environment;
   }
   if (this.webEnvironment) {
      return new StandardServletEnvironment();
   }
   return new StandardEnvironment();
}
接着进行config Environment 环境,configureEnvironment方法主要做两件事、configurePropertySources 和 configureProfiles 处理,处理propertySource类型和profiles类型的配置处理。
protected void configureEnvironment(ConfigurableEnvironment environment,
            String[] args) {
        configurePropertySources(environment, args);
        configureProfiles(environment, args);
    }
protected void configurePropertySources(ConfigurableEnvironment environment,
            String[] args) {
        MutablePropertySources sources = environment.getPropertySources();
        if (this.defaultProperties != null && !this.defaultProperties.isEmpty()) {
            sources.addLast(
                    new MapPropertySource("defaultProperties", this.defaultProperties));
        }
        if (this.addCommandLineProperties && args.length > 0) {
            String name = CommandLinePropertySource.COMMAND_LINE_PROPERTY_SOURCE_NAME;
            if (sources.contains(name)) {
                PropertySource<?> source = sources.get(name);
                CompositePropertySource composite = new CompositePropertySource(name);
                composite.addPropertySource(new SimpleCommandLinePropertySource(
                        name + "-" + args.hashCode(), args));
                composite.addPropertySource(source);
                sources.replace(name, composite);
            }
            else {
                sources.addFirst(new SimpleCommandLinePropertySource(args));
            }
        }
    }

    protected void configureProfiles(ConfigurableEnvironment environment, String[] args) {
        environment.getActiveProfiles(); // ensure they are initialized
        // But these ones should go first (last wins in a property key clash)
        Set<String> profiles = new LinkedHashSet<String>(this.additionalProfiles);
        profiles.addAll(Arrays.asList(environment.getActiveProfiles()));
        environment.setActiveProfiles(profiles.toArray(new String[profiles.size()]));
    }
在configureProertySources中,首先查看defaultProperties是否为空,不为null,则添加该Properties进environment 环境中,然后根据addCommandLineProperties和args参数是否大于0来判断是添加还是替换source。args参数为0,则添加一个由args参数组成的ProertySources,添加到environment 中sources的第一位置(addFirst添加到第一位置,确保main方法中的配置是最优先的,且可以覆盖其他地方的配置)。在本方法中,defaultProperties默认为空,args参数个数未大于0.所以这个方法什么都没有做。
在configureProfiles 中,首先先获key 为spring.profiles.active 的配置项,添加到environment中,然后添加additionalProfiles到配置项profiles中。spring.profiles.active 未配置,additionalProfiles是空对象,所以这个方法实际上也是没有做具体操作。至此,configureEnvironment 方法操作完成,接着调用监听器广播器,发布一个环境准备事件listeners.environmentPrepared(environment),事件发布跟前面发布的start事件过程是一样的,这里发布了一个ApplicationEnvironmentPreparedEvent事件。
// 发布事件
public void environmentPrepared(ConfigurableEnvironment environment) {
        this.initialMulticaster.multicastEvent(new ApplicationEnvironmentPreparedEvent(
                this.application, this.args, environment));
    }
下面看看监听器响应事件内容、看看多少个监听器响应了该事件,并做了什么操作:首先ClearCachesApplicationListener和ParentContextCloserApplicationListener未监听。
FileEncodingApplicationListener 监听器监听了该事件,监听代码执行内容为:
public void onApplicationEvent(ApplicationEnvironmentPreparedEvent event) {
        RelaxedPropertyResolver resolver = new RelaxedPropertyResolver(
                event.getEnvironment(), "spring.");
        if (resolver.containsProperty("mandatoryFileEncoding")) {
            String encoding = System.getProperty("file.encoding");
            String desired = resolver.getProperty("mandatoryFileEncoding");
            if (encoding != null && !desired.equalsIgnoreCase(encoding)) {
                logger.error("System property 'file.encoding' is currently '" + encoding
                        + "'. It should be '" + desired
                        + "' (as defined in 'spring.mandatoryFileEncoding').");
                logger.error("Environment variable LANG is '" + System.getenv("LANG")
                        + "'. You could use a locale setting that matches encoding='"
                        + desired + "'.");
                logger.error("Environment variable LC_ALL is '" + System.getenv("LC_ALL")
                        + "'. You could use a locale setting that matches encoding='"
                        + desired + "'.");
                throw new IllegalStateException(
                        "The Java Virtual Machine has not been configured to use the "
                                + "desired default character encoding (" + desired
                                + ").");
            }
        }
    }
看得出是获取系统的属性mandatoryFileEncoding 和 file.encoding属性,判定是否一致,这里没有配置mandatoryFileEncoding,所有这里的方法,if条件内容就不执行,该监听器没有做任何事情。
AnsiOutputApplicationListener 监听器监听该事件,代码内容:
public void onApplicationEvent(ApplicationEnvironmentPreparedEvent event) {
        RelaxedPropertyResolver resolver = new RelaxedPropertyResolver(
                event.getEnvironment(), "spring.output.ansi.");
        if (resolver.containsProperty("enabled")) {
            String enabled = resolver.getProperty("enabled");
            AnsiOutput.setEnabled(Enum.valueOf(Enabled.class, enabled.toUpperCase()));
        }

        if (resolver.containsProperty("console-available")) {
            AnsiOutput.setConsoleAvailable(
                    resolver.getProperty("console-available", Boolean.class));
        }
    }
也是通过属性解析器,获取到spring.output.ansi和console-available属性,然后对AnsiOutput类进行设置。(AnsiOutput类的解释里是 “生成ANSI编码的输出。。。。”,没搞懂)这里没有配置那两个属性,所以这个监听器也是没有做任何操作。
ConfigFileApplicationListener监听器监听了事件。
public void onApplicationEvent(ApplicationEvent event) {
        if (event instanceof ApplicationEnvironmentPreparedEvent) {
            onApplicationEnvironmentPreparedEvent(
                    (ApplicationEnvironmentPreparedEvent) event);
        }
        if (event instanceof ApplicationPreparedEvent) {
            onApplicationPreparedEvent(event);
        }
    }

    private void onApplicationEnvironmentPreparedEvent(
            ApplicationEnvironmentPreparedEvent event) {
        List<EnvironmentPostProcessor> postProcessors = loadPostProcessors();
        postProcessors.add(this);
        AnnotationAwareOrderComparator.sort(postProcessors);
        for (EnvironmentPostProcessor postProcessor : postProcessors) {
            postProcessor.postProcessEnvironment(event.getEnvironment(),
                    event.getSpringApplication());
        }
    }

    List<EnvironmentPostProcessor> loadPostProcessors() {
        return SpringFactoriesLoader.loadFactories(EnvironmentPostProcessor.class,
                getClass().getClassLoader());
    }
可以看出,该监听器通过loadFactories加载spring.factories中的两个processor处理器,分别是CloudFoundryVcapEnvironmentPostProcessor和SpringApplicationJsonEnvironmentPostProcessor处理器。然后执行两个处理器的postProcessEnvironment方法,用于处理配置文件配置CloudFoundry和Json相关信息。这里没有做任何相关配置,所以这两个处理器未处理任何事情。
LoggingApplicationListener 监听器监听该事件,用于初始化日志工作、在ApplicationStart事件中,已经做了预初始化,这里做初始化,默认选用的是logback日志
public void onApplicationEvent(ApplicationEvent event) {
        if (event instanceof ApplicationStartingEvent) {
            onApplicationStartingEvent((ApplicationStartingEvent) event);
        }
        else if (event instanceof ApplicationEnvironmentPreparedEvent) {
            onApplicationEnvironmentPreparedEvent(
                    (ApplicationEnvironmentPreparedEvent) event);
        }
        else if (event instanceof ApplicationPreparedEvent) {
            onApplicationPreparedEvent((ApplicationPreparedEvent) event);
        }
        else if (event instanceof ContextClosedEvent && ((ContextClosedEvent) event)
                .getApplicationContext().getParent() == null) {
            onContextClosedEvent();
        }
        else if (event instanceof ApplicationFailedEvent) {
            onApplicationFailedEvent();
        }
    }
private void onApplicationEnvironmentPreparedEvent(
            ApplicationEnvironmentPreparedEvent event) {
        if (this.loggingSystem == null) {
            this.loggingSystem = LoggingSystem
                    .get(event.getSpringApplication().getClassLoader());
        }
        initialize(event.getEnvironment(), event.getSpringApplication().getClassLoader());
    }
protected void initialize(ConfigurableEnvironment environment,
            ClassLoader classLoader) {
        new LoggingSystemProperties(environment).apply();
        LogFile logFile = LogFile.get(environment);
        if (logFile != null) {
            logFile.applyToSystemProperties();
        }
        initializeEarlyLoggingLevel(environment);
        initializeSystem(environment, this.loggingSystem, logFile);
        initializeFinalLoggingLevels(environment, this.loggingSystem);
        registerShutdownHookIfNecessary(environment, this.loggingSystem);
    }
到这里,监听器都监听并执行监听操作完成了,接着判定一下是否是web environment 环境,不是,就创建标准的StandardEnvironment 环境返回。
if (isWebEnvironment(environment) && !this.webEnvironment) {
            environment = convertToStandardEnvironment(environment);
        }
private ConfigurableEnvironment convertToStandardEnvironment(
            ConfigurableEnvironment environment) {
        StandardEnvironment result = new StandardEnvironment();
        removeAllPropertySources(result.getPropertySources());
        result.setActiveProfiles(environment.getActiveProfiles());
        for (PropertySource<?> propertySource : environment.getPropertySources()) {
            if (!SERVLET_ENVIRONMENT_SOURCE_NAMES.contains(propertySource.getName())) {
                result.getPropertySources().addLast(propertySource);
            }
        }
        return result;
    }
这样 prepareEnvironment()方法就执行完成了,然后返回ConfigurableEnvironment 对象environment。接着执行Banner 输出。并执行的图标显示。
5、Banner printedBanner = printBanner(environment);
printBanner 方法在应用程序启动时候打印一个图案,并输出一些版本信息。
private Banner printBanner(ConfigurableEnvironment environment) {
        if (this.bannerMode == Banner.Mode.OFF) {
            return null;
        }
        ResourceLoader resourceLoader = this.resourceLoader != null ? this.resourceLoader
                : new DefaultResourceLoader(getClassLoader());
        SpringApplicationBannerPrinter bannerPrinter = new SpringApplicationBannerPrinter(
                resourceLoader, this.banner);
        if (this.bannerMode == Mode.LOG) {
            return bannerPrinter.print(environment, this.mainApplicationClass, logger);
        }
        return bannerPrinter.print(environment, this.mainApplicationClass, System.out);
    }
从代码看首选判定是否开启banner显示,若为off,将返回空值,不打印信息。然后创建一个bannerPrinter 打印对象。调用该对象的print方法打印banner图案信息。如果bannerMode是Log则通过logger打印一句信息,否则则通过system.out 打印
public Banner print(Environment environment, Class<?> sourceClass, Log logger) {
        Banner banner = getBanner(environment, this.fallbackBanner);
        try {
            logger.info(createStringFromBanner(banner, environment, sourceClass));
        }
        catch (UnsupportedEncodingException ex) {
            logger.warn("Failed to create String for banner", ex);
        }
        return new PrintedBanner(banner, sourceClass);
    }
public Banner print(Environment environment, Class<?> sourceClass, PrintStream out) {
        Banner banner = getBanner(environment, this.fallbackBanner);
        banner.printBanner(environment, sourceClass, out);
        return new PrintedBanner(banner, sourceClass);
    }
private static final Banner DEFAULT_BANNER = new SpringBootBanner();
private Banner getBanner(Environment environment, Banner definedBanner) {
        Banners banners = new Banners();
        banners.addIfNotNull(getImageBanner(environment));
        banners.addIfNotNull(getTextBanner(environment));
        if (banners.hasAtLeastOneBanner()) {
            return banners;
        }
        if (this.fallbackBanner != null) {
            return this.fallbackBanner;
        }
        return DEFAULT_BANNER;
    }
logger和system.out方式都是通过getBanner方法获取到具体的banner对象,然后进行打印。这里没有配置任何banner,所以使用了默认的banner(SpringBootBanner)。
SpringBootBanner代码如下,从代码就可以看到我们的打印图标了
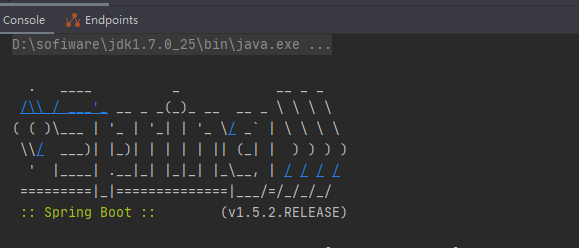
class SpringBootBanner implements Banner {

    private static final String[] BANNER = { "",
            "  .   ____          _            __ _ _",
            " /\\\\ / ___'_ __ _ _(_)_ __  __ _ \\ \\ \\ \\",
            "( ( )\\___ | '_ | '_| | '_ \\/ _` | \\ \\ \\ \\",
            " \\\\/  ___)| |_)| | | | | || (_| |  ) ) ) )",
            "  '  |____| .__|_| |_|_| |_\\__, | / / / /",
            " =========|_|==============|___/=/_/_/_/" };

    private static final String SPRING_BOOT = " :: Spring Boot :: ";

    private static final int STRAP_LINE_SIZE = 42;

    @Override
    public void printBanner(Environment environment, Class<?> sourceClass,
            PrintStream printStream) {
        for (String line : BANNER) {
            printStream.println(line);
        }
        String version = SpringBootVersion.getVersion();
        version = (version == null ? "" : " (v" + version + ")");
        String padding = "";
        while (padding.length() < STRAP_LINE_SIZE
                - (version.length() + SPRING_BOOT.length())) {
            padding += " ";
        }

        printStream.println(AnsiOutput.toString(AnsiColor.GREEN, SPRING_BOOT,
                AnsiColor.DEFAULT, padding, AnsiStyle.FAINT, version));
        printStream.println();
    }

}
printBanner方法将图标和springboot 名字和版本信息格式化输出。程序启动后即可以看到如下画面
到这里,程序启动输出的第一个信息出来了。。。接下来的方法就是创建Application应用上下文具体内容了。。。。
=================================================================================================================================

 浙公网安备 33010602011771号