比Selenium更优秀的playwright介绍与未来展望
Playwright是微软开发的,专门为满足端到端测试需求而创建的。Playwright支持包括Chromium、WebKit和Firefox在内的所有现代渲染引擎。在Windows、Linux和macOS上进行测试,本地或在CI上,无头或有头,带有本机移动仿真。
安装
安装playwright库
pip install --upgrade pip
pip install playwright
然后安装browsers:
playwright install
同步与异步
安装后,就可以导入Playwright 库,支持三种浏览器 (chromium, firefox and webkit).
from playwright.sync_api import sync_playwright

with sync_playwright() as p:
    browser = p.chromium.launch()
    page = browser.new_page()
    page.goto("http://playwright.dev")
    print(page.title())
    browser.close()
Playwright支持同步和异步两种API: synchronous and asynchronous. 如果你的工程使用 asyncio, 可以使用async API:
import asyncio
from playwright.async_api import async_playwright

async def main():
    async with async_playwright() as p:
        browser = await p.chromium.launch()
        page = await browser.new_page()
        await page.goto("http://playwright.dev")
        print(await page.title())
        await browser.close()

asyncio.run(main())
首个例子
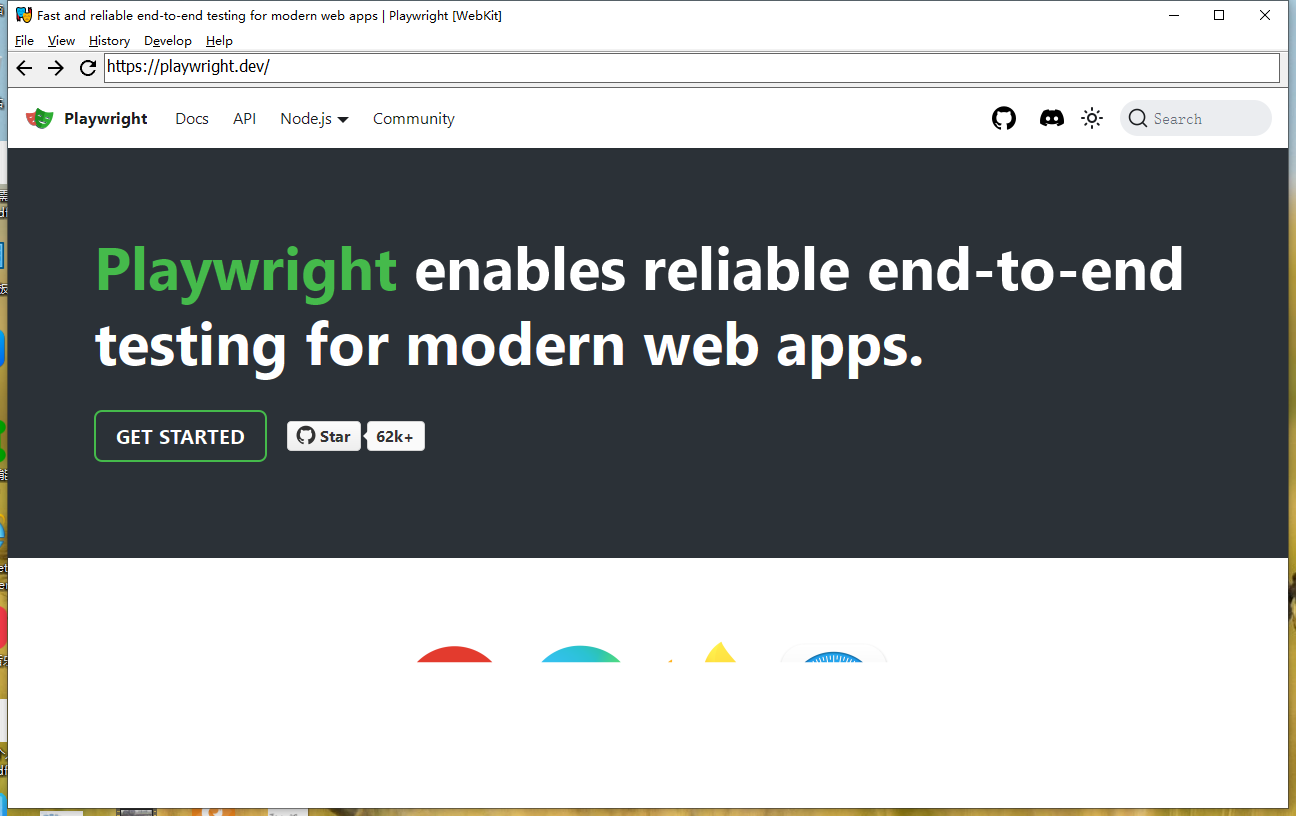
访问https://playwright.dev/网站并截图保存screenshot
from playwright.sync_api import sync_playwright

with sync_playwright() as p:
    browser = p.webkit.launch()
    page = browser.new_page()
    page.goto("https://playwright.dev/")
    page.screenshot(path="example.png")
    browser.close()
上面的代码会将网页保持到example.png。
默认情况下,Playwright 以无头模式运行浏览器,就是看不到窗口。要查看浏览器 UI,可以摘启动浏览器时传递 headless=False 标志。还可以使用 Slow_mo 来减慢执行速度。
from playwright.sync_api import sync_playwright

with sync_playwright() as p:
    browser = p.webkit.launch(headless=False)
    page = browser.new_page()
    page.goto("https://playwright.dev/")
    page.screenshot(path="example.png")
    browser.close()
加上headless=False后,我们可以看到浏览器UI。
使用指南
Actions 表单元素交互
Playwright 可以与 HTML 输入元素进行交互,比如文本输入、复选框、单选按钮、选择选项、鼠标点击、输入字符、按键和快捷键,还可以上传文件和聚焦元素。
比如对于文本:
# Text input
page.get_by_role("textbox").fill("Peter")

# Date input
page.get_by_label("Birth date").fill("2020-02-02")

# Time input
page.get_by_label("Appointment time").fill("13:15")

# Local datetime input
page.get_by_label("Local time").fill("2020-03-02T05:15")
通过get_by_role, get_by_label 获取文本框,通过fill 填充
对应的checkbox 和ratio, 使用check 操作表单
# Check the checkbox
page.get_by_label('I agree to the terms above').check()

# Assert the checked state
expect(page.get_by_label('Subscribe to newsletter')).to_be_checked()

# Select the radio button
page.get_by_label('XL').check()
select下拉框则是select_option
# Single selection matching the value or label
page.get_by_label('Choose a color').select_option('blue')

# Single selection matching the label
page.get_by_label('Choose a color').select_option(label='Blue')

# Multiple selected items
page.get_by_label('Choose multiple colors').select_option(['red', 'green', 'blue'])
还可以模拟点击操作,除了常规的click,还支持Shift+Click,hover,以及指定点击位置等。
# Generic click 普通点击
page.get_by_role("button").click()

# Double click 双击
page.get_by_text("Item").dblclick()

# Right click 鼠标右键点击
page.get_by_text("Item").click(button="right")

# Shift + click
page.get_by_text("Item").click(modifiers=["Shift"])

# Hover over element
page.get_by_text("Item").hover()

# Click the top left corner
page.get_by_text("Item").click(position={ "x": 0, "y": 0})
对于上传文件,也不在话下:
page.get_by_label("Upload file").set_input_files('myfile.pdf')
拖拽:
page.locator("#item-to-be-dragged").drag_to(page.locator("#item-to-drop-at"))
Auto-waiting 自动等待
页面加载是有等待时间的,比如你要点击一个按钮,需要等待页面就绪后,所以playwright提供自动等待功能,确保操作的action符合预期。
举个例子, locator.click(), Playwright 执行前会确保:
- locator 能定位到唯一的element
- element 可见 Visible
- element 是稳定状态 Stable, 不是动画元素
- element Receives Events, as in not obscured by other elements
- element is Enabled
Authentication 认证
一些网站访问需要认证,通常有一些登录表单,我们可以模拟登陆
page = context.new_page()
page.goto('https://github.com/login')

# Interact with login form
page.get_by_label("Username or email address").fill("username")
page.get_by_label("Password").fill("password")
page.get_by_role("button", name="Sign in").click()
# Continue with the test
为了避免每次登录,可以保存状态和恢复状态:
# Save storage state into the file.
storage = context.storage_state(path="state.json")

# Create a new context with the saved storage state.
context = browser.new_context(storage_state="state.json")
有的网站存储state用的session storage,也可以操作:
import os
# Get session storage and store as env variable
session_storage = page.evaluate("() => JSON.stringify(sessionStorage)")
os.environ["SESSION_STORAGE"] = session_storage

# Set session storage in a new context
session_storage = os.environ["SESSION_STORAGE"]
context.add_init_script("""(storage => {
  if (window.location.hostname === 'example.com') {
    const entries = JSON.parse(storage)
    for (const [key, value] of Object.entries(entries)) {
      window.sessionStorage.setItem(key, value)
    }
  }
})('""" + session_storage + "')")
原理是通过page.evaluate 执行一个js,获取页面的sessionStorage,在新的context启动时,注入保存的session_storage。
加载chrome插件
可以摘启动context的时候,通过launch_persistent_context指定extension路径
from playwright.sync_api import sync_playwright, Playwright

path_to_extension = "./my-extension"
user_data_dir = "/tmp/test-user-data-dir"


def run(playwright: Playwright):
    context = playwright.chromium.launch_persistent_context(
        user_data_dir,
        headless=False,
        args=[
            f"--disable-extensions-except={path_to_extension}",
            f"--load-extension={path_to_extension}",
        ],
    )
    if len(context.background_pages) == 0:
        background_page = context.wait_for_event('backgroundpage')
    else:
        background_page = context.background_pages[0]

    # Test the background page as you would any other page.
    context.close()


with sync_playwright() as playwright:
    run(playwright)
其实这里的launch_persistent_context,还能指定更多的东西,包含录屏等。
——更多使用指南,待续——
Playwright 爬虫demo
我们模拟一个加载小红书cookie,然后打开搜索页面,并解析搜索结果。
首先,打开浏览器获取小红书登录后的cookie,F12查看网络请求,随便招一个复制cookie即可

然后存储到COOKIE变量中:
COOKIE = '复制的cookie'
我们启动Playwright,加载cookie:
def load_cookie():
    # 读取保存的 Cookie 文件
    cookies = []
    lines = COOKIE.split(";")
    for line in lines:
        name, value = line.strip().split('=', 1)
        cookies.append({'name': name, 'value': value, 'domain': '.xiaohongshu.com', 'path': '/', 'expires': -1})
    # 添加 Cookie 到浏览器上下文
    context.add_cookies(cookies)


with sync_playwright() as playwright:
    browser = playwright.chromium.launch(headless=False)
    context = browser.new_context()

    # 加载cookie
    load_cookie()
然后打开搜索页面,并解析搜索结果:
# 创建一个新页面,访问小红书搜搜
page = context.new_page()
page.goto('https://www.xiaohongshu.com/search_result?keyword=AI&source=unknown&type=51')

# 解析搜索结果
html = page.content()
cards = parse_cards(html)
print(cards)
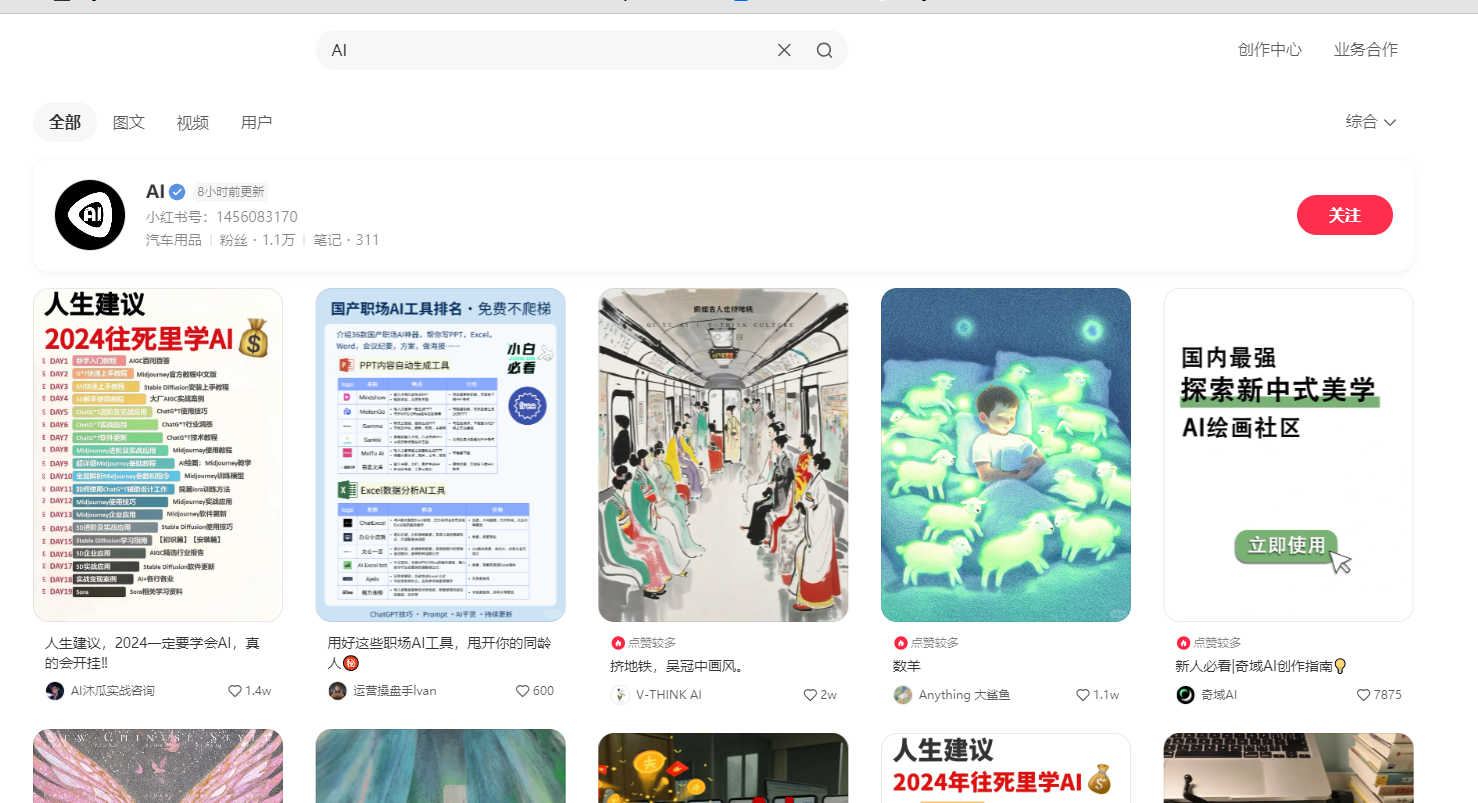
通过page.content() 获取到html,然后用常规的html解析就可以, 这里可以扔给大模型写解析代码,prompt是python playwright 将页面中这样的多个卡片解析出来,包含标题,图片,url,like数量, html是...`
# 解析card
def parse_cards(html):
    cards = []
    soup = BeautifulSoup(html, "html.parser")
    for card in soup.find_all("section", class_="note-item"):
        title = card.find("a", class_="title")
        if not title:
            continue
        title = title.text.strip()
        image_url = card.find("img")["src"]
        url = card.find("a", class_="cover")["href"]
        like_count = card.find("span", class_="count").text.strip()
        if "w" in like_count:
            like_count = str(float(like_count.replace("w", "")) * 10000)
        cards.append({
            "title": title,
            "image_url": image_url,
            "url": url,
            "like_count": like_count
        })
    return cards
最后等到结果:
[
  {
	   'title': '人生建议,2024一定要学会AI,真的会开挂‼️',
	   'image_url': 'https://sns-webpic-qc.xhscdn.com/202405141753/7bec9f3771d1787c19343079183c95fd/1040g008310an3v106g005pahpd9gl25gv5aqt08!nc_n_webp_mw_1',          'url': '/search_result/65f2b75a000000000d00f8f3',
	    'like_count': '14000.0'
  }
 // 省略...
 ]
这里默认只加载了首页,如果我们先多加载几页,可以控制浏览器滚动,可以发现每次loading时,会显示loading中的动画,因此我们可以等待这个loading不显示就认为加载结束:
# 滚动加载10页,滚动到页脚出发自动加载
for i in range(10):
    page.evaluate("window.scrollTo(0, document.body.scrollHeight)")
    # 等待loadding消失
    page.wait_for_selector(".feeds-loading", state="hidden")
完整代码:
from playwright.sync_api import sync_playwright
from bs4 import BeautifulSoup

COOKIE = '...你的cookie...'


# 解析card
def parse_cards(html):
    cards = []
    soup = BeautifulSoup(html, "html.parser")
    for card in soup.find_all("section", class_="note-item"):
        title = card.find("a", class_="title")
        if not title:
            continue
        title = title.text.strip()
        image_url = card.find("img")["src"]
        url = card.find("a", class_="cover")["href"]
        like_count = card.find("span", class_="count").text.strip()
        if "w" in like_count:
            like_count = str(float(like_count.replace("w", "")) * 10000)
        cards.append({
            "title": title,
            "image_url": image_url,
            "url": url,
            "like_count": like_count
        })
    return cards


def load_cookie():
    # 读取保存的 Cookie 文件
    cookies = []
    lines = COOKIE.split(";")
    for line in lines:
        name, value = line.strip().split('=', 1)
        cookies.append({'name': name, 'value': value, 'domain': '.xiaohongshu.com', 'path': '/', 'expires': -1})
    # 添加 Cookie 到浏览器上下文
    context.add_cookies(cookies)


with sync_playwright() as playwright:
    browser = playwright.chromium.launch(headless=False)
    context = browser.new_context()

    # 加载cookie
    load_cookie()

    # 创建一个新页面,访问小红书搜搜
    page = context.new_page()
    page.goto('https://www.xiaohongshu.com/search_result?keyword=AI&source=unknown&type=51')

    # 滚动加载10页,滚动到页脚出发自动加载
    for i in range(10):
        page.evaluate("window.scrollTo(0, document.body.scrollHeight)")
        # 等待loadding消失
        page.wait_for_selector(".feeds-loading", state="hidden")

    # 解析搜索结果
    html = page.content()
    cards = parse_cards(html)
    print(cards)

    page.pause()

    browser.close()
使用LLM驱动Playwright
在skyvern框架中,我们看到了通过LLM来识别网页,决策选择页面元素,然后通过Playwright控制页面元素,实现自动化完成一些任务,比如购买车险。
我们简单分析下。
skyvern 首先定义了一些列的action枚举,用来表示网页元素的操作
class ActionType(StrEnum):
    CLICK = "click"
    INPUT_TEXT = "input_text"
    UPLOAD_FILE = "upload_file"

    # This action is not used in the current implementation. Click actions are used instead."
    DOWNLOAD_FILE = "download_file"

    SELECT_OPTION = "select_option"
    CHECKBOX = "checkbox"
    WAIT = "wait"
    NULL_ACTION = "null_action"
    SOLVE_CAPTCHA = "solve_captcha"
    TERMINATE = "terminate"
    COMPLETE = "complete"
    # Note: Remember to update ActionTypeUnion with new actions
抓取页面时,会获取页面内容、元素、以及组合到一起的截图:
async def scrape_web_unsafe(
    browser_state: BrowserState,
    url: str,
) -> ScrapedPage:
    """
    Asynchronous function that performs web scraping without any built-in error handling. This function is intended    for use cases where the caller handles exceptions or in controlled environments. It directly scrapes the provided    URL or continues on the given page.
    :param browser_context: BrowserContext instance used for scraping.    :param url: URL of the web page to be scraped. Used only when creating a new page.    :param page: Optional Page instance for scraping, a new page is created if None.    :return: Tuple containing Page instance, base64 encoded screenshot, and page elements.
    :note: This function does not handle exceptions. Ensure proper error handling in the calling context.    """    # We only create a new page if one does not exist. This is to allow keeping the same page since we want to    # continue working on the same page that we're taking actions on.    # *This also means URL is only used when creating a new page, and not when using an existing page.    page = await browser_state.get_or_create_page(url)
    # Take screenshots of the page with the bounding boxes. We will remove the bounding boxes later.
    # Scroll to the top of the page and take a screenshot.    # Scroll to the next page and take a screenshot until we reach the end of the page.    # We check if the scroll_y_px_old is the same as scroll_y_px to determine if we have reached the end of the page.    # This also solves the issue where we can't scroll due to a popup.(e.g. geico first popup on the homepage after    # clicking start my quote)
    LOG.info("Waiting for 5 seconds before scraping the website.")
    await asyncio.sleep(5)

    screenshots: list[bytes] = []
    scroll_y_px_old = -30.0
    scroll_y_px = await scroll_to_top(page, drow_boxes=True)
    # Checking max number of screenshots to prevent infinite loop
    # We are checking the difference between the old and new scroll_y_px to determine if we have reached the end of the    # page. If the difference is less than 25, we assume we have reached the end of the page.    while (
        abs(scroll_y_px_old - scroll_y_px) > 25
        and len(screenshots) < SettingsManager.get_settings().MAX_NUM_SCREENSHOTS
    ):
        screenshot = await browser_state.take_screenshot(full_page=False)
        screenshots.append(screenshot)
        scroll_y_px_old = scroll_y_px
        LOG.info("Scrolling to next page", url=url, num_screenshots=len(screenshots))
        scroll_y_px = await scroll_to_next_page(page, drow_boxes=True)
        LOG.info("Scrolled to next page", scroll_y_px=scroll_y_px, scroll_y_px_old=scroll_y_px_old)
    await remove_bounding_boxes(page)
    await scroll_to_top(page, drow_boxes=False)

    elements, element_tree = await get_interactable_element_tree(page)
    element_tree = cleanup_elements(copy.deepcopy(element_tree))

    _build_element_links(elements)

    id_to_xpath_dict = {}
    id_to_element_dict = {}
    for element in elements:
        element_id = element["id"]
        # get_interactable_element_tree marks each interactable element with a unique_id attribute
        id_to_xpath_dict[element_id] = f"//*[@{SKYVERN_ID_ATTR}='{element_id}']"
        id_to_element_dict[element_id] = element

    text_content = await get_all_visible_text(page)
    return ScrapedPage(
        elements=elements,
        id_to_xpath_dict=id_to_xpath_dict,
        id_to_element_dict=id_to_element_dict,
        element_tree=element_tree,
        element_tree_trimmed=trim_element_tree(copy.deepcopy(element_tree)),
        screenshots=screenshots,
        url=page.url,
        html=await page.content(),
        extracted_text=text_content,
    )
注意上面的ScrapedPage,包含elements、screenshots等信息。
用户可以给定一个任务prompt,skyvern 会将ScrapedPage 和预制prompt组合到一起,调用LLM进行决策。我们可以看下预制的prompt:
Identify actions to help user progress towards the user goal using the DOM elements given in the list and the screenshot of the website.
Include only the elements that are relevant to the user goal, without altering or imagining new elements.
Use the details from the user details to fill in necessary values. Always satisfy required fields if the field isn't already filled in. Don't return any action for the same field, if this field is already filled in and the value is the same as the one you would have filled in.
MAKE SURE YOU OUTPUT VALID JSON. No text before or after JSON, no trailing commas, no comments (//), no unnecessary quotes, etc.
Each element is tagged with an ID.
If you see any information in red in the page screenshot, this means a condition wasn't satisfied. prioritize actions with the red information.
If you see a popup in the page screenshot, prioritize actions on the popup.

Reply in JSON format with the following keys:
{
    "actions": array // An array of actions. Here's the format of each action:
    [{
        "reasoning": str, // The reasoning behind the action. Be specific, referencing any user information and their fields and element ids in your reasoning. Mention why you chose the action type, and why you chose the element id. Keep the reasoning short and to the point.
        "confidence_float": float, // The confidence of the action. Pick a number between 0.0 and 1.0. 0.0 means no confidence, 1.0 means full confidence
        "action_type": str, // It's a string enum: "CLICK", "INPUT_TEXT", "UPLOAD_FILE", "SELECT_OPTION", "WAIT", "SOLVE_CAPTCHA", "COMPLETE", "TERMINATE". "CLICK" is an element you'd like to click. "INPUT_TEXT" is an element you'd like to input text into. "UPLOAD_FILE" is an element you'd like to upload a file into. "SELECT_OPTION" is an element you'd like to select an option from. "WAIT" action should be used if there are no actions to take and there is some indication on screen that waiting could yield more actions. "WAIT" should not be used if there are actions to take. "SOLVE_CAPTCHA" should be used if there's a captcha to solve on the screen. "COMPLETE" is used when the user goal has been achieved AND if there's any data extraction goal, you should be able to get data from the page. Never return a COMPLETE action unless the user goal is achieved. "TERMINATE" is used to terminate the whole task with a failure when it doesn't seem like the user goal can be achieved. Do not use "TERMINATE" if waiting could lead the user towards the goal. Only return "TERMINATE" if you are on a page where the user goal cannot be achieved. All other actions are ignored when "TERMINATE" is returned.
        "id": int, // The id of the element to take action on. The id has to be one from the elements list
        "text": str, // Text for INPUT_TEXT action only
        "file_url": str, // The url of the file to upload if applicable. This field must be present for UPLOAD_FILE but can also be present for CLICK only if the click is to upload the file. It should be null otherwise.
        "option": {  // The option to select for SELECT_OPTION action only. null if not SELECT_OPTION action
            "label": str, // the label of the option if any. MAKE SURE YOU USE THIS LABEL TO SELECT THE OPTION. DO NOT PUT ANYTHING OTHER THAN A VALID OPTION LABEL HERE
            "index": int, // the id corresponding to the optionIndex under the the select element.
            "value": str // the value of the option. MAKE SURE YOU USE THIS VALUE TO SELECT THE OPTION. DO NOT PUT ANYTHING OTHER THAN A VALID OPTION VALUE HERE
        },
{% if error_code_mapping_str %}
        "errors": array // A list of errors. This is used to surface any errors that matches the current situation for COMPLETE and TERMINATE actions. For other actions or if no error description suits the current situation on the screenshots, return an empty list. You are allowed to return multiple errors if there are multiple errors on the page.
        [{
            "error_code": str, // The error code from the user's error code list
            "reasoning": str, // The reasoning behind the error. Be specific, referencing any user information and their fields in your reasoning. Keep the reasoning short and to the point.
            "confidence_float": float // The confidence of the error. Pick a number between 0.0 and 1.0. 0.0 means no confidence, 1.0 means full confidence
        }]
{% endif %}
    }],
}

{% if action_history %}
Consider the action history from the last step and the screenshot together, if actions from the last step don't yield positive impact, try other actions or other action combinations.
{% endif %}
...
省略了一些,prompt是指示多模LLM,根据提供的元素、图片,根据用户的prompt决定action,skyvern会解析action并调用Playwright操作页面元素,直到完成任务或者LLM指示停止。
可以看到,skyvern 有效的利用了大模型的多模识别能力,来自主决策做一些具体的任务,但是这里有个坑,是否每次都需要大模型去决策呢?理论上,对于相同的任务,记录下路径,必要时再让大模型去决策或许是更好的解决方案。
playwright selenium 对比
这里转载一个https://www.cnblogs.com/yoyoketang/p/17387733.html 提到的对比,大家可以参考
| 编号 | 功能 | Playwright | Selenium | 哪个更优秀 |
|---|---|---|---|---|
| 1 | 学习资料 | 相对少 | 多 | Selenium |
| 2 | 用户群体 | 出现的比较晚,用户量相对少 | 出现的早,用户量多 | Selenium |
| 3 | 支持语言 | TypeScript、JavaScript、Python、.NET、Java | C#,Java,Perl,PHP,Python 和Ruby | Selenium |
| 4 | 支持浏览器 | Chromium(包含chrome, msedge)、WebKit 和 Firefox | IE(7, 8, 9, 10, 11),Firefox,Safari,Google Chrome,Opera,Edge等 | Selenium |
| 5 | 跨平台 | Windows,Linux(只支持Ubuntu部分系统) ,Mac | Windows,Linux,Mac 都支持 | Selenium |
| 6 | 浏览器安装 | 命令行安装 | 自己安装 | Playwright |
| 7 | 浏览器驱动 | 不需要驱动 | 下载对应版本驱动 | Playwright |
| 8 | 启动速度 | 快 | 慢 | Playwright |
| 9 | context 环境隔离 | 有 | 无 | Playwright |
| 10 | headless 无头模式 | 默认headless, 也可以设置GUI | 默认GUI模式,也可以设置headless | Playwright |
| 11 | 无痕模式 | 默认无痕模式,对应测试很有帮助,对于爬虫用户可能访问页面不通过 | 默认非无痕默认,爬虫用户特别喜欢 | Selenium |
| 12 | 页面等待 | wait_for_load_state可以精准等待commit,domcontentloaded,load,networkidle四种状态 | implicitly_wait等待页面加载完成 | Playwright |
| 13 | 元素定位 | 提供多个内置定位器,定位方式更贴近业务,定位方式更多 | 八大定位 | Playwright |
| 14 | 元素等待 | 定位元素自带等待机制 | 需要自己封装等待方法 | Playwright |
| 15 | 点击元素等操作 | 会判断元素状态,出现位置,是否可点击智能判断 | 需要自己封装webdriverwait.until方法,难度较大 | Playwright |
| 16 | 定位报错 | 会人性化告诉你定位到几个元素,并推荐定位方式 | 报错需要自己去猜谜,自己排除各种可能性 | Playwright |
| 17 | 元素不在当前屏幕 | 会判断元素位置,自动滚动元素出现位置 | 需要自己去判断滚动 | Playwright |
| 18 | iframe | 通过对象操作,不用切换 | 需要来回切换 | Playwright |
| 19 | alert | 默认监听自动关闭,可以异步监听 | 需要自己判断,无异步监听 | Playwright |
| 20 | 文件上传 | 监听文件上传时间,处理优雅 | 无法解决非input 上传 | Playwright |
| 21 | 文件下载 | 可以监听下载 | 只能设置浏览器默认位置 | Playwright |
| 22 | 多窗口标签 | 可以监听窗口事件,操作方便 | 需要来回切换 | Playwright |
| 23 | 事件监听 | 可以监听各种事件 | 无法监听 | Playwright |
| 24 | 捕获ajax 请求 | 可以捕获ajax 请求和 返回 | 无法捕获 | Playwright |
| 25 | mock 功能 | 可以模拟想要的任何接口数据 | 无mock 功能 | Playwright |
| 26 | 断言 | 提供expect 丰富断言 | 需要自己封装webdriverwait.until方法,难度较大 | Playwright |
| 27 | 录制视频 | 录制用例视频 | 无 | Playwright |
| 28 | trace 追踪 | 有 | 无 | Playwright |
| 29 | 断点调试 | 有 | 无 | Playwright |
| 30 | 录制 | 可以生成pytest用例 | 录制功能比较简单 | Playwright |
| 31 | 鼠标键盘操作 | 调用简单方便 | 导入模块,操作复杂 | Playwright |
| 32 | base_url | 可以添加全局base_url | 无此功能 | Playwright |
| 33 | 接口测试 | 提供接口测试 | 无此功能 | Playwright |
| 34 | grid 分布式 | 无 | selenium-grid 分布式 | Selenium |
| 35 | 协议 | websockt 协议,可以实时获取页面状态 | http 协议,只能获取当时的状态,需自己轮询判断 | Playwright |
| 36 | 执行JavaScript | 可以在page,iframe,元素对象执行JavaScript | 只能在driver对象执行JavaScrip | Playwright |
| 37 | async异步 | 有同步和异步2种方式 | 无异步代码 | Playwright |
| 38 | 面试 | 要求playwright 比较少 | 问selenium 比较多 | Selenium |
| 39 | 学习难易程度 | 容易,无需封装,直接用 | 难度较大,需要封装 | Playwright |
原文作者评价:
Playwright的优点是简单方便、功能强大、稳定性高,缺点是相对新,用户群体少,学习资料少。
Selenium的优点是灵活性高、用户群体大、学习资料多,缺点是需要自己封装或者导入其他模块来实现一些功能,启动速度慢,稳定性差。
个人评价,Playwright是微软在吸收了前面框架优势基础上研发出来的新测试框架,站在巨人肩膀上,微软出品下限很高,如果没有历史包袱,可以优先采用Playwright。
总结
Playwright是新兴的自动化测试工具,拥有丰富的功能和API,隐藏在众多的爬虫和自动化工具背后,而多模LLM的出现让Playwright可以如虎添翼,自动化智能化的RPA工具预计将会井喷般出现。

 浙公网安备 33010602011771号