图片优化
前面的话
本文将详细介绍前端项目中的图片相关的优化方案
图片格式
目前在前端的开发中常用的图片格式有jpg、png、gif,png8、png24、png32、svg和webp
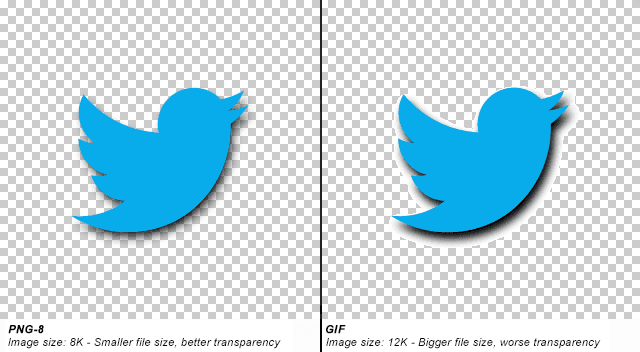
【gif】
gif是无损的,具有文件小、支持动画及透明的优点。但gif无法支持半透明,且仅支持8bit的索引色,即在整个图片中,只能存在256种不同的颜色
但实际上,gif是一种逐渐被抛弃的图片格式。png格式的出现就是为了替代它
由于gif支持动画的这个“一招鲜”的本领,在网络中仍然占有一席之地,主要用于一些小图标
【jpg】
jpg又称为jpeg,是有损的,但采用了直接色,保证了色彩的丰富性。jpg图片支持透明和半透明,所有空白区域填充白色
jpg格式主要用于高清图、摄影图等大图
【png8】
png8是无损的,是png的索引色版本
前面提到过,png是gif格式的替代者,在相同图片效果下,png8具有更小的文件体积,且支持透明度的调节
但png8不支持半透明,也不支持动画
【png24】
png24是无损的,是png的直接色版本。
png24支持透明,也支持半透明,但png有文件体积较大的缺点
png24的目标是替换jpg。但一般而言,png24的文件大小是jpg的5倍之多,但显示效果却只有一点点提升
【png32】
png32是在png24的基础上,添加了8位的alpha通道信息,可以支持透明和半透明,且支持图层,辅助线等复杂数据的保存
使用ps导出的透明的png24图片,实际上是阉割版的png32,因为只有32位的png图片才支持透明,阉割版是说导出的图片不支持图层
【SVG】
svg是无损的矢量图。svg与上面这些图片格式最大的不同是,上面的图片格式都是位图,而svg是矢量图,具有无论如何缩放都不会失真的优点
svg格式非常适用于绘制logo、图标等
但由于低版本浏览器支持不足,应用不广泛
【webp】
WebP 格式是 Google 于2010年发布的一种支持有损压缩和无损压缩的图片文件格式,派生自图像编码格式 VP8。它具有较优的图像数据压缩算法,能带来更小的图片体积,而且拥有肉眼识别无差异的图像质量,同时具备了无损和有损的压缩模式、Alpha 透明以及动画的特性,在 JPEG 和 PNG 上的转化效果都非常优秀、稳定和统一。目前,知名网站 Youtube 、Facebook、Ebay 等均有使用 WebP格式。
WebP 集合了多种图片文件格式的特点,JPEG 适合压缩照片和其他细节丰富的图片,GIF 可以显示动态图片,PNG 支持透明图像,图片色彩非常丰富,而 WebP 则兼具上述优点,且较于它们还有更出色的地方。
无损压缩后的 WebP 比 PNG 文件少了 45% 的文件大小,即使 PNG 文件经过其他压缩工具压缩后,WebP 还是可以减少 28% 的文件大小。此外,与 JPEG 相比,在质量相同的情况下,WebP 格式图像的体积要比 JPEG 格式图像小 40%,而 WebP 在压缩方面比 JPEG 格式更优越
但目前为止,webp只能在安卓系统下使用
PS保存
一般地,在对设计图进行修改前,首先要保留一份psd源文本,然后再在其副本上进行修改
通过photoshop将设计图切成需要的素材时,涉及到图片格式的设置问题,应注意以下几点:
1、当图片色彩丰富且无透明要求时,建议保存为jpg格式并选择合适的品质,一般为60-80
2、当图片色彩不太丰富时无论有无透明要求,保存为PNG8格式(特点是只有256种颜色,文件本身比较小),保存时选择无仿色,无杂边
3、当图片有半透明要求时,保存PNG24格式(对图片不进行压缩,所有相对比较大)
懒加载
图片延迟加载也称为懒加载,延迟加载图片或符合某些条件时才加载某些图片,通常用于图片比较多的网页。可以减少请求数或者延迟请求数,优化性能
【呈现形式】
一般而言,有以下三种呈现形式
1、延时加载,使用setTimeout或setInterval进行加载延迟,如果用户在加载前就离开,自然就不会进行加载
2、条件加载,符合某些条件或者触发了某些条件才开始异步加载
3、可视区域加载,仅仅加载用户可以看到的区域,这个主要监控滚动条实现,一般距离用户看到的底边很近的时候开始加载,这样能保证用户下拉时图片正好接上,不会有太长时间的停顿
【基本步骤】
1、待加载的图片默认加载一张占位图
2、使用data-src属性保存真正地址
3、当触发某些条件时,自动改变该区域的图片的src属性为真实的地址
【可视区域加载】
可视区域加载,是图片懒加载最常用的一种形式,涉及到的细节如下所示:
1、判断可视区域
图片顶部距离页面顶部的高度小于页面高度
2、保存图片路径
待加载的图片默认加载一张占位图,使用data-src属性保存真正的地址
3、判断加载时机
监听页面的scroll事件,收集当前进入页面的图片元素,给src赋值为真正的地址,给已加载的图片添加标记
4、滚动性能提升
使用函数节流优化滚动性能
代码如下所示:
const oList = document.getElementById('list')
const viewHeight = oList.clientHeight
const eles = document.querySelectorAll('img[data-src]')
const lazyLoad = () => {
  Array.prototype.forEach.call(eles, item => {
    const rect = item.getBoundingClientRect()
    if (rect.top <= viewHeight && !item.isLoaded) {
      item.isLoaded = true
      const oImg = new Image()
      oImg.onload = () => { item.src = oImg.src }
      oImg.src = item.getAttribute('data-src')
    }
  })
}
const throttle = (fn, wait=100) =>{
  return function() {
    if(fn.timer) return
    fn.timer = setTimeout(() => {
      fn.apply(this, arguments)
      fn.timer = null
    }, wait)
  }
}
lazyLoad()
oList.addEventListener('scroll', throttle(lazyLoad))
效果如下
懒加载进阶
上面代码的问题在于,每次调用getBoundingClientRect()方法时,都会触发回流,严重地影响性能
可以使用Intersection Observer这一API来解决问题,可以异步观察目标元素与祖先元素或顶层文件的交集变化
创建一个 IntersectionObserver对象并传入相应参数和回调用函数,该回调函数将会在target 元素和root的交集大小超过threshold规定的大小时候被执行
var options = {
    root: document.querySelector('#scrollArea'),
    rootMargin: '0px',
    threshold: 1.0
}
var callback = function(entries, observer) {
    /* Content excerpted, show below */
};
var observer = new IntersectionObserver(callback, options);
如果root参数指定为null或者不指定的时候默认使用浏览器视口做为root
rootMargin表示root元素的外边距。该属性值是用作root元素和target发生交集时的计算交集的区域范围,使用该属性可以控制root元素每一边的收缩或者扩张。默认值为0
threshold可以是单一的number也可以是number数组,target元素和root元素相交程度达到该值的时候,将会被执行
如果只是想要探测当target元素的在root元素中的可见性超过50%的时候,可以指定该属性值为0.5。如果想要target元素在root元素的可见程度每多25%就执行一次回调,那么可以指定一个数组[0, 0.25, 0.5, 0.75, 1]。默认值是0(意味着只要有一个target像素出现在root元素中,回调函数将会被执行)。该值为1.0含义是当target完全出现在root元素时回调才会被执行
为每个观察者配置一个目标
var target = document.querySelector('#listItem')
observer.observe(target)
当目标满足该IntersectionObserver指定的threshold值,回调被调用
var callback = function(entries, observer) {
    entries.forEach(entry => {
        entry.time;
        entry.rootBounds;
        entry.boundingClientRect;
        entry.intersectionRect;
        entry.intersectionRatio;
        entry.target;
    });
};
time: 可见性发生变化的时间,是一个高精度时间戳,单位为毫秒
intersectionRatio: 目标元素的可见比例,即 intersectionRect 占 boundingClientRect 的比例,完全可见时为 1 ,完全不可见时小于等于 0
boundingClientRect: 目标元素的矩形区域的信息
intersectionRect: 目标元素与视口(或根元素)的交叉区域的信息
rootBounds: 根元素的矩形区域的信息,getBoundingClientRect() 方法的返回值,如果没有根元素(即直接相对于视口滚动),则返回 null
isIntersecting: 是否进入了视口,boolean 值
target: 被观察的目标元素,是一个 DOM 节点对象
代码如下所示:
const eles = document.querySelectorAll('img[data-src]')
const observer = new IntersectionObserver( entries => {
  entries.forEach(entry => {
    if (entry.intersectionRatio > 0) {
      let oImg = entry.target
      oImg.src = oImg.getAttribute('data-src')
      observer.unobserve(oImg)
    }
  })
}, {
  root: document.getElementById('list')
})
eles.forEach(item => { observer.observe(item) })
预加载
预加载图片是提升用户体验的一个好办法,提前加载用户所需的图片,保证图片快速、无缝发布,使用户在浏览器网站时获得更好用户体验。常用于图片画廊等应用中
【使用场景】
以下几个场景中,可以使用图片预加载
1、在首屏加载之前,缩短白屏时间
2、在空闲时间为SPA的下一屏预加载
3、预测用户操作,预先加载数据
【三种思路】
一般来说,实现预加载有三种思路:
1、使用页面无用元素的背景图片来进行图片预加载
<button>载入图片</button>
<img src="img/test.png" alt="测试">
<ul class="list">
    <li id="preload1"></li>
    <li id="preload2"></li>
    <li id="preload3"></li>
    <li id="preload4"></li>
</ul>
<script>
var oBtn = document.getElementsByTagName('button')[0];
var oImg0 = document.images[0];
var array = ["img/img1.gif","img/img2.gif","img/img3.gif","img/img4.gif"]
var iNow = -1;
oBtn.onclick = function(){
    iNow++;
    iNow = iNow%4;
    oImg0.src = array[iNow];
}
function preLoadImg(){
    preload1.style.background = "url('img/img1.gif')";
    preload2.style.background = "url('img/img2.gif')";
    preload3.style.background = "url('img/img3.gif')";
    preload4.style.background = "url('img/img4.gif')";
}
window.onload = function(){
    preLoadImg();
}
</script>
2、通过new Image()或document.createElement('img')创建img标签,然后通过img的src属性来加载图片
<button>载入图片</button>
<img src="img/test.png" alt="测试">
<script>
var oBtn = document.getElementsByTagName('button')[0];
var oImg0 = document.images[0];
var array = ["img/img1.gif","img/img2.gif","img/img3.gif","img/img4.gif"]
var iNow = -1;
oBtn.onclick = function(){
    iNow++;
    iNow = iNow%4;
    oImg0.src = array[iNow];
}
var aImages = [];
function preLoadImg(array){
    for(var i = 0, len = preLoadImg.arguments[0].length; i < len; i++){
        aImages[i] = new Image();
        aImages[i].src = preLoadImg.arguments[0][i];
    }
}
window.onload = function(){
    preLoadImg(array);
}
</script>
3、通过XHR对象发送ajax请求来获取图片,但只能获取同域图片
【onload和onerror】
通过添加onload和onerror这两个事件钩子,可以实现图片在加载完成和加载失败时的函数回调。多个资源加载可以计算出大体进度,如3/10
<button>载入图片</button>
<img src="img/test.png" alt="测试">
<script>
var oBtn = document.getElementsByTagName('button')[0];
var oImg0 = document.images[0];
var array = ["img/img1.gif","img/img2.gif","img/img3.gif","img/img4.gif"]
var iNow = -1;
oBtn.onclick = function(){
    iNow++;
    iNow = iNow%4;
    oImg0.src = array[iNow];
}
var iDown = 0;
var oImage = new Image();
function preLoadImg(arr){
    function loadImgTest(arr){
        iDown++;
        if(iDown < arr.length){
            preLoadImg(arr);
        }else{
            alert('ok');
            oImg.onload = null;
            oImg = null;
        }
    }
    oImage.onload = function(){
        loadImgTest(arr);
    };
    oImage.onerror = function(){
        loadImgTest(arr);
    };
    oImage.src = arr[iDown];
}
preLoadImg(array);
</script>
将预加载写成一个通用的资源加载器,代码如下
let isFunc = function(f){
  return typeof f === 'function'
}
function resLoader(config){
  this.option = {
    resourceType: 'image',
    baseUrl: '',
    resources: [],
    onStart: null,
    onProgress: null,
    onComplete: null
  }
  if(config){
    for(i in config){
      this.options[i] = config[i]
    }
  } else {
    alert('参数错误')
    return
  }
  // 加载器状态 0:未启动 1:正在加载 2:加载完毕
  this.status = 0
  this.total = this.option.resources.length || 0
  this.currentIndex = 0
}
resLoader.prototype.start = function(){
  this.status = 1
  let _this = this
  let baseUrl = this.option.baseUrl
  for(var i = 0, l = this.option.resources.length; i < l; i++){
    let r = this.option.resources[i],
        url = ''
    if(r.indexOf('http://) === 0 || r.indexOf('https://') === 0){
      url = r
    } else {
      url = baseUrl + r
    }
    let image = new Image()
    image.onload = function(){_this.loaded()}
    image.onerror = function(){_this.loaded()}
    image.src = url
  }
  if(isFunc(this.option.onStart)){
    this.option.onStart(this.total)
  }
}
resloader.prototype.loaded = funtion(){
  if(isFunc(this.option.onProgress)){
    this.option.onProgress(++this.currentIndex, this.total)
  }
  if(this.currentIndex === this.total){
    if(isFunc(this.option.onComplete)){
      this.option.onComplete(this.total)
    }
  }
}
let loader = new resLoader({
  resources: ['img1.png','img2.png','img3.png'],
  onStart: function(total){
    console.log('start:' + total)
  },
  onProgress: function(current, total){
    console.log(current+ '/' + total)
    let percent = current/total*100
  },
  onComplete: function(total){
    console.log('加载完毕:' + total + '个资源')
  }
})
loader.start()
Webp
在安卓下可以使用webp格式的图片,它具有更优的图像数据压缩算法,能带来更小的图片体积,同等画面质量下,体积比jpg、png少了25%以上,而且同时具备了无损和有损的压缩模式、Alpha 透明以及动画的特性
【检测】
是否支持webp格式的图片的检测方法如下
const isSupportWebp = !![].map && document.createElement('canvas').toDataURL('image/webp').indexOf('data:image/webp') === 0
【七牛自动转换】
七牛支持自动将其他格式的图片转换成webp格式的图片,只需添加在图片地址之后添加?imageView2/2/format/webp
下面是详细代码
/**
 * 若该浏览器支持webp格式,则将返回webp图片的url,否则返回原url
 * @param {string} 'https://static.xiaohuochai.site/20180612030117.png'
 * @return {string} 'https://static.xiaohuochai.site/20180612030117.png?imageView2/1/format/webp'
 */
export const getUrlWithWebp = url => {
  const isSupportWebp = !![].map && document.createElement('canvas').toDataURL('image/webp').indexOf('data:image/webp') === 0
  if (isSupportWebp) {
    return `${url}?imageView2/2/format/webp`
  }
  return url
}
【pageSpeed】
Google开发的PageSpeed模块有一个功能,会自动将图像转换成WebP格式或者是浏览器所支持的其它格式
以nginx为例,它的设置很简单
1、在http模块开启pagespeed属性
pagespeed on;
pagespeed FileCachePath "/var/cache/ngx_pagespeed/";
2、在主机配置添加如下一行代码,就能启用这个特性
pagespeed EnableFilters convert_png_to_jpeg,convert_jpeg_to_webp;
CDN
图片性能的最后一步就是分发了。所有资源都可以从使用 CDN 中受益
CDN 可以降低从图片站点提供自适应和高性能图片的复杂度。大多数CDN都可以根据设备和浏览器进行尺寸调整、裁剪和确定最合适的格式,甚至更多 —— 压缩、检测像素密度、水印、人脸识别和允许后期处理。借助这些强大的功能和能够将参数附到 URL 中,使得提供以用户为中心的图片变得轻而易举了
以七牛云为例,imageView2 提供简单快捷的图片格式转换、缩略、剪裁功能。只需要填写几个参数,即可对图片进行缩略操作,生成各种缩略图
// 裁剪正中部分,等比缩小生成200x200缩略图
http://odum9helk.qnssl.com/resource/gogopher.jpg?imageView2/1/w/200/h/200

// 宽度固定为200px,高度等比缩小,生成200x133缩略图
http://odum9helk.qnssl.com/resource/gogopher.jpg?imageView2/2/w/200
Vue图片优化
下面来介绍一个VUE下的插件vue-lazyload,可以实现图片或背景图片的懒加载、使用webp图片等效果
首先,使用npm安装
npm install vue-lazyload -D
【基础使用】
在main.js中,使用该插件
import Vue from 'vue'
import App from './App.vue'
import VueLazyload from 'vue-lazyload'

Vue.use(VueLazyload)

// or with options
Vue.use(VueLazyload, {
  preLoad: 1.3,
  error: 'dist/error.png',
  loading: 'dist/loading.gif',
  attempt: 1
})

new Vue({
  el: 'body',
  components: {
    App
  }
})
在模板中使用v-lazy来保存图片的真实地址
<ul>
  <li v-for="img in list">
    <img v-lazy="img.src" >
  </li>
</ul>
或者使用v-lazy-container配合图片的data-src属性
<div v-lazy-container="{ selector: 'img', error: 'xxx.jpg', loading: 'xxx.jpg' }">
  <img data-src="//domain.com/img1.jpg">
  <img data-src="//domain.com/img2.jpg">
  <img data-src="//domain.com/img3.jpg">
</div>
<div v-lazy-container="{ selector: 'img' }">
  <img data-src="//domain.com/img1.jpg" data-error="xxx.jpg">
  <img data-src="//domain.com/img2.jpg" data-loading="xxx.jpg">
  <img data-src="//domain.com/img3.jpg">
</div>
【参数说明】
vue-lazyload相关配置的参数说明
key       描述    默认值    类型
preLoad    预加载的宽高比    1.3    Number
error      图片加载失败时使用的图片源    'data-src'    String
loading    图片加载的路径    'data-src'    String
attempt    尝试加载次数    3    Number
listenEvents    想让vue监听的事件    ['scroll', 'wheel', 'mousewheel', 'resize', 'animationend', 'transitionend', 'touchmove']
adapter    动态修改元素属性    { }
filter     图像的SRC过滤器    { }
lazyComponent    懒加载组件    false
比如,可以使用如下的配置
Vue.use(VueLazyload, {
  preLoad: 1.3,
  error: 'dist/error.png',
  loading: 'dist/loading.gif',
  attempt: 1,
  listenEvents: [ 'scroll' ]
})
【动态修改图片的URL】
Vue.use(vueLazy, {
    filter: {
      progressive (listener, options) {
          const isCDN = /qiniudn.com/
          if (isCDN.test(listener.src)) {
              listener.el.setAttribute('lazy-progressive', 'true')
              listener.loading = listener.src + '?imageView2/1/w/10/h/10'
          }
      },
      webp (listener, options) {
          if (!options.supportWebp) return
          const isCDN = /qiniudn.com/
          if (isCDN.test(listener.src)) {
              listener.src += '?imageView2/2/format/webp'
          }
      }
    }
})
【设置事件钩子】
Vue.use(vueLazy, {
    adapter: {
        loaded ({ bindType, el, naturalHeight, naturalWidth, $parent, src, loading, error, Init }) {
            // do something here
            // example for call LoadedHandler
            LoadedHandler(el)
        },
        loading (listender, Init) {
            console.log('loading')
        },
        error (listender, Init) {
            console.log('error')
        }
    }
})
【使用IntersectionObserver】
Vue.use(vueLazy, {
  // set observer to true
  observer: true,

  // optional
  observerOptions: {
    rootMargin: '0px',
    threshold: 0.1
  }
})
【懒加载组件】
Vue.use(VueLazyload, {
  lazyComponent: true
});
<lazy-component @show="handler">
  <img class="mini-cover" :src="img.src" width="100%" height="400">
</lazy-component>

<script>
  {
    ...
    methods: {
      handler (component) {
        console.log('this component is showing')
      }
    }

  }
</script>
【组件中为图片或背景图片使用懒加载】
<script>
export default {
  data () {
    return {
      imgObj: {
        src: 'http://xx.com/logo.png',
        error: 'http://xx.com/error.png',
        loading: 'http://xx.com/loading-spin.svg'
      },
      imgUrl: 'http://xx.com/logo.png' // String
    }
  }
}
</script>

<template>
  <div ref="container">
     <img v-lazy="imgUrl"/>
     <div v-lazy:background-image="imgUrl"></div>

     <!-- with customer error and loading -->
     <img v-lazy="imgObj"/>
     <div v-lazy:background-image="imgObj"></div>

     <!-- Customer scrollable element -->
     <img v-lazy.container ="imgUrl"/>
     <div v-lazy:background-image.container="img"></div>

    <!-- srcset -->
    <img v-lazy="'img.400px.jpg'" data-srcset="img.400px.jpg 400w, img.800px.jpg 800w, img.1200px.jpg 1200w">
    <img v-lazy="imgUrl" :data-srcset="imgUrl' + '?size=400 400w, ' + imgUrl + ' ?size=800 800w, ' + imgUrl +'/1200.jpg 1200w'" />
  </div>
</template>
【CSS状态】
<img src="imgUrl" lazy="loading">
<img src="imgUrl" lazy="loaded">
<img src="imgUrl" lazy="error">
<style>
  img[lazy=loading] {
    /*your style here*/
  }
  img[lazy=error] {
    /*your style here*/
  }
  img[lazy=loaded] {
    /*your style here*/
  }
  /*
  or background-image
  */
  .yourclass[lazy=loading] {
    /*your style here*/
  }
  .yourclass[lazy=error] {
    /*your style here*/
  }
  .yourclass[lazy=loaded] {
    /*your style here*/
  }
</style>
下面是前端小站中vue-lazyload插件的使用
// main.js
import VueLazyload from 'vue-lazyload'

Vue.use(VueLazyload, {
  loading: require('./assets/imgs/loading.gif'),
  listenEvents: ['scroll'],
  filter: {
    webp(listener, options) {
      if (!options.supportWebp) return
      const isCDN = /xiaohuochai.site/
      if (isCDN.test(listener.src)) {
        listener.src += '?imageView2/2/format/webp'
      }
    }
  }
})
// homeCategory.vue
<ul v-lazy:background-image="require('@/assets/imgs/match-bg.jpg')">
好的代码像粥一样,都是用时间熬出来的


 浙公网安备 33010602011771号