webpack实用配置
前面的话
上文介绍了webpack入门,本文将详细介绍webpack实用配置
版本号
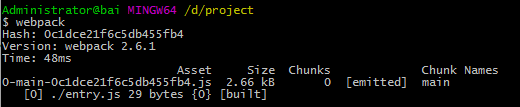
以entry.js打包为bundle.js为例,出口的filename可以设置为[id]、[name]、[hash]、[chunkhash]等替换形式,如下所示
var webpack = require('webpack');
module.exports = {
  entry: './entry.js', //入口文件
  output: {
    path: __dirname,//出口路径
    filename: '[id]-[name]-[hash].js'//出口名称
  }
}
则出口文件为0-main-0c1dce21f6c5db455fb4.js
如果index.html要引用打包后的js文件,由于文件名称不确定,并不好解决。这时,就需要使用html-webpack-plugin插件。该插件并不是内置插件,所以需要安装
npm install html-webpack-plugin
HtmlWebpackPlugin简化了HTML文件的创建,以便为webpack包提供服务。这对于在文件名中包含每次会随着变异会发生变化的哈希的webpack bundle尤其有用
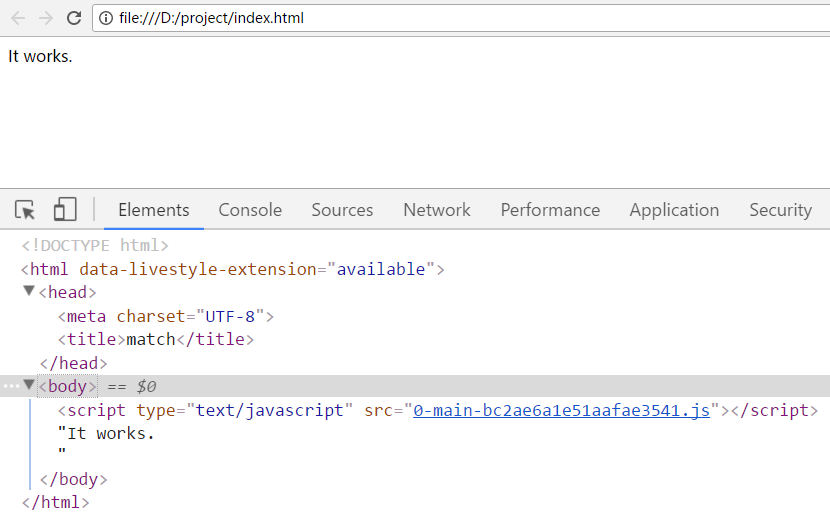
var webpack = require('webpack');
var HtmlWebpackPlugin = require('html-webpack-plugin');
module.exports = {
  entry: './entry.js', //入口文件
  output: {
    path: __dirname,//出口路径
    filename: '[id]-[name]-[hash].js'//出口名称
  },
  plugins: [
    new HtmlWebpackPlugin({
      title: 'match',//生成的html文件的标题为'match'
      filename: 'index.html'//生成的html文件名称为'index.html'
    })
  ]
}
通过以上的配置,如果在当前路径,index.html不存在,则生成;如果存在,则替换
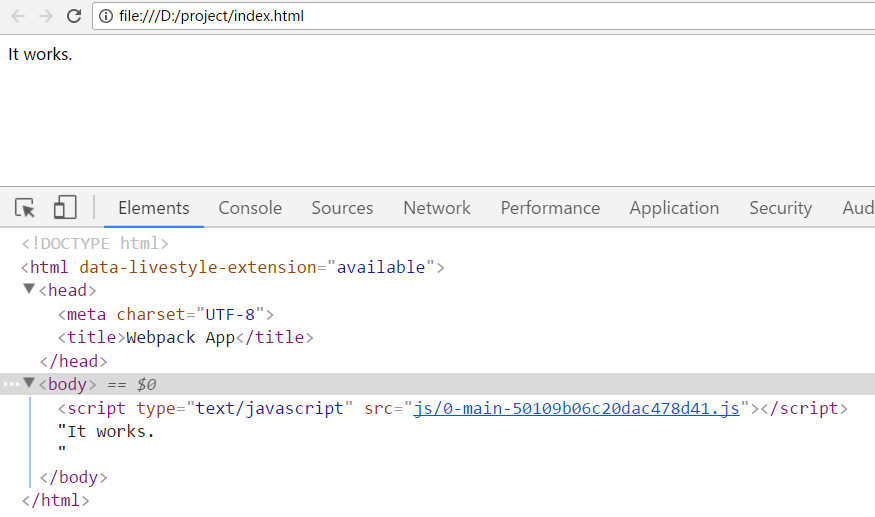
[注意]如果htmlwebpackplugin不进行配置,参数为空, plugins: [new HtmlWebpackPlugin()]。默认地,生成的html文件名称为'index.html',标题为'Webpack APP'
【标签位置】
htmlwebpackplugin插件的常用设置是设置script标签插入的位置,默认插入到body标签中,但可以使用inject:'head',设置插入到head标签中
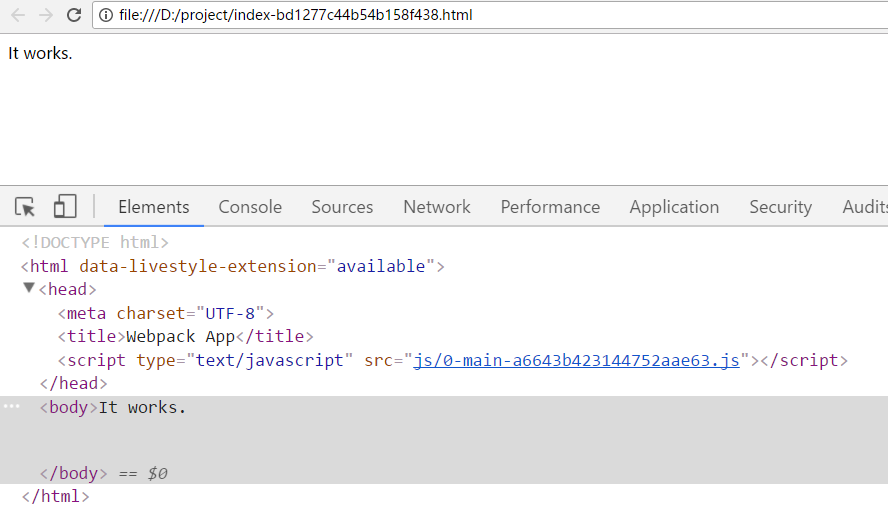
var webpack = require('webpack');
var HtmlWebpackPlugin = require('html-webpack-plugin');
module.exports = {
  entry: './entry.js', //入口文件
  output: {
    path: __dirname,//出口路径
    filename: 'js/[id]-[name]-[hash].js'//出口名称
  },
  plugins: [
    new HtmlWebpackPlugin({
      inject:'head',//将script标签插入到head标签中
      filename: 'index-[hash].html',//生成的html文件名称为'index.html'
    })
  ]
}
【图标设置】
设置favicon属性,可以设置网页的小图标
var webpack = require('webpack');
var HtmlWebpackPlugin = require('html-webpack-plugin');
module.exports = {
  entry: './entry.js', //入口文件
  output: {
    path: __dirname,//出口路径
    filename: 'js/[id]-[name]-[hash].js'//出口名称
  },
  plugins: [
    new HtmlWebpackPlugin({
      favicon:'./icon.ico'
    })
  ]
}

【压缩】
设置minify属性,可以压缩html文件,默认为false,即不压缩
var webpack = require('webpack');
var HtmlWebpackPlugin = require('html-webpack-plugin');
module.exports = {
  entry: './entry.js', //入口文件
  output: {
    path: __dirname,//出口路径
    filename: 'js/[id]-[name]-[hash].js'//出口名称
  },
  plugins: [
    new HtmlWebpackPlugin({
      minify:{
          removeComments: true,//删除注释
          collapseWhitespace:true//删除空格
      }
    })
  ]
}
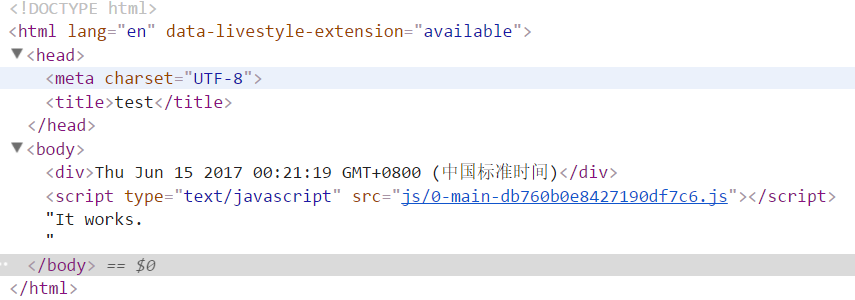
使用webpack打包后的index.html代码如下
<!DOCTYPE html><html><head><meta charset="UTF-8"><title>Webpack App</title></head><body><script type="text/javascript" src="js/0-main-8128c0c26a4449da7a05.js"></script></body></html>
模板文件
HtmlWebpackPlugin除了提供模块版本号的功能,还可以使用模板文件
例如,模板文件为template.html,内容如下
<!DOCTYPE html>
<html lang="en">
<head>
    <meta charset="UTF-8">
    <title>template</title>
</head>
<body>
<script src="test.js"></script>
<div>test</div>
</body>
</html>
webpack配置文件如下
var webpack = require('webpack');
var HtmlWebpackPlugin = require('html-webpack-plugin');
module.exports = {
  entry: './entry.js', //入口文件
  output: {
    path: __dirname,//出口路径
    filename: 'js/[id]-[name]-[hash].js'//出口名称
  },
  plugins: [
    new HtmlWebpackPlugin({
      filename: 'index-[hash].html',//生成的html文件名称为'index.html'
      template:'template/template.html'//模板文件为'template.html'
    })
  ]
}
生成的index-[hash].html以'template.html'文件为模板

[注意]如果在htmlwebpackplugin中使用了模板,则指定title不会生效,因为要以模板的title为准
var webpack = require('webpack');
var HtmlWebpackPlugin = require('html-webpack-plugin');
module.exports = {
  entry: './entry.js', //入口文件
  output: {
    path: __dirname,//出口路径
    filename: 'js/[id]-[name]-[hash].js'//出口名称
  },
  plugins: [
    new HtmlWebpackPlugin({
      title:'test',
      filename: 'index-[hash].html',//生成的html文件名称为'index.html'
      template:'template/template.html'//模板文件为'template.html'
    })
  ]
}

【传参】
模块文件当然是可以传参的,一般地,使用ejs语法。例如,在模板文件中,使用<%= htmlWebpackPlugin.options.title %>,即可读取htmlWebpackPlugin插件中'title'属性的值
[注意]模板文件中的'htmlWebpackPlugin'是固定的,不能随意更改。与webpack.config.js文件中,require()该插件的命名无关
//webpack.config.js
var webpack = require('webpack');
var HtmlWebpackPlugin = require('html-webpack-plugin');
module.exports = {
  entry: './entry.js', //入口文件
  output: {
    path: __dirname,//出口路径
    filename: 'js/[id]-[name]-[hash].js'//出口名称
  },
  plugins: [
    new HtmlWebpackPlugin({
      title:'test',
      template:'template/template.html',//模板文件为'template.html'
      dateData: new Date()
    })
  ]
}
//template.html
<!DOCTYPE html>
<html lang="en">
<head>
    <meta charset="UTF-8">
    <title><%= htmlWebpackPlugin.options.title  %></title>
</head>
<body>
<div><%=htmlWebpackPlugin.options.dateData %></div>
</body>
</html>
【模板组件】
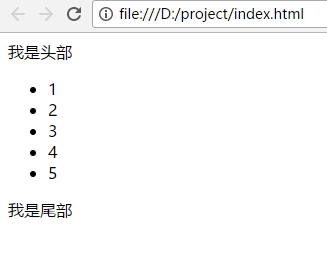
下面利用模板组件组合成一个html文件,以ejs模板语言为例
//webpack.config.js
var webpack = require('webpack');
var HtmlWebpackPlugin = require('html-webpack-plugin');
module.exports = {
  entry: './entry.js', //入口文件
  output: {
    path: __dirname,//出口路径
    filename: 'js/[id]-[name]-[hash].js'//出口名称
  },
  plugins: [
    new HtmlWebpackPlugin({
      template:'template/template.html'})
  ]
}
//template.html
<!DOCTYPE html>
<html lang="en">
<head>
    <meta charset="UTF-8">
    <title>Document</title>
</head>
<body>
<div>
    <% include  template/header.html %>
</div>
<ul>
    <% var arr = [1,2,3,4,5] %>
    <% for(var i = 0; i < arr.length; i++){ %>
        <li><%=arr[i] %></li>
    <% } %>
</ul>
<div>
    <% include  template/footer.html %>
</div>
</body>
</html>
//header.html
<div>我是头部</div>
//footer.html
<div>我是尾部</div>
运行结果报错,提示子模板加载失败

这是因为HtmlWebpackPlugin插件并不具备ejs模板语言所有的功能,其中一个就是不能识别<%include %>语句,这时需要安装一个ejs-compiled-loader
npm install ejs-compiled-loader
安装完成后,修改配置文件如下,表示使用ejs-compiled-loader来编译template.html
[注意]该插件中的include路径相对于webpack配置文件的位置,而不是模板文件template.html的位置
var webpack = require('webpack');
var HtmlWebpackPlugin = require('html-webpack-plugin');
module.exports = {
  entry: './entry.js', //入口文件
  output: {
    path: __dirname,//出口路径
    filename: 'js/[id]-[name]-[hash].js'//出口名称
  },
  plugins: [
    new HtmlWebpackPlugin({
      template:'ejs-compiled-loader!template/template.html'})
  ]
}
结果如下
多页面
对于多页面来说,一般地,有多个入口文件。不同的html页面输出对应不同的入口文件。 插件plugins()是一个数组,每new一个HtmlWebpackPlugin(),就可以输出一个html页面。这里有两个重要的属性:chunks和excludeChunks,chunks表示所包含的入口文件,excludeChunks表示要排除的入口文件
//webpack.config.js
var webpack = require('webpack');
var HtmlWebpackPlugin = require('html-webpack-plugin');
module.exports = {
  entry: {
      a:'./src/js/a.js',
      b:'./src/js/b.js',
      c:'./src/js/c.js'
  },
  output: {
    path: __dirname,//出口路径
    filename: 'js/[id]-[name]-[hash].js'//出口名称
  },
  plugins: [
    new HtmlWebpackPlugin({
          filename:'a.html',
          template:'src/template/template.html',
          title:'this is a',
          chunks:['a']
    }),
    new HtmlWebpackPlugin({
          filename:'b.html',
          template:'src/template/template.html',
          title:'this is b',
          chunks:['b']
    }),
    new HtmlWebpackPlugin({
          filename:'c.html',
          template:'src/template/template.html',
          title:'this is c',
          excludeChunks:['a','b']
    }),
  ]
}
结果如下
//a.html
<!DOCTYPE html>
<html lang="en">
<head>
    <meta charset="UTF-8">
    <title>this is a</title>
</head>
<body>
<div></div>
<script type="text/javascript" src="js/2-a-9828ea84bd8c12c19b5f.js"></script></body>
</html>

//b.html
<!DOCTYPE html>
<html lang="en">
<head>
    <meta charset="UTF-8">
    <title>this is b</title>
</head>
<body>
<div></div>
<script type="text/javascript" src="js/1-b-9828ea84bd8c12c19b5f.js"></script></body>
</html>

//c.html
<!DOCTYPE html>
<html lang="en">
<head>
    <meta charset="UTF-8">
    <title>this is c</title>
</head>
<body>
<div></div>
<script type="text/javascript" src="js/0-c-9828ea84bd8c12c19b5f.js"></script></body>
</html>
内联
在前面的例子中,都是以链接的形式引入入口文件的。有时,为了追求性能,会将其处理为内联的形式。这里就需要安装一个扩展插件html-webpack-inline-source-plugin,专门用来处理入口文件内联的
$ npm install --save-dev html-webpack-inline-source-plugin
该插件的使用很简单,使用require()语句引入后,在插件plugins()新建一个html-webpack-inline-source-plugin对象,然后在html-webpack-plugin对象中添加inlineSource属性即可
inlineSource: '.(js|css)$' // embed all javascript and css inline
//webpack.config.js
var webpack = require('webpack');
var HtmlWebpackPlugin = require('html-webpack-plugin');
var HtmlWebpackInlineSourcePlugin = require('html-webpack-inline-source-plugin');

module.exports = {
  entry: './entry.js',
  output:{
    path: __dirname,//出口路径
    filename: 'js/[id]-[name]-[hash].js'//出口名称
  },
  plugins: [
    new HtmlWebpackPlugin({
        inlineSource: '.(js|css)$'
    }),
    new HtmlWebpackInlineSourcePlugin()
  ]
}
结果如下
<!DOCTYPE html>
<html>
  <head>
    <meta charset="UTF-8">
    <title>Webpack App</title>
  </head>
  <body>
  <script type="text/javascript">/******/ (function(modules) { // webpackBootstrap
/******/     // The module cache
/******/     var installedModules = {};
/******/
/******/     // The require function
/******/     function __webpack_require__(moduleId) {
/******/
/******/         // Check if module is in cache
/******/         if(installedModules[moduleId]) {
/******/             return installedModules[moduleId].exports;
/******/         }
/******/         // Create a new module (and put it into the cache)
/******/         var module = installedModules[moduleId] = {
/******/             i: moduleId,
/******/             l: false,
/******/             exports: {}
/******/         };
/******/
/******/         // Execute the module function
/******/         modules[moduleId].call(module.exports, module, module.exports, __webpack_require__);
/******/
/******/         // Flag the module as loaded
/******/         module.l = true;
/******/
/******/         // Return the exports of the module
/******/         return module.exports;
/******/     }
/******/
/******/
/******/     // expose the modules object (__webpack_modules__)
/******/     __webpack_require__.m = modules;
/******/
/******/     // expose the module cache
/******/     __webpack_require__.c = installedModules;
/******/
/******/     // identity function for calling harmony imports with the correct context
/******/     __webpack_require__.i = function(value) { return value; };
/******/
/******/     // define getter function for harmony exports
/******/     __webpack_require__.d = function(exports, name, getter) {
/******/         if(!__webpack_require__.o(exports, name)) {
/******/             Object.defineProperty(exports, name, {
/******/                 configurable: false,
/******/                 enumerable: true,
/******/                 get: getter
/******/             });
/******/         }
/******/     };
/******/
/******/     // getDefaultExport function for compatibility with non-harmony modules
/******/     __webpack_require__.n = function(module) {
/******/         var getter = module && module.__esModule ?
/******/             function getDefault() { return module['default']; } :
/******/             function getModuleExports() { return module; };
/******/         __webpack_require__.d(getter, 'a', getter);
/******/         return getter;
/******/     };
/******/
/******/     // Object.prototype.hasOwnProperty.call
/******/     __webpack_require__.o = function(object, property) { return Object.prototype.hasOwnProperty.call(object, property); };
/******/
/******/     // __webpack_public_path__
/******/     __webpack_require__.p = "";
/******/
/******/     // Load entry module and return exports
/******/     return __webpack_require__(__webpack_require__.s = 0);
/******/ })
/************************************************************************/
/******/ ([
/* 0 */
/***/ (function(module, exports) {

document.write('It works.')

/***/ })
/******/ ]);</script></body>
</html>
babel
下面使用babel来进行es最新标准的代码向es5代码的转换,首先需要安装babel核心程序,及babel-loader
npm install babel-loader babel-core
在使用babel-loader进行代码转换之前,要先了解到ecmascript标准变化很快,且浏览器支持情况不同。所以,出现了'es2015'、'es2016'、'es2017'、'latest'、'env(new)'等多个不同的标准。这时,要需要来选择从哪个标准进行转换,需要安装插件babel-preset-env
npm install babel-preset-env
在 webpack 配置对象中,需要添加 babel-loader 到 module 的 loaders 列表中。webpack的配置文件如下所示
const path = require('path');
module.exports = {
  entry:{
    app:'./src/app.js',
  },
  output:{
    path:path.resolve(__dirname,'src'),
    filename: '[name].bundle.js'
  },
  module: {
    rules: [{
      test: /\.js$/,
      use: {
        loader: 'babel-loader',
        options: { presets: ['env'] }
      }
    }]
  },
}
关于path有两种写法,除了上面的配置文件的写法外,另一种写法如下所示。但是,尽量不要使用__dirname + '/src'的写法,在某些参数中,该写法无法生效
path: __dirname + "/src"
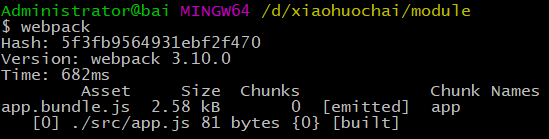
在命令行中运行webpack命令进行打包,打包过程如下
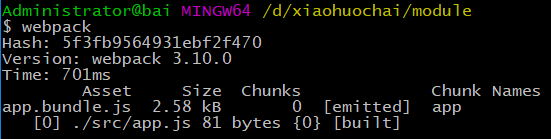
打包前的文件为app.js,内容如下
() => {
  return a + b;
};
Array.from('1,2,3');
new Set;
打包后的文件为app.bundle.js,主要内容如下
/******/ ([
/* 0 */
/***/ (function(module, exports, __webpack_require__) {
"use strict";
(function () {
  return a + b;
});
Array.from('1,2,3');
new Set();

/***/ })
/******/ ]);
经过babel转换后的js文件存在两个问题:
1、打包速度较慢
2、部分ES2017的新语法没有转换为ES5的代码
下面对这两个问题分别进行处理
【打包速度】
loader的test属性表示该loader必须满足的条件,上面代码中使用/\.js$/ 来匹配,也许会去编译 node_modules 目录或者其他不需要的源代码。这样会大大增加webpack的编译时间
要排除 node_modules,就要使用 loaders 配置的 exclude 选项,表示哪些除外,exclude:/node_modules/
module.exports = {
  entry:{
    app:'./src/app.js',
  },
  output:{
    path:__dirname+'/src/',
    filename: '[name].bundle.js'
  },
  module: {
    rules: [{
      test: /\.js$/,
      exclude: /node_modules/,
      use: {
        loader: 'babel-loader',
        options: { presets: ['env'] }
      }
    }]
  },
}
[注意]exclude除了支持正则表达式外,还支持字符串形式,写法如下。如果用__dirname +'/node_modules'的形式则不会生效
const path = require('path');
exclude:path.resolve(__dirname, "node_modules")
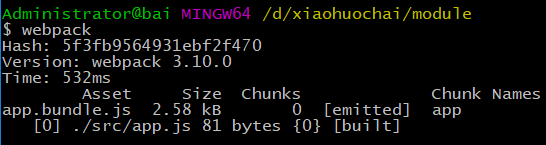
打包过程如下
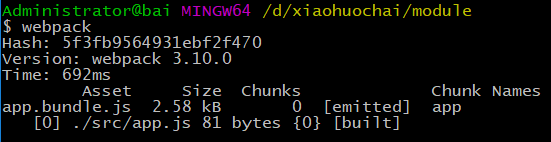
当node-modules文件部分较大时,速度提升会更明显
除了exclude选项,还可以使用include选项,能够明确被打包的文件时,使用include将使打包速度更快
module.exports = {
  entry:{
    app:'./src/app.js',
  },
  output:{
    path:__dirname+'/src/',
    filename: '[name].bundle.js'
  },
  module: {
    rules: [{
      test: /\.js$/,
      include: /src/,
      use: {
        loader: 'babel-loader',
        options: { presets: ['env'] }
      }
    }]
  },
}
[注意]include的另一种写法如下所示
const path = require('path');
include: path.resolve(__dirname, 'src')
打包过程如下
耗费时间有所减小
cacheDirectory选项值默认为false,当为true时,指定的目录将用来缓存 loader 的执行结果。之后的 webpack 构建,将会尝试读取缓存,来避免在每次执行时,可能产生的、高性能消耗的 Babel 重新编译过程
const path = require('path');
module.exports = {
  entry: {
    app: './src/app.js',
  },
  output: {
    path: path.resolve(__dirname, 'src'),
    filename: '[name].bundle.js'
  },
  module: {
    rules: [{
      test: /\.js$/,
      include: path.resolve(__dirname, 'src'),
      use: {
        loader: 'babel-loader',
        options: {
          presets: ['env'],
          cacheDirectory:true
        }
      }
    }]
  },
}
耗费时间减少了100ms,效果很好
解决了babel编译速度后,下面来解决ES新语法不被转换的问题
【babel-polyfill】
Babel默认只转换新的JavaScript句法(syntax),而不转换新的API,比如Iterator、Generator、Set、Maps、Proxy、Reflect、Symbol、Promise等全局对象,以及一些定义在全局对象上的方法(比如Object.assign)都不会转码。
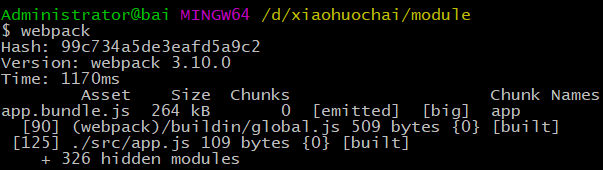
举例来说,ES6在Array对象上新增了Array.from方法。Babel就不会转码这个方法。如果想让这个方法运行,必须使用babel-polyfill。babel-polyfill是一个全局垫片,为开发应用准备的
npm install babel-polyfill
在脚本头部加入下面代码即可使用
import 'babel-polyfill';
app.js的文件内容如下
import 'babel-polyfill';
() => {
  return a + b;
};
Array.from('1,2,3');
new Set;
由下图所示,转换后的文件大小超过了200kb
【babel-plugin-transform-runtime】
相当于babel-polyfill来说,babel-plugin-transform-runtime更加适用,它是一个局部垫片,为开发框架准备
npm install babel-plugin-transform-runtime babel-runtime
app.js文件如下所示
() => {
  return a + b;
};
Array.from('1,2,3');
new Set;
配置文件如下所示
const path = require('path');
module.exports = {
  entry: {
    app: './src/app.js',
  },
  output: {
    path: path.resolve(__dirname, 'src'),
    filename: '[name].bundle.js'
  },
  module: {
    rules: [{
      test: /\.js$/,
      include: path.resolve(__dirname, 'src'),
      use: {
        loader: 'babel-loader',
        options: {
          presets: ['env'],
          cacheDirectory:true,
          plugins: ['transform-runtime']
        }
      }
    }]
  },
}
转换过程如下所示
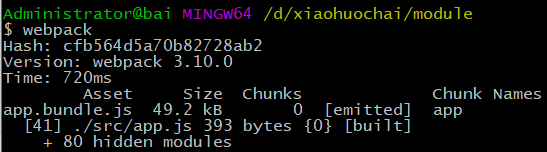
转换后的文件app.bundle.js主要内容如下所示
(function () {
  return a + b;
});
(0, _from2.default)('1,2,3');
new _set2.default();
CSS
在webpack入门博文中由介绍过CSS插件的简单使用,接下来将详细介绍
首先,要安装css-loader和style-loader,css-loader用于读取并加载css文件,style-loader将它插入到页面中
[特别注意]在处理css时,最好不要使用include、exclude等属性。include、exclude属性是加快babel转换速度的,和css没什么关系,而且会添乱
npm install css-loader style-loader
//app.js
require('./css/common.css');
//common.css
body{margin: 0;background-color: red}
//webpack.config.js
var webpack = require('webpack');
var HtmlWebpackPlugin = require('html-webpack-plugin');
module.exports = {
  entry: './src/app.js',
  output:{
    path: __dirname,//出口路径
    filename: 'js/[name].bundle.js'//出口名称
  },
  module:{
      rules:[
          {
              test:/\.css$/,
              use:[ 'style-loader', 'css-loader' ]
          }
      ]
  },
  plugins: [
    new HtmlWebpackPlugin({})
  ]
}
效果如下

【自动前缀】
页面加载CSS往往并不像上面的情况这么简单,需要处理很多问题,其中一个就是浏览器前缀问题。对于某些属性来说,比如transform,不同浏览器的版本对其支持程度不同,浏览器前缀也不同。这时,就需要能够根据实际情况,自动增加前缀,而postcss-loader就是这样的工具,而且功能要强大的多
首先,先安装postcss-loader
npm install postcss-loader
然后,安装postcss的自动前缀的插件autoprefixer
npm install autoprefixer
配置如下
//common.css
body{transform: scale(0);background-color: red}
//app.js
require('./css/common.css');
//webpack.config.js
var webpack = require('webpack');
var HtmlWebpackPlugin = require('html-webpack-plugin');
module.exports = {
  entry: './src/app.js',
  output:{
    path: __dirname,//出口路径
    filename: 'js/[name].bundle.js'//出口名称
  },
  module:{
      rules:[
          {
              test:/\.css$/,
              use:[ 'style-loader',
                    'css-loader',
                    {
                        loader: 'postcss-loader',
                        options: {plugins: [require('autoprefixer')]}
                    }
                 ]
          }
      ]
  },
  plugins: [
    new HtmlWebpackPlugin({})
  ]
}
结果如下
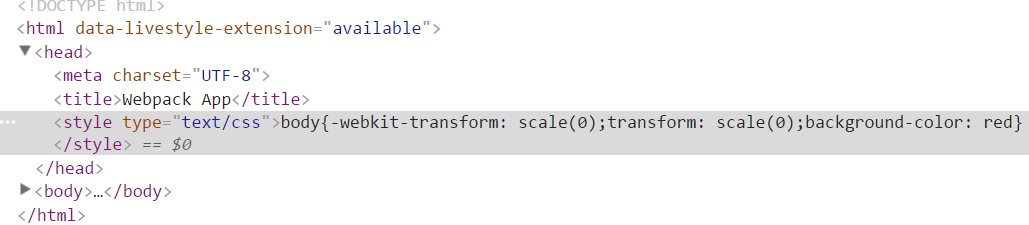
如果css文件中出现@import,则有两种处理方式,一种是将postcss文件单独写成配置文件postcss.config.js
//common.css
@import './flex.css';
body{transform: scale(0);background-color: red}
//flex.css
body{display:flex;}
//app.js
require('./css/common.css');

//webpack.config.js
var webpack = require('webpack');
var HtmlWebpackPlugin = require('html-webpack-plugin');
module.exports = {
  entry: './src/app.js',
  output:{
    path: __dirname,//出口路径
    filename: 'js/[name].bundle.js'//出口名称
  },
  module:{
      rules:[
          {
              test:/\.css$/,
              use:[ 'style-loader',
                  { loader: 'css-loader',
                    options: {importLoaders: 1}
                  },
                'postcss-loader'
                ]
          }
      ]
  },
  plugins: [
    new HtmlWebpackPlugin({})
  ]
}

//postcss.config.js
module.exports = {
 plugins:[require('autoprefixer')]
}
结果如下
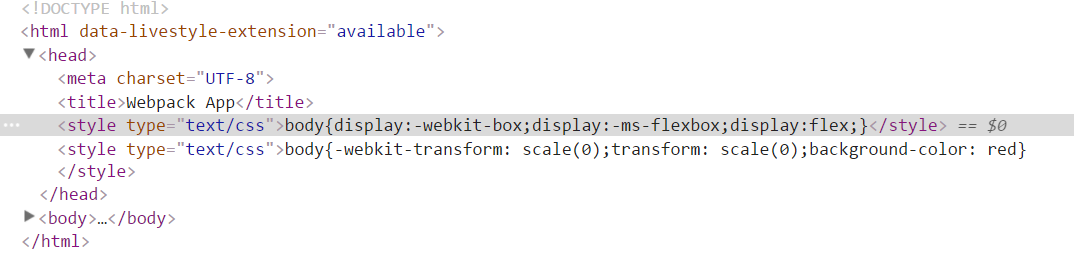
另一种需要安装postcss-import插件
npm install postcss-import
//common.css
@import './flex.css';
body{transform: scale(0);background-color: red}
//flex.css
body{display:flex;}
//app.js
require('./css/common.css');

//webpack.config.js
var webpack = require('webpack');
var HtmlWebpackPlugin = require('html-webpack-plugin');
module.exports = {
  entry: './src/app.js',
  output:{
    path: __dirname,//出口路径
    filename: 'js/[name].bundle.js'//出口名称
  },
  module:{
      rules:[
          {
              test:/\.css$/,
              use:[ 'style-loader',
                  { loader: 'css-loader',
                    options: {importLoaders: 1 }
                  },
                  {
                    loader: 'postcss-loader',
                    options: {plugins: [
                          require('postcss-import'),
                          require('autoprefixer')
                        ]
                    }
                  }
                ]
          }
      ]
  },
  plugins: [
    new HtmlWebpackPlugin({})
  ]
}
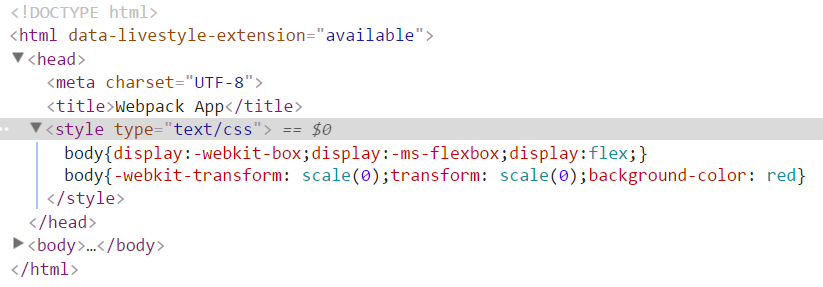
结果如下
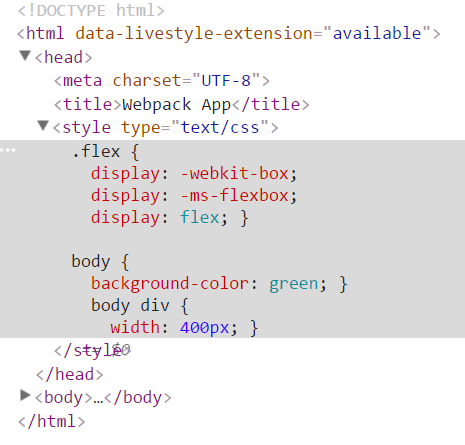
【sass】
首先,需要安装sass-loader及node-sass
[注意]关于node-sass安装的问题移步至此
npm install sass-loader node-sass
由于sass-loader中已经自带了关于@import处理的问题。所以,不需要css-loader及postcss-loader的额外处理
//layer.scss
@import './flex.scss';
body{
    background-color:green;
    div{
        width: 400px;
    }
}
//flex.scss
.flex{display:flex;}
//app.js
require('./components/layer/layer.scss');

//webpack.config.js
var webpack = require('webpack');
var HtmlWebpackPlugin = require('html-webpack-plugin');
module.exports = {
  entry: './src/app.js',
  output:{
    path: __dirname,//出口路径
    filename: 'js/[name].bundle.js'//出口名称
  },
  module:{
      rules:[
          {
              test:/\.scss$/,
              use:[    'style-loader',
                      'css-loader',
                    {
                        loader: 'postcss-loader',
                        options: {plugins: [require('autoprefixer')]}
                    },
                    'sass-loader'
                 ]
          }
      ]
  },
  plugins: [
    new HtmlWebpackPlugin({})
  ]
}
结果如下
【分离CSS】
默认地,CSS作为模块资源被打包到入口js文件中。有时,需要把CSS文件分离出来,这时就需要用到extract-text-webpack-plugin插件
npm install extract-text-webpack-plugin
该插件的配置如下
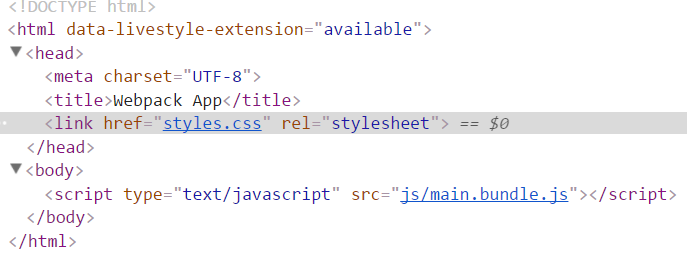
var webpack = require('webpack');
var HtmlWebpackPlugin = require('html-webpack-plugin');
var ExtractTextPlugin = require('extract-text-webpack-plugin');
module.exports = {
  entry: './src/app.js',
  output:{
    path: __dirname,//出口路径
    filename: 'js/[name].bundle.js'//出口名称
  },
  module:{
      rules:[
          {
                  test:/\.scss$/,
                use: ExtractTextPlugin.extract({
                  fallback: 'style-loader',
                  use:[ 'css-loader',
                        {
                            loader: 'postcss-loader',
                            options: {plugins: [require('autoprefixer')]}
                        },
                        'sass-loader'
                     ]
                })
          }
      ]
  },
  plugins: [
    new HtmlWebpackPlugin({}),
    new ExtractTextPlugin("styles.css")
  ]
}
结果如下,该插件将入口文件中引用的 *.css,移动到独立分离的 CSS 文件。因此,你的样式将不再内嵌到 JS bundle 中,而是会放到一个单独的 CSS 文件(即 styles.css)当中。 如果样式文件大小较大,这会做更快提前加载,因为 CSS bundle 会跟 JS bundle 并行加载
图片资源
webpack在处理图片、音乐、电影等资源文件时,需要使用file-loader
npm install file-loader
默认情况下,使用file-loader生成的文件的文件名就是文件内容的MD5哈希值并保留原始扩展名
file-loader的配置项如下所示
name  [hash].[ext] 为文件配置自定义文件名模板
context this.options.context 配置自定义文件 context,默认为 webpack.config.js context
publicPath  __webpack_public_path__ 为文件配置自定义 public 发布目录
outputPath 'undefined' 为文件配置自定义 output 输出目录
useRelativePath false 如果希望为每个文件生成一个相对 url 的 context 时,应该将其设置为 true
emitFile true 默认情况下会生成文件,可以通过将此项设置为 false 来禁止(例如,使用了服务端的 packages)
以引入图片资源例,有以下几种情况
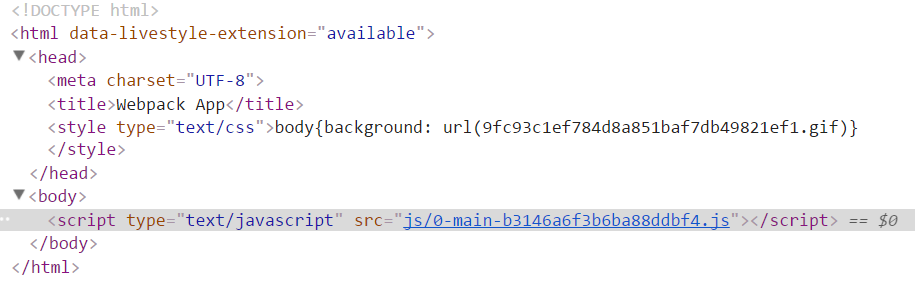
1、通过css文件的background属性引入
//webpack.config.js
var webpack = require('webpack');
var HtmlWebpackPlugin = require('html-webpack-plugin');
module.exports = {
  entry: './entry.js', //入口文件
  output: {
    path: __dirname,//出口路径
    filename: 'js/[id]-[name]-[hash].js'//出口名称
  },
  module:{

      rules:[
          {
              test:/\.css$/,
              use:[ 'style-loader', 'css-loader' ]
          },
          {
              test:/\.(png|jpg|gif|svg)$/i,
              use:'file-loader'
          }
      ]
  },
  plugins: [
    new HtmlWebpackPlugin()
  ]
}
//entry.js
require('./src/css/common.css');
//common.css
body{background: url('../img/eg_bulbon.gif')}
结果如下
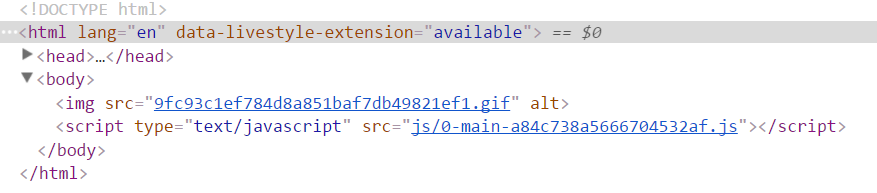
2、通过模板html文件img标签引入,这时需要使用${require('')}将相对路径包裹一次
//webpack.config.js
var webpack = require('webpack');
var HtmlWebpackPlugin = require('html-webpack-plugin');
module.exports = {
  entry: './entry.js', //入口文件
  output: {
    path: __dirname,//出口路径
    filename: 'js/[id]-[name]-[hash].js'//出口名称
  },
  module:{
      rules:[
          {
              test:/\.css$/,
              use:[ 'style-loader', 'css-loader' ]
          },
          {
              test:/\.(png|jpg|gif|svg)$/i,
              use:'file-loader'
          }
      ]
  },
  plugins: [
    new HtmlWebpackPlugin({
        template:'template/template.html'
    })
  ]
}
//template.html
<!DOCTYPE html>
<html lang="en">
<head>
    <meta charset="UTF-8">
    <title>Document</title>
</head>
<body>
<img src="${require('../src/img/eg_bulbon.gif')}" alt="">
</body>
</html>
结果如下
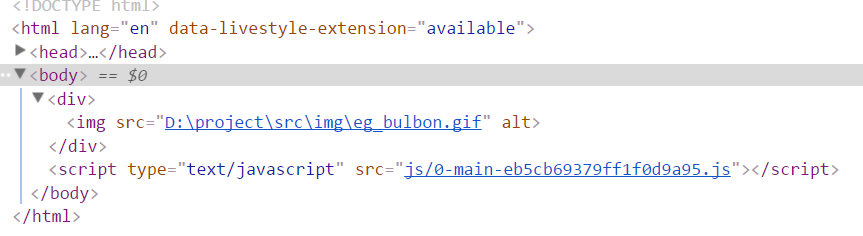
3、若模板使用ejs-compiled-loader插件,则无法使用${require('')}语句,需要使用HtmlWebpackPlugin传参来构造绝对路径
//webpack.config.js
var webpack = require('webpack');
var HtmlWebpackPlugin = require('html-webpack-plugin');
module.exports = {
  entry: './entry.js', //入口文件
  output: {
    path: __dirname + '/dist',//出口路径
    filename: 'js/[id]-[name]-[hash].js'//出口名称
  },
  module:{
      rules:[
          {
              test:/\.css$/,
              use:[ 'style-loader', 'css-loader' ]
          },
          {
              test:/\.(png|jpg|gif|svg)$/i,
              use:'file-loader'
          }
      ]
  },
  plugins: [
    new HtmlWebpackPlugin({
        template:'ejs-compiled-loader!template/template.html',
        file:__dirname
    })
  ]
}
//template.html
<!DOCTYPE html>
<html lang="en">
<head>
    <meta charset="UTF-8">
    <title>Document</title>
</head>
<body>
<div>
    <% include  template/header.html %>
</div>
</body>
</html>
//header.html
<img src="<%=htmlWebpackPlugin.options.file%>\src\img\eg_bulbon.gif" alt="">
结果如下
【file-loader参数】
文件名模板占位符有如下几种
[ext] 资源扩展名
[name] 资源的基本名称
[path] 资源相对于 context 查询参数或者配置的路径
[hash] 内容的哈希值,默认为十六进制编码的 md5
[<hashType>:hash:<digestType>:<length>] 可选配置
  其他的 hashType, 即 sha1, md5, sha256, sha512
  其他的 digestType, 即 hex, base26, base32, base36, base49, base52, base58, base62, base64
  length 字符的长度
[N] 当前文件名按照查询参数 regExp 匹配后获得到第 N 个匹配结果
{
  test:/\.(png|jpg|gif|svg)$/i,
  use:[{
              loader:'file-loader',
            options: {
                name:'[name]-[hash:5].[ext]'
            }
        }]
}
或者
{
  test:/\.(png|jpg|gif|svg)$/i,
  use:['file-loader?name=[name]-[hash:5].[ext]']
}
结果如下

【url-loader】
url-loader功能类似于file-loader,但是在文件大小(单位byte)低于指定的限制时,可以返回一个dataURL
可以通过传递查询参数(query parameter)来指定限制(默认为不限制)
如果文件大小超过限制,将转为使用 file-loader,所有的查询参数也会传过去
npm install url-loader
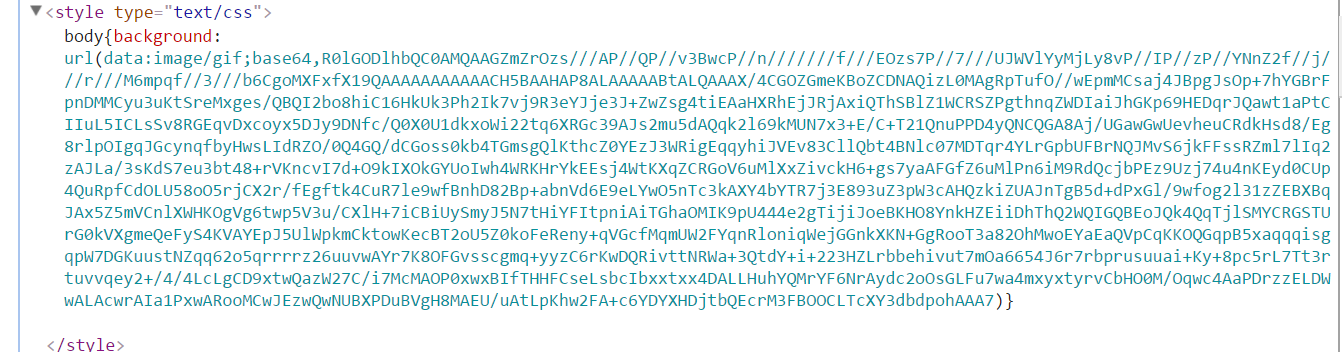
图片的大小为1.1kb,下面将限制设置为2000,则图片将以base64格式传递
{
  test:/\.(png|jpg|gif|svg)$/i,
  use:['url-loader?limit=2000']
}
结果如下
如果将限制大小设置为1000,图片以src的形式传递
{
  test:/\.(png|jpg|gif|svg)$/i,
  use:[{
              loader:'url-loader',
            options: {
                limit:1000,
                name:'[name]-[hash:5].[ext]'
            }
        }]
}

【image-webpack-loader】
使用image-webpack-loader来压缩图片
npm install image-webpack-loader
image-webpack-loader的配置项如下
 options: {
        mozjpeg: {
          progressive: true,
          quality: 65
        },
        optipng: {
          enabled: false,
        },
        pngquant: {
          quality: 80,
          speed: 4
        },
        gifsicle: {
          interlaced: false,
        },
        webp: {
          quality: 75
        }
      }
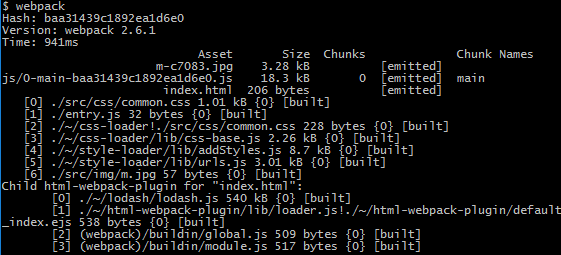
插件一张大小为4.1kb的名称为'm.jpg'的图片,配置如下
{
  test:/\.(png|jpg|gif|svg)$/i,
  use:[
    'url-loader?limit=1000&name=[name]-[hash:5].[ext]',
    'image-webpack-loader'
  ]
}
结果如下所示,生成大小为3.28kb,名称为'm-c7083.jpg'的图片
【雪碧图】
在webpack中自动生成雪碧图,需要使用postcss-sprits插件
npm install postcss-sprites
配置非常简单
  "plugins": {
    "postcss-sprites": {
       spritePath: 'dist/assets/imgs/sprites/'
    }
  }
}
加载第三方库
如果是加载的远程CDN库,则在HTML文件内直接使用script标签引入即可
<script src="https://cdn.bootcss.com/jquery/3.3.1/core.js"></script>
这样,在文件中可以直接使用jQuery
如果jQuery是通过npm保存到本地,则需要使用ProvidePlugin插件来自动加载模块,而不必到处 import 或 require
new webpack.ProvidePlugin({
  $: 'jquery',
  jQuery: 'jquery'
})
然后在我们任意源码中:
// in a module
$('#item'); // <= 起作用
jQuery('#item'); // <= 起作用
// $ 自动被设置为 "jquery" 输出的内容
如果jQuery是保存在一个自定义的目录中的,则需要还需要设置别名
resolve:{
  alias:{
    jquery$:path.resolve(__dirname,'src/libs/jquery.min.js')
  }
}
除了使用providePlugin,还可以使用imports-loader
module: {
  rules: [
    {
      test: path.resolve(__dirname,"src/app.js"),
      use: [
    loader: 'imports-loader',
        options: {$:'jquery'}
   ]
    }
  ]
}
代理远程接口
使用webpack-dev-server的proxy功能,可以代理远程接口。实际上,它使用的是http-proxy-middleware插件
常用参数如下
target:代理指向的地址
changeOrigin:改变源URL(默认false)
headers:设置http请求头
pathRewrite:重定向接口请求
logLevel:控制台显示信息
在 localhost:3000 上有后端服务的话,可以这样启用代理:
proxy: {
  "/api": "http://localhost:3000"
}
如果服务器给出500错误,则需要添加changeOrigin
proxy: {
  "/api": {
    target: "http://localhost:3000",
    changeOrigin: true
  }
}
实用配置
下面将使用webpack搭建一个实用的开发环境
var webpack = require('webpack');
var HtmlWebpackPlugin = require('html-webpack-plugin');
var ExtractTextPlugin = require('extract-text-webpack-plugin');
module.exports = {
    entry: './src/app.js',//入口文件
    output:{
        path: __dirname,//出口路径
        filename: 'js/[name].bundle.js'//出口名称
    },
    module:{
        rules:[
            {
                test:/\.scss$/,
                use: ExtractTextPlugin.extract({
                    fallback: 'style-loader',
                     use:[
                             'css-loader',
                            {
                                loader: 'postcss-loader',
                                //自动添加前缀
                                options: {plugins: [require('autoprefixer')]}
                            },
                            'sass-loader'
                        ]
                })
            },
            {
                test:/\.js$/,
                include:/\.\/src/,
                use:{
                        loader: 'babel-loader',
                        //将最新标准的js代码翻译为es5代码
                        options:{presets: ['env']}
                    }
            },
            {
                test:/\.(png|jpg|gif|svg)$/i,
                use:[
                        //当图片大小大于1000byte时,以[name]-[hash:5].[ext]的形式输出
                        //当图片大小小于1000byte时,以baseURL的形式输出
                        'url-loader?limit=1000&name=[name]-[hash:5].[ext]',
                        //压缩图片
                        'image-webpack-loader'
                    ]
            }
          ]
    },
    plugins: [
          //使用模板生成html文件
        new HtmlWebpackPlugin({template:'ejs-compiled-loader!template/template.html'}),
        //分离出css到style.css
        new ExtractTextPlugin("style.css")
    ]
}
好的代码像粥一样,都是用时间熬出来的


 浙公网安备 33010602011771号