
Elasticsearch8.15.5版本单节点部署集群
一、下载ES和kibana的安装包
- ES下载地址:https://www.elastic.co/downloads/past-releases/elasticsearch-8-15-5
- kibana下载地址:https://www.elastic.co/downloads/past-releases/kibana-8-15-5
二、模拟多节点
-
解压包
在/opt目录下解压ES和kibana的安装压缩包 -
创建elasticsearch用户
执行:
useradd elasticsearch
cd /opt
chown -R elasticsearch:elasticsearch elasticsearch-8.15.5 kibana-8.15.5-linux-x86_64
此后的步骤,全部切换到elasticsearch用户来执行。
- 创建多节点
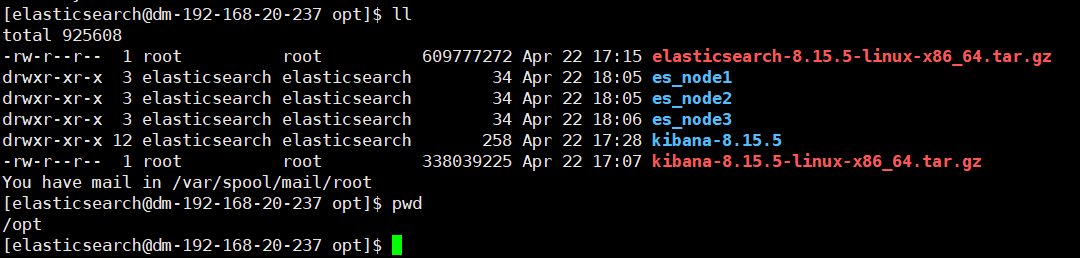
在/opt目录下生成es_node1、es_node2和es_node3三个目录,模拟3节点。
将解压出来的elasticsearch-8.15.5目录分别拷贝到三个目录下。
![]()
![]()

三、启动单节点
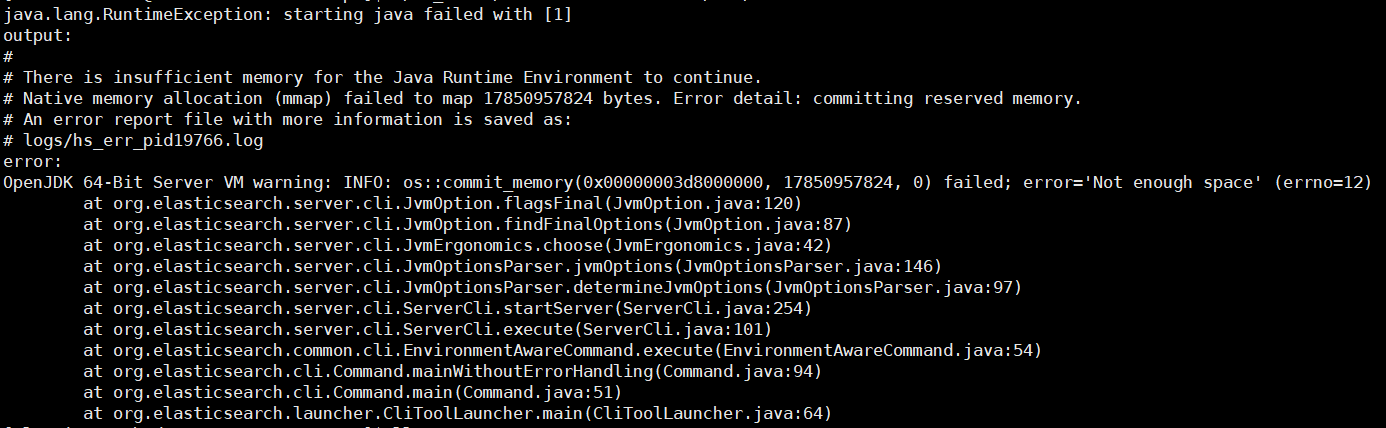
修改jvm.options配置文件中的堆大小配置,否则ES启动默认使用当前系统的一半内存作为堆大小,当启动第二个节点时,就会出现'Not enough space'报错。
不修改其他任何配置文件,在任意虚拟节点(比如es_node1)的elasticsearch-8.15.5目录下执行:
bin/elasticsearch -d
执行后,会启动单机版的单节点ES服务。因为ES在8.x版本中默认开启认证,因此启动时会自动初始化elastic用户的密码、证书以及配置文件。

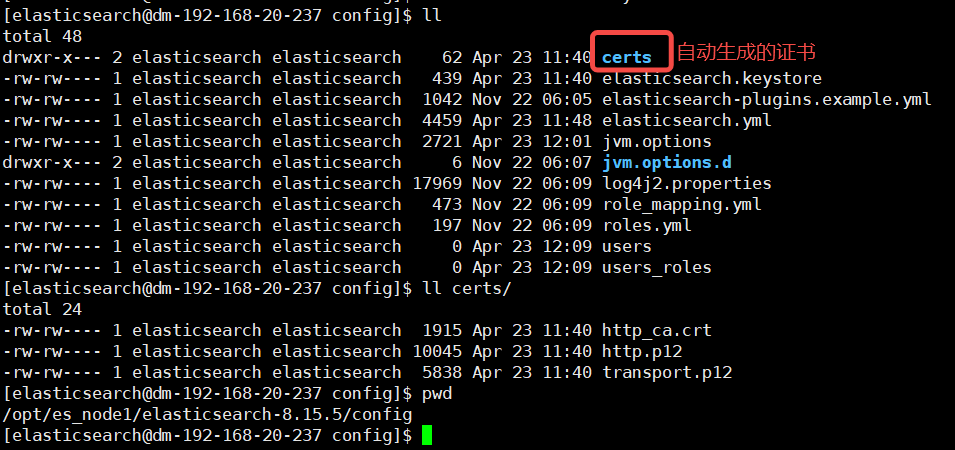
四、复制配置文件到其他节点
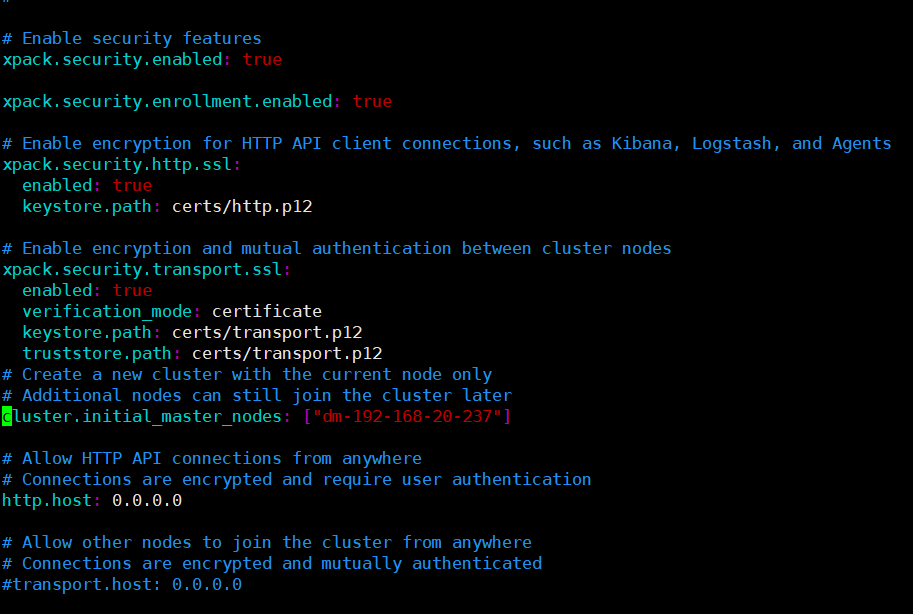
将es_node1的config目录下的内容复制到其他两个节点的config目录下,注释掉自动配置的cluster.initial_master_nodes配置,并增加对应配置,最终的配置如下:
es_node1:
cluster.name: DM
node.name: node-1
node.attr.box_type: hot
node.roles: [ master, data ]
network.host: 192.168.20.237
http.port: 9200
transport.port: 9300
path.data: /opt/es_node1/elasticsearch-8.15.5/data
path.logs: /opt/es_node1/elasticsearch-8.15.5/logs
discovery.seed_hosts: ["192.168.20.237:9300", "192.168.20.237:9301", "192.168.20.237:9302"]
cluster.initial_master_nodes: ["node-1", "node-2", "node-3"]
xpack.security.enabled: true
xpack.security.enrollment.enabled: true
xpack.security.http.ssl:
enabled: true
keystore.path: certs/http.p12
xpack.security.transport.ssl:
enabled: true
verification_mode: certificate
keystore.path: certs/transport.p12
truststore.path: certs/transport.p12
http.host: 0.0.0.0
es_node2:
cluster.name: DM
node.name: node-2
node.attr.box_type: hot
node.roles: [ master, data ]
network.host: 192.168.20.237
http.port: 9201
transport.port: 9301
path.data: /opt/es_node2/elasticsearch-8.15.5/data
path.logs: /opt/es_node2/elasticsearch-8.15.5/logs
discovery.seed_hosts: ["192.168.20.237:9300", "192.168.20.237:9301", "192.168.20.237:9302"]
cluster.initial_master_nodes: ["node-1", "node-2", "node-3"]
xpack.security.enabled: true
xpack.security.enrollment.enabled: true
xpack.security.http.ssl:
enabled: true
keystore.path: certs/http.p12
xpack.security.transport.ssl:
enabled: true
verification_mode: certificate
keystore.path: certs/transport.p12
truststore.path: certs/transport.p12
http.host: 0.0.0.0
es_node3:
cluster.name: DM
node.name: node-3
node.attr.box_type: hot
node.roles: [ master, data ]
network.host: 192.168.20.237
http.port: 9202
transport.port: 9302
path.data: /opt/es_node3/elasticsearch-8.15.5/data
path.logs: /opt/es_node3/elasticsearch-8.15.5/logs
discovery.seed_hosts: ["192.168.20.237:9300", "192.168.20.237:9301", "192.168.20.237:9302"]
cluster.initial_master_nodes: ["node-1", "node-2", "node-3"]
xpack.security.enabled: true
xpack.security.enrollment.enabled: true
xpack.security.http.ssl:
enabled: true
keystore.path: certs/http.p12
xpack.security.transport.ssl:
enabled: true
verification_mode: certificate
keystore.path: certs/transport.p12
truststore.path: certs/transport.p12
http.host: 0.0.0.0
五、启动ES
分别启动三个节点:
cd /opt
./es_node1/elasticsearch-8.15.5/bin/elasticsearch -d
./es_node2/elasticsearch-8.15.5/bin/elasticsearch -d
./es_node3/elasticsearch-8.15.5/bin/elasticsearch -d
六、修改ES elastic用户密码
-
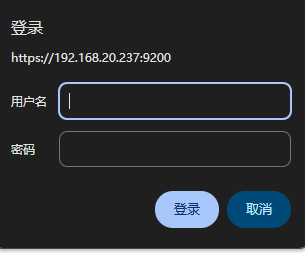
验证ES是否启动成功
ES启动成功后,就可以通过浏览器访问https://192.168.20.237:9200/,提示需要用户名和密码,可以使用ES第一次启动时自动生成的elastic用户和密码来登录。
![]()
-
修改elastic用户密码
但是ES默认密码一般是随机字符,不是我们想要的密码,可以修改成密码。在任务节点(比如es_node1)的elasticsearch-8.15.5目录下执行:
./bin/elasticsearch-reset-password -u elastic -i
按提示操作,输入密码即可,用户名无需修改。
修改成功后,即可刚配置的elastic用户和密码登录访问https://192.168.20.237:9200/。
七、配置kibana
- 配置kibana_system用户密码
在任务节点(比如es_node1)的elasticsearch-8.15.5目录下执行:
./bin/elasticsearch-reset-password -u kibana_system-i
修改kibana的配置文件kibana.yml,配置如下:
server.host: "192.168.20.237"
elasticsearch.hosts: ["https://192.168.20.237:9200","https://192.168.20.237:9201","https://192.168.20.237:9202"]
elasticsearch.username: "kibana_system"
elasticsearch.password: "elastic"
elasticsearch.ssl.verificationMode: none
八、启动kibana
执行:
cd /opt/kibana-8.15.5-linux-x86_64
nohup ./bin/kibana &
注意:ES8.x相比之前的版本,在认证方面做得更好,基本可以做到开箱即用,减少了很多配置复杂度。

 浙公网安备 33010602011771号