

Zetore获取pdf论文,搭建你专属的AI阅读助手 - 详解
相信在座的各位在不得不阅读英文文献时不都像见到了儿童绘本一样如履平地(doge),绝大多数人也得借助一些翻译插件才能勉强看懂。但在专业术语较多的论文中,翻译也不能很好地传达论文的意图,就算艰难地对照着看完,在论文数量越来越多,需要回顾和查找之前看过的方法时,又会面临同样的问题。远程的翻译不准确保存下来用处不大,精确的翻译又需要人工修改成本太高。既然如此,为何不让我们强大的AI来帮助我们总结我们的论文并把结果保存下来,成为我们专属的论文阅读助手呢?
在这里我将基于GraphRAG和常用的论文阅读软件Zetore为例,带领大家一步步地构建一个自己的AI论文助手。不过整个过程并不简单,需要大家申请一个拥有OpenAI接口规范的大模型API接口,这里我使用的是Minimax的模型。(这里可能需要您预充一些费用,亲测一个3万长度的文本大约需要1元,大致可以按照一篇论文0.5元推算)
1. 解析pdf,提取txt文本。
由于pdf数据无法进行解读,因此我们需要别的工具来解析pdf文件获取txt文本,在这里我选择使用MinerU进行提取。尽管依然不能完整地识别所有文本,但是对于一个知识图谱的构建来说勉强够用。https://opendatalab.github.io/MinerU/这里是项目的地址,我们在Windows上通过Python使用这个项目。
(1)部署使用MinerU项目:MinerU - MinerU
这是一个专门为了提取pdf格式论文内容的项目,亲测下来效果非常不错。简单来说它采用了YOLOV8模型来识别目标区域,包括引用、正文、标题、图片、公式等,之后再将识别出的区域用OCR和其他的后处理来提取里面的内容。(以下内容参照官网的部署使用教程)
pip install --upgrade pip
pip install uv
uv pip install -U "mineru[core]"
# 原文使用了uv部署,如果你不想这么麻烦的话,可以直接运行这个代码
pip install --upgrade pip
pip install -U "mineru[core]"
之后clone项目,并且进入项目中安装配置:
git clone https://github.com/opendatalab/MinerU.git
cd MinerU
uv pip install -e .[core]
# 如果你之前没有用uv,在这里替换为:
pip install -e . [core]
(2)测试解析pdf文件:
mineru -p -o我在这里进行测试以后输出的目录大概是这样的:
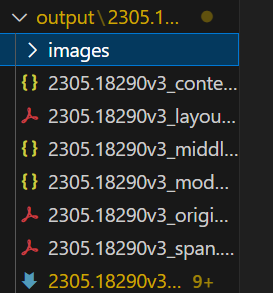
其中的md文档是我们最需要的。经过我的比对,准确率已经非常不错了,但是在构建知识图谱之前,我们仍需要对文档进行一些处理,比如致谢和后续的附录对于知识库的搭建就完全没有必要,在之后我们将它除去。
(3)处理文本数据
我们可以通过下面这样的正则匹配来把需要的东西提取到txt文档当中。
import re
def process_md(input_file: str, output_file: str):
with open(input_file, "r", encoding="utf-8") as f:
content = f.read()
# 1. 截断 Acknowledgements 之后的内容
ack_pattern = re.compile(r"#\s*Acknowledgements.*", re.IGNORECASE | re.DOTALL)
content = re.sub(ack_pattern, "", content)
# 2. 去掉 Markdown 图片语法 
img_pattern = re.compile(r"!\[.*?\]\(.*?\)")
content = re.sub(img_pattern, "", content)
# 3. 保存到 txt
with open(output_file, "w", encoding="utf-8") as f:
f.write(content.strip())
if __name__ == "__main__":
process_md(r"output\2305.18290v3\auto\2305.18290v3.md", "data/txt/1.txt")
print("处理完成,结果已保存到 1.txt")经过各种尝试后,我发现文本数据可能会因为格式的问题导致在最终的社区总结部分出错,调起来非常麻烦,因此我们使用json的格式化输入来避免这个问题(注意这里的json文件只能有两个字段,"text"是内容,还有一个是id,默认配置是"id"字段):
import json
def process_txt_to_json(input_file: str):
"""
读取单个 txt 文件,返回内容字符串
"""
with open(input_file, "r", encoding="utf-8") as f:
content = f.read().strip()
return content
def process_all_txt_to_json(input_dir: str, output_file: str):
"""
遍历目录下所有 txt 文件,将内容整合到一个 JSON 文件中,
格式 [{"id":0,"text":"..."}, {"id":1,"text":"..."}]
"""
if not os.path.exists(input_dir):
raise ValueError(f"输入目录不存在: {input_dir}")
all_records = []
txt_files = [f for f in os.listdir(input_dir) if f.lower().endswith(".txt")]
txt_files.sort()  # 按文件名排序,保证 id 顺序稳定
for idx, file in enumerate(txt_files):
input_path = os.path.join(input_dir, file)
content = process_txt_to_json(input_path)
all_records.append({"id": idx, "text": content})
print(f"已处理 {idx}: {file}")
# 保存到一个 JSON 文件
with open(output_file, "w", encoding="utf-8") as f:
json.dump(all_records, f, ensure_ascii=False, indent=2)
print(f"全部处理完成,共 {len(all_records)} 条记录,保存到 {output_file}")
这里我们将所有的txt文件归化到同一个json文档中,并且设置序号。将来在构建graphrag时使用这个进行。
2. 构建知识图谱(非常漫长)
(1)做GraphRAG的初始化配置
详细初始化方法请参照我之前介绍的GraphRAG教程,这里我就快速过一遍。首先我们将保存有txt文件夹初始化后得到配置文件。这一次我使用的是Minimax的模型作为LLM,PPIO网站(网址为:PPIO - 中国领先的分布式云计算服务商,注册起来比较简单,这里就不详细叙述)的BGE/M3作为嵌入模型。最终的配置如下(替换你的api密钥):(如果推理时间太长的话,可以尝试增加分块大小,在chunks配置下的size,可以根据你的Embedding模型的大小灵活选择。这个模型可以接收8192的上下文长度,可以将chunk设置为6000左右)
### This config file contains required core defaults that must be set, along with a handful of common optional settings.
### For a full list of available settings, see https://microsoft.github.io/graphrag/config/yaml/
### LLM settings ###
## There are a number of settings to tune the threading and token limits for LLM calls - check the docs.
models:
default_chat_model:
type: openai_chat # or azure_openai_chat
api_base: https://api.ppinfra.com/openai
# api_version: 2024-05-01-preview
auth_type: api_key # or azure_managed_identity
api_key: ${GRAPHRAG_API_KEY} # set this in the generated .env file
# audience: "https://cognitiveservices.azure.com/.default"
# organization:
model: qwen/qwen3-30b-a3b-fp8
# deployment_name:
encoding_model: cl100k_base # automatically set by tiktoken if left undefined
model_supports_json: true # recommended if this is available for your model.
concurrent_requests: 25 # max number of simultaneous LLM requests allowed
async_mode: threaded # or asyncio
retry_strategy: native
max_retries: 10
tokens_per_minute: auto              # set to null to disable rate limiting
requests_per_minute: auto            # set to null to disable rate limiting
default_embedding_model:
type: openai_embedding # or azure_openai_embedding
api_base: https://api.ppinfra.com/openai
# api_version: 2024-05-01-preview
auth_type: api_key # or azure_managed_identity
api_key: ${GRAPHRAG_API_KEY}
# audience: "https://cognitiveservices.azure.com/.default"
# organization:
model: baai/bge-m3
# deployment_name:
encoding_model: cl100k_base # automatically set by tiktoken if left undefined
model_supports_json: true # recommended if this is available for your model.
concurrent_requests: 25 # max number of simultaneous LLM requests allowed
async_mode: threaded # or asyncio
retry_strategy: native
max_retries: 10
tokens_per_minute: null              # set to null to disable rate limiting or auto for dynamic
requests_per_minute: null            # set to null to disable rate limiting or auto for dynamic
### Input settings ###
input:
storage:
type: file # or blob
base_dir: "input"
file_type: json # [csv, text, json]
chunks:
size: 6000
overlap: 300
group_by_columns: [id]
### Output/storage settings ###
## If blob storage is specified in the following four sections,
## connection_string and container_name must be provided
output:
type: file # [file, blob, cosmosdb]
base_dir: "output"
cache:
type: file # [file, blob, cosmosdb]
base_dir: "cache"
reporting:
type: file # [file, blob, cosmosdb]
base_dir: "logs"
vector_store:
default_vector_store:
type: lancedb
db_uri: output\lancedb
container_name: default
overwrite: True
### Workflow settings ###
embed_text:
model_id: default_embedding_model
vector_store_id: default_vector_store
extract_graph:
model_id: default_chat_model
prompt: "prompts/extract_graph.txt"
entity_types: [organization,person,geo,event]
max_gleanings: 1
summarize_descriptions:
model_id: default_chat_model
prompt: "prompts/summarize_descriptions.txt"
max_length: 6000
extract_graph_nlp:
text_analyzer:
extractor_type: regex_english # [regex_english, syntactic_parser, cfg]
cluster_graph:
enabled: true
max_cluster_size: 10
community_detection: true
extract_claims:
enabled: false
model_id: default_chat_model
prompt: "prompts/extract_claims.txt"
description: "Any claims or facts that could be relevant to information discovery."
max_gleanings: 1
community_reports:
model_id: default_chat_model
graph_prompt: "prompts/community_report_graph.txt"
text_prompt: "prompts/community_report_text.txt"
max_length: 2000
max_input_length: 8000
embed_graph:
enabled: false # if true, will generate node2vec embeddings for nodes
umap:
enabled: false # if true, will generate UMAP embeddings for nodes (embed_graph must also be enabled)
snapshots:
graphml: false
embeddings: false
### Query settings ###
## The prompt locations are required here, but each search method has a number of optional knobs that can be tuned.
## See the config docs: https://microsoft.github.io/graphrag/config/yaml/#query
local_search:
chat_model_id: default_chat_model
embedding_model_id: default_embedding_model
prompt: "prompts/local_search_system_prompt.txt"
global_search:
chat_model_id: default_chat_model
map_prompt: "prompts/global_search_map_system_prompt.txt"
reduce_prompt: "prompts/global_search_reduce_system_prompt.txt"
knowledge_prompt: "prompts/global_search_knowledge_system_prompt.txt"
drift_search:
chat_model_id: default_chat_model
embedding_model_id: default_embedding_model
prompt: "prompts/drift_search_system_prompt.txt"
reduce_prompt: "prompts/drift_search_reduce_prompt.txt"
basic_search:
chat_model_id: default_chat_model
embedding_model_id: default_embedding_model
prompt: "prompts/basic_search_system_prompt.txt"
之后运行Graphrag构建索引就好了,命令大致如下所示:
# 这是初始化命令
graphrag init --root ./ragtest
# 这是构建索引命令
graphrag index --root ./ragtest
3. (与此同时)保存自己的聊天记录
在本地与模型进行对话时,我们需要自己管理对话历史(只有自己的话就不必要用sqlite数据库了,直接用json文件保存一个对话列表即可)。(由于GraphRAG的初始加载流程较长这里就不详细叙述,详情可以查看我的GraphRAG文章里)
我们首先通过这样的代码获取llm的回复:
import os
import pandas as pd
import tiktoken
from graphrag.config.enums import ModelType
from graphrag.config.models.language_model_config import LanguageModelConfig
from graphrag.language_model.manager import ModelManager
from graphrag.query.indexer_adapters import (
read_indexer_communities,
read_indexer_entities,
read_indexer_reports,
)
from graphrag.query.structured_search.global_search.community_context import (
GlobalCommunityContext,
)
from graphrag.query.structured_search.global_search.search import GlobalSearch
api_key = "你的API密钥"
llm_model = "qwen/qwen3-30b-a3b-fp8"
config = LanguageModelConfig(
api_key=api_key,
type=ModelType.OpenAIChat,
model=llm_model,
api_base="https://api.ppinfra.com/openai",
encoding_model="cl100k_base",
max_retries=5,
)
model = ModelManager().get_or_create_chat_model(
name="global_search",
model_type=ModelType.OpenAIChat,
config=config,
)
token_encoder = tiktoken.get_encoding("cl100k_base")
# parquet files generated from indexing pipeline
INPUT_DIR = "ragtest/output"
COMMUNITY_TABLE = "communities"
COMMUNITY_REPORT_TABLE = "community_reports"
ENTITY_TABLE = "entities"
# community level in the Leiden community hierarchy from which we will load the community reports
# higher value means we use reports from more fine-grained communities (at the cost of higher computation cost)
COMMUNITY_LEVEL = 2
community_df = pd.read_parquet(f"{INPUT_DIR}/{COMMUNITY_TABLE}.parquet")
entity_df = pd.read_parquet(f"{INPUT_DIR}/{ENTITY_TABLE}.parquet")
report_df = pd.read_parquet(f"{INPUT_DIR}/{COMMUNITY_REPORT_TABLE}.parquet")
communities = read_indexer_communities(community_df, report_df)
reports = read_indexer_reports(report_df, community_df, COMMUNITY_LEVEL)
entities = read_indexer_entities(entity_df, community_df, COMMUNITY_LEVEL)
print(f"Total report count: {len(report_df)}")
print(
f"Report count after filtering by community level {COMMUNITY_LEVEL}: {len(reports)}"
)
print(report_df.head())
# 打印信息
total_report_count = len(report_df)
filtered_report_count = len(reports)
# 保存到 TXT 文件
with open("output.txt", "w", encoding="utf-8") as f:
f.write(f"Total report count: {total_report_count}\n")
f.write(f"Report count after filtering by community level {COMMUNITY_LEVEL}: {filtered_report_count}\n\n")
f.write("Report DataFrame preview:\n")
f.write(report_df.head().to_string())
f.write("\n\n")
# 如果你还想保存全部报告内容
f.write("All Reports:\n")
f.write(report_df.to_string())
context_builder = GlobalCommunityContext(
community_reports=reports,
communities=communities,
entities=entities,  # default to None if you don't want to use community weights for ranking
token_encoder=token_encoder,
)
context_builder_params = {
"use_community_summary": False,  # False means using full community reports. True means using community short summaries.
"shuffle_data": True,
"include_community_rank": True,
"min_community_rank": 0,
"community_rank_name": "rank",
"include_community_weight": True,
"community_weight_name": "occurrence weight",
"normalize_community_weight": True,
"max_tokens": 6000,  # change this based on the token limit you have on your model (if you are using a model with 8k limit, a good setting could be 5000)
"context_name": "Reports",
}
map_llm_params = {
"max_tokens": 6000,
"temperature": 0.0,
"response_format": {"type": "json_object"},
}
reduce_llm_params = {
"max_tokens": 6000,  # change this based on the token limit you have on your model (if you are using a model with 8k limit, a good setting could be 1000-1500)
"temperature": 0.0,
}
import asyncio
import json
import os
# 对话管理器
class ChatSession:
def __init__(self, search_engine, history_file="chat_history.json"):
self.search_engine = search_engine
self.history_file = history_file
self.history = []  # [(role, content), ...]
# 尝试加载已有历史
self.load_history()
async def ask(self, user_input: str):
# 把历史拼接成一个长 prompt
conversation = ""
for role, content in self.history:
conversation += f"{role.upper()}: {content}\n"
conversation += f"USER: {user_input}\nASSISTANT:"
# 调用 graphrag LLM
result = await self.search_engine.search(conversation)
# 保存到历史
self.history.append(("user", user_input))
self.history.append(("assistant", result.response))
# 每次对话后保存到文件
self.save_history()
return result.response
def save_history(self):
with open(self.history_file, "w", encoding="utf-8") as f:
json.dump(self.history, f, ensure_ascii=False, indent=2)
def load_history(self):
if os.path.exists(self.history_file):
with open(self.history_file, "r", encoding="utf-8") as f:
try:
self.history = json.load(f)
except json.JSONDecodeError:
self.history = []  # 如果文件损坏,就重置
else:
self.history = []
# === 原来的 main 改造一下 ===
async def get_session():
search_engine = GlobalSearch(
model=model,
context_builder=context_builder,
token_encoder=token_encoder,
max_data_tokens=12_000,
map_llm_params=map_llm_params,
reduce_llm_params=reduce_llm_params,
allow_general_knowledge=True,
json_mode=True,
context_builder_params=context_builder_params,
concurrent_coroutines=32,
response_type="multiple paragraphs",
)
session = ChatSession(search_engine)
if os.path.exists(session.history_file):
session.load_history()
print(f"加载了 {len(session.history)//2} 轮历史对话。")
else:
print("没有找到历史对话文件,开始新的对话。")
return session
async def get_result(session, question: str):
result = await session.ask(question)
return result
if __name__ == "__main__":
session = asyncio.run(get_session())
while True:
q = input("请输入你的问题:")
if q in ["exit", "quit", "q"]:
break
result = asyncio.run(get_result(session, q))
print("AI:", result)
# 退出前保存历史
session.save_history()
print(f"已经保存对话历史到 {session.history_file} 文件中。")
4. 简单的弹框和可视化
至此我们已经基本完成了所有的组件,在main.py文件夹里,我们通过一个简单的可视化来串联整个流程:
import asyncio
import os
import tkinter as tk
from tkinter import scrolledtext
# === 你的 ChatSession 定义保持不变,这里直接导入 ===
from graphrag_chain import ChatSession, get_result, get_session
# 请把上面替换成实际路径,例如直接把 ChatSession 代码放在 main.py 顶部也可以
class ChatApp:
def __init__(self, root, session: ChatSession):
self.root = root
self.session = session
self.root.title("对话可视化窗口")
# 对话历史展示框
self.chat_history = scrolledtext.ScrolledText(
root, wrap=tk.WORD, state="disabled", width=80, height=20
)
self.chat_history.pack(padx=10, pady=10)
# 输入框
self.input_field = tk.Entry(root, width=70)
self.input_field.pack(side=tk.LEFT, padx=(10, 0), pady=(0, 10))
self.input_field.bind("", self.send_message)
# 发送按钮
self.send_button = tk.Button(root, text="发送", command=self.send_message)
self.send_button.pack(side=tk.LEFT, padx=(5, 10), pady=(0, 10))
# 加载已有历史
self.load_history_to_ui()
def load_history_to_ui(self):
self.chat_history.config(state="normal")
self.chat_history.delete(1.0, tk.END)
for role, content in self.session.history:
prefix = "你" if role == "user" else "AI"
self.chat_history.insert(tk.END, f"{prefix}: {content}\n")
self.chat_history.config(state="disabled")
self.chat_history.see(tk.END)
def _append_text(self, text: str):
self.chat_history.config(state="normal")
self.chat_history.insert(tk.END, text + "\n")
self.chat_history.see(tk.END)
self.chat_history.config(state="disabled")
def send_message(self, event=None):
user_input = self.input_field.get().strip()
if not user_input:
return
self.input_field.delete(0, tk.END)
# 显示用户输入
self._append_text(f"你: {user_input}")
# 在后台运行异步 ask
asyncio.create_task(self._handle_async_reply(user_input))
async def _handle_async_reply(self, user_input: str):
reply = await get_result(self.session, user_input)
self._append_text(f"AI: {reply}")
async def main_async():
session = await get_session()
root = tk.Tk()
app = ChatApp(root, session)
# Tkinter 主循环和 asyncio 集成
async def tkinter_loop():
while True:
root.update()
await asyncio.sleep(0.02)
try:
await tkinter_loop()
finally:
session.save_history()
print(f"已经保存对话历史到 {session.history_file}")
def main():
asyncio.run(main_async())
if __name__ == "__main__":
main()
5. 正式使用
最后的最后,我们目前只是用了一个pdf文件进行,如果想要批量处理的化,我提供了以下几种方法,分别是读取一个目录下的所有pdf文件并且放置到一起的、处理所有md文件为txt文件并放置到指定文件夹下的。(mineru -p <input_path> -o <output_path> 可以输入文件夹并批量处理所有的pdf文件)
import os
import re
def process_md(input_file: str, output_file: str):
with open(input_file, "r", encoding="utf-8") as f:
content = f.read()
# 1. 截断 Acknowledgements 之后的内容
ack_pattern = re.compile(r"#\s*Acknowledgements.*", re.IGNORECASE | re.DOTALL)
content = re.sub(ack_pattern, "", content)
# 2. 去掉 Markdown 图片语法 
img_pattern = re.compile(r"!\[.*?\]\(.*?\)")
content = re.sub(img_pattern, "", content)
# 3. 保存到 txt
with open(output_file, "w", encoding="utf-8") as f:
f.write(content.strip())
def process_all_md(input_dir: str, output_dir: str):
"""
遍历 input_dir 下的所有目录,找到 md 文件,
使用 process_md 处理并保存到 output_dir,文件名保持一致(后缀改为 .txt)
"""
if not os.path.exists(output_dir):
os.makedirs(output_dir)
for root, _, files in os.walk(input_dir):
for file in files:
if file.lower().endswith(".md"):
input_path = os.path.join(root, file)
output_path = os.path.join(output_dir, os.path.splitext(file)[0] + ".txt")
process_md(input_path, output_path)
print(f"处理完成: {input_path} -> {output_path}")
import shutil
def move_all_pdfs(input_dir: str, output_dir: str):
"""
遍历 input_dir 下的所有目录,找到 pdf 文件,
移动到 output_dir,文件名保持一致。
"""
if not os.path.exists(output_dir):
os.makedirs(output_dir)
for root, _, files in os.walk(input_dir):
for file in files:
if file.lower().endswith(".pdf"):
input_path = os.path.join(root, file)
output_path = os.path.join(output_dir, file)
# 移动文件
shutil.move(input_path, output_path)
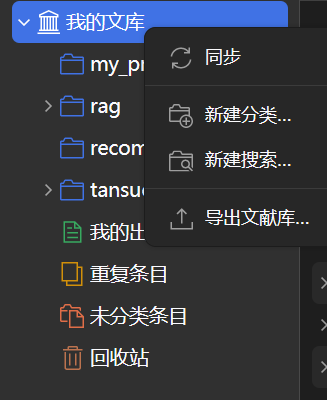
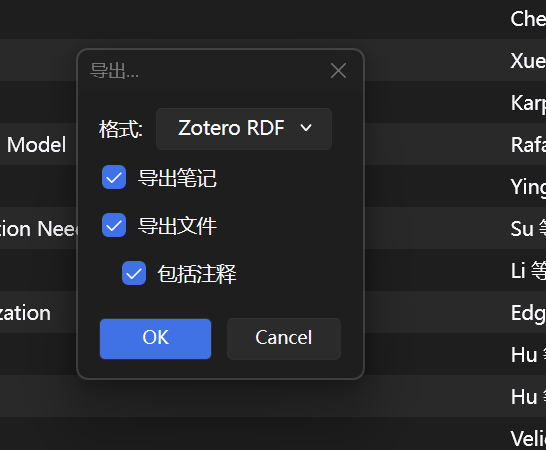
print(f"已移动: {input_path} -> {output_path}")pdf 的来源可以是你从网上下载保存的,也可以通过zetore的导出文献库-->Zetore PDF格式导出。
最后如果我们需要重构或者向其中添加节点时,由于graphrag的可拓展性非常差,因此几乎只能从零开始重构,因此我的建议是第一次就尽可能大地构建一个知识库,最后如果涉及添加再通过使用多个知识库检索后拼接到llm的提示词中进行多次融合。(将来我们可以采取简化的graphrag方法来保留一定的拓展性)
6. (保存知识图谱)将自己的图谱分享给他人
由上所述,graphrag中的output文件夹就是你的专属知识库来源,你可以通过获取别人的output文件夹或者将自己的output分享给他人,就可以直接通过后续的步骤直接使用!我认为这极大地方便了我们的论文阅读和分享,非常欢迎也值得大家使用类似这样的方法来构建自己的本地知识库~
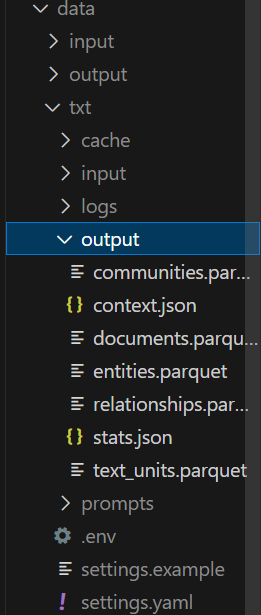
(其中的output文件最为关键,不过也可以把整个txt目录下的文件打包发给对方)
(最后我使用的论文是:http://arxiv.org/abs/2305.18290,经过测试效果非常不错,欢迎直接下载我通过这个论文搭建的知识图谱来快速验证)

 浙公网安备 33010602011771号