

vue学习(二)模板页配置(bootstrap)
1、替换我们的显示页面
删除components下的所有文件,新建模板页文件夹 layout。

//Layout.vue
<template>
    <div>
        <header>header</header>
        <content>content</content>
        <footer>footer</footer>
    </div>
</template>
先增加简单内容,到这一步,发现项目是会报错的,跑不起来。
我们先把默认项目没用的东西删除掉,把App.vue文件代码调整如下:
//App.vue
<template>
  <div id="app">
    <router-view></router-view>
  </div>
</template>

<script>
export default {
  name: "app"
};
</script>
入口只有一个空的视图,下面所有的内容都基友这个空窗口展示。
在page文件夹下增加index.vue和login.vue
//index.vue
<template>
  <div>index page</div>
</template>
//login.vue
<template>
    <div>login page</div>
</template>
先写上这些代码,我们后面再丰富我们的内容。
调整router路由文件
现在,如果你运行还是会出错。因为我们还没有配置路由。
import Vue from 'vue'
import Router from 'vue-router'
import Index from '@/page/index'
import Login from '@/page/login'

Vue.use(Router)

export default new Router({
  routes: [
    {
      path: '/',
      component: Index
    }, {
      path: '/login',
      component: Login
    }
  ]
})
默认,我们的首页,就是我们的 Index 页
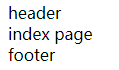
好了,我们现在可以跑起来试试了,应该是没有任何问题了,运行结果出现如下:

好像是只显示了模板页的内容。
我们需要的是,中间内容根据路由来变化,这时候我们需要返回 Layout.vue
配置Layout.vue
删除 <content>content</content> 这一段代码
新增动态内容配置,如下:
//Layout.vue
<template>
    <div>
        <header>header</header>
        <div class="container">
            <keep-alive>
                <router-view></router-view>
            </keep-alive>
        </div>
        <footer>footer</footer>
    </div>
</template>
运行,OK:
2、引用、配置Bootstrap
安装jquery
npm install jquery
打开build文件夹下的webpack.base.conf.js
头部添加代码:
const webpack = require("webpack");
module.exports 中添加代码:
plugins: [
    new webpack.ProvidePlugin({
      $: "jquery",
      jQuery: "jquery"
    })
  ],
在入口文件main.js中加入代码:
import $ from 'jquery' ;
我们在index.vue下添加代码,测试jquery:
<template>
    <div>index page</div>
</template>
<script>
$(function() {
  alert(111);
});
export default {
  name: "HelloWorld",
  data() {
    return {
      msg: "Welcome to Your Vue.js App"
    };
  }
};
</script>
安装bootstrap
如下:
npm i bootstrap
全局引用,在入口文件main.js中加入代码:
import '../node_modules/bootstrap/dist/css/bootstrap.min.css'
import '../node_modules/bootstrap/dist/js/bootstrap.min'
这时可能会报错
This dependency was not found:

* popper.js in ./node_modules/bootstrap/dist/js/bootstrap.min.js

To install it, you can run: npm install --save popper.js
因为bootstrap.js不仅依赖jquery还有popper.js,安装popper.js:
npm i popper.js
同时在webpack.base.conf.js加入》》》Popper: [‘popper.js’, ‘default’],
plugins: [
    new webpack.ProvidePlugin({
      $:"jquery",
      jQuery:"jquery",
      "windows.jQuery":"jquery",
      Popper: ['popper.js', 'default'],
    })
  ],
测试bootstrap:
//index.vue
<template>
    <div>
        <div class="btn-group" role="group" aria-label="...">
            <button type="button" class="btn btn-danger">Left</button>
            <button type="button" class="btn btn-success">Middle</button>
            <button type="button" class="btn btn-default">Right</button>
        </div>
    </div>
</template>
结果:

好了,下一步我们开始选择一个bootstrap模型引入。

 浙公网安备 33010602011771号