


HTTP Basic Auth认证方式,我们将在实例中使用nginx来演示,Apache也类似。
zabbix认证配置
Administration>> Authentication,将http authentication改为HTTP,保存即可,如下图:

接下来在nginx中创建Admin用户,或者创建zabbix已经存在的其他用户。
nginx用户认证配置
nginx配置如下
|
1
2
3
4
5
6
7
8
9
10
11
12
13
14
15
16
17
18
19
20
21
|
server{
server_name www.ttlsa.com;
index index.html index.php;
root /data/site/www.ttlsa.com;
..... 省略部分配置 .....
location ~ ^/zabbix(/.*)$
{
auth_basic "nginx basic http test for ttlsa.com";
auth_basic_user_file htpasswd;
location ~ .php$ {
fastcgi_pass 127.0.0.1:9000;
fastcgi_split_path_info ^(.+\.php)(/.+)$;
fastcgi_param SCRIPT_FILENAME $document_root$fastcgi_script_name;
fastcgi_param SCRIPT_NAME $fastcgi_script_name;
fastcgi_param PATH_INFO $fastcgi_path_info;
include fastcgi_params;
}
}
..... 省略部分配置 .....
|
创建用户密码
|
1
2
3
|
# printf "Admin:$(openssl passwd -crypt 123456)\n" >>conf/htpasswd
# cat conf/htpasswd
Admin:xyJkVhXGAZ8tM
|
重启nginx
|
1
|
# /usr/local/nginx-1.5.2/sbin/nginx -s reload
|
更多关于nginx认证的内容,请参考前面的文章:nginx用户认证配置( Basic HTTP authentication)
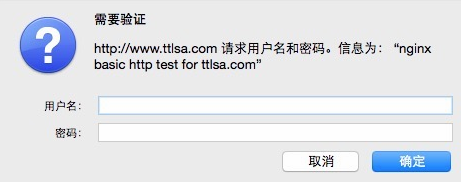
zabbix http认证效果
像往常一样打开zabbix管理地址,此时会弹出账号密码框,账号是Admin,密码123456。假如哪天你取消了http认证,那么zabbix会使用zabbix系统内的密码。
输入完账号密码之后,直接进入了zabbix界面。

 浙公网安备 33010602011771号