


Kubernetes组件简介+实战使用kubeadm安装集群(1.24版本使用Containerd作为容器运行时)
什么是云原生(一种理念):
- 容器化
- 微服务
- devops
- 服务网格
- 不可变的基础设施
- 声明式api(restful)
kubernetes相当于云原生的操作系统,需要什么功能只需要“插在”上面即可
kubernetes各组件作用说明:
- scheduler:调度器,他会根据不同的算法计算处集群中的哪个节点最适合运行此pod
- kube-proxy:运行在各个结点上,通过apiserver监听service的变化来通过iptables或ipvs做网络转发
- 切换ipvs的方式:
- node节点需要安装ipvsadm和ipset工具并且需要加载ip_vs内核模块
- kube-proxy的cm找到mode赋值为ipvs(如果是二进制安装的k8s集群,需要修改kube-proxy的配置文件)
- 注意!!!kube-proxy使用ipvs启动的时候会验证节点是否已经加载了ip_vs模块,如果没有加载会退回iptables
- 优势:iptables是使用规则记录,而ipvs是使用哈希表的方式并且工作在内核空间,他会比iptables更快更可靠的做网络转发
- 切换ipvs的方式:
- apiserver:集群中的用户认证、鉴权,并且提供声明式api可以调用api来获取数据,集群中只有apiserver才能操作etcd
- coredns:解析集群中service域名和集群外的域名
- 四种模式:
- Default:Pod继承所在主机上的dns配置
- ClusterFirst:k8s中的默认配置,现在k8s中的coredns上尝试解析(解析的记录存储在etcd中),如果找不到的再去主机继承的nameserver中查询
- ClusterFirstWithHostNet:对于网络配置为hostNetwork的pod而言,其DNS规则等同于ClusterFirst
- None:忽略k8s的dns配置,直接使用pod配置的dnsConfig
- controller-manager:集群的控制器,控制器最为集群内部的管理公职中心,负责集群内的Node、Pod副本、Endpoint,Namespace、服务账号、资源定额的管理
- 四种模式:
- kubelet:运行在每个节点上,定时向master汇报node节点状态信息,接受指令并在pod中创建容器,准备pod所需要的数据卷,定期返回pod的运行状态,在node节点执行容器健康检查
- kubectl:命令行客户端工具
- calico:网络插件,用于创建集群网络
- overlay网络:
- node网络:主机网络
- pod网络:容器创建好后会使用pod网络的ip
- service网络:kube-proxy维护,用户node去访问pod的转发
- underlay网络:
- node、pod和service公用一个网络
- overlay网络:
- etcd:kubernetes保存所有集群数据的组件(key: value),支持分布式集群
安装containerd:
containerd下载地址:https://github.com/containerd/containerd/releases/tag/v1.6.6
ctr为containerd的命令客户端,但是非常不好用(功能少),建议安装一个nerdctl(命令使用方式和docker相似)
containerd部署过程
# cd /usr/local/src/
# tar -zxvf containerd-1.6.6-linux-amd64.tar.gz  -C /usr/local/src/
# cp bin/* /usr/local/bin/
# vim /lib/systemd/system/containerd.service
################################containerd的service文件################################
# Copyright The containerd Authors.
#
# Licensed under the Apache License, Version 2.0 (the "License");
# you may not use this file except in compliance with the License.
# You may obtain a copy of the License at
#
#     http://www.apache.org/licenses/LICENSE-2.0
#
# Unless required by applicable law or agreed to in writing, software
# distributed under the License is distributed on an "AS IS" BASIS,
# WITHOUT WARRANTIES OR CONDITIONS OF ANY KIND, either express or implied.
# See the License for the specific language governing permissions and
# limitations under the License.

[Unit]
Description=containerd container runtime
Documentation=https://containerd.io
After=network.target local-fs.target

[Service]
ExecStartPre=-/sbin/modprobe overlay
ExecStart=/usr/local/bin/containerd

Type=notify
Delegate=yes
KillMode=process
Restart=always
RestartSec=5
# Having non-zero Limit*s causes performance problems due to accounting overhead
# in the kernel. We recommend using cgroups to do container-local accounting.
LimitNPROC=infinity
LimitCORE=infinity
LimitNOFILE=infinity
# Comment TasksMax if your systemd version does not supports it.
# Only systemd 226 and above support this version.
TasksMax=infinity
OOMScoreAdjust=-999

[Install]
WantedBy=multi-user.target
################################containerd的service文件################################
# mkdir /etc/containerd
# containerd config default > /etc/containerd/config.toml
# vim /etc/containerd/config.toml
####第135行增加下增加镜像加速器
[plugins."io.containerd.grpc.v1.cri".registry.mirrors."docker.io"]
  endpoint = ["https://s3o5ymtt.mirror.aliyuncs.com"]
####如果部署k8s需要找到sandbox_image从谷歌官方镜像“k8s.gcr.io/pause:3.6”修改为国内阿里云的
sandbox_image = "registry.cn-hangzhou.aliyuncs.com/google_containers/pause:3.7"
# systemctl restart containerd
启动如果报错“Failed to restart containerd.service: Unit containerd.service is masked.”
执行# systemctl unmask containerd.service && systemctl restart containerd
# systemctl enable containerd
# vim /etc/sysctl.conf
添加:net.ipv4.ip_forward=1
##下载runc
# wget https://github.com/opencontainers/runc/releases/download/v1.1.3/runc.amd64
# cp runc.amd64 /usr/bin/runc
# chmod a+x /usr/bin/runc
# wget https://github.com/containerd/nerdctl/releases/download/v0.22.0/nerdctl-0.22.0-linux-amd64.tar.gz
# tar -zxvf nerdctl-0.22.0-linux-amd64.tar.gz
# cp nerdctl /usr/local/bin/
##安装网络接口cni(容器网络接口,用于管理容器ip)
# wget https://github.com/containernetworking/plugins/releases/download/v1.1.1/cni-plugins-linux-amd64-v1.1.1.tgz
# mkdir /opt/cni/bin -p
# tar -zxvf cni-plugins-linux-amd64-v1.1.1.tgz -C /opt/cni/bin/
#########################################containerd安装完成!!####################################
安装kubernetes1.24(master单节点)+containerd(kubernetes1.24版本后不在内容docker,使用docker捐给cncf的containerd)
##安装后支持https的网络源
# apt-get install apt-transport-https
##从阿里云下载安装k8s,链接“https://developer.aliyun.com/mirror/kubernetes?spm=a2c6h.13651102.0.0.3e221b117wvwyu”
# curl https://mirrors.aliyun.com/kubernetes/apt/doc/apt-key.gpg | apt-key add -
# cat <<EOF >/etc/apt/sources.list.d/kubernetes.list
deb https://mirrors.aliyun.com/kubernetes/apt/ kubernetes-xenial main
EOF
# apt-get update
##需要哪个版本就安装哪个版本的kubeadm,kubelet和kubectl同理
# apt-cache madison kubeadm
# apt-get install -y kubelet=1.24.3-00 kubeadm=1.24.3-00 kubectl=1.24.3-00
##检查这个k8s版本应该安装的组件版本,并提前安装
# kubeadm config images list --kubernetes-version v1.24.3
##将需要的插件版本写个脚本并拉取镜像
##%s@k8s.gcr.io@nerdctl pull redistry.cn-hangzhou.aliyuncs.com/google_containers@g
######
cat <<EOF >/usr/local/src/k8s_image.sh
#!/bin/bash
nerdctl pull docker.io/coredns/coredns:1.8.6
nerdctl tag docker.io/coredns/coredns:1.8.6 registry.cn-hangzhou.aliyuncs.com/google_containers/coredns:v1.8.6
EOF
#######
# chmod +x /usr/local/src/k8s_image.sh
# bash /usr/local/src/k8s_image.sh
##挂载模块
# modprobe br_netfilter
##开机自动加载方法
# cp $(find / -name "br_netfilter*" | fgrep "br_netfilter.ko") /lib/modules/`uname -r`/
# echo 'br_netfilter' | sudo tee -a /etc/modules
##优化内核参数
# vim /etc/sysctl.conf
net.ipv4.ip_forward = 1 #启动ip转发功能,如果一台服务器有多个网卡,服务器可当作路由器来使用,能将网卡收到的信息转发给其他网卡,例子:eth0收到的数据包转发给docker0接口,来确保两个服务器间pod可通信
net.bridge.bridge-nf-call-iptables = 1 #开启后,网桥在二层转发的时候也会调用三层配置的iptables规则,为啥这么配置,例子:pod调用coredns访问service,走三层的网络转发(访问service后,目的地址是cluster IP),如果转发到的coredns在pod的同节点上,coredns回包的时候发现目的ip在同一网桥上,就会走二层转发了,没有原路返回,导致两边的通信没有在同一“频道”上,不认为在同一连接上,最终通信失败!也就会偶尔出现无法解析域名
# sysctl -p
# swapoff -a
##初始化集群
# kubeadm init --apiserver-advertise-address=192.168.213.111 --apiserver-bind-port=6443 --kubernetes-version=v1.24.3 --pod-network-cidr=10.100.0.0/16 --service-cidr=10.200.0.0/16 --service-dns-domain=cluster.local --image-repository=registry.cn-hangzhou.aliyuncs.com/google_containers --ignore-preflight-errors=swap
##--apiserver-advertise-address:master主机地址
##-apiserver-bind-port:apiserver端口,默认为6443,不需要修改
##--kubernetes-version:集群版本
##--pod-network-cidr:pod网络,如果是生产环境,地址最好给多一些掩码/16,不要配置公网ip段
##--service-cidr:service网络
##--service-dns-domain:service域名后缀
##--image-repository:镜像仓库指向阿里云
##--ignore-preflight-errors:忽略预检查错误,k8s不支持swap
#########################################################安装遇到的问题##############################################


问题原因:CPU和内存的cgroup层次结构不统一
处理方法:
# vim /lib/systemd/system/kubelet.service
##找到ExecStart=在二进制文件后面加上启动参数“--runtime-cgroups=/systemd/system.slice --kubelet-cgroups=/systemd/system.slice”

###########################################################问题解决!!#################################################
###########################################################安装遇到的问题###################################################
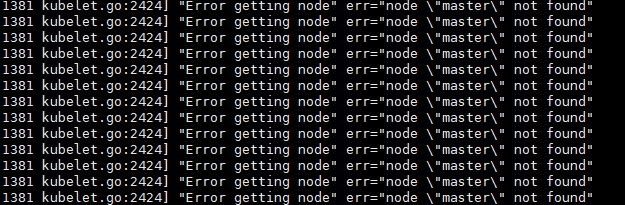
处理方法:
# export NODE_NAME="master"
###########################################################问题解决!!#####################################################
##############################################################################################
Your Kubernetes control-plane has initialized successfully!
To start using your cluster, you need to run the following as a regular user:
mkdir -p $HOME/.kube
sudo cp -i /etc/kubernetes/admin.conf $HOME/.kube/config
sudo chown $(id -u):$(id -g) $HOME/.kube/config
Alternatively, if you are the root user, you can run:
export KUBECONFIG=/etc/kubernetes/admin.conf
You should now deploy a pod network to the cluster.
Run "kubectl apply -f [podnetwork].yaml" with one of the options listed at:
Then you can join any number of worker nodes by running the following on each as root:
kubeadm join 192.168.213.111:6443 --token b2flpm.t2y3fliauacjoijn \
--discovery-token-ca-cert-hash sha256:4476a465fd41e76be26c44672457a05df33734a7612462f42f8f4139ac47f626
###############################################################################################
##master服务器执行:
# mkdir -p $HOME/.kube
# sudo cp -i /etc/kubernetes/admin.conf $HOME/.kube/config
# sudo chown $(id -u):$(id -g) $HOME/.kube/config
##node服务器执行命令加入集群:
# kubeadm join 192.168.213.111:6443 --token b2flpm.t2y3fliauacjoijn --discovery-token-ca-cert-hash sha256:4476a465fd41e76be26c44672457a05df33734a7612462f42f8f4139ac47f626
##在master上安装calico,上传calico文件到服务器上,yaml文件去这找https://github.com/projectcalico/calico/tree/master/manifests,yaml文件需要修改pod的网段
# kubectl apply -f calico-ipip.yaml
# kubectl get pod -nkube-system
#########################################等待pod全部启动后,k8s部署大功告成

 浙公网安备 33010602011771号