
[SpringBoot] Spring Boot(11)Redis集成从Docker安装到分布式Session共享
1 简介
Redis是一个开源的使用ANSI C语言编写、支持网络、可基于内存亦可持久化的日志型、Key-Value数据库,并提供多种语言的API,Redis也是技术领域使用最为广泛的存储中间件,它是「Remote Dictionary Service」首字母缩写,也就是「远程字典服务」。
Redis相比Memcached提供更多的数据类型支持和数据持久化操作。
2 在Docker中安装Redis
2.1 下载镜像
访问官网:https://hub.docker.com/r/library/redis/ 选择下载版本,本文选择最新Stable 4.0.11
使用命令拉取镜像:
docker pull redis:4.0.11
2.2 启动容器
启动Redis命令如下:
docker run --name myredis -p 6379:6379 -d redis:4.0.11 redis-server --appendonly yes
命令说明:
● –name 设置别名
● -p 映射宿主端口到容器端口
● -d 后台运行
● redis-server --appendonly yes 在容器启动执行redis-server启动命令,打开redis持久化
启动成功之后使用命令:
docker ps
查看redis运行请求,如下图为运行成功:

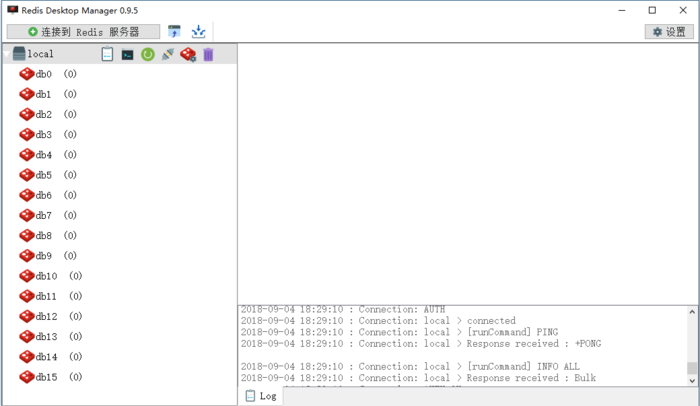
2.3 使用客户端连接
连接Redis不错的GUI工具应该是Redis Desktop Manager了,不过现在只有Linux版可以免费下载,我上传了一个Windows版本在百度云,版本号为:0.9.5(发布于2018.08.24)也是比较新的,链接: https://pan.baidu.com/s/16npZtnGa3-p2PAafiPEAkA 密码: 9uqg,还是免安装的,很好用。
Redis Desktop Manager客户端预览:
3 Redis集成
开发环境
● Spring Boot 2.0.4 RELEASE
● Manven
3.1 添加依赖
在pom.xml添加如下依赖:
<dependency>
  <groupId>org.springframework.boot</groupId>
  <artifactId>spring-boot-starter-data-redis</artifactId>
</dependency>
注意不要依赖“spring-boot-starter-redis”它是旧版本,新版已经迁移到“spring-boot-starter-data-redis”了。
3.2 配置Redis
在application.properties进行如下设置:
# Redis 配置
# Redis服务器地址
spring.redis.host = 127.0.0.1
# Redis服务器连接密码(默认为空)
spring.redis.password =
# Redis服务器连接端口
spring.redis.port = 6379
# Redis分片(默认为0)Redis默认有16个分片
spring.redis.database = 0
# 连接池最大连接数(使用负值表示没有限制)
spring.redis.pool.max-active = 8
# 连接池最大阻塞等待时间(使用负值表示没有限制)
spring.redis.pool.max-wait = -1
# 连接池中的最大空闲连接
spring.redis.pool.max-idle = 8
# 连接池中的最小空闲连接
spring.redis.pool.min-idle = 0
# 连接超时时间(毫秒)
spring.redis.timeout = 10000
# 指定spring的缓存为redis
spring.cache.type = redis
注意:spring.redis.timeout不要设置为0,设置为0查询Redis时会报错,因为查询连接时间太短了。
3.3 Redis使用
完成以上配置之后就可以写代码操作Redis了,示例代码如下:
@Autowired
private StringRedisTemplate stringRedisTemplate;

@RequestMapping("/")
public String doTest() {
  String _key = "time"; //缓存key
  stringRedisTemplate.opsForValue().set(_key, String.valueOf(new Date().getTime())); //redis存值
  return stringRedisTemplate.opsForValue().get(_key); //redis取值
}
更多操作:
● stringRedisTemplate.opsForValue().set(“test”, “100”,60*10,TimeUnit.SECONDS); 向redis里存入数据和设置缓存时间;
● stringRedisTemplate.hasKey(“keyName”); 检查key是否存在,返回boolean;
4 声明式缓存
为了简化缓存可以直接使用声名式缓存,可以省去设置缓存和读取缓存的代码,使用起来会方便很多。
声明式缓存使用步骤如下:
4.1 设置Redis缓存
在pom.xml文件设置缓存为Redis,代码如下:
spring.cache.type = redis
4.2 开启全局缓存
在启动文件Application.java设置开启缓存,代码如下:
@SpringBootApplication
@EnableCaching
public class Application {
  public static void main(String[] args) {
    SpringApplication.run(Application.class, args);
  }
}
4.3 使用注解
注解如下:
● @Cacheable 设置并读取缓存(第一次设置以后直接读取);
● @CachePut 更新缓存(每次删除并更新缓存结果);
● @CacheEvict 删除缓存(只删除缓存);
通用属性:
● value 缓存名称;
● key 使用SpEL表达式自定义的缓存Key,比如:#name是以参数name为key的缓存,#resule.name是以返回结果的name作为key的缓存;
4.3.1 @Cacheable 使用
示例代码如下:
// 缓存key
private final String _CacheKey = "userCacheKeyTime";

@RequestMapping("/")
@Cacheable(value = _CacheKey)
public String index() {
  System.out.println("set cache");
  return "cache:" + new Date().getTime();
}
只有首次访问的时候会在控制台打印“set cache”信息,之后直接返回Redis结果了,不会在有添加的打印信息出现。
4.3.2 @CachePut 使用
示例代码如下:
// 缓存key
private final String _CacheKey = "userCacheKeyTime";

@RequestMapping("/put")
@CachePut(value = _CacheKey)
public String putCache() {
  System.out.println("update cache");
  return "update cache:" + new Date().getTime();
}
访问http://xxx/put 每次会把最新的数据存储缓存起来。
4.3.3 @CacheEvict 使用
示例代码如下:
// 缓存key
private final String _CacheKey = "userCacheKeyTime";

@RequestMapping("/del")
@CacheEvict(value = _CacheKey)
public String delCache() {
  System.out.println("缓存删除");
  return "delete cache:" + new Date().getTime();
}
访问http://xxx/del 只会删除缓存,除此之后不会进行任何操作。
5 分布式Session共享
在分布式系统中Session共享有很多种方案,而把Session托管在缓存中是最常用的方案之一,下面来看Session在Redis中的托管步骤。
5.1 添加依赖
在pom.xml中添加如下引用:
<dependency>
  <groupId>org.springframework.session</groupId>
  <artifactId>spring-session-data-redis</artifactId>
</dependency>
5.2 开启Session功能
在启动类Application.java的类注解添加开启Session,代码如下:
@SpringBootApplication
@EnableCaching
@EnableRedisHttpSession(maxInactiveIntervalInSeconds = 1800)
public class RedisApplication {
  public static void main(String[] args) {
    SpringApplication.run(RedisApplication.class, args);
  }
}
其中maxInactiveIntervalInSeconds为Session过期时间,默认30分钟,设置单位为秒。
5.3 Session使用
接下来编写一段代码来测试一下Session,示例代码如下:
@RequestMapping("/uid")
public String testSession(HttpSession session) {
  UUID uid = (UUID) session.getAttribute("uid");
  if (uid == null) {
    uid = UUID.randomUUID();
  }
  session.setAttribute("uid", uid);

  return session.getId();
}
连续访问两次请求之后,查看控制台信息如下图:

可以看出,两次访问的SessionId是一样的,这个时候在查看Redis 客户端,如下图:
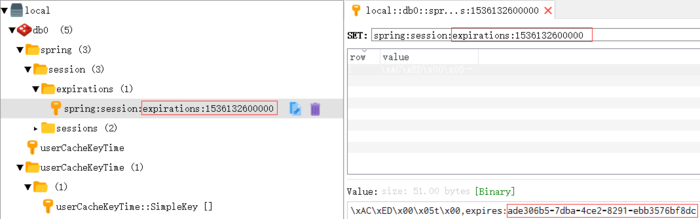
发现Redis里存储的Session过期时间也是对的,符合我们的设置。
5.4 分布式系统共享Session
因为把Session托管给同一台Redis服务器了,所以Session在Spring Boot中按照如上方式在配置多台服务器,得到的Session是一样的。
示例源码下载:https://github.com/vipstone/springboot-example/tree/master/springboot-redis
参考资料
Spring boot中Redis的使用:http://www.ityouknow.com/springboot/2016/03/06/spring-boot-redis.html
备注
原文链接:https://blog.csdn.net/sufu1065/article/details/83685700

 浙公网安备 33010602011771号