harbor搭建及使用
一、harbor概述
VMware开源的企业级Registry项目Harbor,以Docker公司开源的registry 为基础,提供了管理UI, 基于角色的访问控制(Role Based Access Control),AD/LDAP集成、以及审计日志(Audit logging) 等企业用户需求的功能,同时还原生支持中文,主要特点:
-
基于角色的访问控制 - 用户与 Docker 镜像仓库通过“项目”进行组织管理,一个用户可以对多个镜像仓库在同一命名空间(project)里有不同的权限。
-
镜像复制 - 镜像可以在多个 Registry 实例中复制(同步)。尤其适合于负载均衡,高可用,混合云和多云的场景。
-
图形化用户界面 - 用户可以通过浏览器来浏览,检索当前 Docker 镜像仓库,管理项目和命名空间。
-
AD/LDAP 支持 - Harbor 可以集成企业内部已有的 AD/LDAP,用于鉴权认证管理。
-
审计管理 - 所有针对镜像仓库的操作都可以被记录追溯,用于审计管理。
-
国际化 - 已拥有英文、中文、德文、日文和俄文的本地化版本。更多的语言将会添加进来。
-
RESTful API - RESTful API 提供给管理员对于 Harbor 更多的操控, 使得与其它管理软件集成变得更容易。
-
部署简单 - 提供在线和离线两种安装工具, 也可以安装到 vSphere 平台(OVA 方式)虚拟设备
二、harbor架构介绍
默认情况下,Harbor运行起来后有如下容器:

名称分别为:nginx、harbor-jobservice、harbor-ui、harbor-db、harbor-adminserver、registry以及harbor-log。
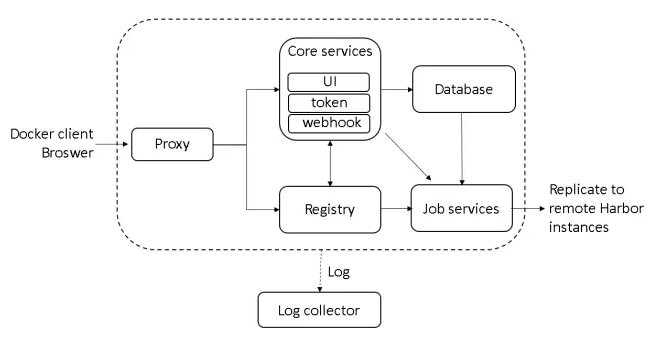
如上图所描述,Harbor由6个大的模块所组成:
-
Proxy: Harbor的registry、UI、token services等组件,都处在一个反向代理后边。该代理将来自浏览器、docker clients的请求转发到后端服务上。
-
Registry: 负责存储Docker镜像,以及处理Docker push/pull请求。因为Harbor强制要求对镜像的访问做权限控制, 在每一次push/pull请求时,Registry会强制要求客户端从token service那里获得一个有效的token。
-
Core services: Harbor的核心功能,主要包括如下3个服务:
1)UI: 作为Registry Webhook, 以图像用户界面的方式辅助用户管理镜像。
2)WebHook:WebHook是在registry中配置的一种机制, 当registry中镜像发生改变时,就可以通知到Harbor的webhook endpoint。Harbor使用webhook来更新日志、初始化同步job等。
3) Token 服务:负责根据用户权限给每个docker push/pull命令签发token. Docker 客户端向Regiøstry服务发起的请求,如果不包含token,会被重定向到这里,获得token后再重新向Registry进行请求。 -
Database:为core services提供数据库服务,负责储存用户权限、审计日志、Docker image分组信息等数据。 -
Job services: 主要用于镜像复制,本地镜像可以被同步到远程Harbor实例上。
-
Log collector: 负责收集其他组件的日志到一个地方
这里我们与上面运行的7个容器对比,对harbor-adminserver感觉有些疑虑。其实这里harbor-adminserver主要是作为一个后端的配置数据管理,并没有太多的其他功能。harbor-ui所要操作的所有数据都通过harbor-adminserver这样一个数据配置管理中心来完成。
三、Harbor实现
Harbor的每一个组件都被包装成一个docker容器。自然,Harbor是通过docker compose来部署的。在Harbor源代码的make目录下的docker-compose模板会被用于部署Harbor。打开该模板文件,可以看到Harbor由7个容器组件所组成:
-
proxy: 通过nginx服务器来做反向代理 -
registry: docker官方发布的一个仓库镜像组件 -
ui: 整个架构的核心服务。该容器是Harbor工程的主要部分 -
adminserver: 作为Harbor工程的配置数据管理器使用 -
mysql: 通过官方Mysql镜像创建的数据库容器 -
job services: 通过状态机的形式将镜像复制到远程Harbor实例。镜像删除同样也可以被同步到远程Harbor实例中。 -
log: 运行rsyslogd的容器,主要用于收集其他容器的日志
这些容器之间都通过Docker内的DNS服务发现来连接通信。通过这种方式,每一个容器都可以通过相应的容器来进行访问。对于终端用户来说,只有反向代理(Nginx)服务的端口需要对外暴露。
四、harbor部署
1、系统版本

2、软件版本(Docker安装过程略)

3、安装docker-compose(Harbor是通过docker compose来部署的)
1)配置阿里的epel源
# wget -O /etc/yum.repos.d/epel.repo http://mirrors.aliyun.com/repo/epel-7.repo
2)安装并升级Python-pip
# yum install python-pip -y
# pip install --upgrade pip
3)安装docker-compose
# pip install docker-compose
4)查看docker-compose版本
# docker-compose -v
docker-compose version 1.26.2, build unknow
4、下载harbor安装包
1)可以在网站上下载离线安装包
地址:https://github.com/goharbor/harbor/releases

此处我们下载的是最新版:2.0.1版本:
https://github.com/goharbor/harbor/releases/download/v2.0.1/harbor-offline-installer-v2.0.1.tgz
2)国内harbor离线版镜像(版本可能不是最新,下载速度较快)
5、解压harbor离线版安装包
# tar xf harbor-offline-installer-v2.0.1.tgz
# cd harbor
# ll
总用量 522300
-rw-r--r-- 1 root root 3361 6月 29 09:58 common.sh
-rw-r--r-- 1 root root 534799479 6月 29 09:58 harbor.v2.0.1.tar.gz
-rw-r--r-- 1 root root 7816 6月 29 09:58 harbor.yml.tmpl
-rwxr-xr-x 1 root root 2523 6月 29 09:58 install.sh
-rw-r--r-- 1 root root 11347 6月 29 09:58 LICENSE
-rwxr-xr-x 1 root root 1856 6月 29 09:58 prepare
6、修改harbor安装的配置文件
# cp harbor.yml.tmpl  harbor.yml
# mkdir -p /opt/application/harbor     //用于存放harbor的持久化数据
harbor.yml配置文件主要修改参数如下:
hostname: 192.168.0.8:9999          //设置访问地址,可以使用ip、域名,不可以设置为127.0.0.1或localhost。默认情况下,harbor使用的端口是80,若使用自定义的端口,除了要改docker-compose.yml文件中的配置外,这里的hostname也要加上自定义的端口,否则在docker login、push时会报错
#http配置
http:
# port for http, default is 80. If https enabled, this port will redirect to https port
port: 9999

#https配置(如不需要可不配置,注释掉)
# https related config
#https:
# https port for harbor, default is 443
 #port: 443
# The path of cert and key files for nginx
 #certificate: /your/certificate/path
 #private_key: /your/private/key/path

#external_url: https://reg.mydomain.com:8433      //如果要启用外部代理,比如外层的NGINX、LB等,请取消注释external_url,当它启用时,hostname将不再使用。

harbor_admin_password: Harbor12345         //admin密码


#数据库配置
database:
# The password for the root user of Harbor DB. Change this before any production use.
password: root123
# The maximum number of connections in the idle connection pool. If it <=0, no idle connections are retained.
max_idle_conns: 50
# The maximum number of open connections to the database. If it <= 0, then there is no limit on the number of open connections.
# Note: the default number of connections is 100 for postgres.
max_open_conns: 100


#持久化数据目录

data_volume: /opt/application/harbor

……
7、安装并启动Harbor
安装之前需要启动docker,然后执行安装脚本:
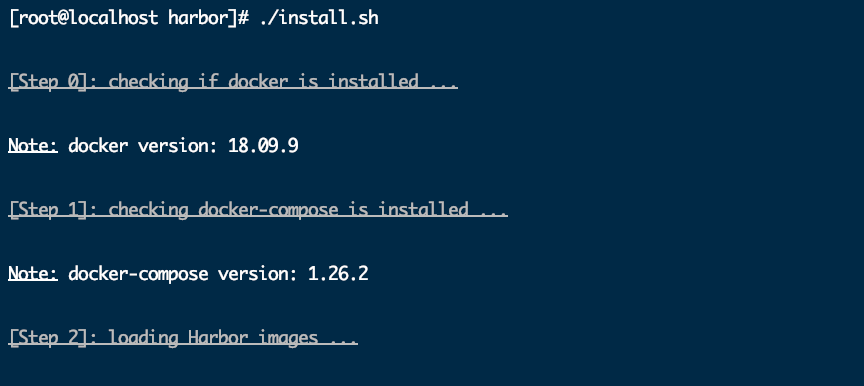
安装完成后查看下正在运行的docker容器:
8、访问harbor WEB界面
http://192.168.0.8:9999 admin Harbor12345
五、Harbor的使用(上传下载镜像)
1、登录harbor
# docker login 192.18.0.8:9999
Username: admin
Password:
Error response from daemon: Get https://192.18.0.8:9999/v2/: net/http: request canceled while waiting for connection (Client.Timeout exceeded while awaiting headers)
报错原因:Docker自从1.3.X之后docker registry交互默认使用的是HTTPS,但是我们搭建私有镜像默认使用的是HTTP服务,所以与私有镜像交时出现以上错误。
报错解决:
修改Docker的配置文件/etc/docker/daemon.json :
# vim /etc/docker/daemon.json
{
"registry-mirrors": ["https://k728i8z5.mirror.aliyuncs.com"],
"insecure-registries":["192.168.0.8:5000"],
"insecure-registries":["192.168.0.8:9999"]
}
然后重新启动Docker:
# systemctl restart docker
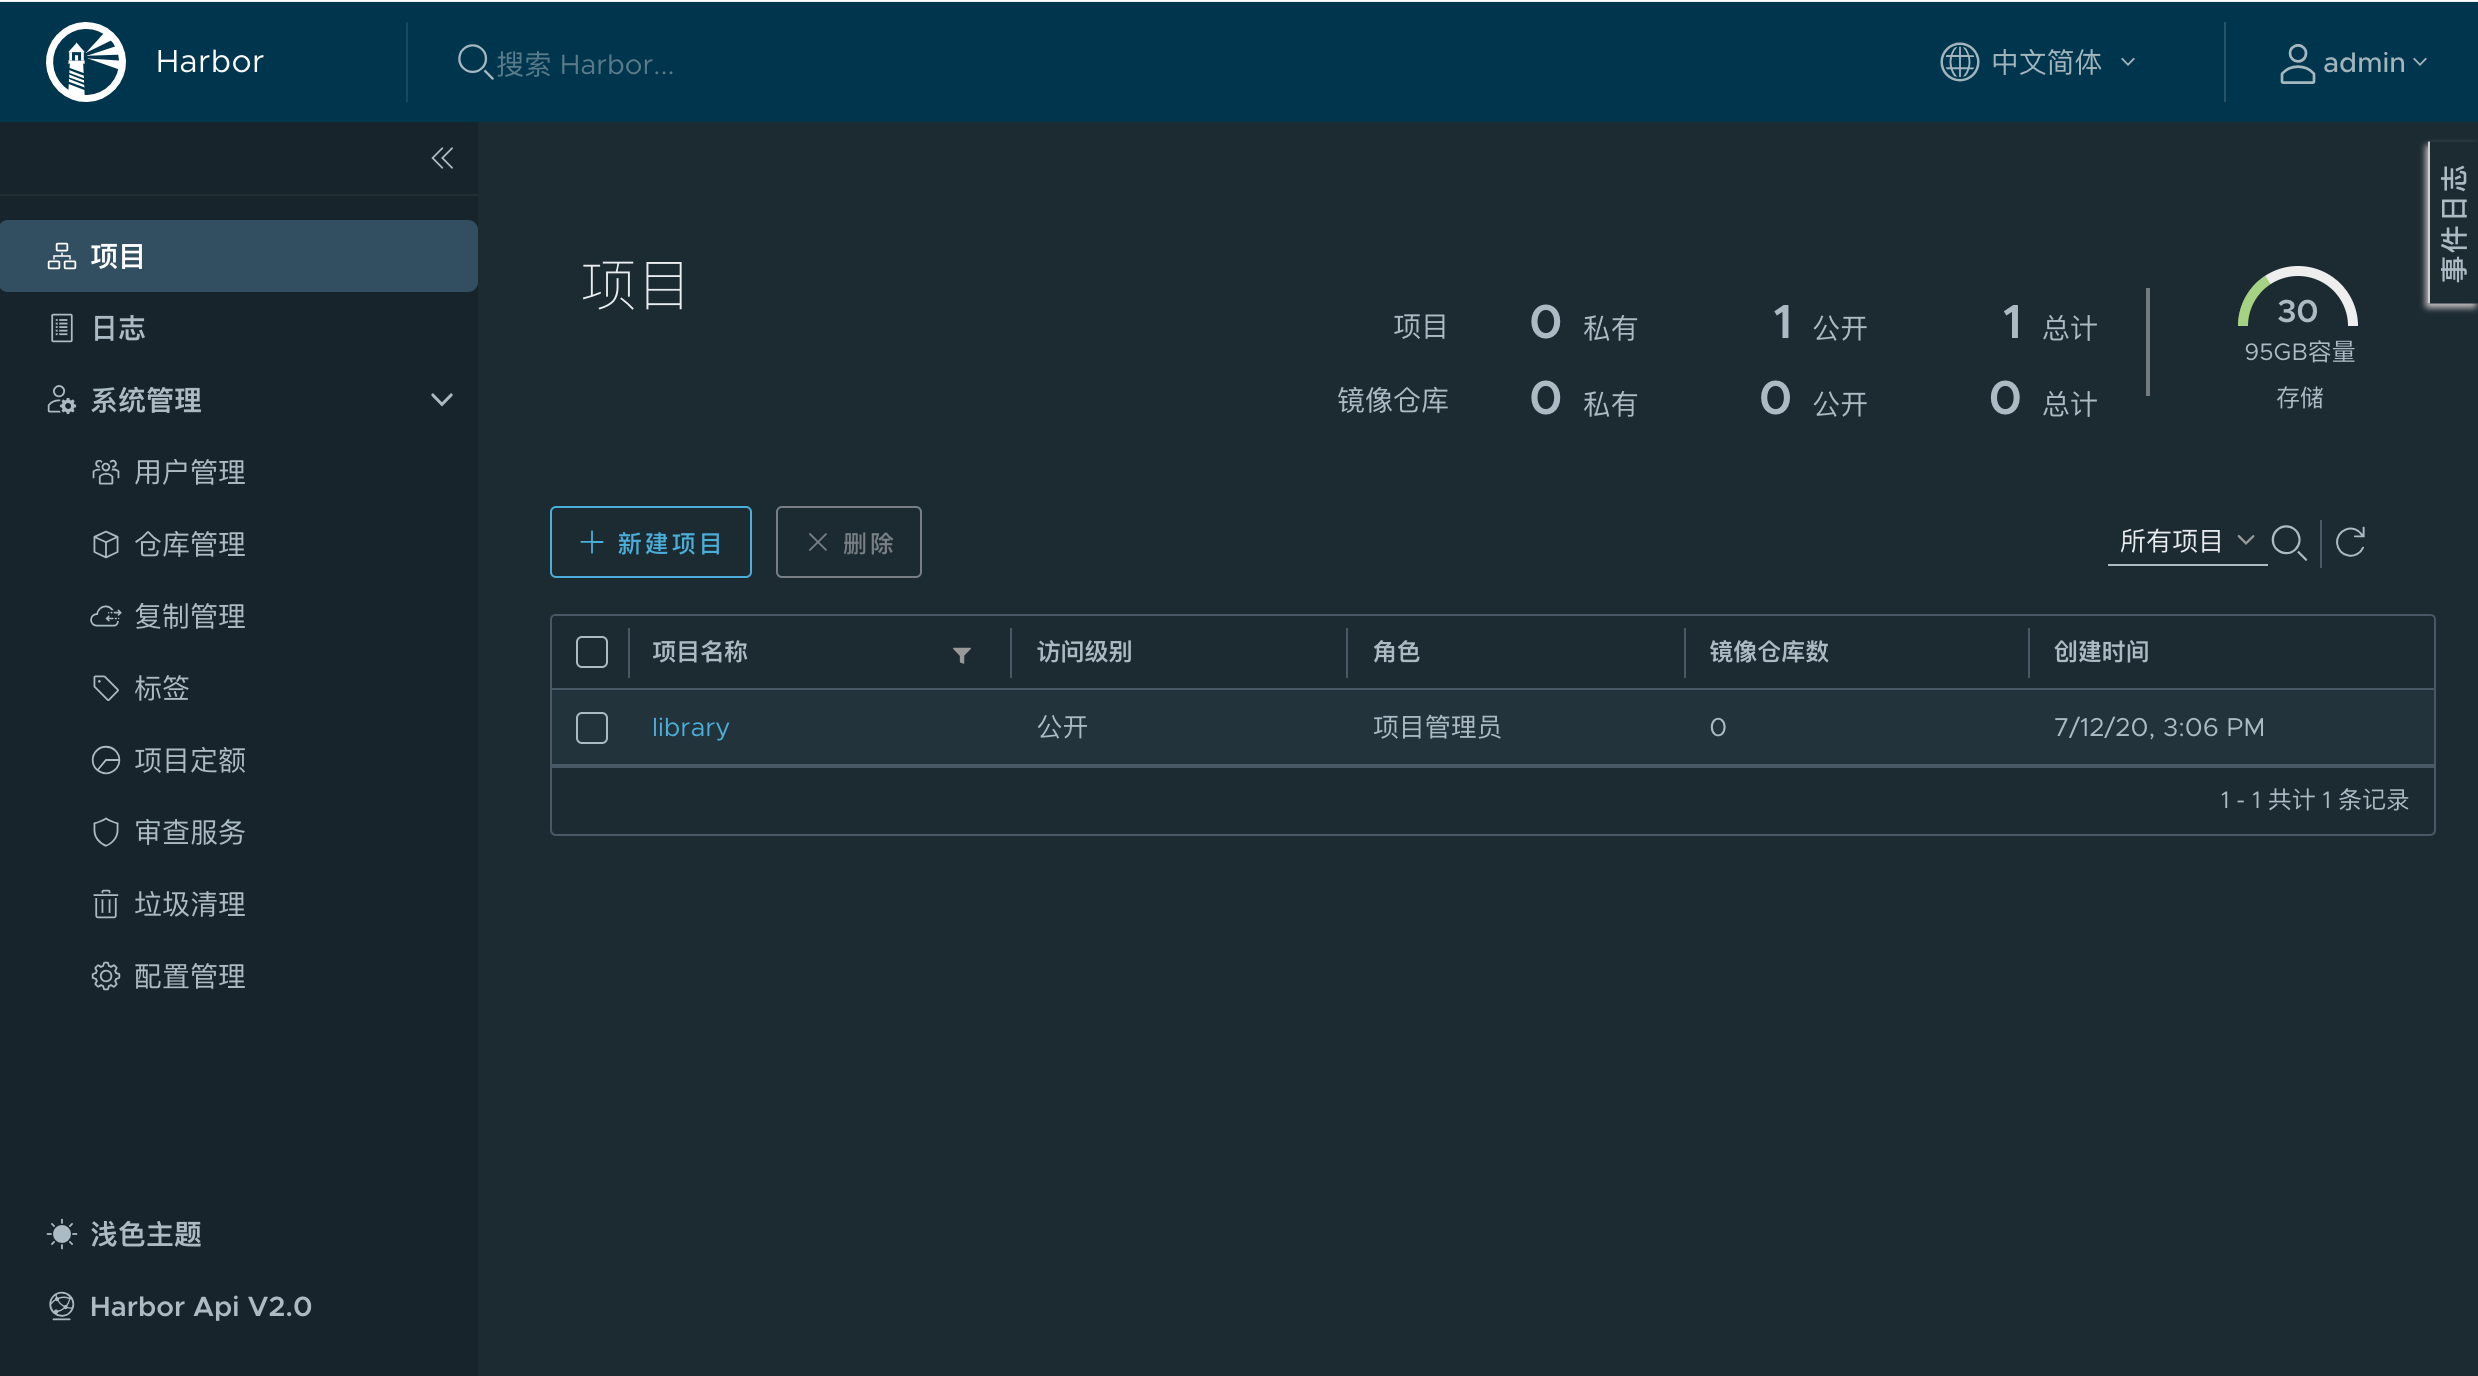
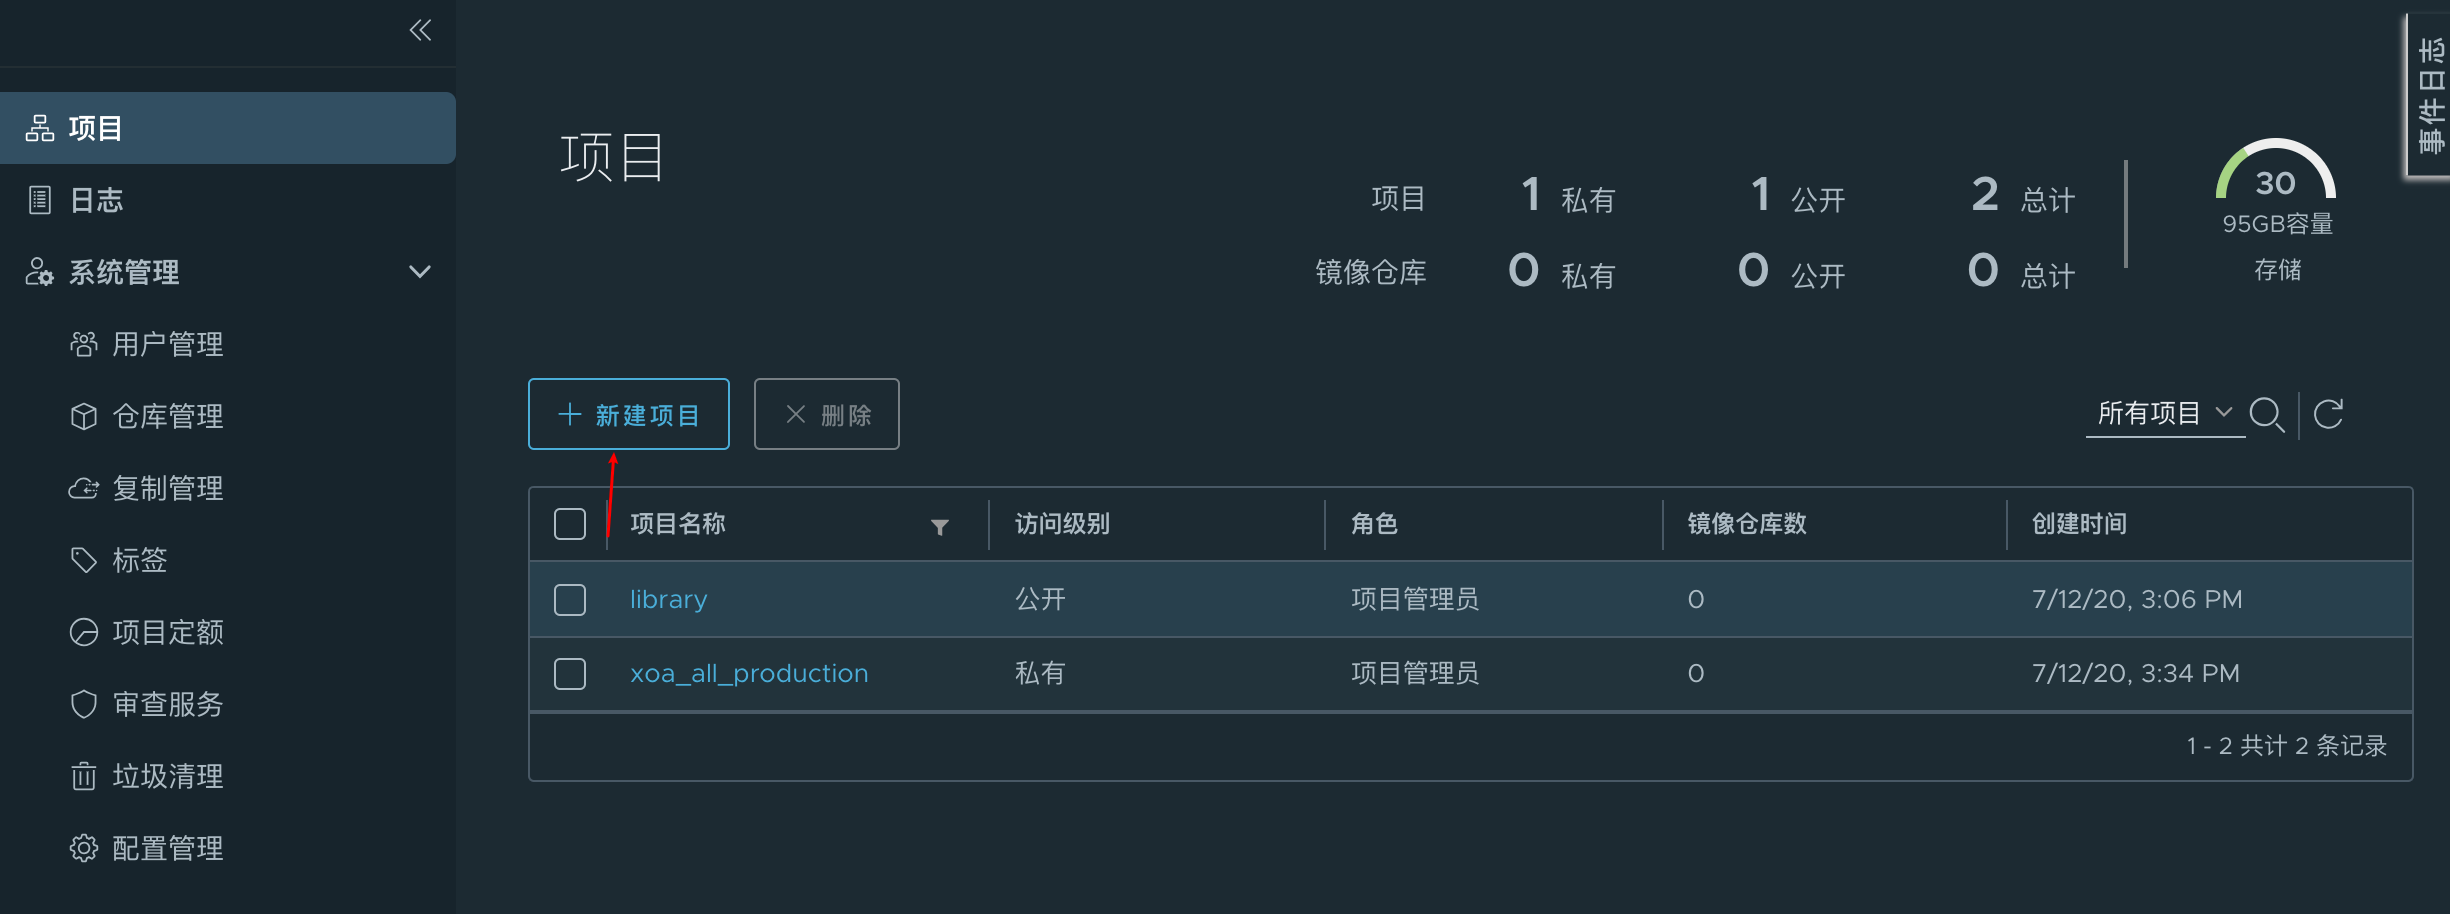
2、在Harbor上创建新项目供上传使用
3、给构建好的镜像打标签并上传到harbor
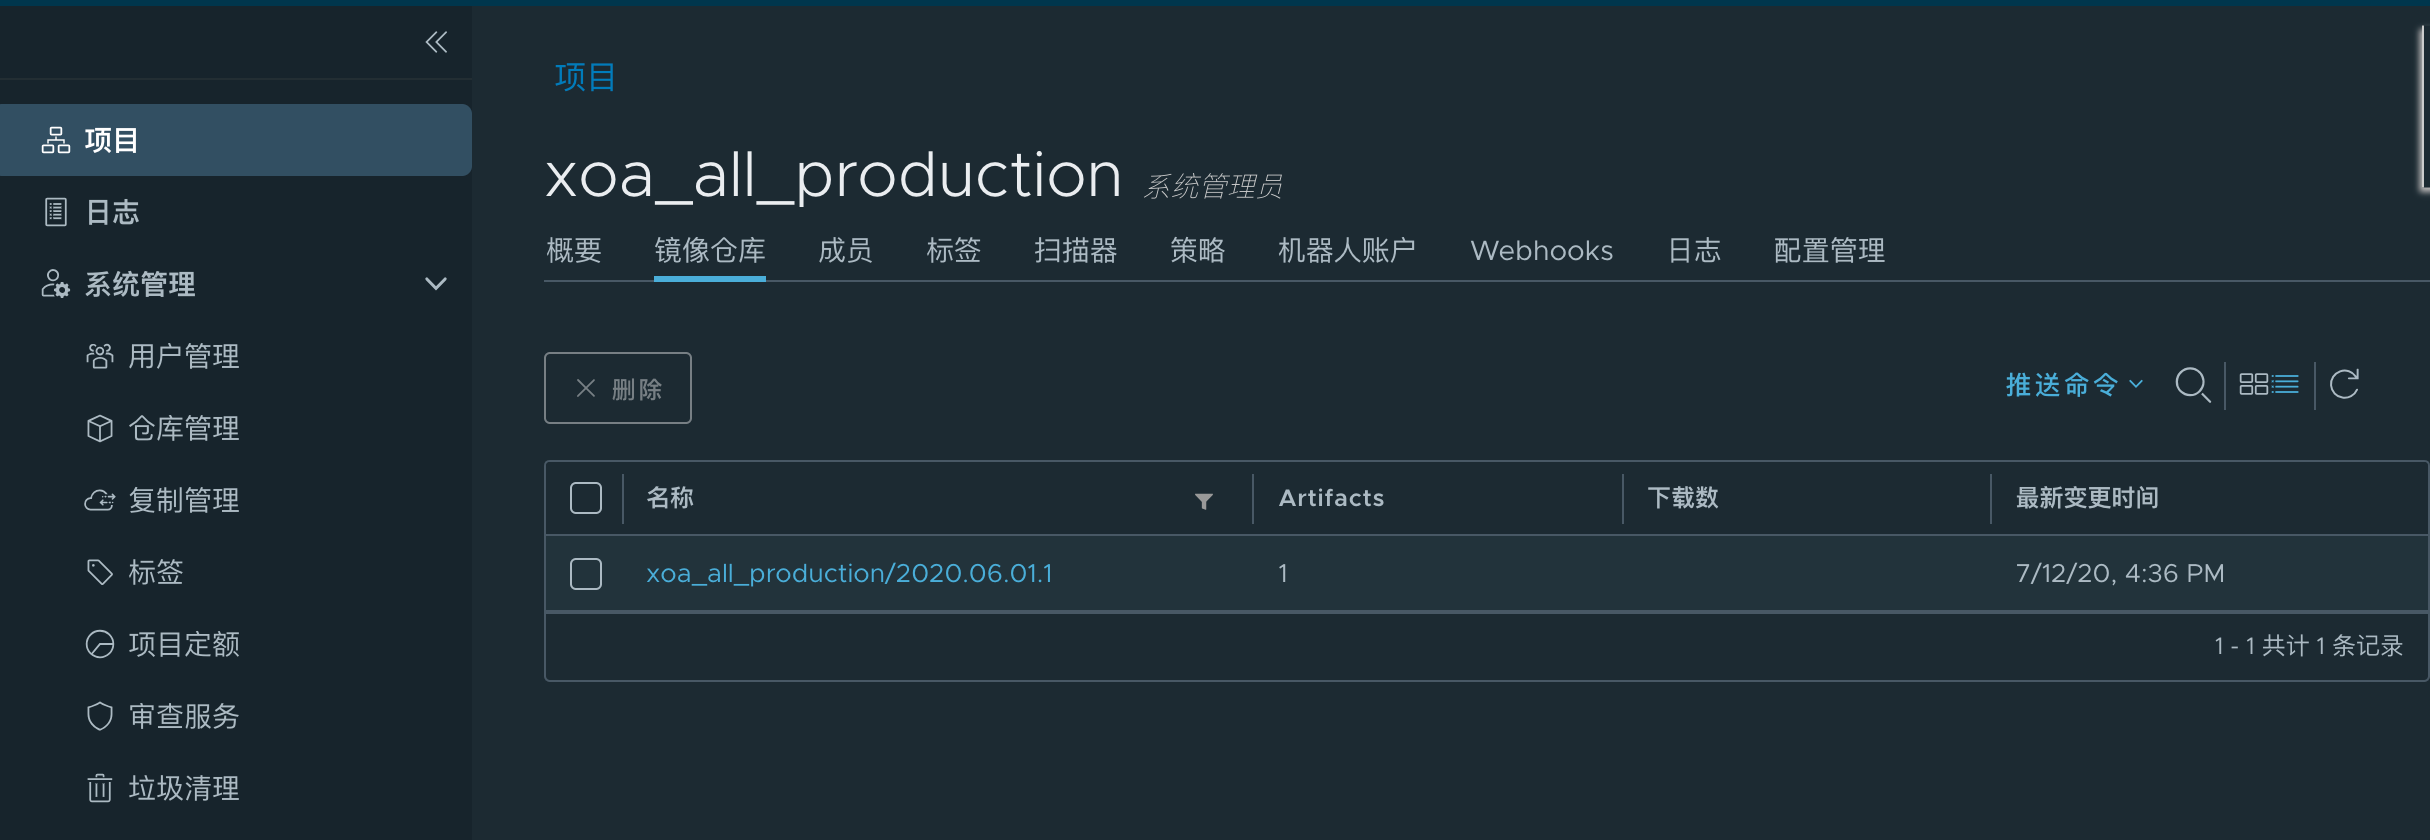
# docker tag xoa_all_production:v1 192.168.0.8:9999/xoa_all_production/2020.06.01.1:v1
# docker push 192.168.0.8:9999/xoa_all_production/2020.06.01.1:v1
The push refers to repository [192.168.0.8:9999/xoa_all_production/2020.06.01.1]
9d4aefde8c76: Pushed
22e5c751af2a: Pushed
8143d5ce48e6: Pushed
39f6023f8742: Pushed
5a4d6e35085c: Pushed
56057dc217a6: Pushed
452b3c93db6e: Pushed
aaefb8d976d1: Pushed
f1de55fab847: Pushed
72223f98927f: Pushed
edf3aa290fb3: Pushed
v1: digest: sha256:81de8ab261ecfdb0bfd66ed1b1db8c13222b288fcd732c1dcdd09446f250b185 size: 2637
注意:xoa_all_production:这个是项目名称,非镜像名。如果tag的镜像名是:192.168.0.8:9999/xoa_all_production:v1,在推送过程中会报错,会不知道把镜像上传到哪去,最终会报错。为此耗费了不少时间去排错。
4、下载镜像
# docker rmi 192.168.0.8:9999/xoa_all_production/2020.06.01.1:v1    //先删除本地镜像
# docker pull 192.168.0.8:9999/xoa_all_production/2020.06.01.1:v1   //拉取镜像
v1: Pulling from xoa_all_production/2020.06.01.1
Digest: sha256:81de8ab261ecfdb0bfd66ed1b1db8c13222b288fcd732c1dcdd09446f250b185
Status: Downloaded newer image for 192.168.0.8:9999/xoa_all_production/2020.06.01.1:v1
六、Harbor如何停止与启动
# cd soft/harbor       //切换到harbor安装包目录
# docker-compose stop   //停止Harbor
# docker-compose start  //启动Harbor
七、Harbor使用外部代理
harbor默认只能使用harbor.yml中hostname指定的ip或主机名作为web访问地址,但在实际使用过程中,一般不允许ip地址或者主机名直接暴露在外访问,故需要配置nginx代理,通过代理后指定的地址进行访问。
配置方式:
修改harbor.yml,把https相关的注释(如果没有注释,http会自动重定向到https,导致多次重定向),然后添加external_url配置:
# Configuration file of Harbor

# The IP address or hostname to access admin UI and registry service.
# DO NOT use localhost or 127.0.0.1, because Harbor needs to be accessed by external clients.
hostname: 192.168.0.8:9999

# http related config
http:
  # port for http, default is 80. If https enabled, this port will redirect to https port
  port: 9999

# https related config
#https:
  # https port for harbor, default is 443
  #port: 443
  # The path of cert and key files for nginx
  #certificate: /your/certificate/path
  #private_key: /your/private/key/path

# # Uncomment following will enable tls communication between all harbor components
# internal_tls:
#   # set enabled to true means internal tls is enabled
#   enabled: true
#   # put your cert and key files on dir
#   dir: /etc/harbor/tls/internal

# Uncomment external_url if you want to enable external proxy
# And when it enabled the hostname will no longer used
external_url: https://harbor.xxx.cn                     #如果这里是https,nginx代理就需要配置ssl
……
修改配置后docker-compose down停止所有服务,删除当前配置目录:rm -rf ./common/config下配置清单,重新执行install.sh生成配置
NGINX外部代理配置文件:
server {
    listen 80;
    server_name  harbor.xxx.cn;
    #client_max_body_size 1000M;
    access_log /data/wwwlogs/harbor.xxx.cn_access.log combined;
    rewrite ^(.*) https://$server_name$1 permanent;
    location / {
        #proxy_redirect off;
        #proxy_set_header Host $host;
        #proxy_set_header X-Real-IP $remote_addr;
        #proxy_set_header X-Forwarded-For $proxy_add_x_forwarded_for;
        proxy_pass http://127.0.0.1:9999;
}
}


##########################ssl#######################
server {
    listen 443 ssl;
    server_name  harbor.xxx.cn;
    ssl_certificate  sslkey/harbor.xxx.cn_chain.crt;
    ssl_certificate_key sslkey/harbor.xxx.cn_key.key;
    ssl_session_cache shared:SSL:1m;
    ssl_session_timeout 5m;
    ssl_ciphers HIGH:!aNULL:!MD5;
    ssl_prefer_server_ciphers on;
    access_log /data/wwwlogs/harbor.xxx.cn_access.log combined;
    location / {
        #proxy_redirect off;
        #proxy_set_header Host $host;
        #proxy_set_header X-Real-IP $remote_addr;
        #proxy_set_header X-Forwarded-For $proxy_add_x_forwarded_for;
        proxy_pass http://127.0.0.1:9999;
}
}
注意:这几项配置都不要,注释掉,否则在pull和push镜像的时候会报错。
        #proxy_redirect off;
        #proxy_set_header Host $host;
        #proxy_set_header X-Real-IP $remote_addr;
        #proxy_set_header X-Forwarded-For $proxy_add_x_forwarded_for;

具体报错如下:
# docker push harbor.xxx.cn/xxx/ubuntu
The push refers to repository [harbor.xxx.cn/xxx/ubuntu]
7555a8182c42: Pushing [==================================================>] 72.78MB/72.78MB
unknown blob
# docker push harbor.xxx.cn/xxx/ubuntu
The push refers to repository [harbor.xxx.cn/xxx/ubuntu]
7555a8182c42: Pushing [==================================================>] 72.78MB/72.78MB
dial tcp 127.0.0.1:9999: connect: connection refused
另外一个报错:push的镜像文件比较大的时候
error parsing HTTP 413 response body: invalid character '<' looking for beginning of value: "<html>\r\n<head><title>413 Request Entity Too Large</title></head>\r\n<body>\r\n<center><h1>413 Request Entity Too Large</h1></center>\r\n<hr><center>nginx</center>\r\n</body>\r\n</html>\r\n"
解决方式:
修改外部代理nginx配置文件:nginx.conf
client_max_body_size默认为0, 修改0为特定的大小即可。如 client_max_body_size 102400M

 浙公网安备 33010602011771号