【SpringBoot】使用IDEA创建一个SpringBoot服务,并创建三个restful风格的接口
我的个人博客:https://www.wuyizuokan.com
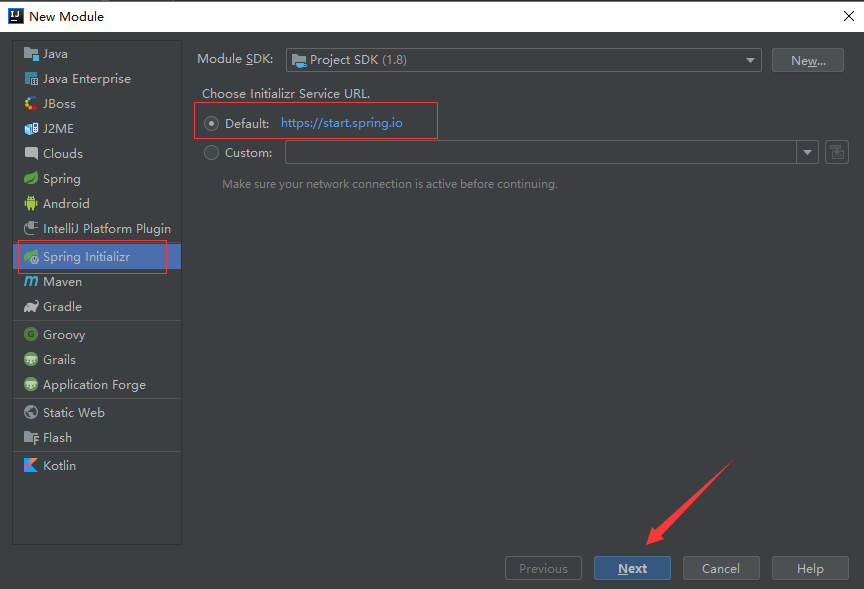
项目创建:
选择创建一个springboot项目:
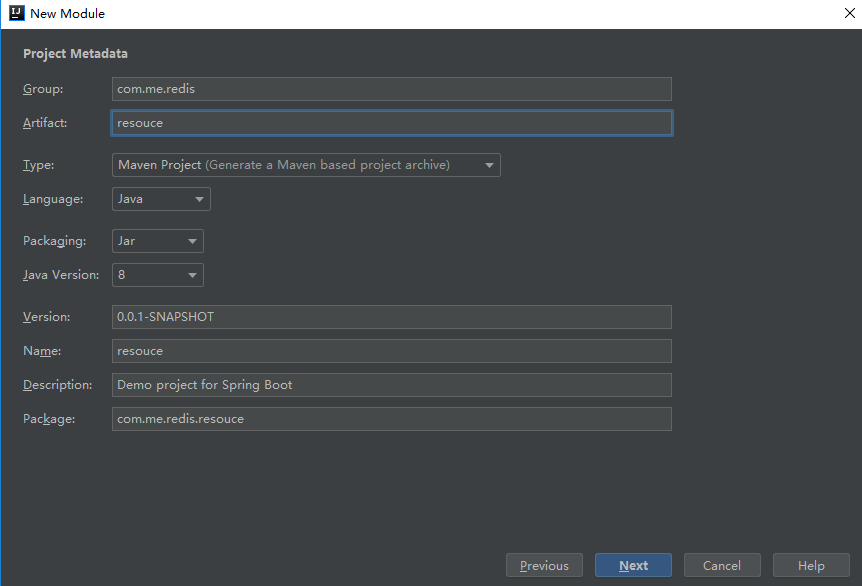
输入一下项目信息,一般就是maven的信息填一下:
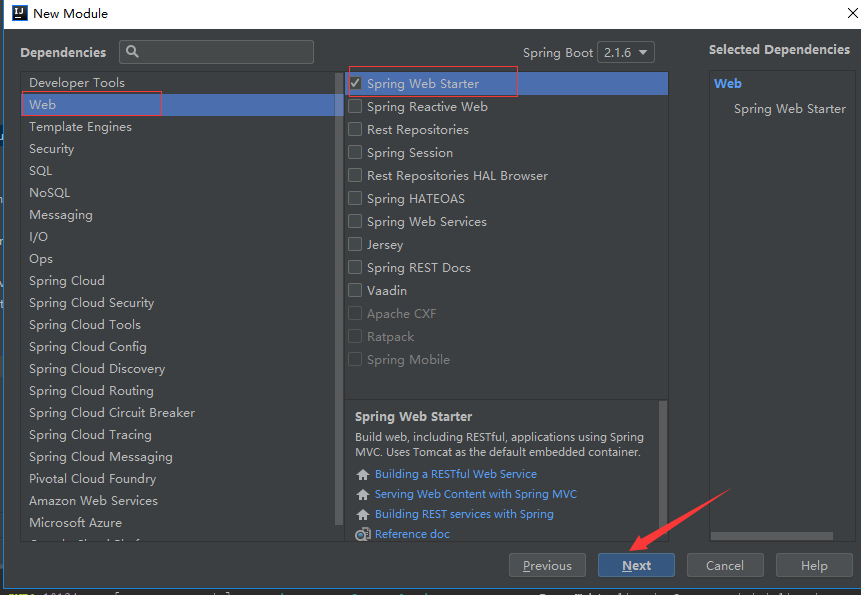
选择spring web starter:
然后finish就OK了。
编码:
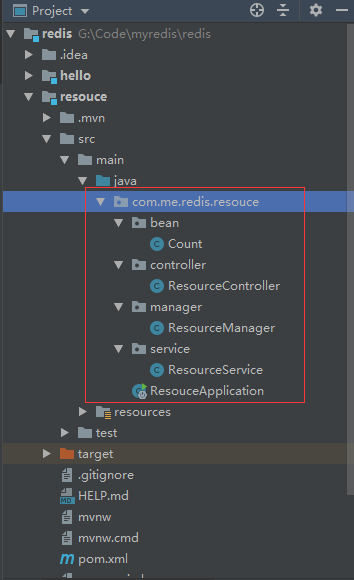
演示的功能就是提供一个计数器功能,可以初始化计数器,修改计数器,查询计数器当前值。没有使用数据库,直接用一个单例类来模拟了,项目结构如下:
Count:
 1 package com.me.redis.resouce.bean;
 2
 3 public class Count {
 4     private int count;
 5
 6     public int getCount() {
 7         return count;
 8     }
 9
10     public void setCount(int count) {
11         this.count = count;
12     }
13 }
ResourceController:
 1 package com.me.redis.resouce.controller;
 2
 3 import com.me.redis.resouce.bean.Count;
 4 import org.springframework.beans.factory.annotation.Autowired;
 5 import org.springframework.web.bind.annotation.*;
 6 import com.me.redis.resouce.service.ResourceService;
 7
 8 @RestController
 9 public class ResourceController {
10
11     @Autowired
12     ResourceService resourceService;
13
14     @RequestMapping(value = "/me/count", method = RequestMethod.PUT)
15     @ResponseBody
16     public void initCount(@RequestBody Count count){
17         resourceService.initCount(count);
18     }
19
20     @RequestMapping(value = "/me/count", method = RequestMethod.POST)
21     @ResponseBody
22     public void modifyCount(@RequestBody Count count){
23         resourceService.addCount(count);
24     }
25
26     @RequestMapping(value = "/me/count", method = RequestMethod.GET)
27     @ResponseBody
28     public  Count getCount()
29     {
30         return resourceService.getCount();
31     }
32 }
ResourceService:
 1 package com.me.redis.resouce.service;
 2
 3 import com.me.redis.resouce.bean.Count;
 4 import com.me.redis.resouce.manager.ResourceManager;
 5 import org.springframework.stereotype.Service;
 6
 7 @Service
 8 public class ResourceService {
 9     public void addCount(Count count){
10         if (count != null){
11             ResourceManager.getInstance().addCount(count.getCount());
12         }
13     }
14
15     public void minusCount(Count count){
16         if (count != null) {
17             ResourceManager.getInstance().minusCount(count.getCount());
18         }
19     }
20
21     public Count getCount()
22     {
23         Count count = new Count();
24         count.setCount(ResourceManager.getInstance().getCount());
25         return count;
26     }
27
28     public void initCount(Count count){
29         if (count != null) {
30             ResourceManager.getInstance().initCount(count.getCount());
31         }
32     }
33 }
ResourceManager:
 1 package com.me.redis.resouce.manager;
 2
 3 public class ResourceManager {
 4     private int count = 0;
 5
 6     private static ResourceManager instance = new ResourceManager();
 7
 8     private ResourceManager(){}
 9
10     public static ResourceManager getInstance(){
11         return instance;
12     }
13
14     public synchronized void addCount(int i){
15         count = count + i;
16     }
17
18     public synchronized  void minusCount(int i){
19         count = count -i;
20     }
21
22     public int getCount(){
23         return count;
24     }
25
26     public void initCount(int i){
27         count = i;
28     }
29 }
ResouceApplication是idea自动生成的:
 1 package com.me.redis.resouce;
 2
 3 import org.springframework.boot.SpringApplication;
 4 import org.springframework.boot.autoconfigure.SpringBootApplication;
 5
 6 @SpringBootApplication
 7 public class ResouceApplication {
 8
 9     public static void main(String[] args) {
10         SpringApplication.run(ResouceApplication.class, args);
11     }
12
13 }
代码就是这样,注意几个注解的作用就行了。
启动服务:
在ResourceApplication类上右键启动:
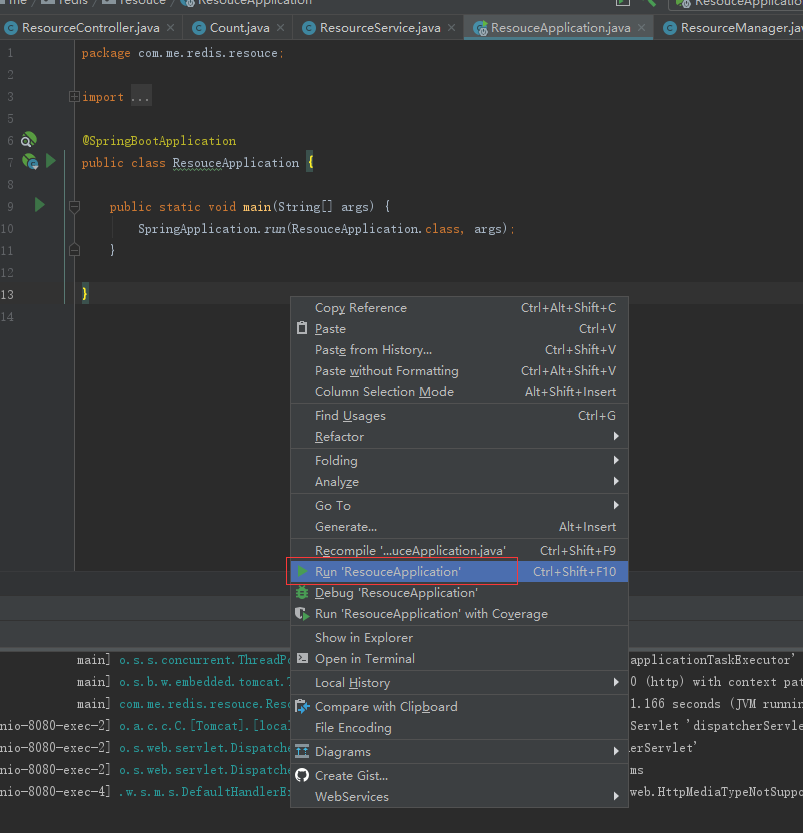
服务启动正常:

测试:
服务提供了三个接口:
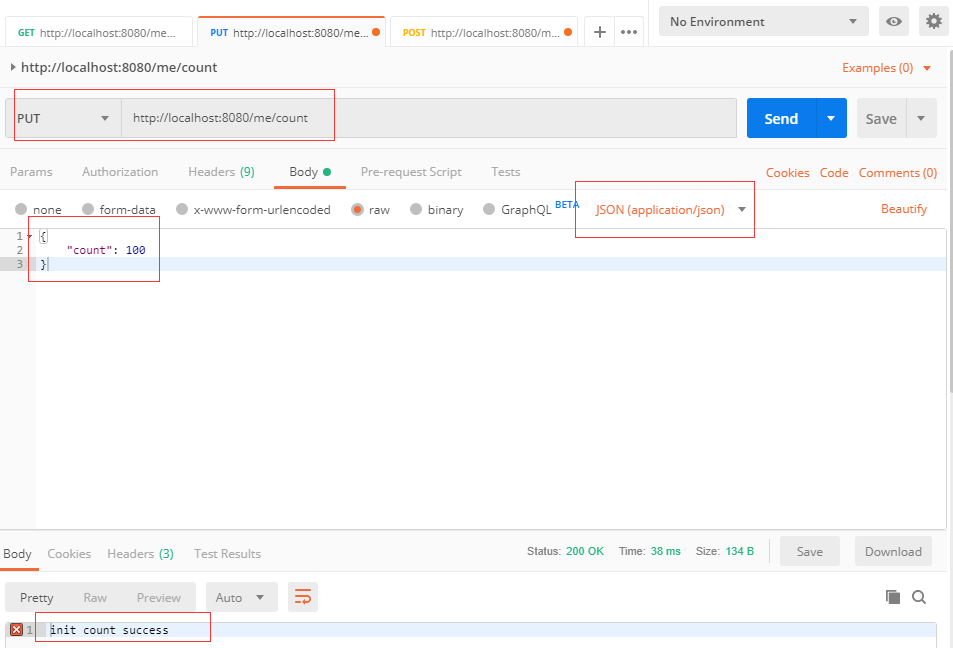
URL都是:/me/count 只是分PUT、POST和GET,其中PUT用于初始化,POST用于修改(这里修改是累加),GET用于查询。
下面使用POSTMan进行测试:
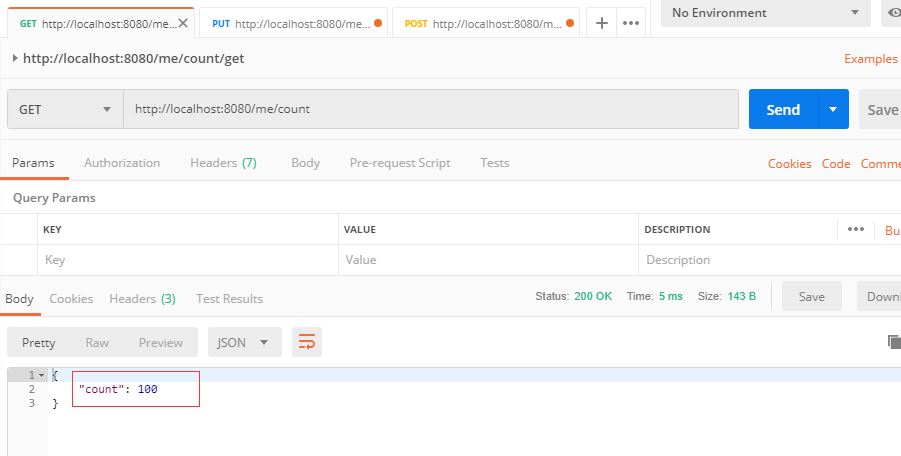
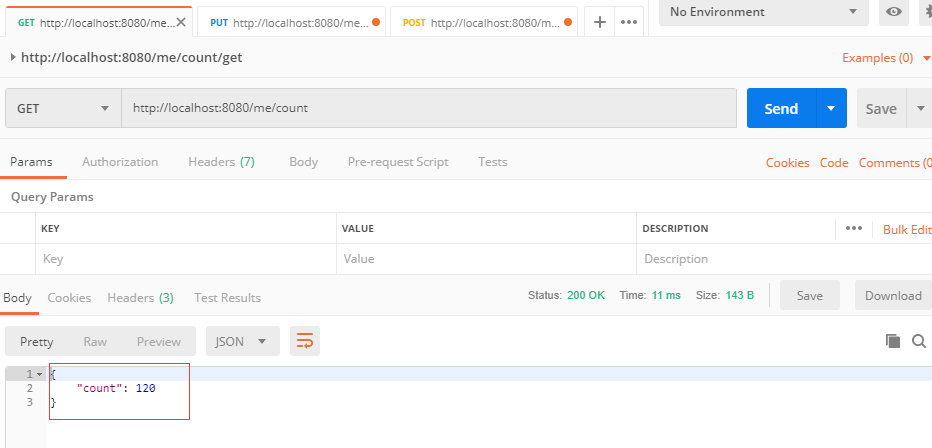
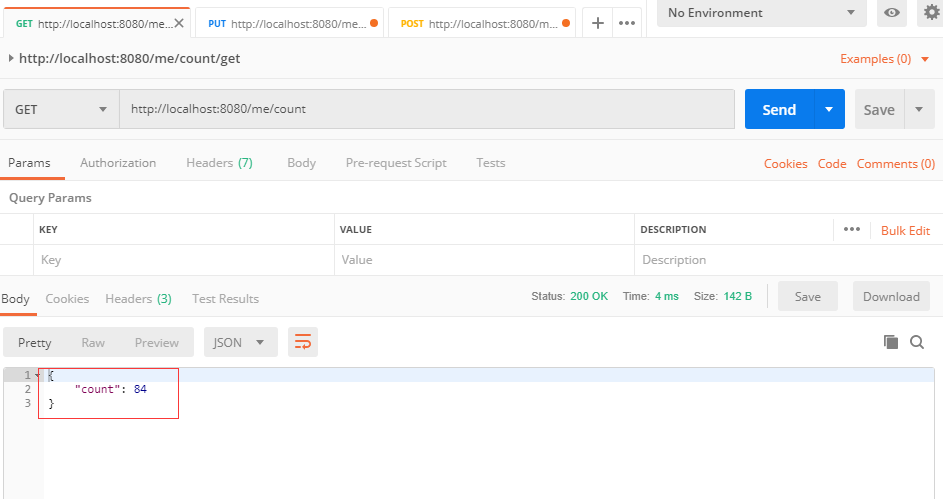
查询接口,服务启动,count默认就是0:

初始化:
再次使用查询接口:
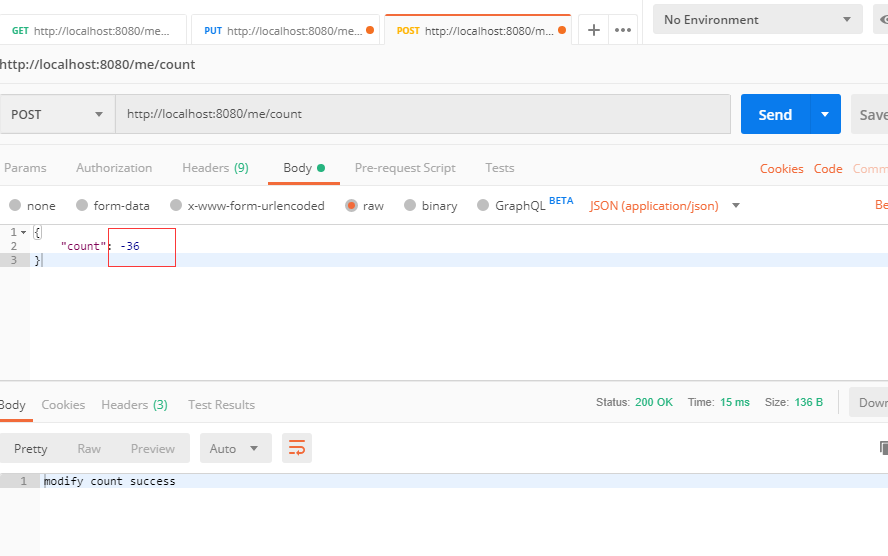
修改接口:
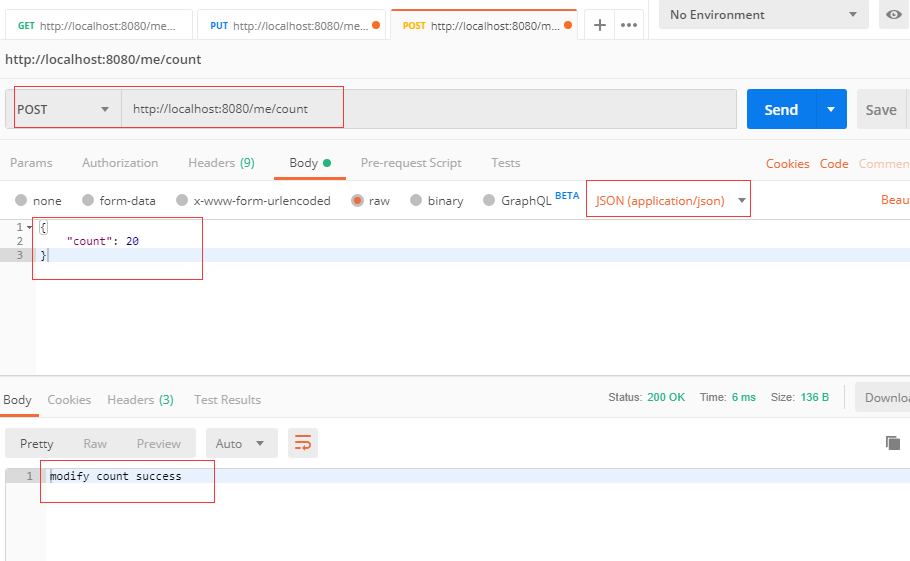
修改后查询:
加一个负数试试:
查询:
OK,使用SpringBoot开发restful风格的接口完成。
时间总是悄悄流逝

 浙公网安备 33010602011771号