


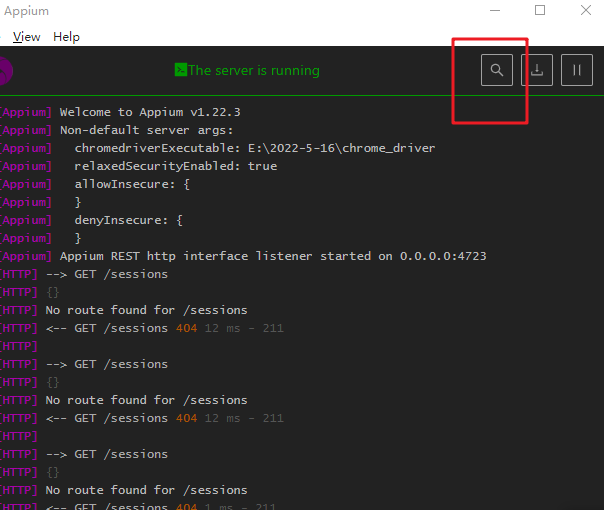
Appium
1. Appium环境搭建
1.1 Appium环境搭建
(1)安装 python的运行环境
(2)安装JDK:下载地址:https://www.oracle.com/java/technologies/javase-downloads.html;配置环境变量:新建系统变量名:JAVA_HOME,变量值:C:\Program Files (x86)\Java\jdk-13.0.2(安装目录),编辑path变量:%JAVA_HOME%\bin
配置环境变量:注意,在安装结束后,需要新建JAVA_HOME环境变量,并将其配置到环境变量PATH中。在本例中,JDK的安装路径为C:\Program Files (x86)\Java\jdk-13.0.2,因此需要在“新建系统变量”对话框中,指定“变量名”为“JAVA_HOME”,设置“变量值”为“C:\Program Files (x86)\Java\jdk-13.0.2”
(3)安装Android SDK:下载地址:https://www.androiddevtools.cn/,配置环境变量:新建系统变量名:ANDROID_SDK_HOME,变量值D:\soft\Android-SDK(安装目录),编辑Path变量:%ANDROID_SDK_HOME%\platform-tools;%ANDROID_SDK_HOME%\tools;%ANDROID_SDK_HOME%\build-tools\29.0.3
(4)安装Appium桌面客户端:下载地址https://github.com/appium/appium-desktop/releases
(5)用命令行安装Python的Appium库
cd /d E:\soft\python3.6\Scripts
pip3 install Appium-Python-Client
(6)安装元素定位工具:打开appium,点击放大镜图标会跳转至Appium Inspector路径,下载最新版本的元素定位工具安装即可。
(7)配置appium server
#查系统版本号
>adb shell getprop ro.build.version.release
10
#查设备详细信息,model是设备名
>adb devices -l
List of devices attached
192.168.10.177:5555    device product:ELE-AL00 model:ELE_AL00 device:HWELE transport_id:3

#打开测试的app,该命令可以获取app的信息,其中com.android.chrome是appPackage,
>adb shell dumpsys activity | findstr "mResume"
    mResumedActivity: ActivityRecord{a9d3ac6 u0 com.android.chrome/com.google.android.apps.chrome.Main t447}
desired_caps={
    "platformName": "Android",
    "platformVersion":"10",
    "deviceName": "ELE_AL00",
    "browserName": "chrome",
    "unicodeKeyboard":True,
    "resetKeyboard":True,
    "appPackage":"com.android.chrome",
    "appActivity":"xxx"
}
(8)使用元素定位工具帮助编程自动化测试程序
在计算机上开启虚拟手机设备或连接真实手机设备(本例中使用虚拟设备),启动Appium,单击右上角的放大镜图标打开Appium检测工具,在JSON Representation区域输入以下内容,如下图所示:

点击Start Session连接测试app开始会话。现在在Android设备中进行操作,进入百度首页,但Appium工具中左侧的界面并不会同步变化,需要在元素定位工具界面上单击刷新按钮,此时工具左侧的界面会刷新。接着单击左侧界面上的任意元素,例如百度搜索文本框,右侧的Selected Element区域会显示该元素的所有属性。这些属性可作为编写客户端代码的参考。如下图所示:

1.2 解决SDK自带的uiautomatorview不支持android9.0+版本
uiautomatorview是Andriod-SDK自带的获取页面元素信息的工具,该工具存放位置:\xxxx\Android-SDK\tools\
当我们使用的android版本太高,使用uiautomatorview会报如下错误:

解决办法:
(1)去该地址下载两个jar文件,https://github.com/yaming116/uiautomatorview/tree/master/jar
(2)cmd 中运行adb push E:\LvmamaXmlKit.jar /data/local/tmp/
(3)将下载的uiautomatorviewer.jar,替换你本地的${ANDROID_HOME}/tools/lib下的uiautomatorviewer.jar
若仍报 该错误,试试如下命令
adb kill-server
adb start-server
2.Appium Inspector基本使用
2.1Appinum Inspector界面按钮详解
通过下图配置后,点击会话,便能使用Appium自己获取元素信息

进入会话后,点击appium inspector工具界面上的刷新按钮,此时工具左侧的界面会刷新,与手机界面同步。

Appium检测工具可执行的操作有3类——界面级操作、设备级操作和会话级操作。接下来先介绍界面级操作。在进行操作之前,可以先单击录制按钮,下图红色框中的就是录制按钮,单击录制按钮后,界面下方将弹出Recorder面板,之后所有对界面的操作都会以代码的形式保存下来。

接下来介绍下面一组按钮的功能:

按钮1::选择元素按钮,Appium检测工具默认会选中此按钮。此按钮处于选中状态时,此时单击左侧界面上的任何一个元素,右侧的Selected Element区域都将显示这个元素的全部属性。右侧的Selected Element区域拥有两个表格,其中第一个表格显示了Find By和Selector两列。该表格中列出的属性是查找元素时推荐使用的条件,可以将其直接用在客户端代码中作为查询条件,而下方拥有Attribute和Value两列的第二个表格主要用于查看元素属性。
按钮2:第二个按钮的功能比较独特,它完全针对手机设备,使用该功能可以在界面上实现滑动效果。此时先单击滑动按钮,然后,在左侧界面选择一个滑动起始点并单击,再选择一个滑动结束点并单击,就会在界面上执行滑动操作,现在,在Recorder面板中,可以看到已经生成了一行操作代码(new TouchAction(driver)) .press(PointOption.point(1708, 254})) .moveTo(PointOption.point(1703, 634})) .release() .perform();
按钮3:该按钮的功能是实现界面单击,这种单击并非单击指定元素,而是基于坐标性质的单击。此时可以单击该按钮,然后在左侧界面中任意位置单击。操作执行后,可以看到Recorder面板为此生成了一条命令。该操作本质上是屏幕坐标式的单击。(new TouchAction(driver)).tap(1753, 467).perform()
接下来介绍下面一组按钮的功能:

按钮1:后退按钮,它的功能和Android系统的后退键完全一致,单击它即可后退。
按钮2:刷新按钮,如果直接在移动设备上操作界面,而不是在Appium检测工具上操作界面,那么Appium检测工具左侧的界面不会同步变化,需要单击刷新按钮才会变化。
按钮3:录制按钮,单击录制按钮后,界面下方将弹出Recorder面板,之后所有对界面的操作都会以代码的形式保存下来。
按钮4:查找元素按钮,该按钮可用于验证界面上是否存在指定条件的元素。在Selector(查询表达式)文本框中,填入Contacts,然后单击Search按钮。如果该元素存在,将进入元素查找结果界面,其中会列出所有匹配条件的元素。在列表中选中某个元素,左侧界面上会高亮显示该元素,同时下方的按钮将会变为启用状态,可以单击元素(单击Tap Element按钮),清空元素内容(单击Clear按钮),输入元素内容(在Enter keys文本框中输入和单击Send Keys按钮)。该功能可以很好地辅助测试代码的编写,可以先通过该功能验证自己输入的定位表达式是否正确,然后再到测试代码中填入已经验证的定位表达式。如下图所示:

按钮5:退出会话按钮,点击该按钮将退出当前会话。
接下来介绍Recoder面板:

下拉框1:Recorder面板支持将录制的操作转换为多种语言,单击语言下拉框可以选择需要的编程语言
按钮1:生成完整的式样代码
按钮2:复制按钮,可将面板生成的代码复制到剪切板,减少代码编写的时间
按钮3:清除按钮,清除Recoder的内容
3. Appium API
#获取webdriver对象的所有属性和方法
from appium import webdriver
import time
desired_caps = dict()
desired_caps['platformName'] =  "Android"
desired_caps['platformVersion'] = '10'
desired_caps['deviceName'] = '192.xxx.xxx.xxx:5555'
driver = webdriver.Remote('http://localhost:4723/wd/hub',desired_caps)
print(driver.__dir__())
官方文档:https://www.kancloud.cn/testerhome/appium_docs_cn/2001819
3.1 API快速入门

3.1.2 获取和操作控件信息的API


>>待补充
3.1.5 appium做UI自动化测试需要考虑的问题
3.2 appium-API总结


Appium_Python_Api 文档

1.contexts

contexts(self):

Returns the contexts within the current session.
返回当前会话中的上下文,使用后可以识别H5页面的控件
:Usage:
driver.contexts
用法 driver.contexts

2. current_context

current_context(self):

Returns the current context of the current session.
返回当前会话的当前上下文
:Usage:
driver.current_context
用法driver. current_context

3. context

context(self):

Returns the current context of the current session.
返回当前会话的当前上下文。
:Usage:
driver.context
用法driver. Context

4. find_element_by_ios_uiautomation

find_element_by_ios_uiautomation(self, uia_string):

Finds an element by uiautomation in iOS.
通过iOS uiautomation查找元素
:Args:
- uia_string - The element name in the iOS UIAutomation library
:Usage:
driver.find_element_by_ios_uiautomation('.elements()[1].cells()[2]')
用法driver.find_element_by_ios_uiautomation(‘elements’)

5. find_element_by_accessibility_id

find_element_by_accessibility_id(self, id):

Finds an element by accessibility id.
通过accessibility id查找元素
:Args:
- id - a string corresponding to a recursive element search using the
Id/Name that the native Accessibility options utilize
:Usage:
driver.find_element_by_accessibility_id()
用法driver.find_element_by_accessibility_id(‘id’)
注意:此处id为UIAutomatorView 获取的该元素的 content-desc 值


6.scroll

scroll(self, origin_el, destination_el):

Scrolls from one element to another
从元素origin_el滚动至元素destination_el
:Args:
- originalEl - the element from which to being scrolling
- destinationEl - the element to scroll to
:Usage:
driver.scroll(el1, el2)
用法 driver.scroll(el1,el2)
示例:
element1 = driver.find_element_by_xpath("//android.widget.TextView[@text='位置信息']")
element2 = driver.find_element_by_xpath("//android.widget.TextView[@text='应用和通知']")
driver.scroll(element1,element2)
注意:scroll方法不能设置持续时间,惯性很大

7. drag_and_drop

drag_and_drop(self, origin_el, destination_el):

Drag the origin element to the destination element
将元素origin_el拖到目标元素destination_el的位置
:Args:
- originEl - the element to drag
- destinationEl - the element to drag to
用法 driver.drag_and_drop(el1,el2)
示例:
element1 = driver.find_element_by_xpath("//android.widget.TextView[@text='位置信息']")
element2 = driver.find_element_by_xpath("//android.widget.TextView[@text='应用和通知']")
driver.drag_and_drop(element1,element2)
注意:drag_and_drop方法,不能设置持续时间,没有惯性

8.tap

tap(self, positions, duration=None):

Taps on an particular place with up to five fingers, holding for a certain time
模拟手指点击(最多五个手指),可设置按住时间长度(毫秒)

:Args:
- positions - an array of tuples representing the x/y coordinates of
the fingers to tap. Length can be up to five.
- duration - (optional) length of time to tap, in ms
:Usage:
driver.tap([(100, 20), (100, 60), (100, 100)], 500)
用法 driver.tap([(x,y),(x1,y1)],500)

9. swipe

swipe(self, start_x, start_y, end_x, end_y, duration=None):

Swipe from one point to another point, for an optional duration.
从A点滑动至B点,滑动时间为毫秒
:Args:
- start_x - x-coordinate at which to start
- start_y - y-coordinate at which to start
- end_x - x-coordinate at which to stop
- end_y - y-coordinate at which to stop
- duration - (optional) time to take the swipe, in ms.
:Usage:
driver.swipe(100, 100, 100, 400)
用法 driver.swipe(x1,y1,x2,y2,500)

注意:swipe实现一个坐标滑动到另一个坐标,只能是两个点之间的滑动。当设置的duration时间较短时,滑动有惯性,当设置的duration时间较长时,无惯性。

10.Class TouchAction
应用场景:TouchAction可以实现一些针对手势的操作,比如滑动、长按、拖动等。我们可以将这些基本的手势组合成一个相对复杂的手势。
使用步骤:
(1)创建TouchAction对象
(2)通过对象调用想执行的手势
(3)通过perform()执行动作
Class TouchAction常用方法:
(1)tap:模拟手指对某个元素或坐标按下并快速抬起。
使用方法:
TouchAction(driver).tap(element=None,x=None,y=None,count=1).perform()
参数:count--点击次数
示例1:
wlan_button = driver.find_element_by_xpath(“//*[@text=’WLAN’]”)
TouchAction(driver).tap(wlan_button).perform()
示例2:
TouchAction(driver).tap(x=100,y=100).perform()
(2)press:模拟手指一直按下;release:模拟手指释放
使用方法:
TouchAction(driver).press(el=None,x=None,y=None).perform()
TouchAction(driver).press("").release().perform()#组合实现按下并抬起
(3)wait:模拟手指等待,比如按下等待5秒钟之后再抬起
使用方法:
TouchAction(driver).wait(ms=0).perfrom()
参数:
ms: 暂停的毫秒数
示例:
TouchAction(driver).press("").wait(2000).perform()#组合实现长按2s释放
(4)long_press:模拟手指长按
使用方法:
TouchAction(driver).long_press(el=None,x=None,y=None,duration=1000).perform()
参数:duration:长按持续时间
(4)move_to:模拟手指触屏移动
使用方法:
TounchAction(driver).move_to(el=None,x=None,y=None).perform()

11.flick

flick(self, start_x, start_y, end_x, end_y):

Flick from one point to another point.
按住A点后快速滑动至B点
:Args:
- start_x - x-coordinate at which to start
- start_y - y-coordinate at which to start
- end_x - x-coordinate at which to stop
- end_y - y-coordinate at which to stop
:Usage:
driver.flick(100, 100, 100, 400)
用法 driver.flick(x1,y1,x2,y2)

12.pinch

pinch(self, element=None, percent=200, steps=50):

Pinch on an element a certain amount
在元素上执行模拟双指捏(缩小操作)
:Args:
- element - the element to pinch
- percent - (optional) amount to pinch. Defaults to 200%
- steps - (optional) number of steps in the pinch action
:Usage:
driver.pinch(element)
用法 driver.pinch(element)

13.zoom

zoom(self, element=None, percent=200, steps=50):

Zooms in on an element a certain amount
在元素上执行放大操作
:Args:
- element - the element to zoom
- percent - (optional) amount to zoom. Defaults to 200%
- steps - (optional) number of steps in the zoom action
:Usage:
driver.zoom(element)
用法 driver.zoom(element)

14.reset

reset(self):

Resets the current application on the device.
重置应用(类似删除应用数据)
用法 driver.reset()

15. hide_keyboard

hide_keyboard(self, key_name=None, key=None, strategy=None):

Hides the software keyboard on the device. In iOS, use `key_name` to press a particular key, or `strategy`. In Android, no parameters are used.
隐藏键盘,iOS使用key_name隐藏,安卓不使用参数

:Args:
- key_name - key to press
- strategy - strategy for closing the keyboard (e.g., `tapOutside`)
driver.hide_keyboard()

16. keyevent

keyevent(self, keycode, metastate=None):

Sends a keycode to the device. Android only. Possible keycodes can be found in http://developer.android.com/reference/android/view/KeyEvent.html.
发送按键码(安卓仅有),按键码可以上网址中找到
:Args:
- keycode - the keycode to be sent to the device
- metastate - meta information about the keycode being sent
用法 dr.keyevent(‘4’)

17. press_keycode

press_keycode(self, keycode, metastate=None):

Sends a keycode to the device. Android only. Possible keycodes can be found in http://developer.android.com/reference/android/view/KeyEvent.html.
发送按键码(安卓仅有),按键码可以上网址中找到

:Args:
- keycode - the keycode to be sent to the device
- metastate - meta information about the keycode being sent
用法 driver.press_ keycode(‘4’)
dr.keyevent(‘4’) 与 driver.press_ keycode(‘4’) 功能实现上一样的,都是按了返回键

18. long_press_keycode

long_press_keycode(self, keycode, metastate=None):

Sends a long press of keycode to the device. Android only. Possible keycodes can be
found in http://developer.android.com/reference/android/view/KeyEvent.html.
发送一个长按的按键码(长按某键)
详细的按键代码见这里 http://developer.android.com/reference/android/view/KeyEvent.html.

:Args:
- keycode - the keycode to be sent to the device
- metastate - meta information about the keycode being sent
用法 driver.long_press_keycode(4) 谢谢@user3童鞋反馈

19.current_activity

current_activity(self):

Retrieves the current activity on the device.
获取当前的activity名
用法 print(driver.current_activity)

20.current_package

current_package(self: T) -> str:

"""Retrieves the current package running on the device."""
获取当前的package名
用法print(driver.current_package)

21. wait_activity

wait_activity(self, activity, timeout, interval=1):

Wait for an activity: block until target activity presents or time out.
This is an Android-only method.
等待指定的activity出现直到超时,interval为扫描间隔1秒
即每隔几秒获取一次当前的activity
返回的True 或 False
:Agrs:
- activity - target activity
- timeout - max wait time, in seconds
- interval - sleep interval between retries, in seconds
用法driver.wait_activity(‘.activity.xxx’,5,2)

22.implicitly_wait

implicitly_wait(self, time_to_wait):
"""
Sets a sticky timeout to implicitly wait for an element to be found,
or a command to complete. This method only needs to be called one
time per session. To set the timeout for calls to execute_async_script, see set_script_timeout.
:Args:
- time_to_wait: Amount of time to wait (in seconds)
:Usage:
driver.implicitly_wait(30)
"""
该方法针对所有元素定位的方法设置同一个超时等待时间,后续所有的定位元素方法都会在这个时间内等待元素出现,超出时长未定位到元素抛出NoSuchElementException异常。
23.class WebDriverWait(object):
def __init__(self, driver, timeout, poll_frequency=POLL_FREQUENCY, ignored_exceptions=None):

"""Constructor, takes a WebDriver instance and timeout in seconds.
:Args:
- driver - Instance of WebDriver (Ie, Firefox, Chrome or Remote)
- timeout - Number of seconds before timing out
- poll_frequency - sleep interval between calls
By default, it is 0.5 second.
- ignored_exceptions - iterable structure of exception classes ignored during calls.
By default, it contains NoSuchElementException only.

Example:
from selenium.webdriver.support.ui import WebDriverWait \n
element = WebDriverWait(driver, 10).until(lambda x: x.find_element_by_id("someId")) \n
is_disappeared = WebDriverWait(driver, 30, 1, (ElementNotVisibleException)).\ \n
until_not(lambda x: x.find_element_by_id("someId").is_displayed())
"""
'''
driver:传入的webDriver实例
timeout:超时时间,等待的最长时间(同时要考虑隐性等待时间)
poll_frequency:调用until或until_not中的方法的间隔时间,默认是0.5s
ignored_exceptions:忽略的异常,如果在调用until或者until_not的过程中抛出这个元组中的异常,则不中断代码,继续等待,
如果抛出这个元组外的异常,则中断代码,抛出异常。默认只有NoSuchElementException
until method:在等待期间,每隔一段时间调用这个传入的方法,直到返回值不是False
message:如果超时,抛出TimeOutException,将message传入异常
until_not与until相反,until是当什么元素出现或什么条件成立则继续执行。
'''
#使用方法:WebDriverWait(driver,超时时长,调用频率,忽略异常).until(可执行方法,超时返回的信息)
# expected_conditions是selenium的一个模块,其中包含一系列可用于判断的条件可作为可执行方法:
#方法 说明
#title_is(title) 判断当前的title是否完全等于预期字符串,返回布尔值,title:期望的页面标题
#title_contains(title) 判断当前界面的title是否包含预期字符串,返回布尔值,title:期望的页面标题
#presence_of_element_located(locator) 判断某个元素是否被加到了dom树里,并不代表该元素一定可见,locator:元素的定位信息
#visibility_of_element_located(locator) 判断元素是否可见(可见代表元素非隐藏,并且元素宽和高都不为0),locator:元素的定位信息
#visibility_of(element) 同上一方法,element:所获得的元素
#url_contains(url) 判断页面网址中是否包含url,url:期望的页面网址
#url_to_be(url) 判断页面网址是否为url,url:期望的页面网址
#url_changes(url) 判断页面网址不是url,url:期望的页面网址
#presence_of_all_elements_located(locator) 判断此定位的一组元素是否至少存在一个,locator:元素的定位信息
#visibility_of_any_elements_located(locator) 判断此定位的一组元素至少有一个可见,locator:元素的定位信息
#visibility_of_all_elements_located(locator) 判断此定位的一组元素全部可见,locator:元素的定位信息
#text_to_be_present_in_element(locator, text_) 判断此定位中是否包含text_的内容,locator:元素的定位信息;text_:期望的文本信息
#text_to_be_present_in_element_value(locator, text_)判断此定位中的value属性中是否包含text_的内容,locator:元素的定位信息;text_:期望的文本信息
#frame_to_be_available_and_switch_to_it(locator) 判断定位的元素是否为frame,并直接切换到这个frame中,locator:元素的定位信息
#invisibility_of_element_located(locator) 判断定位的元素是否不可见,locator:元素的定位信息
#invisibility_of_element(element) 判断此元素是否不可见,element:所获得的元素
#element_to_be_clickable(locator) 判断所定位的元素是否可见且可点击,locator:元素的定位信息
#staleness_of(element) 判断此元素是否不可用,element:所获得的元素
#element_to_be_selected(element) 判断该元素是否被选中,element:所获得的元素
#element_located_to_be_selected(locator) 判断定位的元素是否被选中,locator:元素的定位信息
#element_selection_state_to_be(element,Boolean) 判断该元素被选中状态是否和期望状态相同element:所获得的元素,Boolean:期望的状态(True/False)
# element_located_selection_state_to_be(locator,Boolean) 判断定位的元素被选中状态是否和期望状态相同,locator:元素的定位信息,Boolean:期望的状态(True/False)
该类实现显示等待,设置一个超时等待时间,在这个超时等待时间内进行查找元素,默认每0.5S找一次定位元素,0.5S的频率可以设置,一但找到这个元素,直接进行后续操作,如果没找到,报错:TimeOutException
用法示例:
from appium import webdriver
from selenium.webdriver.support.wait import WebDriverWait
desired_caps = dict()
desired_caps['platformName'] = "Android"
desired_caps['platformVersion'] = "10"
desired_caps['deviceName'] = '192.168.31.5:5555
driver = webdriver.Remote('http://localhost:4723/wd/hub',desired_caps)
wait = WebDriverWait(driver,25,1)
element = wait.until(lambda x: x.find_element_by_xpath("//android.widget.TextView[@text='显示']"))
element.click()
#element = WebDriverWait(driver,25,1).until(method = lambda x: x.find_element_by_xpath("//android.widget.TextView[@text='显示']"),message='Not find this element')
#print(WebDriverWait(driver,25,1).until(EC.text_to_be_present_in_element(('xpath',"//android.widget.TextView[@text='显示']"),'显示')))


24. background_app

background_app(self, seconds):

Puts the application in the background on the device for a certain duration.
后台运行app多少秒
:Args:
- seconds - the duration for the application to remain in the background
用法 driver.background_app(5) 置后台5秒后再运行

25.is_app_installed

is_app_installed(self, bundle_id):

Checks whether the application specified by `bundle_id` is installed on the device.
检查app是否有安装
返回 True or False
:Args:
- bundle_id - the id of the application to query
用法 driver.is_app_installed(“com.xxxx”)

26.install_app

install_app(self, app_path):

Install the application found at `app_path` on the device.
安装app,app_path为安装包路径
:Args:
- app_path - the local or remote path to the application to install
用法 driver.install_app(app_path)

27.remove_app

remove_app(self, app_id):

Remove the specified application from the device.
删除app
:Args:
- app_id - the application id to be removed
用法 driver.remove_app(“com.xxx.”)

28.launch_app
launch_app(self):

Start on the device the application specified in the desired capabilities.
启动app
用法 driver.launch_app()

29.close_app
close_app(self):

Stop the running application, specified in the desired capabilities, on the device.
关闭app
用法 driver.close_app()
启动和关闭app运行好像会出错

30. start_activity

start_activity(self, app_package, app_activity, **opts):

Opens an arbitrary activity during a test. If the activity belongs to
another application, that application is started and the activity is opened.

This is an Android-only method.
在测试过程中打开任意活动。如果活动属于另一个应用程序,该应用程序的启动和活动被打开。
这是一个安卓的方法
:Args:
- app_package - The package containing the activity to start.
- app_activity - The activity to start.
- app_wait_package - Begin automation after this package starts (optional).
- app_wait_activity - Begin automation after this activity starts (optional).
- intent_action - Intent to start (optional).
- intent_category - Intent category to start (optional).
- intent_flags - Flags to send to the intent (optional).
- optional_intent_arguments - Optional arguments to the intent (optional).
- stop_app_on_reset - Should the app be stopped on reset (optional)?
用法 driver.start_activity(app_package, app_activity)

31.lock

lock(self, seconds):

Lock the device for a certain period of time. iOS only.
锁屏一段时间 iOS专有
:Args:
- the duration to lock the device, in seconds
用法 driver.lock()

32.shake

shake(self):

Shake the device.
摇一摇手机
用法 driver.shake()

33.open_notifications

open_notifications(self):

Open notification shade in Android (API Level 18 and above)
打系统通知栏(仅支持API 18 以上的安卓系统)
用法 driver.open_notifications()

34.network_connection

network_connection(self):

Returns an integer bitmask specifying the network connection type.
Android only.
返回网络类型 数值
返回数字 1:飞行模式 2:只开wifi 4:只开流量 6:网络全开
Possible values are available through the enumeration `appium.webdriver.ConnectionType`

用法 driver.network_connection

35. set_network_connection

set_network_connection(self, connectionType):

Sets the network connection type. Android only.
Possible values:
Value (Alias) | Data | Wifi | Airplane Mode
-------------------------------------------------
0 (None) | 0 | 0 | 0
1 (Airplane Mode) | 0 | 0 | 1
2 (Wifi only) | 0 | 1 | 0
4 (Data only) | 1 | 0 | 0
6 (All network on) | 1 | 1 | 0
These are available through the enumeration `appium.webdriver.ConnectionType`
设置网络类型
:Args:
- connectionType - a member of the enum appium.webdriver.ConnectionType

用法 先加载from appium.webdriver.connectiontype import ConnectionType
dr.set_network_connection(ConnectionType.WIFI_ONLY)
ConnectionType的类型有
NO_CONNECTION = 0
AIRPLANE_MODE = 1
WIFI_ONLY = 2
DATA_ONLY = 4
ALL_NETWORK_ON = 6

36. available_ime_engines

available_ime_engines(self):

Get the available input methods for an Android device. Package and activity are returned (e.g., ['com.android.inputmethod.latin/.LatinIME'])
Android only.
返回安卓设备可用的输入法
用法print(driver.available_ime_engines)

37.is_ime_active

is_ime_active(self):

Checks whether the device has IME service active. Returns True/False.
Android only.
检查设备是否有输入法服务活动。返回真/假。

安卓
用法 print(driver.is_ime_active())

38.activate_ime_engine

activate_ime_engine(self, engine):

Activates the given IME engine on the device.
Android only.
激活安卓设备中的指定输入法,设备可用输入法可以从“available_ime_engines”获取
:Args:
- engine - the package and activity of the IME engine to activate (e.g.,
'com.android.inputmethod.latin/.LatinIME')

用法 driver.activate_ime_engine(“com.android.inputmethod.latin/.LatinIME”)

39.deactivate_ime_engine

deactivate_ime_engine(self):

Deactivates the currently active IME engine on the device.
Android only.
关闭安卓设备当前的输入法
用法 driver.deactivate_ime_engine()

40.active_ime_engine

active_ime_engine(self):

Returns the activity and package of the currently active IME engine (e.g.,
'com.android.inputmethod.latin/.LatinIME').
Android only.
返回当前输入法的包名
用法 driver.active_ime_engine

41. toggle_location_services

toggle_location_services(self):

Toggle the location services on the device. Android only.
打开安卓设备上的位置定位设置
用法 driver.toggle_location_services()

42.set_location

set_location(self, latitude, longitude, altitude):

Set the location of the device
设置设备的经纬度
:Args:
- latitude纬度 - String or numeric value between -90.0 and 90.00
- longitude经度 - String or numeric value between -180.0 and 180.0
- altitude海拔高度- String or numeric value
用法 driver.set_location(纬度,经度,高度)

43.tag_name
tag_name(self):

This element's ``tagName`` property.
返回元素的tagName属性
经实践返回的是class name
用法 element.tag_name

44.text

text(self):

The text of the element.
返回元素的文本值
用法 element.text

45.click
click(self):

Clicks the element.
点击元素
用法 element.click()

46.submit

submit(self):

Submits a form.
提交表单
用法 暂无

47.clear

clear(self):

Clears the text if it's a text entry element.
清除输入的内容
用法 element.clear()

48.get_attribute

get_attribute(self, name):
详见@chenhengjie123 的超级链接

Gets the given attribute or property of the element.
1、获取 content-desc 的方法为 get_attribute("name") ,而且还不能保证返回的一定是 content-desc (content-desc 为空时会返回 text 属性值)
2、get_attribute 方法不是我们在 uiautomatorviewer 看到的所有属性都能获取的(此处的名称均为使用 get_attribute 时使用的属性名称):
可获取的:
字符串类型:
name(返回 content-desc 或 text)
text(返回 text)
className(返回 class,只有 API=>18 才能支持)
resourceId(返回 resource-id,只有 API=>18 才能支持)
This method will first try to return the value of a property with the
given name. If a property with that name doesn't exist, it returns the
value of the attribute with the same name. If there's no attribute with
that name, ``None`` is returned.

Values which are considered truthy, that is equals "true" or "false",
are returned as booleans. All other non-``None`` values are returned
as strings. For attributes or properties which do not exist, ``None``
is returned.

:Args:
- name - Name of the attribute/property to retrieve.

Example::

# Check if the "active" CSS class is applied to an element.
is_active = "active" in target_element.get_attribute("class")
用法:
element = driver.find_element_by_xpath("//android.widget.TextView[@text='显示']")
print(element.get_attribute("enabled"))
print(element.get_attribute("text"))
print(element.get_attribute('name'))
print(element.get_attribute('resourceId'))
print(element.get_attribute('className'))
print(element.get_attribute('focused'))


49.is_selected

is_selected(self):

Returns whether the element is selected.

Can be used to check if a checkbox or radio button is selected.
返回元素是否选择。
可以用来检查一个复选框或单选按钮被选中。
用法 element.is_slected()

50.is_enabled
is_enabled(self):

Returns whether the element is enabled.
返回元素是否可用True of False
用法 element.is_enabled()

51.find_element_by_id
find_element_by_id(self, id_):

Finds element within this element's children by ID.
通过元素的ID定位元素
:Args:
- id_ - ID of child element to locate.
用法 driver. find_element_by_id(“id”)

52. find_elements_by_id
find_elements_by_id(self, id_):

Finds a list of elements within this element's children by ID.
通过元素ID定位,含有该属性的所有元素
:Args:
- id_ - Id of child element to find.
用法 driver. find_elements_by_id(“id”)

53. find_element_by_name 1.5 以上的版本已弃用
find_element_by_name(self, name):

Finds element within this element's children by name.
通过元素Name定位(元素的名称属性text)
:Args:
- name - name property of the element to find.
用法 driver.find_element_by_name(“name”)
替代方法 driver.find_element_by_xpath("//*[@text='我的']")

还有其它方法的话欢迎补充

54. find_elements_by_name

find_elements_by_name(self, name):

Finds a list of elements within this element's children by name.
通过元素Name定位(元素的名称属性text),含有该属性的所有元素
:Args:
- name - name property to search for.
用法 driver.find_element_by_name(“name”)

55. find_element_by_link_text
find_element_by_link_text(self, link_text):

Finds element within this element's children by visible link text.
通过元素可见链接文本定位
:Args:
- link_text - Link text string to search for.
用法 driver.find_element_by_link_text(“text”)

56. find_elements_by_link_text

find_elements_by_link_text(self, link_text):

Finds a list of elements within this element's children by visible link text
通过元素可见链接文本定位,含有该属性的所有元素
:Args:
- link_text - Link text string to search for.
用法 driver.find_elements_by_link_text(“text”)

57. find_element_by_partial_link_text

find_element_by_partial_link_text(self, link_text):

Finds element within this element's children by partially visible link text.
通过元素部分可见链接文本定位
:Args:
- link_text - Link text string to search for.
driver. find_element_by_partial_link_text(“text”)


58. find_elements_by_partial_link_text

find_elements_by_partial_link_text(self, link_text):

Finds a list of elements within this element's children by link text.
通过元素部分可见链接文本定位,含有该属性的所有元素
:Args:
- link_text - Link text string to search for.
driver. find_elements_by_partial_link_text(“text”)

59. find_element_by_tag_name

find_element_by_tag_name(self, name):

Finds element within this element's children by tag name.
通过查找html的标签名称定位元素
:Args:
- name - name of html tag (eg: h1, a, span)
用法 driver.find_element_by_tag_name(“name”)

60. find_elements_by_tag_name

find_elements_by_tag_name(self, name):

Finds a list of elements within this element's children by tag name.
通过查找html的标签名称定位所有元素
:Args:
- name - name of html tag (eg: h1, a, span)
用法driver.find_elements_by_tag_name(“name”)

61. find_element_by_xpath

find_element_by_xpath(self, xpath):

Finds element by xpath.
通过Xpath定位元素,详细方法可参阅http://www.w3school.com.cn/xpath/
:Args:
xpath - xpath of element to locate. "//input[@class='myelement']"

Note: The base path will be relative to this element's location.

This will select the first link under this element.

::

myelement.find_elements_by_xpath(".//a")

However, this will select the first link on the page.

::

myelement.find_elements_by_xpath("//a")

用法 find_element_by_xpath(“//*”)

62. find_elements_by_xpath

find_elements_by_xpath(self, xpath):

Finds elements within the element by xpath.

:Args:
- xpath - xpath locator string.

Note: The base path will be relative to this element's location.

This will select all links under this element.

::

myelement.find_elements_by_xpath(".//a")

However, this will select all links in the page itself.

::

myelement.find_elements_by_xpath("//a")

用法find_elements_by_xpath(“//*”)

63. find_element_by_class_name

find_element_by_class_name(self, name):

Finds element within this element's children by class name.
通过元素class name属性定位元素
:Args:
- name - class name to search for.
用法 driver. find_element_by_class_name(“android.widget.LinearLayout”)

64. find_elements_by_class_name

find_elements_by_class_name(self, name):

Finds a list of elements within this element's children by class name.
通过元素class name属性定位所有含有该属性的元素
:Args:
- name - class name to search for.
用法 driver. find_elements_by_class_name(“android.widget.LinearLayout”)

65. find_element_by_css_selector

find_element_by_css_selector(self, css_selector):

Finds element within this element's children by CSS selector.
通过CSS选择器定位元素
:Args:
- css_selector - CSS selctor string, ex: 'a.nav#home'

注意:如果使用find_element_by_xx方法,如果传入一个没有的特征,会报NoSuchElementException的错误。如果使用find_elements_by_xx方法,如果传入一个没有的特征,不会报错,会返回一个空列表。

66.send_keys

send_keys(self, *value):

Simulates typing into the element.
在元素中模拟输入(开启appium自带的输入法并配置了appium输入法后,可以输入中英文)
:Args:
- value - A string for typing, or setting form fields. For setting
file inputs, this could be a local file path.

Use this to send simple key events or to fill out form fields::

form_textfield = driver.find_element_by_name('username')
form_textfield.send_keys("admin")

This can also be used to set file inputs.

::

file_input = driver.find_element_by_name('profilePic')
file_input.send_keys("path/to/profilepic.gif")
# Generally it's better to wrap the file path in one of the methods
# in os.path to return the actual path to support cross OS testing.
# file_input.send_keys(os.path.abspath("path/to/profilepic.gif"))
driver.element.send_keys(“中英”)
注意此外要输入中文,可添加如下两行代码:
desire_caps['unicodeKeyboard'] = True
desire_caps['resetKeyboard'] = True

67. is_displayed

is_displayed(self):

Whether the element is visible to a user.
此元素用户是否可见。简单地说就是隐藏元素和被控件挡住无法操作的元素(仅限 Selenium,appium是否实现了类似功能不是太确定)这一项都会返回 False

用法 driver.element.is_displayed()

68. location_once_scrolled_into_view

location_once_scrolled_into_view(self):

"""THIS PROPERTY MAY CHANGE WITHOUT WARNING. Use this to discover
where on the screen an element is so that we can click it. This method
should cause the element to be scrolled into view.

Returns the top lefthand corner location on the screen, or ``None`` if
the element is not visible.
暂不知道用法
"""
69.size

size(self):

The size of the element.
获取元素的大小(高和宽)

new_size["height"] = size["height"]
new_size["width"] = size["width"]

用法 driver.element.size

70. value_of_css_property

value_of_css_property(self, property_name):

The value of a CSS property.
CSS属性

用法 暂不知

71.location

location(self):

The location of the element in the renderable canvas.
获取元素左上角的坐标

用法 driver.element.location
'''返回element的x坐标, int类型'''
driver.element.location.get('x')
'''返回element的y坐标, int类型'''
driver.element.location.get('y')

72.rect

rect(self):

A dictionary with the size and location of the element.
元素的大小和位置的字典

73. get_screenshot_as_base64

screenshot_as_base64(self):

Gets the screenshot of the current window as a base64 encoded string
which is useful in embedded images in HTML.
获取当前元素的截图为Base64编码的字符串,在HTML中嵌入的图像
:Usage:
img_b64 = element.get_screenshot_as_base64

74.execute_script

execute_script(self, script, *args):

Synchronously Executes JavaScript in the current window/frame.
在当前窗口/框架(特指 Html 的 iframe )同步执行 javascript 代码。你可以理解为如果这段代码是睡眠5秒,这五秒内主线程的 javascript 不会执行
:Args:
- script: The JavaScript to execute.
- \*args: Any applicable arguments for your JavaScript.

:Usage:
driver.execute_script('document.title')

75.execute_async_script

execute_async_script(self, script, *args):

Asynchronously Executes JavaScript in the current window/frame.
插入 javascript 代码,只是这个是异步的,也就是如果你的代码是睡眠5秒,那么你只是自己在睡,页面的其他 javascript 代码还是照常执行
:Args:
- script: The JavaScript to execute.
- \*args: Any applicable arguments for your JavaScript.

:Usage:
driver.execute_async_script('document.title')

76.current_url

current_url(self):

Gets the URL of the current page.
获取当前页面的网址。
:Usage:
driver.current_url
用法 driver.current_url

77. page_source

page_source(self):

Gets the source of the current page.
获取当前页面的源。
:Usage:
driver.page_source

78.close

close(self):

Closes the current window.
关闭当前窗口
:Usage:
driver.close()

79.quit

quit(self):

Quits the driver and closes every associated window.
退出脚本运行并关闭每个相关的窗口连接
:Usage:
driver.quit()

80.get_screenshot_as_file

get_screenshot_as_file(self, filename):

Gets the screenshot of the current window. Returns False if there is
any IOError, else returns True. Use full paths in your filename.
截取当前窗口的截图,如果有写入错误会返回False,其它返回True
filename 使用绝对路径
:Args:
- filename: The full path you wish to save your screenshot to.

:Usage:
driver.get_screenshot_as_file('c:/foo.png')

81.get_window_size

get_window_size(self, filename):

Gets the width and height of the current window.
获取当前屏幕的分辨率(长和宽)
:Usage:
driver.get_window_size()
示例:
Print(driver.get_window_size()[“width”])
Print(driver.get_window_size()[“height”])
#coding=utf-8
# #Appium基础操作
from appium import webdriver
from selenium.webdriver.support.wait import WebDriverWait
from appium.webdriver.common.touch_action import TouchAction

import time
desired_caps = dict()
#指定移动操作系统平台,不区分大小写,如 iOS,Android 或 FirefoxOS
desired_caps['platformName'] =  "Android"
#指定移动操作系统版本
desired_caps['platformVersion'] = '10'
#指定移动设备或模拟器的种类
desired_caps['deviceName'] = '192.168.31.5:5555'#需要通过adb命令adb tcpip 5555(确定手机端和电脑端的wifi通讯端口)
#send_keys输入中文设置代码
desired_caps['unicodeKeyboard'] = True
desired_caps['resetKeyboard'] = True
# #指定 app 程序包名
# desired_caps['appPackage'] = 'tv.danmaku.bili'#通过adb shell dumpsys window  | findstr mFocusedApp命令获取包名
# #指定启动页的名字
# desired_caps['appActivity'] = '.ui.splash.SplashActivity'
#desired_caps['udid']='8KE5T19911007558'#指定在哪台设备运行命令,可以通过adb devices获取设备的唯一标志符udid
#启动 app
driver = webdriver.Remote('http://localhost:4723/wd/hub',desired_caps)
# driver.quit()
'''
API for appium
'''
# 1.contexts(self):返回当前会话中的上下文,使用后可以识别H5页面的控件.
# 返回内容['NATIVE_APP', 'WEBVIEW_com.sxxxxx.xxx']
print(driver.contexts)

#2.current_context(self):返回当前会话的当前上下文
print(driver.current_context)

#3.context(self):返回当前会话的当前上下文
print(driver.context)

#4.APP的安装、卸载、启用、关闭与隐藏
#(1)install_app(self, app_path): 安装app,app_path为安装包路径,路径可以是相连接的计算机路径,也可以是设备路径
driver.install_app(r'E:\test_tools\base.apk')

#(2)is_app_installed(self, "appPackage名称"): 检查app是否有安装,返回 True or False
driver.is_app_installed('tv.danmaku.bili')

#(3)remove_app(self,"appPackage名称"):删除app
driver.remove_app('com.pandavpn.androidproxy')

#(4)activate_app(self,"appPackage名称")#启动app,这种方式启动不需要appActivity
driver.activate_app("appPackege名称")

#(5)query_app_state(self,"appPackage名称"):查看App状态,返回值为数字,0表示未安装,1表示未运行,2表示在后台驻留但已经终止运行,3表示已运行在后台,4表示运行在前台
driver.query_app_state("appPackage")

#(6)background_app(self, seconds):后台运行app多少秒后再前台运行
driver.background_app(5)

#(7)terminate_app(self,"appPackage名称");终止运行指定App
driver.terminate_app("appPackage名称")

#############################################################################################
#操作desired_capabilities中指定的App
#如果已经在desired_capabilities中指定过appPackage和appActivity,则可以通过以下函数操作该App。

#(8)launch_app(self):启动desired_capabilities中指定的App
driver.launch_app()

#(9).close_app(self):关闭desired_capabilities中指定的App
#注意:如果实例化的driver是打开的桌面,并不是应用,此时使用 close_app()是关闭的桌面,跟没有关闭一样;
driver.close_app()

#(10)reset(self):重启desired_capabilities中指定的App
driver.reset()

#5.操作及获取当前的appPackage和appActivity

#在Appium中可以直接启动指定的appPackage和appActivity,无须通过desired_capabilities指定。
#除了通过activate_app函数启动App,还可以通过以下函数启动App,或者等待App的Activity位于指定的appActivity。

#(1)start_activity(self, "app_package", "app_activity", **opts):在测试过程中打开任意活动。
driver.start_activity(app_package= 'com.android.camera2',app_activity = 'com.android.camera.CameraLauncher')
#打开第三方安装的软件,需要先取得root权限,命令行adb root
driver.start_activity('tv.danmaku.bili','.MainActivityV2')

#(2)wait_avtivity(self,"appActivity属性",等待的秒数)
driver.wait_avtivity("tv.danmaku.bili",10)

#(3)current_activity(self): 获取当前正在运行的appActivity名
print(driver.current_activity)

#(4)current_package(self) 获取当前正在运行的appPackage
print(driver.current_package)

from appium import webdriver
server='http://localhost:6000/wd/hub'
desired_caps={
  "platformName": "Android",
  "deviceName": "Any"
}

driver = webdriver.Remote(server, desired_caps)

print("启动短信App前的appPackage:", driver.current_package)
print("启动短信App前的appActivity:", driver.current_activity)
driver.start_activity("com.google.android.apps.messaging", ".ui.ConversationListActivity")
driver.wait_activity(".ui.ConversationListActivity", 10)
print("启动短信App后的appPackage:", driver.current_package)
print("启动短信App后的appActivity:", driver.current_activity)


# 6.find_element_by_accessibility_id(self, id):此处id值为 UIAutomatorView 获取的该元素的 content-desc 值
element = driver.find_element_by_accessibility_id('首页')

#7.scroll(self, origin_el, destination_el): 从元素origin_el滚动至元素destination_el
# 注意scroll方法不能设置持续时间,惯性很大
element1 = driver.find_element_by_xpath("//android.widget.TextView[@text='位置信息']")
element2 = driver.find_element_by_xpath("//android.widget.TextView[@text='应用和通知']")
driver.scroll(element1,element2)

#8.drag_and_drop(self, origin_el, destination_el):将元素origin_el拖到目标元素destination_el的位置
# 注意:drag_and_drop方法,不能设置持续时间,没有惯性
driver.drag_and_drop(element1,element2)

#9.swipe(self, start_x, start_y, end_x, end_y, duration=None):从A点滑动至B点,滑动时间为毫秒
#注意:当设置的duration时间较短时,滑动有惯性,当设置的duration时间较长时,无惯性。
driver.swipe(153,1274,153,499,1000)

#10.Class TouchAction: TouchAction可以实现一些针对手势的操作,比如滑动、长按、拖动等。
# (1)tap:模拟手指对某个元素或坐标按下并快速抬起。参数:count--点击次数
# 使用方法:TouchAction(driver).tap(element=None,x=None,y=None,count=1).perform()
wlan_button = driver.find_element_by_xpath("//android.widget.TextView[@text='WLAN、流量使用和热点']")
TouchAction(driver).tap(wlan_button).perform()
# (2)press:模拟手指一直按下;release:模拟手指释放
# 使用方法:TouchAction(driver).press(el=None,x=None,y=None).perform()
TouchAction(driver).press(wlan_button).release().perform()#组合实现按下并抬起
# (3)wait:模拟手指等待,比如按下等待5秒钟之后再抬起
# 使用方法:TouchAction(driver).wait(ms=0).perfrom()
TouchAction(driver).press(wlan_button).wait(2000).release().perform()
# (4)long_press:模拟手指长按
# 使用方法:TouchAction(driver).long_press(el=None,x=None,y=None,duration=1000).perform()
# 参数:duration:长按持续时间
TouchAction(driver).long_press(wlan_button).perform()
# (4)move_to:模拟手指触屏移动
# 使用方法:TounchAction(driver).move_to(el=None,x=None,y=None).perform()
ele1 = driver.find_element_by_xpath("//android.widget.TextView[@text='存储']")
ele2 = driver.find_element_by_xpath("//android.widget.TextView[@text='应用和通知']")
TouchAction(driver).press(ele1).wait(2000).move_to(ele2).release().perform()

#11.flick(self, start_x, start_y, end_x, end_y): 按住A点后快速滑动至B点
driver.flick(495, 1530, 495, 433)

# 12.reset(self) 重置应用(类似删除应用数据)
driver.reset()

#13.hide_keyboard(self, key_name=None, key=None, strategy=None) 隐藏键盘,iOS使用key_name隐藏,安卓不使用参数
driver.hide_keyboard()

#14.keyevent(self, keycode, metastate=None) 发送按键码(安卓仅有)
driver.keyevent(4)#返回键

#15.press_keycode(self, keycode, metastate=None): 发送按键码(安卓仅有)
driver.press_keycode(4)

#16.long_press_keycode(self, keycode, metastate=None): 发送一个长按的按键码(长按某键)
driver.long_press_keycode(4)


#17.wait_activity(self, activity, timeout, interval=1):等待指定的activity出现直到超时,interval为扫描间隔1秒
# 即每隔几秒获取一次当前的activity,返回的True 或 False
print(driver.wait_activity('.MainActivityV2',5,1))

#18.implicitly_wait(self, time_to_wait):
'''
由webdriver提供的方法,一旦设置,这个隐式等待会在WebDriver对象实例的整个生命周期起作用,
它不针对某一个元素,是全局元素等待,即在定位元素时,需要等待页面全部元素加载完成,才会执行下一个语句。
如果超出了设置时间的则抛出异常。
driver.implicitly_wait(3)
'''
driver.implicitly_wait(3)

#19.webDriverWait(driver,timeout,poll_frequency=0.5,ignored_exception=None)
'''
driver:传入的webDriver实例
timeout:超时时间,等待的最长时间(同时要考虑隐性等待时间)
poll_frequency:调用until或until_not中的方法的间隔时间,默认是0.5s
ignored_exceptions:忽略的异常,如果在调用until或者until_not的过程中抛出这个元组中的异常,则不中断代码,继续等待,
如果抛出这个元组外的异常,则中断代码,抛出异常。默认只有NoSuchElementException
until method:在等待期间,每隔一段时间调用这个传入的方法,直到返回值不是False
message:如果超时,抛出TimeOutException,将message传入异常
until_not与until相反,until是当什么元素出现或什么条件成立则继续执行。
'''
#使用方法:WebDriverWait(driver,超时时长,调用频率,忽略异常).until(可执行方法,超时返回的信息)
# expected_conditions是selenium的一个模块,其中包含一系列可用于判断的条件可作为可执行方法:
#方法                                              说明
#title_is(title)                                判断当前的title是否完全等于预期字符串,返回布尔值,title:期望的页面标题
#title_contains(title)                          判断当前界面的title是否包含预期字符串,返回布尔值,title:期望的页面标题
#presence_of_element_located(locator)           判断某个元素是否被加到了dom树里,并不代表该元素一定可见,locator:元素的定位信息
#visibility_of_element_located(locator)         判断元素是否可见(可见代表元素非隐藏,并且元素宽和高都不为0),locator:元素的定位信息
#visibility_of(element)                         同上一方法,element:所获得的元素
#url_contains(url)                              判断页面网址中是否包含url,url:期望的页面网址
#url_to_be(url)                                 判断页面网址是否为url,url:期望的页面网址
#url_changes(url)                               判断页面网址不是url,url:期望的页面网址
#presence_of_all_elements_located(locator)      判断此定位的一组元素是否至少存在一个,locator:元素的定位信息
#visibility_of_any_elements_located(locator)    判断此定位的一组元素至少有一个可见,locator:元素的定位信息
#visibility_of_all_elements_located(locator)    判断此定位的一组元素全部可见,locator:元素的定位信息
#text_to_be_present_in_element(locator, text_)  判断此定位中是否包含text_的内容,locator:元素的定位信息;text_:期望的文本信息
#text_to_be_present_in_element_value(locator, text_)判断此定位中的value属性中是否包含text_的内容,locator:元素的定位信息;text_:期望的文本信息
#frame_to_be_available_and_switch_to_it(locator) 判断定位的元素是否为frame,并直接切换到这个frame中,locator:元素的定位信息
#invisibility_of_element_located(locator)        判断定位的元素是否不可见,locator:元素的定位信息
#invisibility_of_element(element)                判断此元素是否不可见,element:所获得的元素
#element_to_be_clickable(locator)                判断所定位的元素是否可见且可点击,locator:元素的定位信息
#staleness_of(element)                           判断此元素是否不可用,element:所获得的元素
#element_to_be_selected(element)                 判断该元素是否被选中,element:所获得的元素
#element_located_to_be_selected(locator)         判断定位的元素是否被选中,locator:元素的定位信息
#element_selection_state_to_be(element,Boolean)  判断该元素被选中状态是否和期望状态相同element:所获得的元素,Boolean:期望的状态(True/False)
# element_located_selection_state_to_be(locator,Boolean) 判断定位的元素被选中状态是否和期望状态相同,locator:元素的定位信息,Boolean:期望的状态(True/False)

from selenium.webdriver.support.wait import WebDriverWait
from selenium.webdriver.support import expected_conditions as EC

element = WebDriverWait(driver,25,1).until(method = lambda x: x.find_element_by_xpath("//android.widget.TextView[@text='显示']"),message='Not find this element')
print(WebDriverWait(driver,25,1).until(EC.text_to_be_present_in_element(('xpath',"//android.widget.TextView[@text='显示']"),'显示')))


#20.open_notifications(self): 打系统通知栏(仅支持API 18 以上的安卓系统)
driver.open_notifications()

#21.network_connection(self):返回网络类型  数值 ,返回数字 1:飞行模式 2:只开wifi 4:只开流量 6:网络全开
print(driver.network_connection)

#22.set_network_connection(self, connectionType): 设置网络类型,1:飞行模式 2:只开wifi 4:只开流量 6:网络全开
driver.set_network_connection(1)

# 23.available_ime_engines(self):返回安卓设备可用的输入法
f = driver.available_ime_engines

# 24.is_ime_active(self):检查设备是否有输入法服务活动。返回真/假。
g = driver.is_ime_active()

# 25.activate_ime_engine(self, engine):激活安卓设备中的指定输入法,设备可用输入法可以从“available_ime_engines”获取
driver.activate_ime_engine('com.android.inputmethod.latin/.LatinIME')

# 26.deactivate_ime_engine(self):关闭安卓设备当前的输入法
driver.deactivate_ime_engine()

# 27.active_ime_engine(self):返回当前输入法的包名
h = driver.active_ime_engine

# 28.toggle_location_services(self):打开安卓设备上的位置定位设置
driver.toggle_location_services()

# 29.set_location(self, latitude, longtitude, altitude):设置设备的经纬度
driver.set_location(60, 120, 200)

# 30.tag_name(self):返回元素的tagName属性
i = driver.find_element_by_id('id').tag_name

# 31.text(self):返回元素的文本值
j = driver.find_element_by_name('name').text

element = driver.find_element_by_xpath(xpath= "//android.widget.TextView[@text='显示']")
print('className:',element.tag_name,'text:',element.text)

# 32.click(self) 点击元素
driver.find_element_by_class_name('class_name').click()

# 33.submit(self) 提交表单
driver.find_element_by_accessibility_id('id').submit()

# 34.clear(self) 清除输入的内容
driver.find_element_by_id('id').clear()

# 35.get_attribute(self, name) 可获取:字符串类型(name, text, className, resourceId),
# 布尔类型(如果无特殊说明, get_attribute 里面使用的属性名称和 uiautomatorviewer 里面的一致)
element = driver.find_element_by_xpath("//android.widget.TextView[@text='显示']")
print('enabled:',element.get_attribute("enabled"))
print('text:',element.get_attribute("text"))
print('name:',element.get_attribute('name'))
print('resourceId:',element.get_attribute('resourceId'))
print('className:',element.get_attribute('className'))
print('focused:',element.get_attribute('focused'))

# 36.is_selected(self) 返回元素是否选择。可以用来检查一个复选框或单选按钮被选中。
driver.find_element_by_id('id').is_selected()

# 37.is_enabled(self) 返回元素是否可用 True / False
driver.find_element_by_id('id').is_enabled()

# 38.is_displayed(self) 此元素用户是否可见。简单地说就是隐藏元素和被控件挡住无法操作的元素
driver.find_element_by_id('id').is_displayed()

#39.元素定位方法
'''
find_element_by_
find_elements_by_
......
'''
#(1)find_element_by_id(self, id_):通过元素ID定位
#(2)find_elements_by_id(self, id_):
#(3)find_element_by_name(self, name):通过元素Name定位(元素的名称属性text)
#(4)find_elements_by_name(self, name):
#(5)find_element_by_link_text(self, link_text):通过元素可见链接文本定位
#(6)find_elements_by_link_text(self, link_text):
#(7)find_element_by_partial_link_text(self, link_text):通过元素部分可见链接文本定位
#(8)find_elements_by_partial_link_text(self, link_text):
#(9)find_element_by_tag_name(self, name):通过查找html的标签名称定位元素
#(10)find_elements_by_tag_name(self, name):
#(11)find_element_by_xpath(self, xpath):
#(12)find_elements_by_xpath(self, xpath):
#(13)find_element_by_class_name(self, name):
#(14)find_elements_by_class_name(self, name):
#(15)find_element_by_css_selector(self, css_selector):通过CSS选择器定位元素

element = driver.find_elements_by_id("android:id/title")#resource-id

# 40.send_keys(self, *value) 在元素中模拟输入(开启appium自带的输入法并配置了appium输入法后,可以输入中英文)
search_ele = driver.find_element_by_xpath("//android.widget.EditText[@index='0']")
search_ele.send_keys('4')

# 41.size(self) 获取元素的大小(高和宽)
#k = driver.find_element_by_id('id').size
element = driver.find_element_by_xpath(xpath="//android.widget.TextView[@text='显示']")
print(element.size)#返回值:{'height': 46, 'width': 68}

# 42.value_of_css_property(self, property_name) CSS属性
driver.find_element_by_id('id').value_of_css_property()

# 43.location(self) 获取元素左上角的坐标
m = driver.find_element_by_id('id').location
element = driver.find_element_by_xpath(xpath="//android.widget.TextView[@text='显示']")
print(element.location)#返回值:{'x': 153, 'y': 720}

# 44.rect(self) 元素的大小和位置的字典
print(driver.find_element_by_xpath(xpath="//android.widget.TextView[@text='显示']").rect)#{'height': 46, 'width': 68, 'x': 153, 'y': 720}

#45. screenshot_as_base64(self) 获取当前元素的截图为Base64编码的字符串
img = driver.find_element_by_id('id').screenshot_as_base64

# 46.execute_script(self, script, *args) 在当前窗口/框架(特指 Html 的 iframe )同步执行 javascript 代码。
#果这段代码是睡眠5秒,这五秒内主线程的 javascript 不会执行
driver.execute_script('document.title')

# 47.execute_async_script(self, script, *args) 插入 javascript 代码,只是这个是异步的,
# 也就是如果你的代码是睡眠5秒,那么你只是自己在睡,页面的其他 javascript 代码还是照常执行
driver.execute_async_script('document.title')

# 48.current_url(self) 获取当前页面的网址。
n = driver.current_url

# 49.page_source(self) 获取当前页面的源。
o = driver.page_source

# 50.quit(self) 退出脚本运行并关闭每个相关的窗口连接
driver.quit()

#51.屏幕录制
#Appium支持对屏幕进行录制,以便出现问题时能回放当时的场景,更快速地定位问题。屏幕录制的相关函数如下。

#(1)driver.start_recording_screen()  #开始录制

#(2)driver.stop_recording_screen()   #结束录制,并返回Base-64编码的字符串,这些字符串中记录了屏幕录制的全部内容

#我们可以编写代码,录制屏幕并将其保存到文件中,具体代码如下。

from appium import webdriver
import base64

server='http://localhost:6000/wd/hub'
desired_caps={
  "platformName": "Android",
  "deviceName": "Any"
}

driver = webdriver.Remote(server, desired_caps)

driver.start_recording_screen()
#这里进行一些操作...
recordingRes = driver.stop_recording_screen()
with open('D:\\Test.mp4', 'wb') as f:
  f.write(base64.b64decode(recordingRes))
print("end")

#执行代码后,将开始录制屏幕,并在进行一些操作后结束录制。录制的内容将以Base-64编码字符串的形式返回,然后解码并写入文件D:\Test.mp4中。接下来就可以直接播放视频文件了。


#52获取app性能消息

#在获取性能信息之前,可以通过以下函数,获取当前设备支持的所有性能信息类型。
print(driver.get_performance_data_types())
#输出结果如下。当前设备支持的性能信息类型分别是CPU信息、内存信息、电源信息和网络信息。
#['cpuinfo', 'memoryinfo', 'batteryinfo', 'networkinfo']
#知道支持的性能信息类型后,就可以通过以下函数获取指定App消耗的性能信息了。
driver.get_performance_data("appPackage属性","性能信息类型")
#例
appPackage = "com.google.android.apps.messaging"
print(driver.get_performance_data(appPackage,"cpuinfo"))
>>待补充
4.使用Appium测试程序
4.1使用Appium测试web程序
4.1.1设置浏览器驱动程序
Appium支持的浏览器有限,iOS只支持Safari,Android只支持Chrome或默认浏览器。
以设置chrome浏览器驱动为例:
step1:在手机端Chrome浏览器中通过Setting→About Chrome命令可以查看浏览器版本。
step2:下载对应版本的浏览器驱动,下载地址:http://chromedriver.storage.googleapis.com/index.html,解压到任意路径:E:\2022-5-16\chrome_driver
step3:在Appium界面中单击Advanced(高级)标签页,进入高级设置界面,需要填写浏览器驱动程序ChromeDriver的可执行文件.exe的路径,路径要填写完整,E:\2022-5-16\chrome_driver\chromedriver.exe。需要注意的是,驱动程序的版本必须与手机设备的浏览器版本匹配。

step4:驱动程序设置好之后,单击Start Server按钮启动Appium服务器。
4.1.2编写web代码操作web程序
from selenium import webdriver
from selenium.webdriver.common.by import By

server='http://localhost:4723/wd/hub'
desired_caps={
    "platformName": "Android",
    "platformVersion":"10",
    "deviceName": "ELE_AL00",
    "browserName": "chrome",
    "unicodeKeyboard":True,
    "resetKeyboard":True
}

driver = webdriver.Remote(server, desired_caps)
driver.get("https://www.baidu.com")
driver.find_element(By.ID, "index-kw").send_keys("hello world")
driver.find_element(By.ID, "index-bn").click()
4.2使用Appium测试移动端app
from appium import webdriver
from selenium.webdriver.common.by import By
from selenium.webdriver.support.ui import WebDriverWait
from selenium.webdriver.support import expected_conditions as EC

server='http://localhost:4723/wd/hub'
desired_caps={
  "platformName": "Android",
  "deviceName": "Any",
  "appPackage": "com.tencent.mm",
  "appActivity": ".ui.LauncherUI"
}

#启动微信App
driver = webdriver.Remote(server, desired_caps)

loginButton = WebDriverWait(driver, 20).until(EC.presence_of_element_located((By.ID,"com.tencent.mm:id/j_9")))
#单击"登录"按钮
loginButton.click()

numberTextbox = WebDriverWait(driver, 20).until(EC.presence_of_element_located((By.ID, "com.tencent.mm:id/cd7")))
# 输入号码
numberTextbox.send_keys("136 6666 6666")

# 单击"同意并继续"按钮
driver.find_element(By.ID, "com.tencent.mm:id/hfe").click()
>>待续

 浙公网安备 33010602011771号