
第8步:安装Oracle
- 安装Oracle
注意,安装Oracle时需要以oracle用户身份执行,在那之前需要以root身份执行xhost+,即命令:
代码1
| [root@sgdb1~]# xhost+
[root@sgdb1~]# su - oracle
|
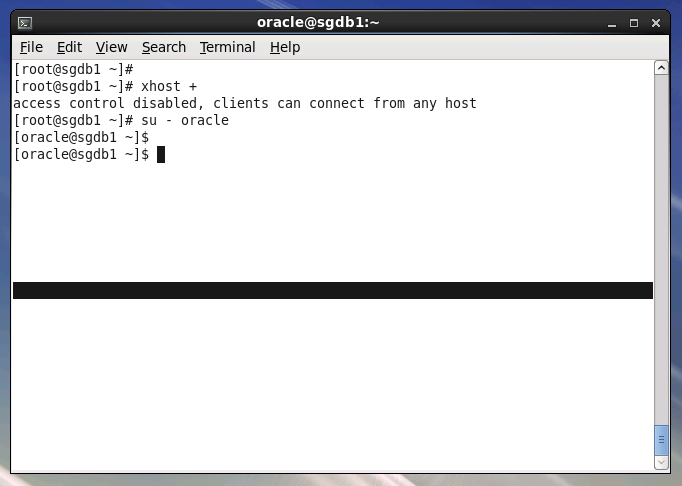
图1 执行xhost+
| [oracle @sgdb1~]$ cd database
[oracle @sgdb1~]$ ./runinstaller
|
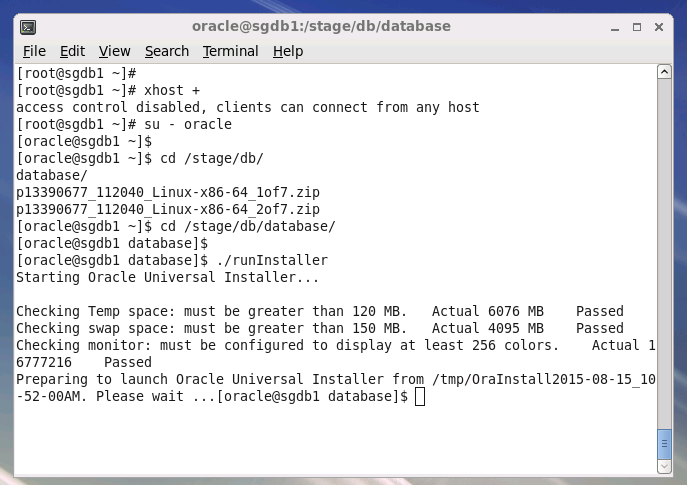
图2 执行runInstaller
-
取消软件更新
-
取消勾选【I wish to receive…】,点击【Next】
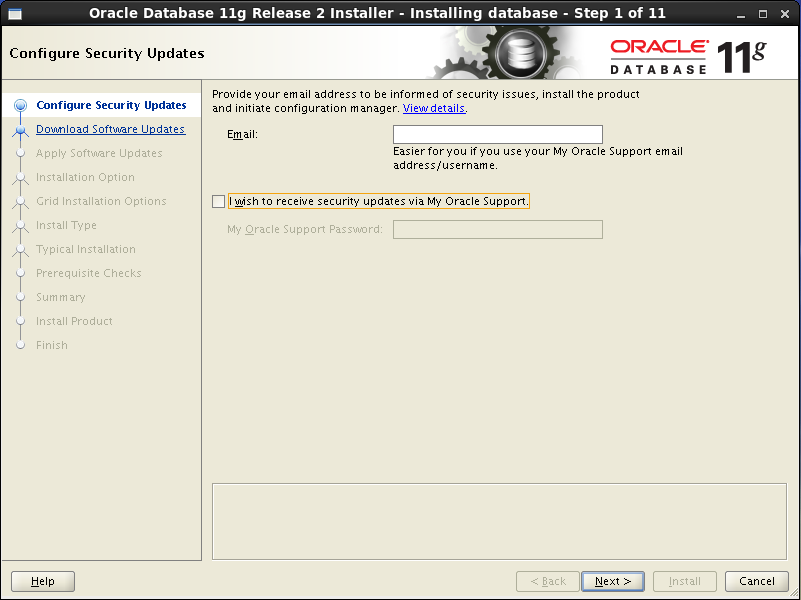
图35 取消更新邮件通知
-
跳过软件更新
-
选择【Skip software】
点击【Next】
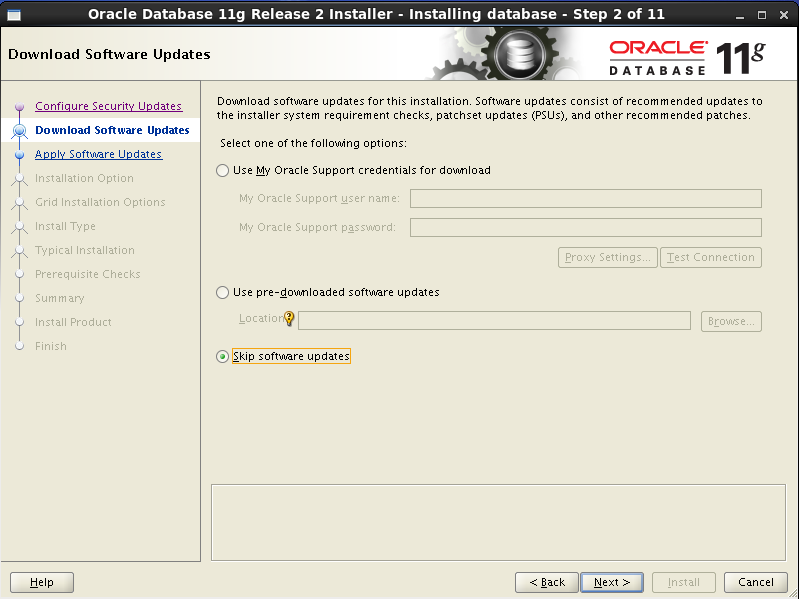
图36 跳过软件更新
-
Oracle安装选项
-
选择【Install database software only】,选择只安装数据库,不安装实例
点击【Next】
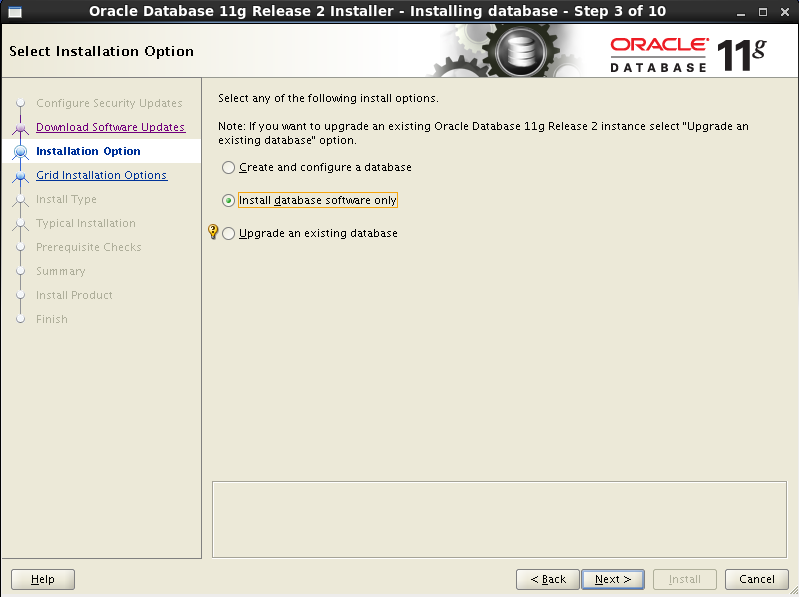
图37 只安装数据库,不安装实例
-
Oracle安装方式
-
点击【Oracle Real Application Clusters Database Installation】,选择RAC方式安装,并将两个节点勾选。
注意此处要类似grid用户那样配置互信,点击【SSH Connectivity】配置户型,此次不再详细描述。
点击【Next】,如果没有配置互信,会报错
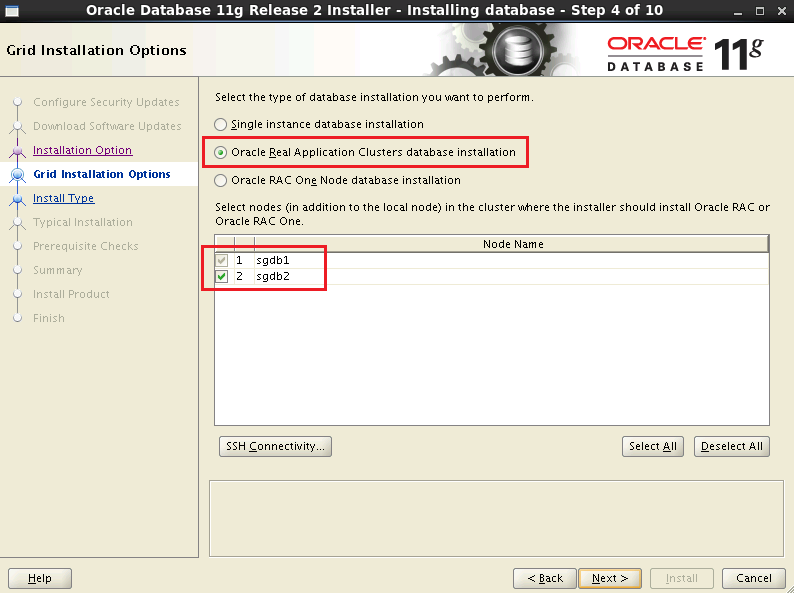
图38 RAC方式安装
-
Oralce安装语言
-
注意要将Simplified Chinese加入到选中的语言中
点击【Next】
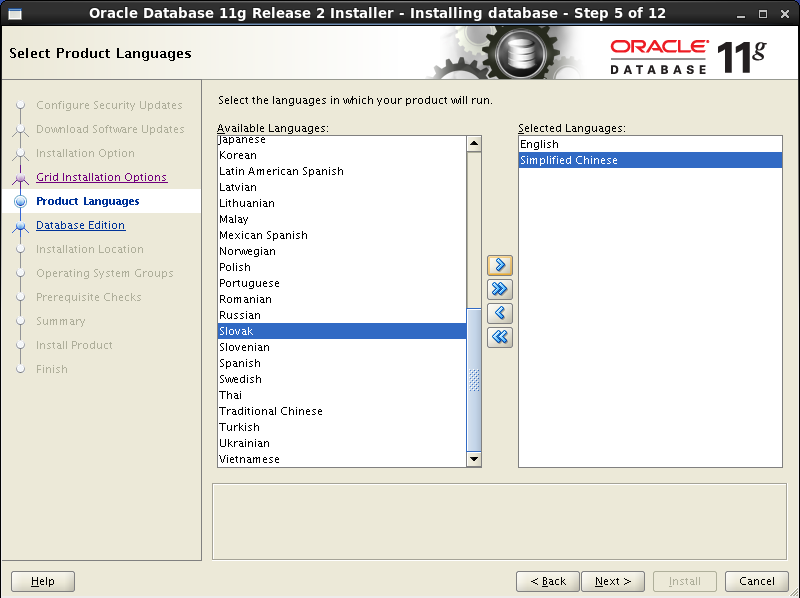
图39 选择语言
-
安装版本选择
-
选择Enterprise版本(企业级),可以点击【Select Options】来确认安装内容
确认无误后,点击【Next】
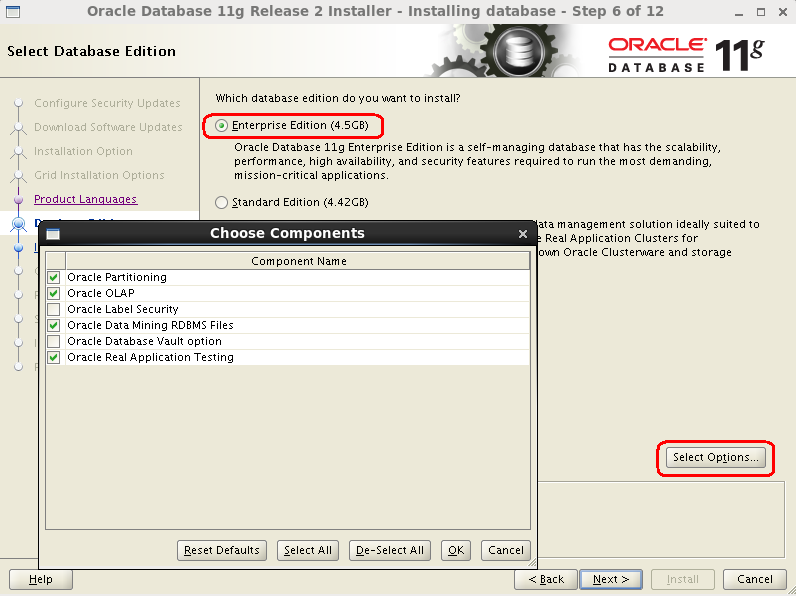
图40 选择Enterprise方式
-
选择安装目录
-
即Oracle对应的环境变量:
ORACLE_BASE: /oracle/db
ORACLE_HOME:/oracle/db/product/11.2.0
点击【Next】
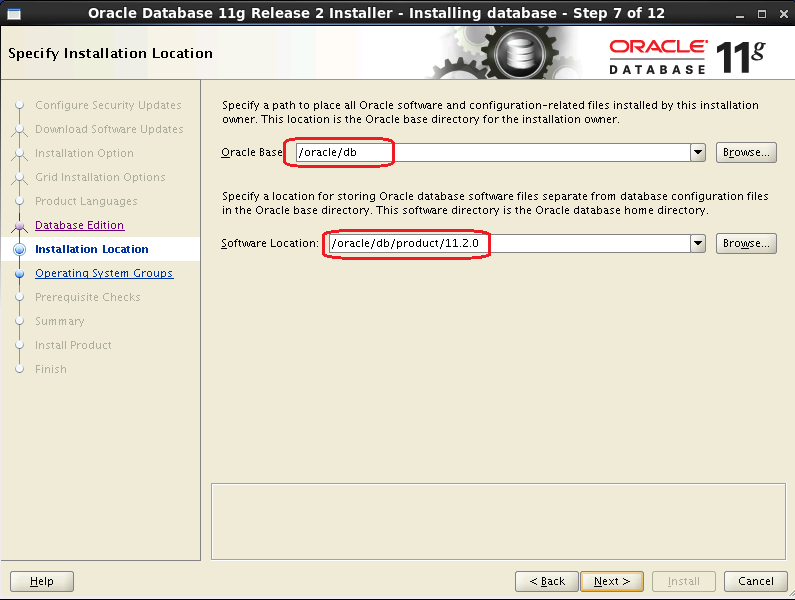
图41 安装目录(图有误,按文字标准)
-
选择组
-
ODDBA组,选择dba
OSOPER组,留空
点击【Next】
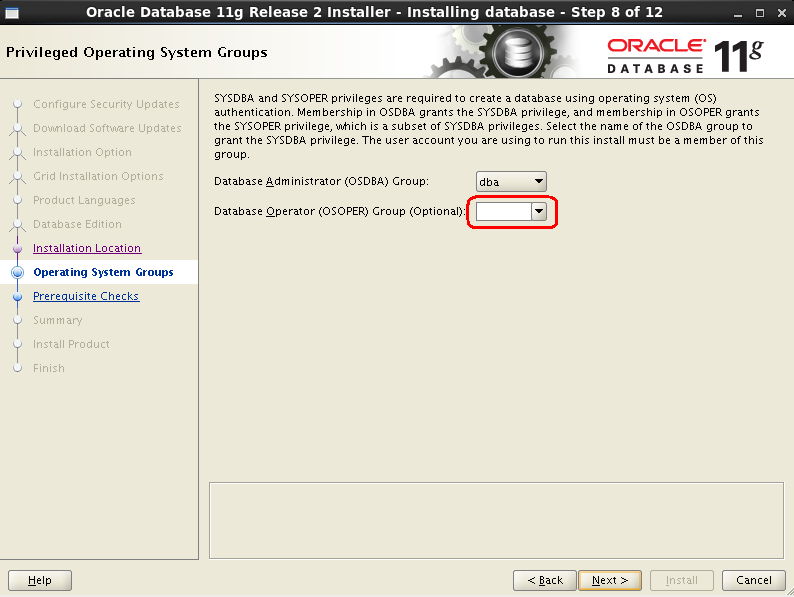
图42 选择组
-
执行安装前检查
-
有若干错误,直接点击【Ignore All】即可
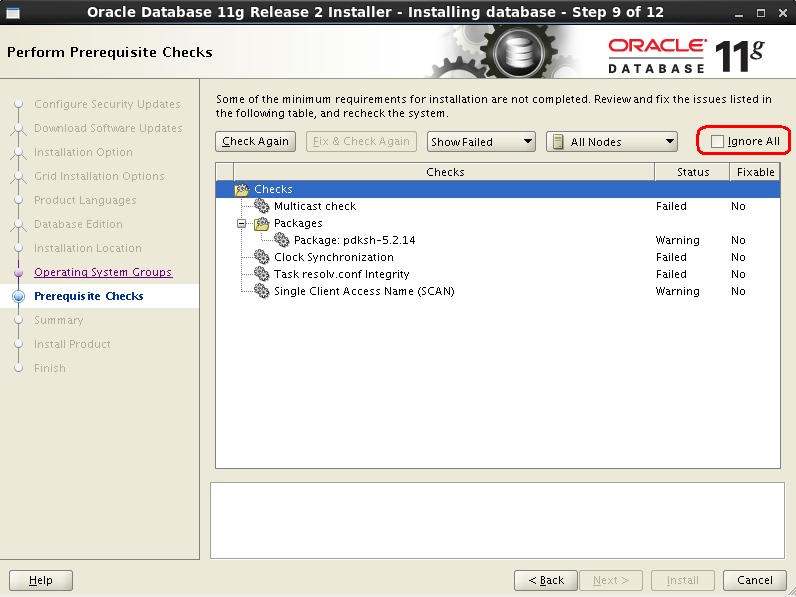
图43 执行安装前检查
点击【Yes】,确认忽略问题
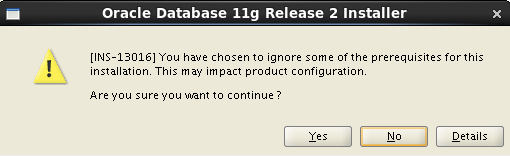
图44 确认忽略问题
-
安装信息统计
-
确认无误后,点击【Install】执行安装
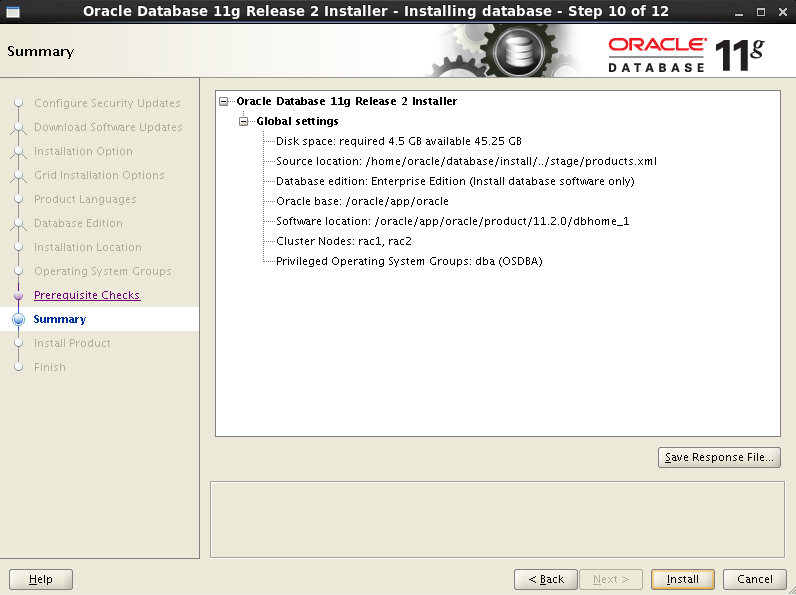
图45 安装信息统计
-
安装结束前,需要执行脚本
-
安装到最后阶段,需要在两节点(SGDB1与SGDB2)上分别以root身份执行这个脚本:
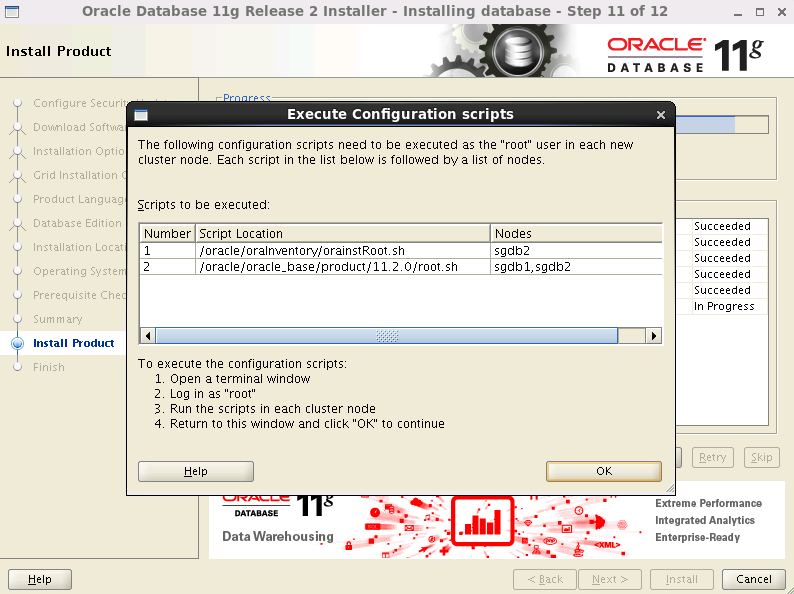
图46 安装结束前需要执行的脚本
代码31
| [root@sgdb1 ~]# /oracle/oraInventory/orainstRoot.sh
Changing permissions of /oracle/oraInventory.
Adding read,write permissions for group.
Removing read,write,execute permissions for world.
Changing groupname of /oracle/oraInventory to oinstall.
The execution of the script is complete.
|
代码32
| [root@sgdb2 ~]# /oracle/oraInventory/orainstRoot.sh
Changing permissions of /oracle/oraInventory.
Adding read,write permissions for group.
Removing read,write,execute permissions for world.
Changing groupname of /oracle/oraInventory to oinstall.
The execution of the script is complete.
|
代码33
| [root@sgdb1 ~]# /oracle/db/product/11.2.0/root.sh
Performing root user operation for Oracle 11g
The following environment variables are set as:
ORACLE_OWNER= oracle
ORACLE_HOME= /oracle/db/product/11.2.0
Enter the full pathname of the local bin directory: [/usr/local/bin]:
The contents of "dbhome" have not changed. No need to overwrite.
The contents of "oraenv" have not changed. No need to overwrite.
The contents of "coraenv" have not changed. No need to overwrite.
Entries will be added to the /etc/oratab file as needed by
Database Configuration Assistant when a database is created
Finished running generic part of root script.
Now product-specific root actions will be performed.
Finished product-specific root actions.
|
代码34
| [root@sgdb2 ~]# /oracle/db/product/11.2.0/root.sh
Performing root user operation for Oracle 11g
The following environment variables are set as:
ORACLE_OWNER= oracle
ORACLE_HOME= /oracle/db/product/11.2.0
Enter the full pathname of the local bin directory: [/usr/local/bin]:
The contents of "dbhome" have not changed. No need to overwrite.
The contents of "oraenv" have not changed. No need to overwrite.
The contents of "coraenv" have not changed. No need to overwrite.
Entries will be added to the /etc/oratab file as needed by
Database Configuration Assistant when a database is created
Finished running generic part of root script.
Now product-specific root actions will be performed.
Finished product-specific root actions.
|
此时点击【OK】,会看到已完成安装,点击【Close】
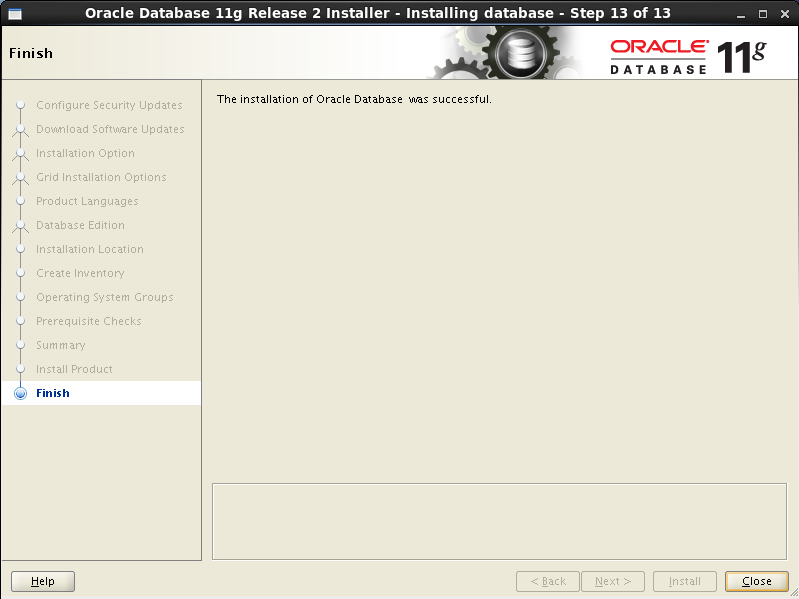
图47 安装完成

 浙公网安备 33010602011771号