springboot使用RestHighLevelClient操作es
springboot使用RestHighLevelClient操作es
之前博客中已经写过集成es6.3了,今天回过头来看觉得之前的太麻烦了,现在使用的是es官方的
Java High Level REST Client
具体的api可以查看下官方文档,老样子本次博文还是采用docker进行搭建
进行环境配置
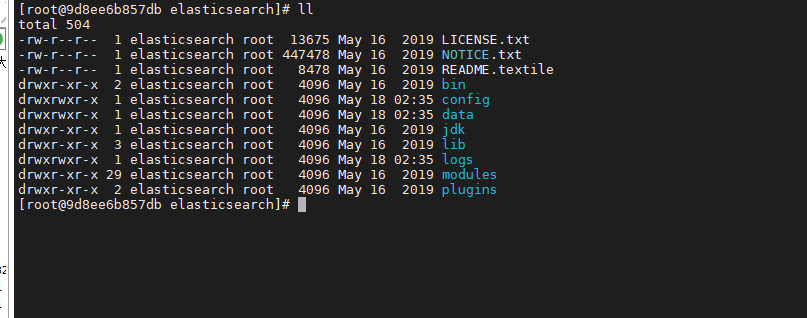
安装es7.1
拉取镜像
docker pull elasticsearch:7.1.0

运行镜像
指定了最大日志文件,因为这个服务的日志文件实在太大了
docker run -d --log-opt max-size=10m -e "discovery.type=single-node" --name es -p 9200:9200 -p 9300:9300 elasticsearch:7.1.0
进入容器,安装中文ik分词器
docker exec -it es /bin/bash
ik分词器地址 https://github.com/medcl/elasticsearch-analysis-ik/ ,自己下载对应版本,下面的命令太长了,复制到一行执行
./bin/elasticsearch-plugin install https://github.com/medcl/elasticsearch-analysis-ik/releases/download/v7.1.0/elasticsearch-analysis-ik-7.1.0.zip
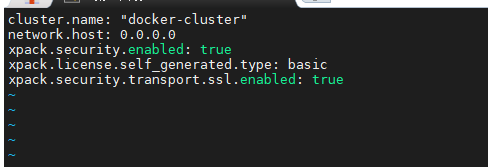
添加密码认证(可选)
还是在容器中进行操作,在/usr/share/elasticsearch/config中的elasticsearch.yml中添加下面的配置

重启es
重启后进入es,进行密码配置
elasticsearch-setup-passwords interactive
依次输入密码就行

安装kibana7.1(可选)
拉取镜像
docker pull kibana:7.1.0

运行镜像
docker run -d -it --name=kibana -p 5601:5601 kibana:7.1.0
要是上一步配置了密码,就需要修改kibana的配置文件
#修改es配置文件kibana.yml
vi /usr/share/kibana/config/kibana.yml
#添加以下内容
elasticsearch.username: "elastic"
elasticsearch.password: "*****"
重启kibana
访问URL验证结果
- 访问es http://host:9200
用户名:elastic
密码:之前设置的密码 - 访问kibana http://host:5601
用户名:elastic
密码:之前设置的密码
进行springboot的集成
-
首先配置maven依赖,本次用的是highlevelclient
<!-- es--> <dependency> <groupid>org.elasticsearch.client</groupid> <artifactid>elasticsearch-rest-high-level-client</artifactid> <version>7.1.0</version> </dependency> <dependency> <groupid>org.elasticsearch</groupid> <artifactid>elasticsearch</artifactid> <version>7.1.0</version> </dependency> -
配置es
-
首先在yml中进行常见配置
elasticsearch: host: localhost port: 9200 connTimeout: 3000 socketTimeout: 5000 connectionRequestTimeout: 500 # 索引名称 index-name: contentik username: elastic password: 123456 -
新建es配置类
后续所有的操作都是通过这个client来进行的
package com.pgy.esdemo.config; import org.apache.http.HttpHost; import org.apache.http.auth.AuthScope; import org.apache.http.auth.UsernamePasswordCredentials; import org.apache.http.client.CredentialsProvider; import org.apache.http.impl.client.BasicCredentialsProvider; import org.apache.http.impl.nio.client.HttpAsyncClientBuilder; import org.elasticsearch.client.RestClient; import org.elasticsearch.client.RestClientBuilder; import org.elasticsearch.client.RestHighLevelClient; import org.springframework.beans.factory.annotation.Value; import org.springframework.context.annotation.Bean; import org.springframework.context.annotation.Configuration; /** * @Author: Kevin * @Description: * @Date: create in 2021/5/11 15:21 */ @Configuration public class ElasticsearchConfiguration { @Value("${elasticsearch.host}") private String host; @Value("${elasticsearch.port}") private int port; @Value("${elasticsearch.connTimeout}") private int connTimeout; @Value("${elasticsearch.socketTimeout}") private int socketTimeout; @Value("${elasticsearch.connectionRequestTimeout}") private int connectionRequestTimeout; @Value("${elasticsearch.username}") private String USERNAME; @Value("${elasticsearch.password}") private String PASSWORD; @Bean(destroyMethod = "close", name = "client") public RestHighLevelClient initRestClient() { //如果没配置密码就可以不用下面这两部 final CredentialsProvider credentialsProvider = new BasicCredentialsProvider(); credentialsProvider.setCredentials(AuthScope.ANY, new UsernamePasswordCredentials(USERNAME, PASSWORD)); RestClientBuilder builder = RestClient.builder(new HttpHost(host, port)) .setRequestConfigCallback(requestConfigBuilder -> requestConfigBuilder .setConnectTimeout(connTimeout) .setSocketTimeout(socketTimeout) .setConnectionRequestTimeout(connectionRequestTimeout)) //没有密码可以不用这一个set .setHttpClientConfigCallback(new RestClientBuilder.HttpClientConfigCallback() { @Override public HttpAsyncClientBuilder customizeHttpClient(HttpAsyncClientBuilder httpClientBuilder) { httpClientBuilder.disableAuthCaching(); return httpClientBuilder.setDefaultCredentialsProvider(credentialsProvider); } }); return new RestHighLevelClient(builder); } } -
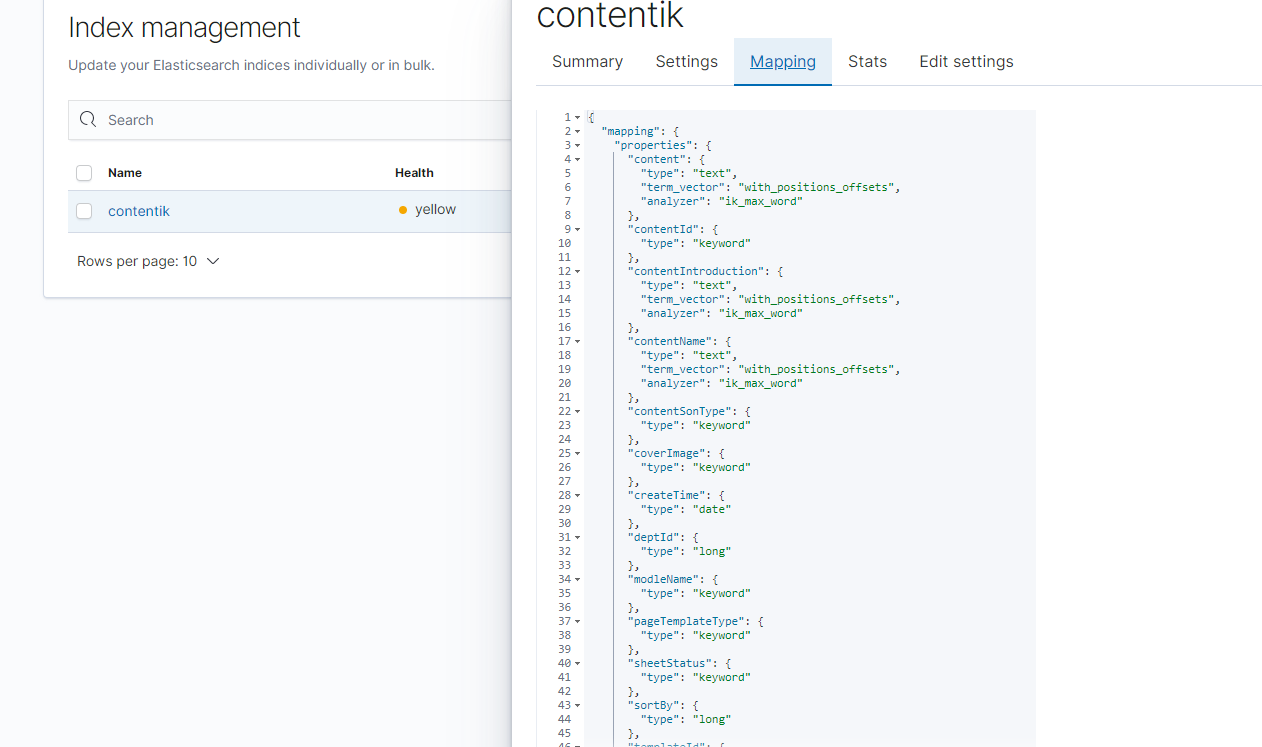
创建索引
官方文档https://www.elastic.co/guide/en/elasticsearch/client/java-rest/master/java-rest-high-document-index.html
public void createContentIk() throws IOException { //这里的都是es的对象 indexName就是你的索引名 CreateIndexRequest request = new CreateIndexRequest(indexName); //下面是索引的字段,和对应的字段类型 getField方法可以自己修改下,我这边是进行的text类型的添加分词操作 Map<string, object=""> properties = new HashMap<>(); properties.put("contentId", getField("keyword")); properties.put("contentName", getField("text")); properties.put("contentIntroduction", getField("text")); properties.put("coverImage", getField("keyword")); properties.put("contentSonType", getField("keyword")); properties.put("pageTemplateType", getField("keyword")); properties.put("sheetStatus", getField("keyword")); properties.put("templateId", getField("keyword")); properties.put("modleName", getField("keyword")); properties.put("content", getField("text")); Map<string, object=""> mapping = new HashMap<>(); mapping.put("properties", properties); //Adds mapping that will be added when the index gets created. Note that the definition should request.mapping(mapping); // 执行创建请求 CreateIndexResponse createIndexResponse = client.indices().create(request, RequestOptions.DEFAULT); //判断成功与否 boolean acknowledged = createIndexResponse.isAcknowledged(); log.info("acknowledged:{}", acknowledged); boolean shardsAcknowledged = createIndexResponse.isShardsAcknowledged(); log.info("shardsAcknowledged:{}", shardsAcknowledged); } private static Map<string, object=""> getField(String type) { Map<string, object=""> result = new HashMap<>(); result.put("type", type); if ("text".equals(type)) { result.put("analyzer", "ik_max_word"); result.put("search_analyzer", "ik_max_word"); // result.put("ignore_above", ""); // 这个地方是因为我存储内容太长了,所以加上了这个配置 不然会报错Exceeding maximum length of field in elasticsearch - error in kibana result.put("term_vector", "with_positions_offsets"); } return result; }在kibana进行查看结果
-
存数据
这边用的是es自己设置的id,我就没手动设置
public Boolean save(XmyContentMianSearchVo vo) { BulkRequest request = new BulkRequest(); request.add(new IndexRequest(indexName) .source(JSONObject.toJSONString(vo), XContentType.JSON)); BulkResponse bulkResponse = null; try { bulkResponse = client.bulk(request, RequestOptions.DEFAULT); } catch (IOException e) { e.printStackTrace(); } boolean b = bulkResponse.hasFailures(); log.info("保存返回:{}", b); return b; } -
删除
我这边做法是通过我实体类的id 查询出来es的id,然后再通过es的id进行删除
public void delete(String id) { String esIdbyContentId = getEsIdbyContentId(id); DeleteRequest deleteRequest = new DeleteRequest(indexName, esIdbyContentId); DeleteResponse delete = null; try { delete = client.delete(deleteRequest, RequestOptions.DEFAULT); } catch (IOException e) { e.printStackTrace(); } DocWriteResponse.Result result = delete.getResult(); String s = checkResponse(result); log.info(s); } public String getEsIdbyContentId(String contentId) { String id = ""; SearchRequest request = new SearchRequest(indexName); //构建查询 SearchSourceBuilder sourceBuilder = new SearchSourceBuilder(); BoolQueryBuilder boolQueryBuilder = new BoolQueryBuilder(); boolQueryBuilder.should(matchQuery("contentId", contentId)); sourceBuilder.query(boolQueryBuilder); request.source(sourceBuilder); SearchResponse response = null; try { response = client.search(request, RequestOptions.DEFAULT); } catch (IOException e) { e.printStackTrace(); } long value = response.getHits().getTotalHits().value; SearchHit[] hits = response.getHits().getHits(); for (SearchHit hit : hits) { id = hit.getId(); } return id; } -
修改
做法也是跟删除差不多,通过实体类的id 先找到es中的id,然后再去更新内容
public String update(String id) { String esIdbyContentId = getEsIdbyContentId(id); if (org.apache.commons.lang3.StringUtils.isBlank(esIdbyContentId)) { log.info("更新时未找到es内容,id为:{}", id); return "更新时未找到es内容"; } String join = StringUtils.join("自己的内容", ","); vo.setContent(join); // log.info("更新:{}", vo); UpdateRequest updateRequest = new UpdateRequest(indexName, esIdbyContentId); updateRequest.doc(JSON.toJSONString(vo), XContentType.JSON); UpdateResponse update = null; try { update = client.update(updateRequest, RequestOptions.DEFAULT); } catch (IOException e) { e.printStackTrace(); } String s = checkResponse(update.getResult()); log.info(s); return s; } -
查询
这边就分为很多查询类型,具体的可以看看官方的api文档
https://www.elastic.co/guide/en/elasticsearch/client/java-rest/master/java-rest-high-search.html
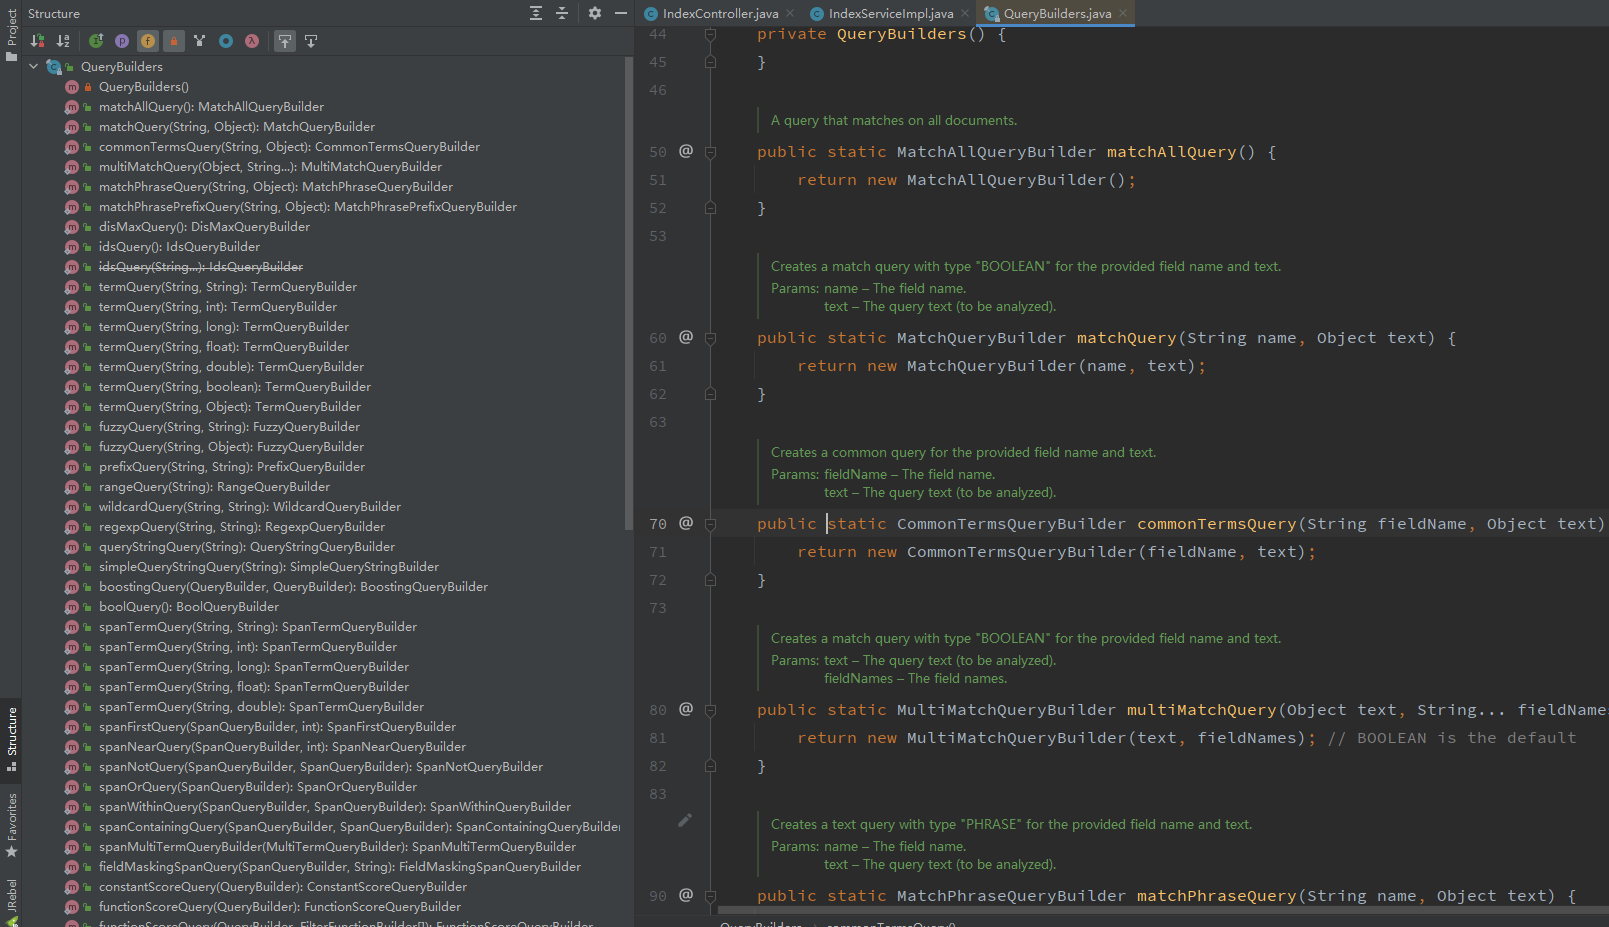
在QueryBuildes中对应有很多不同的查询方式
-
讲下查询api
看到这里来了,说明你还是没怎么搞懂,来,咱们再细细看下查询的api
全文查询 Full Text Queries
什么是全文查询?
像使用 match 或者 query_string 这样的高层查询都属于全文查询,
- 查询 日期(
date) 或整数(integer) 字段,会将查询字符串分别作为日期或整数对待。 - 查询一个(
not_analyzed)未分析的精确值字符串字段,会将整个查询字符串作为单个词项对待。 - 查询一个(
analyzed)已分析的全文字段,会先将查询字符串传递到一个合适的分析器,然后生成一个供查询的词项列表
组成了词项列表,后面就会对每个词项逐一执行底层查询,将查询结果合并,并且为每个文档生成最终的相关度评分。
match 查询的单个词的步骤是什么?
- 检查字段类型,查看字段是
analyzed,not_analyzed - 分析查询字符串,如果只有一个单词项,
match查询在执行时就会是单个底层的term查询 - 查找匹配的文档,会在倒排索引中查找匹配文档,然后获取一组包含该项的文档
- 为每个文档评分
全文查询 API 列表
全部的 API 列表如下(链接均指向 elasticsearch 官网)
基于词项的查询
这种类型的查询不需要分析,它们是对单个词项操作,只是在倒排索引中查找准确的词项(精确匹配)并且使用 TF/IDF 算法为每个包含词项的文档计算相关度评分 _score。
Term
term 查询可用作精确值匹配,精确值的类型则可以是数字,时间,布尔类型,或者是那些 not_analyzed 的字符串。
对应的 QueryBuilder class 是TermQueryBuilder
具体方法是 QueryBuilders.termQuery()
Terms
terms 查询允许指定多个值进行匹配。如果这个字段包含了指定值中的任何一个值,就表示该文档满足条件。
对应的 QueryBuilder class 是 TermsQueryBuilder
具体方法是 QueryBuilders.termsQuery()
Wildcard
wildcard 通配符查询是一种底层基于词的查询,它允许指定匹配的正则表达式。而且它使用的是标准的 shell 通配符查询:
?匹配任意字符*匹配 0 个或多个字符
wildcard 需要扫描倒排索引中的词列表才能找到所有匹配的词,然后依次获取每个词相关的文档 ID。
由于通配符和正则表达式只能在查询时才能完成,因此查询效率会比较低,在需要高性能的场合,应当谨慎使用。
对应的 QueryBuilder class 是 WildcardQueryBuilder
具体方法是 QueryBuilders.wildcardQuery()
基于词项 API 列表
复合查询
什么是复合查询?
复合查询会将其他的复合查询或者叶查询包裹起来,以嵌套的形式展示和执行,得到的结果也是对各个子查询结果和分数的合并。可以分为下面几种:
-
经常用在使用 filter 的场合,所有匹配的文档分数都是一个不变的常量
-
可以将多个叶查询和组合查询再组合起来,可接受的参数如下
must: 文档必须匹配这些条件才能被包含进来must_not文档必须不匹配才能被包含进来should如果满足其中的任何语句,都会增加分数;即使不满足,也没有影响filter以过滤模式进行,不评分,但是必须匹配
-
叫做分离最大化查询,它会将任何与查询匹配的文档都作为结果返回,但是只是将其中最佳匹配的评分作为最终的评分返回。
-
允许为每个与主查询匹配的文档应用一个函数,可用来改变甚至替换原始的评分
-
用来控制(提高或降低)复合查询中子查询的权重。
复合查询列表
特殊查询
Wrapper Query
这里比较重要的一个是 Wrapper Query,是说可以接受任何其他 base64 编码的字符串作为子查询。
主要应用场合就是在 Rest High-Level REST client 中接受 json 字符串作为参数。比如使用 gson 等 json 库将要查询的语句拼接好,直接塞到 Wrapper Query 中查询就可以了,非常方便。
Wrapper Query 对应的 QueryBuilder class 是WrapperQueryBuilder
具体方法是 QueryBuilders.wrapperQuery()
下面是我写的两个查询 一个是分页的,一个是查询从start 到end的,各有优势,对比可以看下这个https://www.jianshu.com/p/14aa8b09c789
/**
* @param text 搜索的文本内容
* @param flag 是否为 仅内容包含 true 为是
* @param field 字段
* @return
*/
public List<xmycontentmiansearchvo> searchES(String text, Boolean flag, String... field) {
SearchRequest request = new SearchRequest(indexName);
//构建查询
SearchSourceBuilder sourceBuilder = new SearchSourceBuilder();
BoolQueryBuilder boolQueryBuilder = new BoolQueryBuilder();
if (flag) {
boolQueryBuilder.should(matchQuery(field[2], text))
.should(matchPhraseQuery(field[2], text));
} else {
boolQueryBuilder.should(matchQuery(field[0], text))
.should(matchQuery(field[1], text));
}
//
sourceBuilder.from(0).size(50000);
sourceBuilder.query(boolQueryBuilder);
request.source(sourceBuilder);
SearchResponse response = null;
try {
response = client.search(request, RequestOptions.DEFAULT);
} catch (IOException e) {
e.printStackTrace();
}
long value = response.getHits().getTotalHits().value;
List<xmycontentmiansearchvo> res = new ArrayList<>();
if (value > 0) {
SearchHit[] hits = response.getHits().getHits();
for (SearchHit hit : hits) {
XmyContentMianSearchVo xmyContentMianSearchVo = JSONObject.parseObject(hit.getSourceAsString(), XmyContentMianSearchVo.class);
res.add(xmyContentMianSearchVo);
}
}
return res;
}
//分页
/**
*
* @param text 搜索内容
* @param sid 分类id
* @param size 每页数量
* @param type 查询类型
* @param contentIds 实体类id集合
* @param field 匹配字段
* @return
*/
public ResScrollerDto scrollers(String text, String sid, Integer size, String type, List<string> contentIds, String... field) {
if (StringUtils.isBlank(text)) {
text = "";
}
SearchRequest searchRequest = new SearchRequest(indexName);
SearchHit[] hits = null;
String scrollId = null;
if (org.apache.commons.lang3.StringUtils.isNotBlank(sid)) {
SearchScrollRequest scrollRequest = new SearchScrollRequest(sid);
scrollRequest.scroll(TimeValue.timeValueSeconds(1));
SearchResponse searchScrollResponse = null;
try {
searchScrollResponse = client.scroll(scrollRequest, RequestOptions.DEFAULT);
} catch (Exception e) {
log.info("分页的异常:{}", e.getMessage());
e.printStackTrace();
}
scrollId = searchScrollResponse.getScrollId();
hits = searchScrollResponse.getHits().getHits();
} else {
SearchSourceBuilder searchSourceBuilder = new SearchSourceBuilder();
BoolQueryBuilder boolQueryBuilder = new BoolQueryBuilder();
if (StringUtils.equals(type, "9")){
boolQueryBuilder.should(matchQuery(field[0], text))
.should(matchQuery(field[1], text))
.should(matchQuery(field[2], text))
.should(matchPhraseQuery(field[2], text))
;
}else{
boolQueryBuilder.should(matchQuery(field[0], text))
.should(matchQuery(field[1], text))
.should(matchQuery(field[2], text))
.should(matchPhraseQuery(field[2], text))
.must(termsQuery("contentId", contentIds))
;
}
searchSourceBuilder.query(boolQueryBuilder);
//
searchSourceBuilder.size(size);
searchRequest.source(searchSourceBuilder);
// 设置游标过期时间
searchRequest.scroll(TimeValue.timeValueSeconds(1));
SearchResponse searchResponse = null;
try {
searchResponse = client.search(searchRequest, RequestOptions.DEFAULT);
} catch (IOException e) {
e.printStackTrace();
}
scrollId = searchResponse.getScrollId();
hits = searchResponse.getHits().getHits();
}
List<xmycontentmiansearchvo> res = new ArrayList<>();
for (SearchHit hit : hits) {
XmyContentMianSearchVo xmyContentMianSearchVo = JSONObject.parseObject(hit.getSourceAsString(), XmyContentMianSearchVo.class);
res.add(xmyContentMianSearchVo);
}
ResScrollerDto dto = new ResScrollerDto();
dto.setSid(res.size() == 0 ? "" : scrollId);
// dto.setRes(res);
if (StringUtils.equals(type, "1")) {
dto.setDettContentList(res);
} else if (StringUtils.equals(type, "2")) {
dto.setCloudContentList(res);
}else {
dto.setDettContentList(res);
}
log.info("分页:{}", dto);
return dto;
}

 浙公网安备 33010602011771号