参考文章:
https://blog.csdn.net/qq_42815754/article/details/82990073
https://blog.csdn.net/cailongbiaoyuli/article/details/84348866
https://help.aliyun.com/document_detail/98728.html?spm=5176.b6927164.help.dexternal.5cb756a7lCkF1G#section-ydh-4qb-1gb(在Nginx独立服务器上安装证书)
https://blog.csdn.net/LP890127/article/details/101411169
https://console.qingcloud.com/ssl_certificates(青云证书购买、配置)
1. 先更新一下 更新yum,防止编译时报:make: *** No rule to make target `build', needed by `default'. Stop. 错误:
yum update
2. 安装依赖,防止编译时报:make: *** No rule to make target `build', needed by `default'. Stop. 错误:
yum install -y gcc gcc-c++
yum install -y gcc zlib zlib-devel pcre pcre-devel openssl openssl-devel gd gd-devel
2. 下载 tar.gz 包(建议不要在 /usr/local 目录下执行,除非 nginx 安装目录不为 /usr/local/nginx )
wget http://nginx.org/download/nginx-1.16.1.tar.gz
3. 解压
tar -zxvf nginx-1.16.1.tar.gz
4. 编译、安装
cd nginx-1.16.1/
执行(
1. 加上 --with-http_ssl_module 执行参数,则可以 将 ssl 模块编译进 nginx,防止后期需要配置 ssl 证书时报:the "ssl" parameter requires ngx_http_ssl_module 错误
2. 加上 --prefix=/usr/local/nginx 执行参数,表明 将 nginx 安装到 /usr/local/nginx 目录下,不加也可,默认也是安装到 该目录下)
./configure --prefix=/usr/local/nginx --pid-path=/usr/local/nginx/run --with-http_ssl_module --with-http_flv_module --with-http_stub_status_module --with-http_gzip_static_module --with-pcre --with-http_image_filter_module --with-debug
接着执行
make && make install
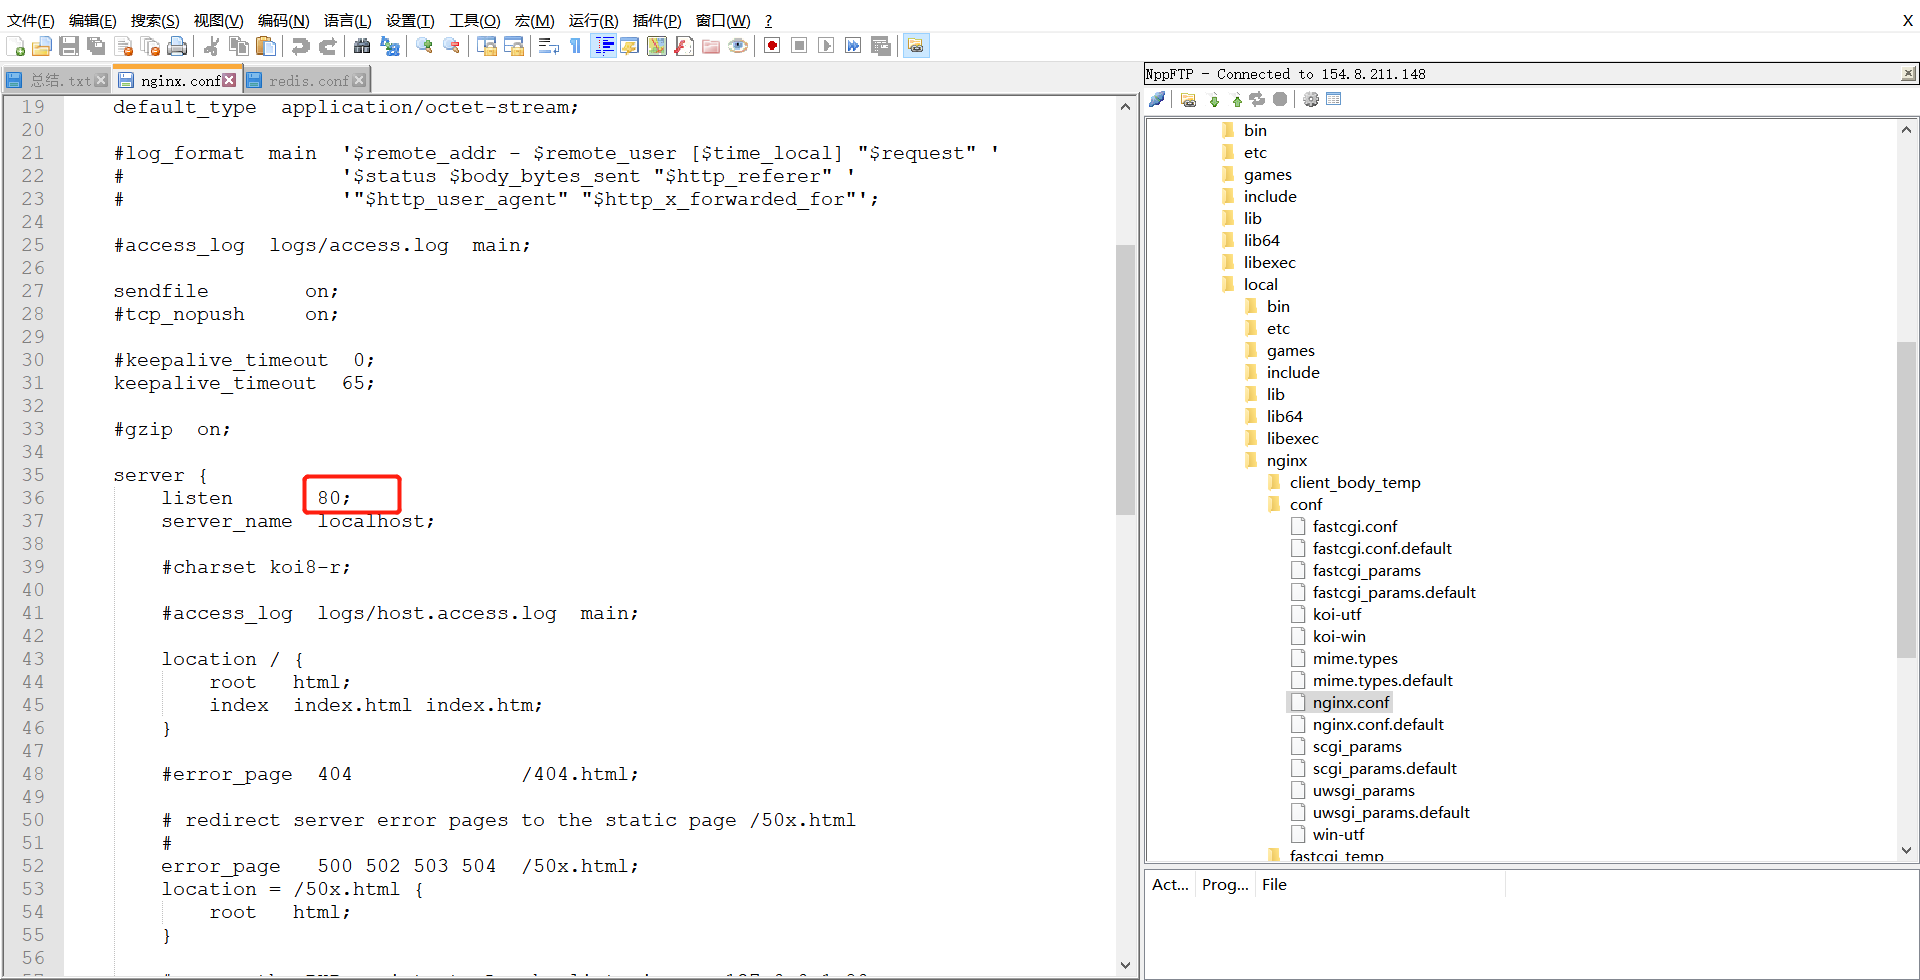
5. 配置 nginx 端口号(默认 80):
使用 notepad++ 连接服务器,打开 nginx.conf 文件,修改 80 为其他值(我的没改,可以不改,如果后期不会有其他服务占用 80 端口的话)
6. 启动 nginx
cd /usr/local/nginx/sbin 目录,执行
./nginx -t 验证是否安装、配置正确

上述截图代表安装、配置正确
执行
./nginx
启动 nginx
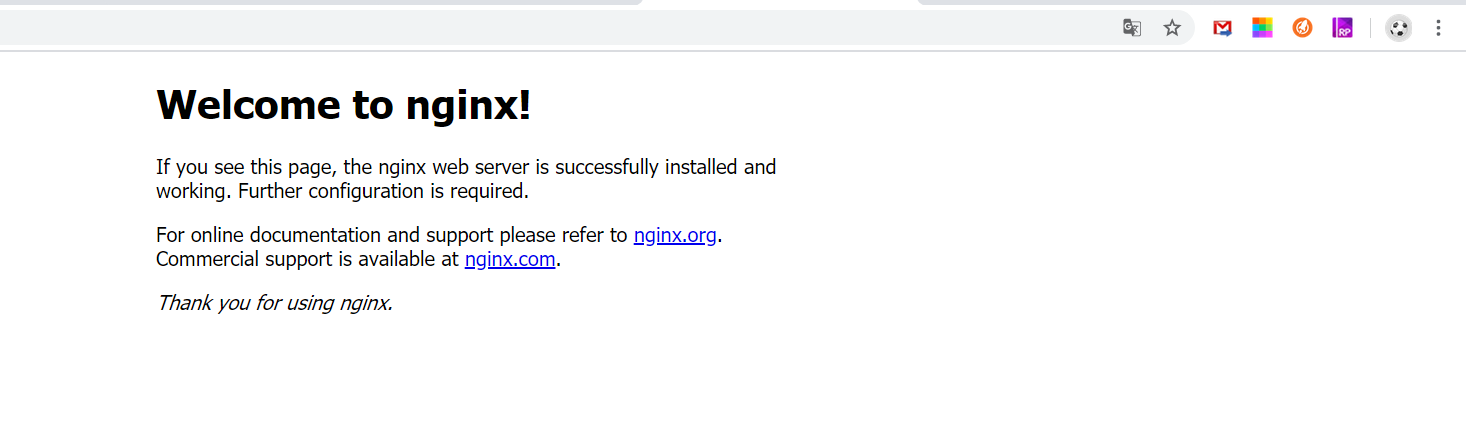
7. 验证 nginx 是否启动成功
直接在 浏览器地址栏输入 服务器 ip,如 192.168.100.6:80 (80可省略,直接输入 192.168.100.6 即可) 回车
注意:
1. 如果编译命令为(即 出于安全考虑,nginx 只能由独立的名为 nginx,属于nginx用户组的用户 身份运行):
./configure --prefix=/usr/local/nginx --pid-path=/usr/local/nginx/run --user=nginx --group=nginx --with-http_ssl_module --with-http_flv_module --with-http_stub_status_module --with-http_gzip_static_module --with-pcre --with-http_image_filter_module --with-debug
则还需要执行
mkdir -p /var/cache/nginx/client_temp
然后
useradd -s /sbin/nologin -M nginx
2. 收到"/cert/3970497_pic.certificatestests.com.pem":BIO_new_file() failed (SSL: error:02001002:system library:fopen:No such file or directory:fopen('/cert/3970497_pic.certificatestests.com.pem','r') error:2006D080:BIO routines:BIO_new_file:no such file)报错:
需要去掉证书相对路径最前面的/。例如,需要去掉/cert/cert-file-name.pem最前面的/,使用正确的相对路径cert/cert-file-name.pem
3. 卸载nginx:https://blog.csdn.net/qq_42815754/article/details/82990073

 浙公网安备 33010602011771号