
通过filebeat的modules搜集nginx日志
前提安装好ES和Kibana
NGINX日志格式如下
log_format main '$remote_addr - $remote_user [$time_local] "$request" '
                    '$status $body_bytes_sent "$http_referer" '
                    '"$http_user_agent" "$http_x_forwarded_for" '
                    '"$request_body" "$upstream_addr" "$uri" "$upstream_response_time" "$upstream_http_name" "$upstream_http_host" "$request_time" ';
1.下载并安装filebeat
rpm -ivh filebeat-7.5.1-x86_64.rpm
2.启用nginx modules
filebeat modules enable nginx
3.配置NGINX访问日志路径
/etc/filebeat/modules.d/nginx.yml
- module: nginx
  # Access logs
  access:
    enabled: true

    # Set custom paths for the log files. If left empty,
    # Filebeat will choose the paths depending on your OS.
    var.paths: ["/var/log/nginx/*.access.log"]
4.配置ES地址并修改index名称
/etc/filebeat/filebeat.yml
#==================== Elasticsearch template setting ==========================

setup.template.settings:
  index.number_of_shards: 1
  #index.codec: best_compression
  #_source.enabled: false
setup.ilm.enabled: false
setup.template.name: "filebeat-nginx"
setup.template.pattern: "filebeat-nginx-*"

#-------------------------- Elasticsearch output ------------------------------
output.elasticsearch:
  # Array of hosts to connect to.
  hosts: ["192.168.160.34:9200"]
  index: "filebeat-nginx-%{[agent.version]}-%{+yyyy.MM.dd}"

  # Optional protocol and basic auth credentials.
  #protocol: "https"
  username: "elastic"
  password: "pass"
5.修改日志的默认匹配规则
/usr/share/filebeat/module/nginx/access/ingest/default.json
添加upstream_addr、upstream_url、upstream_response_time、request_time等字段
可以通过Grok Debugger检查匹配规则是否正确:http://grokdebug.herokuapp.com/
"grok": {
    "field": "message",
    "patterns": [
        "\"?(?:%{IP_LIST:nginx.access.remote_ip_list}|%{DATA:source.address}) - %{DATA:user.name} \\[%{HTTPDATE:nginx.access.time}\\] \"%{DATA:nginx.access.info}\" %{NUMBER:http.response.status_code:long} %{NUMBER:http.response.body.bytes:long} \"%{DATA:http.request.referrer}\" \"%{DATA:user_agent.original}\" \"%{URIHOST:nginx.access.upstream_addr}\" \"%{DATA:nginx.access.upstream_url}\" \"%{NUMBER:nginx.access.upstream_response_time:float}\" \"-\" \"-\" \"%{NUMBER:nginx.access.request_time:float}\""
    ],
    "pattern_definitions": {
        "IP_LIST": "%{IP}(\"?,?\\s*%{IP})*"
    },
    "ignore_missing": true
}
6.修改fields字段
/etc/filebeat/fields.yml
添加upstream_addr、upstream_url、upstream_response_time、request_time等字段
- name: agent
  type: alias
  path: user_agent.original
  migration: true
- name: upstream_response_time
  type: alias
  path: upstream_response_time
  migration: true
- name: upstream_addr
  type: alias
  path: upstream_addr
  migration: true
- name: upstream_url
  type: alias
  path: upstream_url
  migration: true
- name: request_time
  type: alias
  path: request_time
  migration: true
删除原有的pipeline,防止kibana不显示自定义的字段

重新启动filebeat,查看自定义的字段是否出现

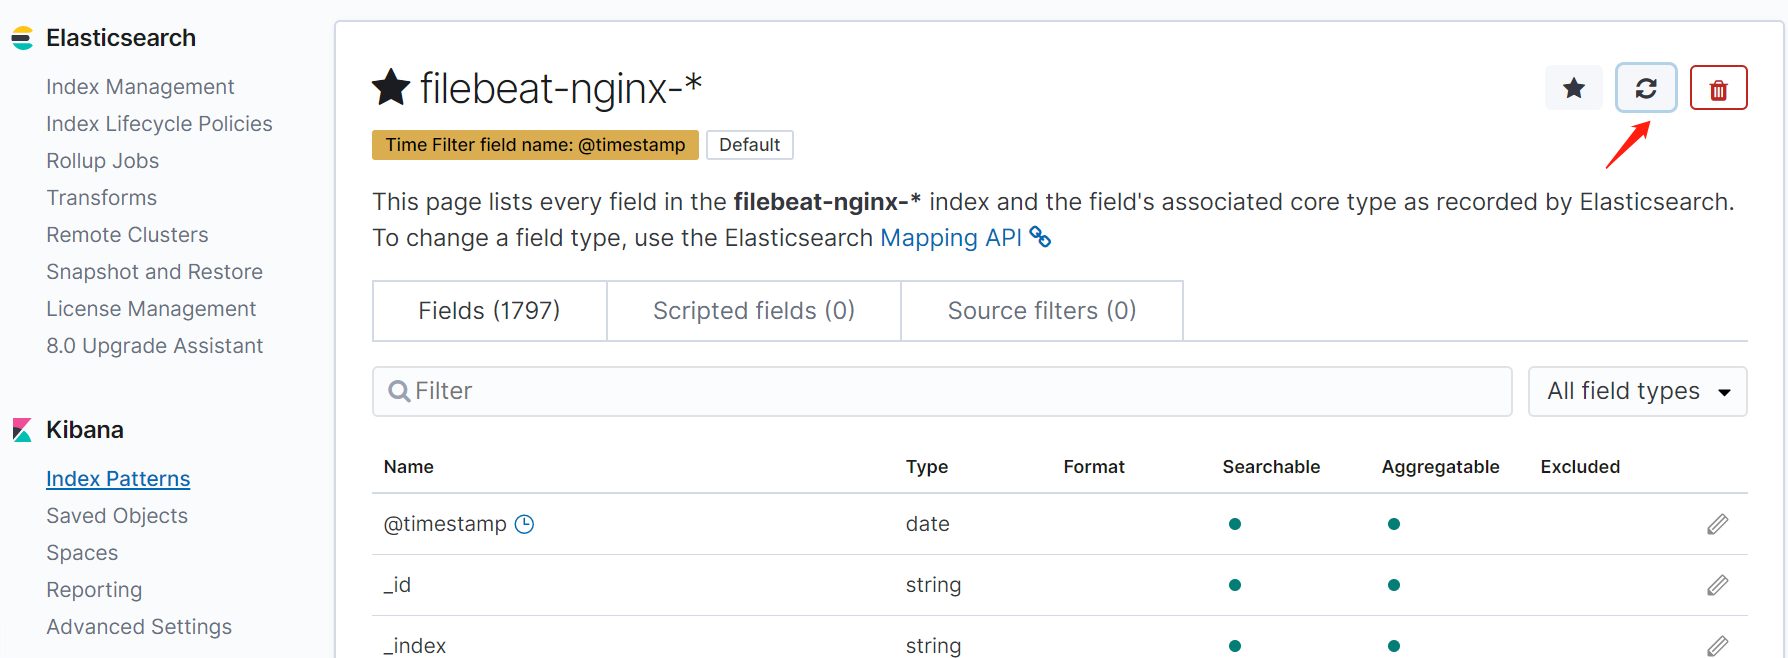
字段出来以后有黄色小三角,刷新一下index 的字段缓存就好了
参考:https://www.iamle.com/archives/2610.html
https://elasticsearch.cn/question/4580

 浙公网安备 33010602011771号