


源码剖析Django REST framework的认证方式及自定义认证
源码剖析Django REST framework的认证方式
由Django的CBV模式流程,可以知道在url匹配完成后,会执行自定义的类中的as_view方法。
如果自定义的类中没有定义as_view方法,根据面向对象中类的继承可以知道,则会执行其父类View中的as_view方法
在Django的View的as_view方法中,又会调用dispatch方法。
现在来看看Django restframework的认证流程
Django restframework是基于Django的框架,所以基于CBV的模式也会执行自定义的类中的as_view方法
先新建一个项目,配置url
from django.conf.urls import url
from django.contrib import admin
from app01 import views
urlpatterns = [

url(r'^user/', views.UserView.as_view()),

]
views.py文件内容
from django.shortcuts import render,HttpResponse
from rest_framework.views import APIView
class UserView(APIView):
<span class="hljs-function"><span class="hljs-keyword">def</span> <span class="hljs-title">get</span><span class="hljs-params">(self,request,*args,**kwargs)</span>:</span>
print(request.__dict__)
print(request.user)
<span class="hljs-keyword">return</span> HttpResponse(<span class="hljs-string">"UserView GET"</span>)
<span class="hljs-function"><span class="hljs-keyword">def</span> <span class="hljs-title">post</span><span class="hljs-params">(self,request,*args,**kwargs)</span>:</span>
<span class="hljs-keyword">return</span> HttpResponse(<span class="hljs-string">"UserView POST"</span>)</code></pre>
启动项目,用浏览器向http://127.0.0.1:8000/user/发送get请求
![]()
可以知道请求发送成功。现在来看看源码流程,由于UserView继承APIView,查看APIView中的as_view方法
class APIView(View):
...
@classmethod
def as_view(cls, **initkwargs):
if isinstance(getattr(cls, 'queryset', None), models.query.QuerySet):
def force_evaluation():
raise RuntimeError(
'Do not evaluate the `.queryset` attribute directly, '
'as the result will be cached and reused between requests. '
'Use `.all()` or call `.get_queryset()` instead.'
)
cls.queryset._fetch_all = force_evaluation
view = super(APIView, cls).as_view(**initkwargs)
view.cls = cls
view.initkwargs = initkwargs
<span class="hljs-keyword">return</span> csrf_exempt(view)</code></pre>
通过super来执行APIView的父类Django的View中的as_view方法。上一篇文章源码解析Django CBV的本质中已经知道,View类的as_view方法会调用dispatch方法。
View类的as_view方法源码如下所示
class View(object):
...
@classonlymethod
def as_view(cls, **initkwargs):
...
def view(request, *args, **kwargs):
self = cls(**initkwargs)
if hasattr(self, 'get') and not hasattr(self, 'head'):
self.head = self.get
self.request = request
self.args = args
self.kwargs = kwargs
return self.dispatch(request, *args, **kwargs)
...
as_view方法中的self实际上指的是自定义的UserView这个类,上面的代码会执行UserView类中dispatch方法。
由于UserView类中并没有定义dispatch方法,而UserView类继承自Django restframework的APIView类,所以会执行APIView类中的dispatch方法
def dispatch(self, request, *args, **kwargs):
self.args = args
self.kwargs = kwargs
request = self.initialize_request(request, *args, **kwargs)
self.request = request
self.headers = self.default_response_headers # deprecate?
<span class="hljs-symbol">try:</span>
<span class="hljs-keyword">self</span>.initial(request, *args, **kwargs)
<span class="hljs-keyword">if</span> request.method.lower() <span class="hljs-keyword">in</span> <span class="hljs-keyword">self</span>.<span class="hljs-symbol">http_method_names:</span>
handler = getattr(<span class="hljs-keyword">self</span>, request.method.lower(),
<span class="hljs-keyword">self</span>.http_method_not_allowed)
<span class="hljs-symbol">else:</span>
handler = <span class="hljs-keyword">self</span>.http_method_not_allowed
response = handler(request, *args, **kwargs)
except Exception as <span class="hljs-symbol">exc:</span>
response = <span class="hljs-keyword">self</span>.handle_exception(exc)
<span class="hljs-keyword">self</span>.response = <span class="hljs-keyword">self</span>.finalize_response(request, response, *args, **kwargs)
<span class="hljs-keyword">return</span> <span class="hljs-keyword">self</span>.response</code></pre>
可以看到,先执行initialize_request方法处理浏览器发送的request请求。
来看看initialize_request方法的源码
def initialize_request(self, request, *args, **kwargs):
"""
Returns the initial request object.
"""
parser_context = self.get_parser_context(request)
<span class="hljs-keyword">return</span> Request(
request,
parsers=self.get_parsers(),
authenticators=self.get_authenticators(),
negotiator=self.get_content_negotiator(),
parser_context=parser_context
)</code></pre>
在initialize_request方法里,把浏览器发送的request和restframework的处理器,认证,选择器等对象列表作为参数实例化Request类中得到新的request对象并返回,其中跟认证相关的对象就是authenticators。
def get_authenticators(self):
"""
Instantiates and returns the list of authenticators that this view can use.
"""
return [auth() for auth in self.authentication_classes]
get_authenticators方法通过列表生成式得到一个列表,列表中包含认证类实例化后的对象
在这里,authentication_classes来自于api_settings的配置
authentication_classes = api_settings.DEFAULT_AUTHENTICATION_CLASSES
通过查看api_settings的源码可以知道,可以在项目的settings.py文件中进行认证相关的配置
api_settings = APISettings(None, DEFAULTS, IMPORT_STRINGS)
def reload_api_settings(*args, **kwargs):
setting = kwargs['setting']
if setting == 'REST_FRAMEWORK':
api_settings.reload()
Django restframework通过initialize_request方法对原始的request进行一些封装后实例化得到新的request对象
然后执行initial方法来处理新得到的request对象,再来看看initial方法中又执行了哪些操作
def initial(self, request, *args, **kwargs):
self.format_kwarg = self.get_format_suffix(**kwargs)
neg = self.perform_content_negotiation(request)
request.accepted_renderer, request.accepted_media_type = neg
version, scheme = <span class="hljs-keyword">self</span>.determine_version(request, *args, **kwargs)
request.version, request.versioning_scheme = version, scheme
<span class="hljs-keyword">self</span>.perform_authentication(request)
<span class="hljs-keyword">self</span>.check_permissions(request)
<span class="hljs-keyword">self</span>.check_throttles(request)</code></pre>
由上面的源码可以知道,在initial方法中,执行perform_authentication来对request对象进行认证操作
def perform_authentication(self, request):
request.user
perform_authentication方法中调用执行request中的user方法,这里的request是封装了原始request,认证对象列表,处理器列表等之后的request对象
class Request(object):
...
@property
def user(self):
"""
Returns the user associated with the current request, as authenticated
by the authentication classes provided to the request.
"""
if not hasattr(self, '_user'):
with wrap_attributeerrors():
self._authenticate()
return self._user
从request中获取_user的值,如果获取到则执行_authenticate方法,否则返回_user
def _authenticate(self):
"""
Attempt to authenticate the request using each authentication instance
in turn.
"""
for authenticator in self.authenticators:
try:
user_auth_tuple = authenticator.authenticate(self)
except exceptions.APIException:
self._not_authenticated()
raise
<span class="hljs-keyword">if</span> user_auth_tuple <span class="hljs-keyword">is</span> <span class="hljs-keyword">not</span> <span class="hljs-keyword">None</span>:
self._authenticator = authenticator
self.user, self.auth = user_auth_tuple
<span class="hljs-keyword">return</span></code></pre>
在这里self.authenticators实际上是get_authenticators方法执行完成后返回的对象列表
class Request(object):
def __init__(<span class="hljs-title">self</span>, <span class="hljs-title">request</span>, <span class="hljs-title">parsers</span>=<span class="hljs-type">None</span>, <span class="hljs-title">authenticators</span>=<span class="hljs-type">None</span>,
<span class="hljs-title">negotiator</span>=<span class="hljs-type">None</span>, <span class="hljs-title">parser_context</span>=<span class="hljs-type">None</span>):
assert isinstance(<span class="hljs-title">request</span>, <span class="hljs-type">HttpRequest</span>), (
'<span class="hljs-type">The</span> `<span class="hljs-title">request</span>` <span class="hljs-title">argument</span> <span class="hljs-title">must</span> <span class="hljs-title">be</span> <span class="hljs-title">an</span> <span class="hljs-title">instance</span> <span class="hljs-title">of</span> '
'`<span class="hljs-title">django</span>.<span class="hljs-title">http</span>.<span class="hljs-type">HttpRequest</span>`, <span class="hljs-title">not</span> `{}.{}`.'
.<span class="hljs-title">format</span>(<span class="hljs-title">request</span>.<span class="hljs-title">__class__</span>.<span class="hljs-title">__module__</span>, <span class="hljs-title">request</span>.<span class="hljs-title">__class__</span>.<span class="hljs-title">__name__</span>)
)
self._request = request
self.parsers = parsers or ()
self.authenticators = authenticators or ()
...</span></code></pre>
循环认证的对象列表,执行每一个认证方法的类中的authenticate方法,得到通过认证的用户及用户的口令的元组,并返回元组完成认证的流程
在_authenticate方法中使用了try/except方法来捕获authenticate方法可能出现的异常
如果出现异常,就调用_not_authenticated方法来设置返回元组中的用户及口令并终止程序继续运行
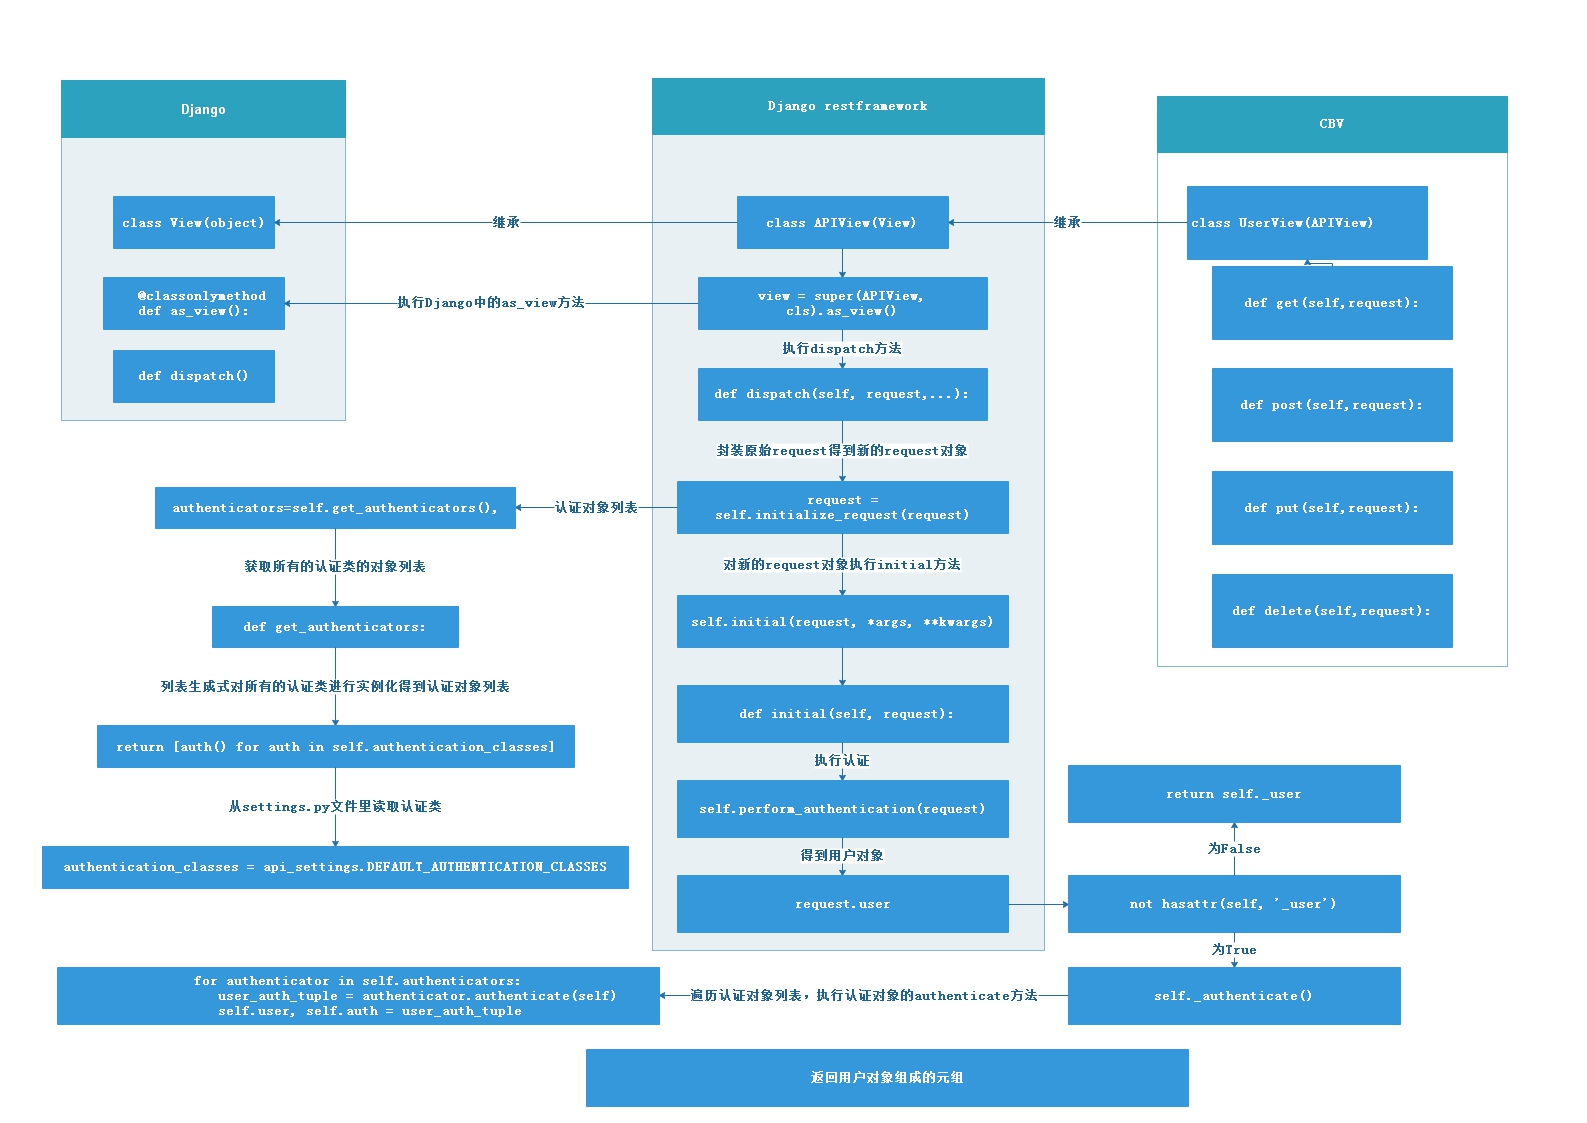
总结,Django restframework的认证流程如下图
![]()
Django restframework内置的认证类
在上面的项目例子中,在UsersView的get方法中,打印authentication_classes和request._user的值
class UserView(APIView):
# authentication_classes = [MyAuthentication,]
<span class="hljs-function"><span class="hljs-keyword">def</span> <span class="hljs-title">get</span><span class="hljs-params">(self,request,*args,**kwargs)</span>:</span>
print(<span class="hljs-string">'authentication_classes:'</span>, self.authentication_classes)
print(request._user)
<span class="hljs-keyword">return</span> HttpResponse(<span class="hljs-string">"UserView GET"</span>)</code></pre>
打印结果为
authentication_classes: [<class 'rest_framework.authentication.SessionAuthentication'>, <class 'rest_framework.authentication.BasicAuthentication'>]
AnonymousUser
由此可以知道,authentication_classes默认是Django restframework内置的认证类,而request._user为AnonymousUser,因为发送GET请求,用户没有进行登录认证,所以为匿名用户
在视图函数中导入这两个类,再查看这两个类的源码,可以知道
class BasicAuthentication(BaseAuthentication):
www_authenticate_realm = <span class="hljs-string">'api'</span>
<span class="hljs-function"><span class="hljs-keyword">def</span> <span class="hljs-title">authenticate</span><span class="hljs-params">(<span class="hljs-keyword">self</span>, request)</span></span>:
...
<span class="hljs-function"><span class="hljs-keyword">def</span> <span class="hljs-title">authenticate_credentials</span><span class="hljs-params">(<span class="hljs-keyword">self</span>, userid, password)</span></span>:
...
class SessionAuthentication(BaseAuthentication):
<span class="hljs-function"><span class="hljs-keyword">def</span> <span class="hljs-title">authenticate</span><span class="hljs-params">(<span class="hljs-keyword">self</span>, request)</span></span>:
...
<span class="hljs-function"><span class="hljs-keyword">def</span> <span class="hljs-title">enforce_csrf</span><span class="hljs-params">(<span class="hljs-keyword">self</span>, request)</span></span>:
...
class TokenAuthentication(BaseAuthentication):
...
从上面的源码可以发现,这个文件中不仅定义了SessionAuthentication和BasicAuthentication这两个类,
相关的类还有TokenAuthentication,而且这三个认证相关的类都是继承自BaseAuthentication类
从上面的源码可以大概知道,这三个继承自BaseAuthentication的类是Django restframework内置的认证方式.
自定义认证功能
在上面我们知道,Request会调用认证相关的类及方法,APIView会设置认证相关的类及方法
所以如果想自定义认证功能,只需要重写authenticate方法及authentication_classes的对象列表即可
修改上面的例子的views.py文件
from django.shortcuts import render, HttpResponse
from rest_framework.views import APIView
from rest_framework.authentication import BaseAuthentication
from rest_framework import exceptions
TOKEN_LIST = [ # 定义token_list
'aabbcc',
'ddeeff',
]
class UserAuthView(BaseAuthentication):
def authenticate(self, request):
tk = request._request.GET.get("tk") # request._request为原生的request
<span class="hljs-keyword">if</span> tk <span class="hljs-keyword">in</span> TOKEN_LIST:
<span class="hljs-keyword">return</span> (tk, <span class="hljs-keyword">None</span>) <span class="hljs-comment"># 返回一个元组</span>
<span class="hljs-keyword">raise</span> exceptions.AuthenticationFailed(<span class="hljs-string">"用户认证失败"</span>)
<span class="hljs-function"><span class="hljs-keyword">def</span> <span class="hljs-title">authenticate_header</span><span class="hljs-params">(self, request)</span>:</span>
<span class="hljs-comment"># 如果不定义authenticate_header方法会抛出异常</span>
<span class="hljs-keyword">pass</span>
class UserView(APIView):
authentication_classes = [UserAuthView, ]
<span class="hljs-function"><span class="hljs-keyword">def</span> <span class="hljs-title">get</span><span class="hljs-params">(self, request, *args, **kwargs)</span>:</span>
print(request.user)
<span class="hljs-keyword">return</span> HttpResponse(<span class="hljs-string">"UserView GET"</span>)</code></pre>
启动项目,在浏览器中输入http://127.0.0.1:8000/users/?tk=aabbcc,然后回车,在服务端后台会打印
aabbcc
把浏览器中的url换为http://127.0.0.1:8000/users/?tk=ddeeff,后台打印信息则变为
ddeeff
这样就实现REST framework的自定义认证功能
Django restframework认证的扩展
基于Token进行用户认证
修改上面的项目,在urls.py文件中添加一条路由记录
from django.conf.urls import url
from django.contrib import admin
from app01 import views
urlpatterns = [
url(r'^admin/', admin.site.urls),
url(r'^users/',views.UsersView.as_view()),
url(r'^auth/',views.AuthView.as_view()),
]
修改视图函数
from django.shortcuts import render,HttpResponse
from rest_framework.views import APIView
from rest_framework.authentication import BaseAuthentication
from rest_framework import exceptions
from django.http import JsonResponse
def gen_token(username):
"""
利用时间和用户名生成用户token
:param username:
:return:
"""
import time
import hashlib
ctime=str(time.time())
hash=hashlib.md5(username.encode("utf-8"))
hash.update(ctime.encode("utf-8"))
return hash.hexdigest()
class AuthView(APIView):
def post(self, request, *args, **kwargs):
"""
获取用户提交的用户名和密码,如果用户名和密码正确,则生成token,并返回给用户
:param request:
:param args:
:param kwargs:
:return:
"""
res = {'code': 1000, 'msg': None}
user = request.data.get("user")
pwd = request.data.get("pwd")
<span class="hljs-keyword">from</span> app01 <span class="hljs-keyword">import</span> models
user_obj = models.UserInfo.objects.filter(user=user, pwd=pwd).first()
<span class="hljs-keyword">if</span> user_obj:
token = gen_token(user) <span class="hljs-comment"># 生成用户口令</span>
<span class="hljs-comment"># 如果数据库中存在口令则更新,如果数据库中不存在口令则创建用户口令</span>
models.Token.objects.update_or_create(user=user_obj, defaults={<span class="hljs-string">'token'</span>: token})
print(<span class="hljs-string">"user_token:"</span>, token)
res[<span class="hljs-string">'code'</span>] = <span class="hljs-number">1001</span>
res[<span class="hljs-string">'token'</span>] = token
<span class="hljs-keyword">else</span>:
res[<span class="hljs-string">'msg'</span>] = <span class="hljs-string">"用户名或密码错误"</span>
<span class="hljs-keyword">return</span> JsonResponse(res)
class UserAuthView(BaseAuthentication):
def authenticate(self,request):
tk=request.query_params.GET.get("tk") # 获取请求头中的用户token
<span class="hljs-keyword">from</span> app01 <span class="hljs-keyword">import</span> models
token_obj=models.Token.objects.filter(token=tk).first()
<span class="hljs-keyword">if</span> token_obj: <span class="hljs-comment"># 用户数据库中已经存在用户口令返回认证元组</span>
<span class="hljs-keyword">return</span> (token_obj.user,token_obj)
<span class="hljs-keyword">raise</span> exceptions.AuthenticationFailed(<span class="hljs-string">"认证失败"</span>)
<span class="hljs-function"><span class="hljs-keyword">def</span> <span class="hljs-title">authenticate_header</span><span class="hljs-params">(self,request)</span>:</span>
<span class="hljs-keyword">pass</span>
class UsersView(APIView):
authentication_classes = [UserAuthView,]
<span class="hljs-function"><span class="hljs-keyword">def</span> <span class="hljs-title">get</span><span class="hljs-params">(self,request,*args,**kwargs)</span>:</span>
<span class="hljs-keyword">return</span> HttpResponse(<span class="hljs-string">"....."</span>)</code></pre>
创建用户数据库的类
from django.db import models
class UserInfo(models.Model):
user=models.CharField(max_length=32)
pwd=models.CharField(max_length=64)
email=models.CharField(max_length=64)
class Token(models.Model):
user=models.OneToOneField(UserInfo)
token=models.CharField(max_length=64)
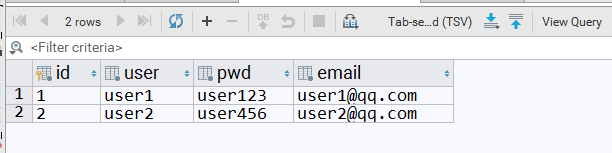
创建数据库,并添加两条用户记录
![]()
再创建一个test_client.py文件,来发送post请求
import requests
response=requests.post(
url="http://127.0.0.1:8000/auth/",
data={'user':'user1','pwd':'user123'},
)
print("response_text:",response.text)
启动Django项目,运行test_client.py文件,则项目的响应信息为
response_text: {"code": 1001, "msg": null, "token": "eccd2d256f44cb25b58ba602fe7eb42d"}
由此,就完成了自定义的基于token的用户认证
如果想在项目中使用自定义的认证方式时,可以在authentication_classes继承刚才的认证的类即可
authentication_classes = [UserAuthView,]
全局自定义认证
在正常的项目中,一个用户登录成功之后,进入自己的主页,可以看到很多内容,比如用户的订单,用户的收藏,用户的主页等
此时,难倒要在每个视图类中都定义authentication_classes,然后在authentication_classes中追加自定义的认证类吗?
通过对Django restframework认证的源码分析知道,可以直接在项目的settings.py配置文件中引入自定义的认证类,即可以对所有的url进行用户认证流程
在应用app01目录下创建utils包,在utils包下创建auth.py文件,内容为自定义的认证类
from rest_framework import exceptions
from api import models
class Authtication(object):
def authenticate(self,request):
token = request._request.GET.get("token") # 获取浏览器传递的token
token_obj = models.UserToken.objects.filter(token=token).first() # 到数据库中进行token查询,判断用户是否通过认证
if not token_obj:
raise exceptions.AuthenticationFailed("用户认证失败")
<span class="hljs-comment"># restframework会将元组赋值给request,以供后面使用</span>
<span class="hljs-keyword">return</span> (token_obj.user,token_obj)
<span class="hljs-comment"># 必须创建authenticate_header方法,否则会抛出异常</span>
<span class="hljs-function"><span class="hljs-keyword">def</span> <span class="hljs-title">authenticate_header</span><span class="hljs-params">(self,request)</span>:</span>
<span class="hljs-keyword">pass</span></code></pre>
在settings.py文件中添加内容
REST_FRAMEWORK = {
'DEFAULT_AUTHENTICATION_CLASSES':['app01.utils.auth.Authtication',]
}
修改views.py文件
from django.shortcuts import render, HttpResponse
from rest_framework.views import APIView
from rest_framework.authentication import BaseAuthentication
from rest_framework import exceptions
from django.http import JsonResponse
def gen_token(username):
"""
利用时间和用户名生成用户token
:param username:
:return:
"""
import time
import hashlib
ctime = str(time.time())
hash = hashlib.md5(username.encode("utf-8"))
hash.update(ctime.encode("utf-8"))
return hash.hexdigest()
class AuthView(APIView):
authentication_classes = [] # 在这里定义authentication_classes后,用户访问auth页面不需要进行认证
def post(self, request, *args, **kwargs):
"""
获取用户提交的用户名和密码,如果用户名和密码正确,则生成token,并返回给用户
:param request:
:param args:
:param kwargs:
:return:
"""
res = {'code': 1000, 'msg': None}
user = request.data.get("user")
pwd = request.data.get("pwd")
<span class="hljs-keyword">from</span> app01 <span class="hljs-keyword">import</span> models
user_obj = models.UserInfo.objects.filter(user=user, pwd=pwd).first()
<span class="hljs-keyword">if</span> user_obj:
token = gen_token(user) <span class="hljs-comment"># 生成用户口令</span>
<span class="hljs-comment"># 如果数据库中存在口令则更新,如果数据库中不存在口令则创建用户口令</span>
models.Token.objects.update_or_create(user=user_obj, defaults={<span class="hljs-string">'token'</span>: token})
print(<span class="hljs-string">"user_token:"</span>, token)
res[<span class="hljs-string">'code'</span>] = <span class="hljs-number">1001</span>
res[<span class="hljs-string">'token'</span>] = token
<span class="hljs-keyword">else</span>:
res[<span class="hljs-string">'msg'</span>] = <span class="hljs-string">"用户名或密码错误"</span>
<span class="hljs-keyword">return</span> JsonResponse(res)
class UserView(APIView):
def get(self, request, *args, **kwargs):
return HttpResponse("UserView GET")
class OrderView(APIView):
def get(self,request,*args,**kwargs):
return HttpResponse("OrderView GET")
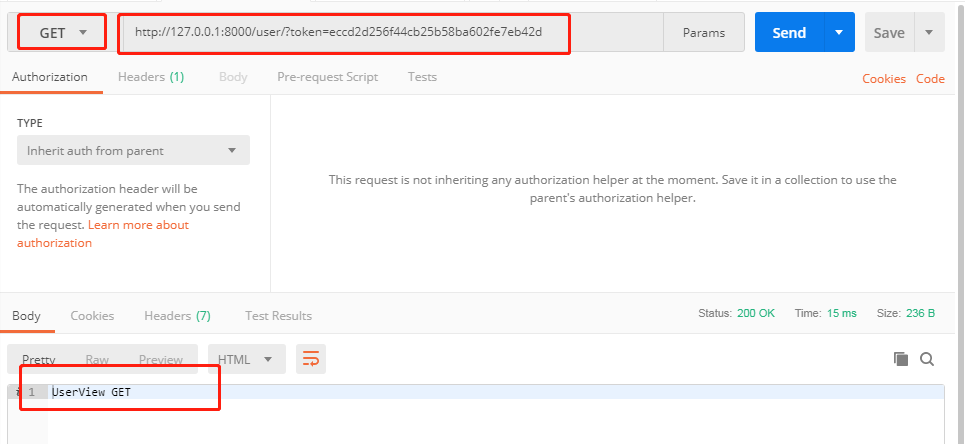
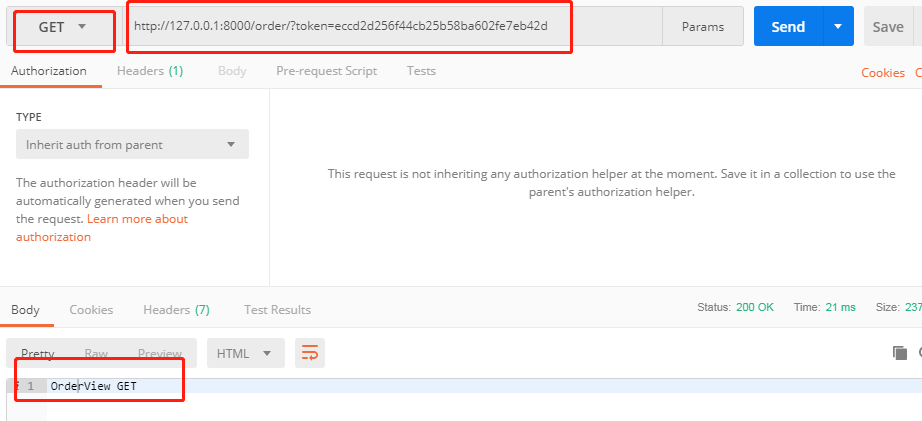
启动项目,使用POSTMAN向http://127.0.0.1:8000/order/?token=eccd2d256f44cb25b58ba602fe7eb42d和http://127.0.0.1:8000/user/?token=eccd2d256f44cb25b58ba602fe7eb42d发送GET请求,响应结果如下
![]()
![]()
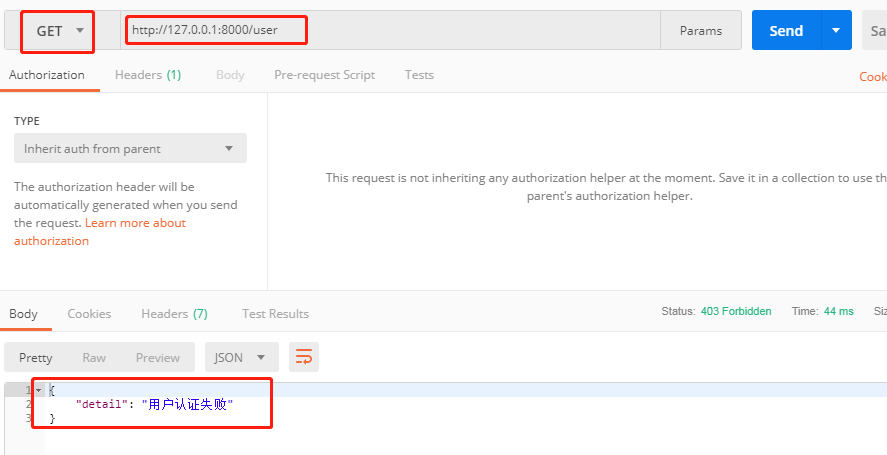
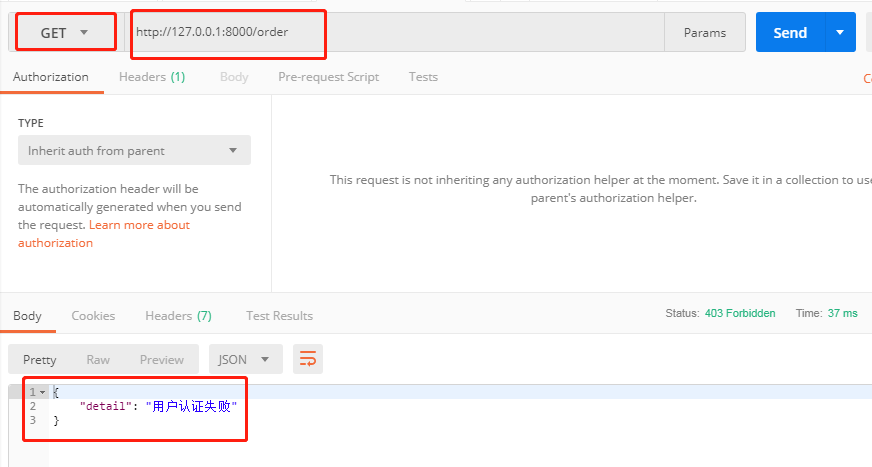
在url中不带token,使用POSTMAN向http://127.0.0.1:8000/order/和http://127.0.0.1:8000/user/发送GET请求,则会出现"认证失败"的提示
![]()
![]()
由此可以知道,在settings.py配置文件中配置自定义的认证类也可以实现用户认证功能
配置匿名用户
修改settings.py文件
REST_FRAMEWORK = {
'DEFAULT_AUTHENTICATION_CLASSES': ['app01.utils.auth.Authtication', ],
'UNAUTHENTICATED_USER': lambda :"匿名用户", # 用户未登录时显示的名称
'UNAUTHENTICATED_TOKEN': lambda :"无效token", # 用户未登录时打印的token名
}
修改views.py文件中的OrderView类
class OrderView(APIView):
authentication_classes = [] # authentication_classes为空列表表示视图类不进行认证
def get(self,request,*args,**kwargs):
print(request.user)
print(request.auth)
return HttpResponse("OrderView GET")
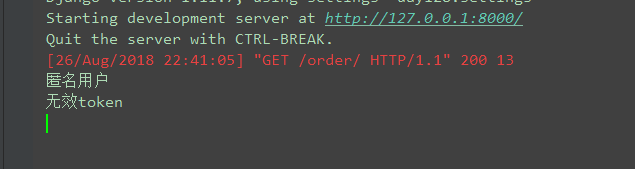
使用浏览器向http://127.0.0.1:8000/order/发送GET请求,后台打印
![]()
这说明在settings.py文件中配置的匿名用户和匿名用户的token起到作用
建议把匿名用户及匿名用户的token都设置为:None
Django restframework内置的认证类
从rest_framework中导入authentication
from rest_framework import authentication
可以看到Django restframework内置的认证类
class BaseAuthentication(object):
def authenticate(self, request):
...
<span class="hljs-function"><span class="hljs-keyword">def</span> <span class="hljs-title">authenticate_header</span><span class="hljs-params">(<span class="hljs-keyword">self</span>, request)</span></span>:
pass
class BasicAuthentication(BaseAuthentication):
def authenticate(self, request):
...
<span class="hljs-function"><span class="hljs-keyword">def</span> <span class="hljs-title">authenticate_credentials</span><span class="hljs-params">(<span class="hljs-keyword">self</span>, userid, password, request=None)</span></span>:
...
<span class="hljs-function"><span class="hljs-keyword">def</span> <span class="hljs-title">authenticate_header</span><span class="hljs-params">(<span class="hljs-keyword">self</span>, request)</span></span>:
...
class SessionAuthentication(BaseAuthentication):
<span class="hljs-function"><span class="hljs-keyword">def</span> <span class="hljs-title">authenticate</span><span class="hljs-params">(<span class="hljs-keyword">self</span>, request)</span></span>:
...
<span class="hljs-function"><span class="hljs-keyword">def</span> <span class="hljs-title">enforce_csrf</span><span class="hljs-params">(<span class="hljs-keyword">self</span>, request)</span></span>:
...
class TokenAuthentication(BaseAuthentication):
def authenticate(self, request):
...
<span class="hljs-function"><span class="hljs-keyword">def</span> <span class="hljs-title">authenticate_credentials</span><span class="hljs-params">(<span class="hljs-keyword">self</span>, key)</span></span>:
...
<span class="hljs-function"><span class="hljs-keyword">def</span> <span class="hljs-title">authenticate_header</span><span class="hljs-params">(<span class="hljs-keyword">self</span>, request)</span></span>:
...
class RemoteUserAuthentication(BaseAuthentication):
def authenticate(self, request):
...
可以看到,Django restframework内置的认证包含下面的四种:
BasicAuthentication
SessionAuthentication
TokenAuthentication
RemoteUserAuthentication
而这四种认证类都继承自BaseAuthentication,在BaseAuthentication中定义了两个方法:authenticate和authenticate_header
总结:
为了让认证更规范,自定义的认证类要继承 BaseAuthentication类
自定义认证类必须要实现authenticate和authenticate_header方法
authenticate_header方法的作用:在认证失败的时候,给浏览器返回的响应头,可以直接pass,不实现authenticate_header程序会抛出异常

 浙公网安备 33010602011771号