Hadoop学习(7)-hive的安装和命令行使用和java操作
Hive的用处,就是把hdfs里的文件建立映射转化成数据库的表
但hive里的sql语句都是转化成了mapruduce来对hdfs里的数据进行处理
,并不是真正的在数据库里进行了操作。
而那些表的定义则是储存在了mysql数据库中,他只是记录相应表的定义
所以你的集群中要有一台机器装了mysql
装hive,装到哪都行

然后解压tar –zxvf xxxxx –C apps
然后进入到这个目录里下的conf里
创建hive-site.xml文件

告诉他mysql在哪,连接驱动是啥,用户名和密码
然后进入lib目录下,把jdbc jar 包放到该目录下
然后是启动hive
你的hadoop和hive要配置的有环境变量
echo $PATH //可以查看配置的环境变量
echo $HADOOP-HOME //可以查看具体的哪一个
然后最好把hadoop和yarn都启动起来
然后再安装目录里bin/hive就可以启动了
默认的是default数据库
创建数据库和表都会在真正的hdfs里面创建目录

然后如果你要是想往表里面导数据,你需要把相应的文件用 ^A 来分割放到hdfs里的相应目录下

然后把这个文件上传到hdfs里面
hadoop fs -put stu.info /user/hive/warehouse/t_big24/
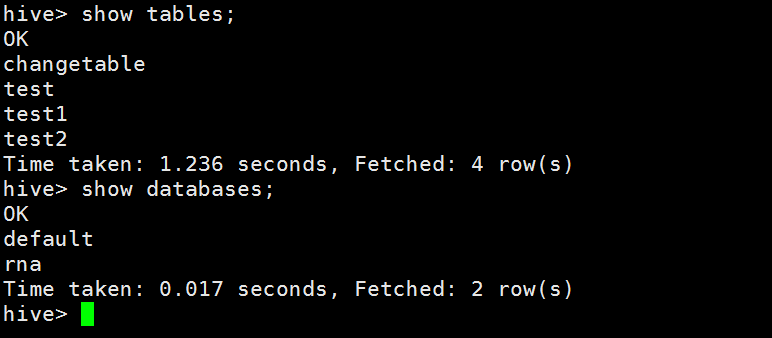
在hive交互页面中,显示当前库
设置一些基本参数,让hive使用起来更便捷,比如:
1、让提示符显示当前库:
hive>set hive.cli.print.current.db=true;
2、显示查询结果时显示字段名称:
hive>set hive.cli.print.header=true;
但是这样设置只对当前会话有效,重启hive会话后就失效,解决办法:
在linux的当前用户目录中,编辑一个.hiverc文件,将参数写入其中:
vi .hiverc
|
set hive.cli.print.header=true; set hive.cli.print.current.db=true; |
配置hive环境变量
比如我hive是解压在 /root/apps/hive-1.2.1
Vi /etc/profile
然后在最后加上
Export HIVE_HOME=/root/apps/hive-1.2.1
Export PATH=$PATH:$JAVA_HOME/bin:$HADOOP_HOME/bin:$HADOOP_HOME/sbin:$HIVE_HOME/bin
还可以把hive当成一个服务,使用客户端来访问这个服务
服务端口号10000
启动hive服务
bin/hiveserver2
然后可以在linux监听端口号netstat -nltp
启动成功后,可以在别的节点上用beeline去连接
启动服务 bin/beeline
然后要连接他
!connect jdbc:hive2://hdp-01:10000
然后输入账户root 没有密码
课外知识 标准输出重定向。Linux里1就是标准输出
./linux脚本文件 1>/要输入的文件名 2>/错误时要定向到的文件名 &
这样就不会再终端打印了
/dev/null 是一个“黑洞”什么东西都会删除
上述启动,会将这个服务启动在前台,如果要启动在后台,则命令如下:
nohup bin/hiveserver2 1>/dev/null 2>&1 &
前面加上nohup就是就算这个用户退出,这个进程也会继续
hive -e "sql命令"
这样可以不用进到hive直接运行
然后,进一步,可以将上述命令写入shell脚本中,以便于脚本化运行hive任务,并控制、调度众多hive任务,示例如下:
vi t_order_etl.sh
|
#!/bin/bash hive -e "select * from db_order.t_order" hive -e "select * from default.t_user" hql="create table default.t_bash as select * from db_order.t_order" hive -e "$hql" |
如果要执行的hql语句特别复杂,那么,可以把hql语句写入一个文件:
vi x.hql
|
select * from db_order.t_order; select count(1) from db_order.t_user; |
然后,用hive -f /root/x.hql 来执行
use db_order;
create table t_order(id string,create_time string,amount float,uid string);
表建好后,会在所属的库目录中生成一个表目录
/user/hive/warehouse/db_order.db/t_order
只是,这样建表的话,hive会认为表数据文件中的字段分隔符为 ^A
正确的建表语句为:
create table t_order(id string,create_time string,amount float,uid string)
row format delimited
fields terminated by ',';
这样就指定了,我们的表数据文件中的字段分隔符为 ","
内部表(MANAGED_TABLE):表目录按照hive的规范来部署,位于hive的仓库目录/user/hive/warehouse中
外部表(EXTERNAL_TABLE):表目录由建表用户自己指定
create external table t_access(ip string,url string,access_time string)
row format delimited
fields terminated by ','
location '/access/log';
外部表和内部表的特性差别:
1、内部表的目录在hive的仓库目录中 VS 外部表的目录由用户指定
2、drop一个内部表时:hive会清除相关元数据,并删除表数据目录
3、drop一个外部表时:hive只会清除相关元数据;
分区表的实质是:在表目录中为数据文件创建分区子目录,以便于在查询时,MR程序可以针对分区子目录中的数据进行处理,缩减读取数据的范围。
比如,网站每天产生的浏览记录,浏览记录应该建一个表来存放,但是,有时候,我们可能只需要对某一天的浏览记录进行分析
1、创建带分区的表
|
create table t_access(ip string,url string,access_time string) partitioned by(dt string) row format delimited fields terminated by ','; |
注意:分区字段不能是表定义中的已存在字段
向分区中导入数据
load data local inpath '/root/access.log.2017-08-04.log' into table t_access partition(dt='20170804');
load data local inpath '/root/access.log.2017-08-05.log' into table t_access partition(dt='20170805');
针对分区数据进行查询
统计8月4号的总PV:
select count(*) from t_access where dt='20170804';
实质:就是将分区字段当成表字段来用,就可以使用where子句指定分区了
建表:
create table t_partition(id int,name string,age int)
partitioned by(department string,sex string,howold int)
row format delimited fields terminated by ',';
导数据:
load data local inpath '/root/p1.dat' into table t_partition partition(department='xiangsheng',sex='male',howold=20);
可以通过已存在表来建表:
1、create table t_user_2 like t_user;
新建的t_user_2表结构定义与源表t_user一致,但是没有数据
2、在建表的同时插入数据
|
create table t_access_user as select ip,url from t_access; |
t_access_user会根据select查询的字段来建表,同时将查询的结果插入新表中
1.1.1. 将hive表中的数据导出到指定路径的文件
1、将hive表中的数据导入HDFS的文件
insert overwrite directory '/root/access-data'
row format delimited fields terminated by ','
select * from t_access;
2、将hive表中的数据导入本地磁盘文件
insert overwrite local directory '/root/access-data'
row format delimited fields terminated by ','
select * from t_access limit 100000;
hql里面的数据类型和普通的没什么区别
array数组类型
arrays: ARRAY<data_type> (Note: negative values and non-constant expressions are allowed as of Hive 0.14.)
示例:array类型的应用
假如有如下数据需要用hive的表去映射:
|
战狼2,吴京:吴刚:龙母,2017-08-16 三生三世十里桃花,刘亦菲:痒痒,2017-08-20 |
设想:如果主演信息用一个数组来映射比较方便
建表:
create table t_movie(moive_name string,actors array<string>,first_show date)
row format delimited fields terminated by ','
collection items terminated by ':';
导入数据:
load data local inpath '/root/movie.dat' into table t_movie;
查询:
select * from t_movie;
select moive_name,actors[0] from t_movie;
select moive_name,actors from t_movie where array_contains(actors,'吴刚');
select moive_name,size(actors) from t_movie;
map类型
1) 假如有以下数据:
|
1,zhangsan,father:xiaoming#mother:xiaohuang#brother:xiaoxu,28 2,lisi,father:mayun#mother:huangyi#brother:guanyu,22 3,wangwu,father:wangjianlin#mother:ruhua#sister:jingtian,29 4,mayun,father:mayongzhen#mother:angelababy,26 |
可以用一个map类型来对上述数据中的家庭成员进行描述
2) 建表语句:
create table t_person(id int,name string,family_members map<string,string>,age int)
row format delimited fields terminated by ','
collection items terminated by '#'
map keys terminated by ':';
3) 查询
select * from t_person;
## 取map字段的指定key的值
select id,name,family_members['father'] as father from t_person;
## 取map字段的所有key
select id,name,map_keys(family_members) as relation from t_person;
## 取map字段的所有value
select id,name,map_values(family_members) from t_person;
select id,name,map_values(family_members)[0] from t_person;
## 综合:查询有brother的用户信息
|
select id,name,father from (select id,name,family_members['brother'] as father from t_person) tmp where father is not null; |
struct类型
1) 假如有如下数据:
|
1,zhangsan,18:male:beijing 2,lisi,28:female:shanghai |
其中的用户信息包含:年龄:整数,性别:字符串,地址:字符串
设想用一个字段来描述整个用户信息,可以采用struct
2) 建表:
create table t_person_struct(id int,name string,info struct<age:int,sex:string,addr:string>)
row format delimited fields terminated by ','
collection items terminated by ':';
3) 查询
select * from t_person_struct;
select id,name,info.age from t_person_struct;
其他的执行语句和sql里面的是基本一样的
注意: 一旦有group by子句,那么,在select子句中就不能有 (分组字段,聚合函数) 以外的字段
## 为什么where必须写在group by的前面,为什么group by后面的条件只能用having
因为,where是用于在真正执行查询逻辑之前过滤数据用的
having是对group by聚合之后的结果进行再过滤;
上述语句的执行逻辑:
1、where过滤不满足条件的数据
2、用聚合函数和group by进行数据运算聚合,得到聚合结果
3、用having条件过滤掉聚合结果中不满足条件的数据
假如有以下数据:
|
1,zhangsan,化学:物理:数学:语文 2,lisi,化学:数学:生物:生理:卫生 3,wangwu,化学:语文:英语:体育:生物 |
映射成一张表:
create table t_stu_subject(id int,name string,subjects array<string>)
row format delimited fields terminated by ','
collection items terminated by ':';

然后,我们利用这个explode的结果,来求去重的课程:
|
select distinct tmp.sub from (select explode(subjects) as sub from t_stu_subject) tmp; |
然后java代码操作的话,需要现在服务器上开启hive2服务,这个跟上面使用beeline连接hive是一个道理
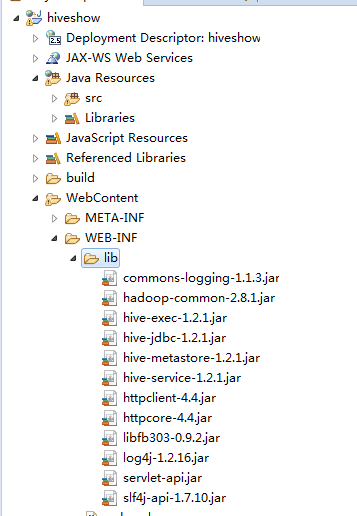
需要的包在解压后的hive里面都有
import java.sql.Connection;
import java.sql.DriverManager;
import java.sql.SQLException;

public class getConnection {
 public getConnection() {
 }

 public static Connection getConnection() throws ClassNotFoundException, SQLException {
     Class.forName("org.apache.hive.jdbc.HiveDriver");
     Connection connection = DriverManager.getConnection("jdbc:hive2://hdp-02:10000/test","root","123456");

     return connection;
 }
}
这样就可以获得一个连接
import java.sql.Connection;
import java.sql.ResultSet;
import java.sql.SQLException;
import java.sql.Statement;

public class getData {
    public getData() {
    }

    public static void getdata() throws ClassNotFoundException, SQLException {
        Connection connection = getConnection.getConnection();
        Statement statement = connection.createStatement();
        String sql = "select * from people";
        ResultSet res = statement.executeQuery(sql);while(res.next()) {
            System.out.println(res.getString(1) + "  " + res.getString(2) + "  " + res.getString(3) + "  " + res.getString(4));
        }

        res.close();
        statement.close();
        connection.close();
        return res;

    }
}
这个其实和连接普通的mysql也没啥区别........

 浙公网安备 33010602011771号