

Anaconda管理python模块
Anaconda 可以创建多个Evironment,针对不同的python版本;然后安装各个模块时,需要提前设置python版本,然后在其版本下安装对应的模块
1、创建新的Python环境:参考链接
1)命令
conda config --set auto_activate_base false  //自动启动base环境
conda update conda //更新自身
conda update -n base conda //也是更新自身?
conda update --all  //更新
conda info --envs  //显示所有环境
conda create --name python27 python=2.7  //创建python27环境
python --version  //显示当前python版本,即代表了哪个python环境
activate python27  //更改当前环境为
conda remove --name python27 --all  //移除python27环境
conda update -n base conda //更新conda安装工具?
2)尽量不要用base作为环境,要不然环境太大
3)删除base环境包
(1)直接删除会提示如下错误
RemoveError: 'requests' is a dependency of conda and cannot be removed from ......(2)解决办法:需要先更新升级conda
conda update -n base -c defaults conda
conda remove pytorch2、环境移植:参考链接
1)如果使用conda,用pip之类装的东西并没有移植过来,需要你重新安装。
# 环境拷贝:复制既有环境
conda create -n new_env --clone old_env

# 导出环境
conda env export > ~/env.yaml
conda env export > environment.yaml

# 使用yaml配置文件创建新环境
#在新的机器中可直接执行上述命令,生成的环境与复制源完全一样(包括环境名),如果想在同一台机器上复制,需要把yaml文件中的环境名修改为一个新的名字,否则会冲突。
conda env create -f ~/env.yaml
conda env create -f environment.yaml

# pip导出安装的库到requirements.txt
pip freeze > requirements.txt
# pip导入requirements.txt中列出的库到系统
pip install -r requirements.txt2、卸载base环境:参考链接
1)命令
# 执行以下命令,会报错
conda activate 其他环境
conda uninstall -n base --all

# 一种方法是在安装任何用户包之前将环境恢复到某一个版本,那么如何查看我的版本呢?
conda list -n base -r
# 根据conda list -n base -r输出的版本,选择你想要的版本即可,比如:
conda install --revision 0
3、安装、更新、删除、查找包
# 更新Anaconda
conda update conda
# 更新所有包
conda update --all
# 显示安装的所有库
conda list
#安装与更新
pip install 库名
pip install 库名 --upgrade
pip install --upgrade 包名称
pip --no-cache-dir install 包名(删除缓存)
# 或者
conda install 库名
conda install 库名=版本
conda update 库名
# 更新所有库
conda update --all
# 更新 conda 自身
conda update conda
# 更新 anaconda 自身
conda update anaconda
# 查找
conda search 库名
#删除包
conda remove 库
pip uninstall 库
#清理本地
conda clean -p  //删除没有用的包
conda clean -t  //tar打包
conda clean -y --all  //删除所有的安装包及cache
sudo rm -r ~/.cache/pip
windows是:进入目录:C:\Users\"用户名"\AppData\Local\pip,删除该目录下的cache文件夹即可。
4、pip 批量删除包
1)命令
pip list
pip freeze>python_modules.txt
pip uninstall -r python_modules.txt -y
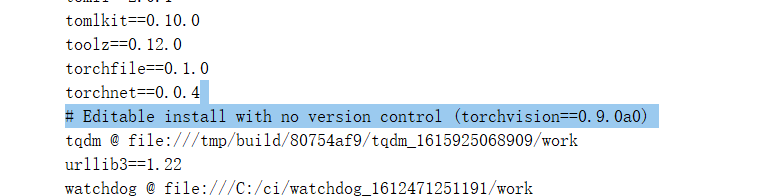
2)如果出现下面的内容,手动删除
3)如果碰到有些内容无法删除,会终止删除后面的包,所以需要手动处理
4)可能破坏conda环境
5、conda-forge
安装cudnn8.1.1时,出现包找不到的错误:PackagesNotFoundError: The following packages are not available from current channels: https://blog.csdn.net/weixin_53051863/article/details/116096932
conda config --add channels conda-forge6、conda 显示、添加、删除、复位镜像源:https://www.jianshu.com/p/39819bcb889f
1)显示 conda config --show channels
2)添加 conda config --add channels https://mirrors.tuna.tsinghua.edu.cn/anaconda/pkgs/free/
3) 删除 conda config --remove channels https://pypi.doubanio.com/simple/
4) 复位到原本镜像源 https://blog.csdn.net/m0_38129460/article/details/90289661 conda config --remove-key channels
5)添加镜像:
清华源:来源
conda config --add channels  https://mirrors.tuna.tsinghua.edu.cn/anaconda/pkgs/main
conda config --add channels  https://mirrors.tuna.tsinghua.edu.cn/anaconda/pkgs/free
conda config --add channels  https://mirrors.tuna.tsinghua.edu.cn/anaconda/pkgs/r
conda config --add channels  https://mirrors.tuna.tsinghua.edu.cn/anaconda/pkgs/pro
conda config --add channels  https://mirrors.tuna.tsinghua.edu.cn/anaconda/pkgs/msys2
6、pip设置镜像源
(1)一般安装方式
pip install numpy -i https://pypi.douban.com/simple/(2)设置默认安装源,会替换以前的
pip install pip -U
pip config set global.index-url https://pypi.douban.com/simple/
(3)windows上更改本地:C:\Users\wq\AppData\Roaming\pip\pip.ini
# 列出配置位置
pip config -v list [global]
index-url=http://pypi.douban.com/simple
extra-index-url=
http://mirrors.aliyun.com/pypi/simple/
https://pypi.tuna.tsinghua.edu.cn/simple/
http://pypi.mirrors.ustc.edu.cn/simple/
[install]
trusted-host=
pypi.douban.com
mirrors.aliyun.com
pypi.tuna.tsinghua.edu.cn
pypi.mirrors.ustc.edu.cn(4)linux:永久修改安装源
#创建目录
mkdir -p ~/.pip
#修改配置文件
vim  ~/.pip/pip.conf
#写入以下内容并保存
[global]
index-url = https://mirrors.aliyun.com/pypi/simple/
(5)可用源
http://mirrors.aliyun.com/pypi/simple/
https://pypi.tuna.tsinghua.edu.cn/simple/
https://pypi.mirrors.ustc.edu.cn/simple/
http://pypi.mirrors.ustc.edu.cn/simple/
https://pypi.douban.com/simple/
7、pip 设置、清理缓存
pip config set global.cache-dir "D:\DSABD\PSF\www.python.org\pipCache"
pip cache purge  //默认路径是C:\Users\wq\AppData\Local\pip,也是pip.ini里面
8、windows环境变量
D:\Programs\Anaconda3\Scripts;
D:\Programs\Anaconda3\Library\bin;
D:\Programs\Anaconda3\Library\usr\bin;
D:\Programs\Anaconda3\Library\mingw-w64\bin;
D:\Programs\Anaconda3
8、说明
(1)pip安装的包,conda无法卸载,但是conda list会显示pip安装包。

 浙公网安备 33010602011771号