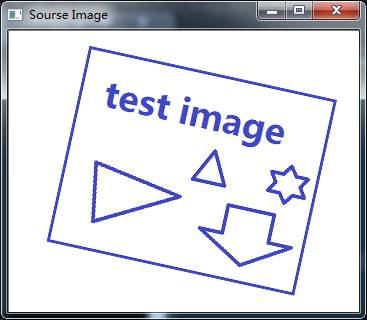
《图像处理实例》 之 目标旋转矫正(基于区域提取、DFT变换)
目标:1.把矩形旋转正。
2.把文字旋转校正。

目标一(旋转正方形)
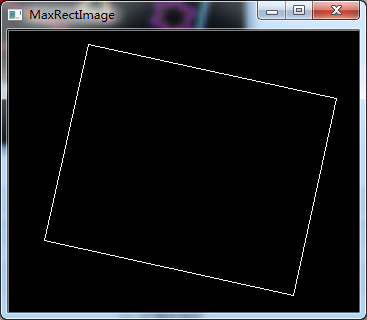
思路:A.利用寻找边界进行旋转,然后进行ROI提取。
B.利用霍夫变换等寻找直线,主要找到拐点再进行图像变化。
本文利用第一点思路进行。。。


程序很简单,直接上代码:
  1 #include<iostream>
  2 #include <opencv2/opencv.hpp>
  3 #include <math.h>
  4 using namespace cv;
  5 using namespace std;
  6
  7 int Threshold_Value = 50;
  8 const int Threshold_Max_value = 255;
  9 const int Threshold_type_value = 3;
 10 double MaxWidth = 0, MaxHeight = 0;//找最大的矩形边
 11
 12 RNG rng(12345);
 13
 14 Mat input_image, threshold_image, output_image, Middle_image;
 15
 16 void Threshold_Image_Bar(int, void *);
 17
 18 int main(int argc, char**argv)
 19 {
 20     input_image = imread("1.jpg");
 21     if (input_image.data == NULL) {
 22         return -1; cout << "can't open image.../";
 23     }
 24     imshow("Sourse Image", input_image);
 25     blur(input_image, Middle_image,Size(3,3),Point(-1,-1),4);
 26     imshow("Blur Image", Middle_image);
 27     cvtColor(Middle_image, Middle_image,COLOR_RGB2GRAY);
 28     imshow("Gray Image", Middle_image);
 29     namedWindow("Threshold Image",1);
 30     createTrackbar("阈值调整", "Threshold Image",&Threshold_Value,255,Threshold_Image_Bar);
 31     Threshold_Image_Bar(0,0);
 32     waitKey(0);
 33     return 0;
 34 }
 35
 36 void Threshold_Image_Bar(int, void *)
 37 {
 38     /*--------------------------------------------------------------------------------------------------------------------------*/
 39     /*--------------------------------------------------------------------------------------------------------------------------*/
 40     /*-----------------------------------------------------图像旋转校正---------------------------------------------------------*/
 41     /*--------------------------------------------------------------------------------------------------------------------------*/
 42     /*--------------------------------------------------------------------------------------------------------------------------*/
 43
 44     threshold(Middle_image, threshold_image, 90, 255, 3);
 45     Canny(threshold_image,threshold_image, Threshold_Value, Threshold_Value*3);
 46     imshow("Threshold Image", threshold_image);
 47
 48     vector<vector<Point>> contours;
 49     vector<Vec4i> hireachy;
 50     findContours(threshold_image,contours,hireachy, RETR_TREE, CHAIN_APPROX_SIMPLE,Point(-1,-1));
 51     char flag_count = 0;
 52     Mat Show_threImage = Mat::zeros(threshold_image.size(),CV_8UC3);
 53     RotatedRect MinRect;
 54     for (size_t i = 0; i < contours.size(); i++)
 55     {
 56         const Scalar color = Scalar(rng.uniform(0,255),rng.uniform(0,255),rng.uniform(0,255));
 57         drawContours(Show_threImage,contours,static_cast<int>(i),color,2,8,hireachy,0,Point());
 58         MinRect = minAreaRect(contours[i]);
 59         //---------------------找最大的长宽、边界-----------------------------//
 60         MaxWidth  =  MaxWidth  > MinRect.size.width  ? MaxWidth  : MinRect.size.width;
 61         MaxHeight =  MaxHeight > MinRect.size.height ? MaxHeight : MinRect.size.height;
 62         flag_count = ((MaxWidth == MinRect.size.width) || (MaxHeight == MinRect.size.height)) ? static_cast<int>(i) : flag_count;
 63     }
 64     imshow("Draw_Image_Contours", Show_threImage);
 65     //-----------------为了求矩形边角点坐标---------------------//
 66     Point2f pt[4];
 67     MinRect = minAreaRect(contours[flag_count]);
 68     MinRect.points(pt);
 69     Mat MaxRectImage = Mat::zeros(input_image.size(),CV_8UC3);
 70     for (size_t i = 0; i < 4; i++)
 71     {
 72         const Scalar color = Scalar(255,255,255);
 73         line(MaxRectImage,Point(pt[i]),Point(pt[(i+1)%4]),color);
 74     }
 75     imshow("MaxRectImage", MaxRectImage);
 76     //------水漫操作,为了就倾斜矩形座位ROI,在这里没作用,就是为了看看而已----//
 77     Mat gray;
 78     gray.create(input_image.size(), input_image.type());
 79     Rect s = boundingRect(contours[flag_count]);
 80     floodFill(MaxRectImage, Point(s.x + s.width / 2, s.y + s.height / 2), Scalar(255, 255, 255));
 81     bitwise_and(input_image, MaxRectImage, gray);
 82     imshow("wjy", gray);
 83     //--------图像旋转-----------//
 84     Mat RotateImage = getRotationMatrix2D(Point2f(input_image.cols / 2, input_image.rows / 2), 90+MinRect.angle, 1.0);
 85     warpAffine(input_image, input_image,RotateImage, input_image.size(),1,0,Scalar(255,255,255));
 86     imshow("RotateImage", input_image);
 87
 88 /*--------------------------------------------------------------------------------------------------------------------------*/
 89 /*--------------------------------------------------------------------------------------------------------------------------*/
 90 /*------------------------------------------------ROI区域进行充满图像操作---------------------------------------------------*/
 91 /*--------------------------------------------------------------------------------------------------------------------------*/
 92 /*--------------------------------------------------------------------------------------------------------------------------*/
 93
 94     Mat test;
 95     blur(input_image, test, Size(3, 3), Point(-1, -1), 4);
 96     cvtColor(test, test, COLOR_RGB2GRAY);
 97     MaxWidth = 0; MaxHeight = 0;
 98     threshold(test, test, 90, 255, 3);
 99
100     Canny(test, test, Threshold_Value, Threshold_Value * 3);
101     findContours(test, contours, hireachy, RETR_TREE, CHAIN_APPROX_SIMPLE, Point(-1, -1));
102     for (size_t i = 0; i < contours.size(); i++)
103     {
104         const Scalar color = Scalar(rng.uniform(0, 255), rng.uniform(0, 255), rng.uniform(0, 255));
105         drawContours(test, contours, static_cast<int>(i), color, 2, 8, hireachy, 0, Point());
106         MinRect = minAreaRect(contours[i]);
107
108         MaxWidth = MaxWidth  > MinRect.size.width ? MaxWidth : MinRect.size.width;
109         MaxHeight = MaxHeight > MinRect.size.height ? MaxHeight : MinRect.size.height;
110         flag_count = ((MaxWidth == MinRect.size.width) || (MaxHeight == MinRect.size.height)) ? static_cast<int>(i) : flag_count;
111     }
112     MinRect = minAreaRect(contours[flag_count]);
113
114     /*通过水漫算法找ROI
115     Mat gray;
116     gray.create(input_image.size(), input_image.type());
117     Rect s = boundingRect(contours[flag_count]);
118     floodFill(MaxRectImage, Point(s.x + s.width / 2, s.y + s.height / 2), Scalar(255, 255, 255));
119     bitwise_and(input_image, MaxRectImage, gray);
120     imshow("wjy", gray);
121     */
122     /*通过矩形找ROI
123     Rect bbox = MinRect.boundingRect();
124     Mat wjy_image = input_image(bbox);
125     imshow("123", wjy_image);
126     */
127
128     /*通过四个点找ROI*/
129     MinRect.points(pt);
130     //Mat Result_Image = input_image(Rect(Point2i(100,100), Point2i(250, 250)));
131     Mat Result_Image = input_image(Rect(Point2i(pt[1]),Point2i(pt[3])));
132     Mat Result_ROI = Result_Image.clone();
133     imshow("123",Result_ROI);
134
135 }
目标二(旋转文字)
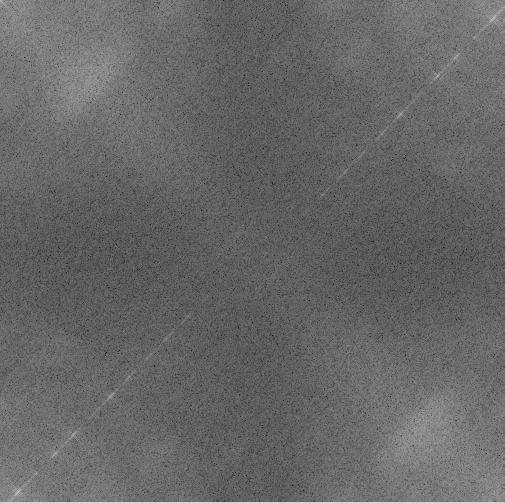
首先介绍一下DFT:
1.我们的图像是代表:空间域+值域。
(1)其中空间域就是像素直接的距离,之前的高斯滤波考虑的就是空间域,距离中心像素越近占的权重就越大(这个不懂去看我的高斯那篇博文)。
(2)其中值域就是像素值,之前的中值滤波考虑的就是像素值。
--->>>我现在想看看这个图像的边缘和纹理特征,也就是想看到图像哪里变化的快,图像的走向等,怎么办?如果是一条曲线,我们能看到线的走向,但是看得不明显,这个大家都知道,求f(x)的微分就可以了,看得不够细再求二阶微分。。。那么图像呢?边缘不就是canny算子求得梯度?sift算法不也是求得细节,其中也用到梯度了。这个时候我们的傅里叶变换就上场了。。。
2.我们的频率域代表:图像的变化率(简单理解梯度)
(1)傅里叶变换就是将图像从空间域--->>>频率域(值域就不说了,后者也包含值域),高频部分代表图像的细节、纹理等,低频部分代表图像的轮廓信息。比如中值滤波在空间域就是平衡那些较高的信号,在频率域就是把高频部分给过滤掉。两者是相互变化而来的,对某个的操作另一个操作也适合。
(2)变换的结果包括实数+复数(x+yi),以后用到的大部分都是将两者结合等于幅值图像显示。
(3)变换的大致意思就是任何一个函数都可以用sinx和cosx来表示,具体去看公式~~我也没太理解。。。
程序还有其它知识点,部分有注释,有部分看不懂的都在其它博客中有讲解!
上代码:
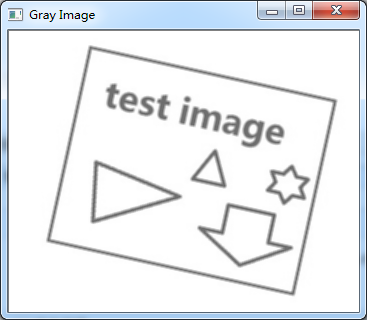
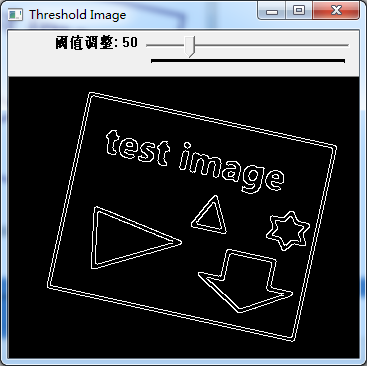
  1 #include <opencv2/opencv.hpp>
  2 #include <iostream>
  3 #include <windows.h>
  4
  5 using namespace cv;
  6 using namespace std;
  7 void DFT(Mat& src, Mat& dst);
  8 int main(int argc, char**argv)
  9 {
 10     Mat input_image,output_image;
 11     input_image = imread("2.jpg");
 12     if (input_image.data == NULL) {
 13         return -1; cout << "can't open image.../";
 14     }
 15     DFT(input_image, output_image);
 16
 17     imshow("input_image2", input_image);
 18     imshow("input_image2", output_image);
 19     waitKey(0);
 20     return 0;
 21 }
 22 void DFT(Mat& src, Mat& dst123)
 23 {
 24     Mat dst,wjy = src.clone();
 25     cvtColor(src, src, CV_BGR2GRAY);
 26     //----获得有利于DFT变换的尺寸--->>就是扩大成奇数尺寸
 27     const int height = getOptimalDFTSize(src.rows);
 28     const int width  = getOptimalDFTSize(src.cols);
 29     //----为扩大的尺寸赋值为0
 30     Mat middle_image;
 31     copyMakeBorder(src, middle_image, 0, height - src.rows, 0, width - src.cols, BORDER_CONSTANT, Scalar::all(0));
 32     //----DFT变换的结果为:实数+虚数,需要弄一个二通道Mat来存储
 33     //Mat channels[] = { Mat_<float>(dst),Mat::zeros(src.size(),CV_32F) };
 34     vector<Mat> channels(2);
 35     channels[0] = Mat_<float>(middle_image);
 36     Mat temp = Mat::zeros(middle_image.size(), CV_32F);
 37     channels[1] = temp;
 38     Mat complexI;
 39     merge(channels,complexI);
 40     dft(complexI, complexI);//DFT变换
 41     split(complexI, channels);//分离变换的结果:实数+虚数,两个通道
 42     magnitude(channels[0], channels[1], channels[0]);//幅值计算-->>结果在channels[3]
 43     dst = channels[0];
 44     //---由于幅值太大无法显示,需要进行尺度(详细看sift算法)变换
 45     //---这里使用 M1 = log( M + 1 )进行尺寸缩小
 46     dst += Scalar::all(1);
 47     log(dst, dst);
 48     dst = dst(Rect(0, 0, src.cols, src.rows));
 49     normalize(dst, dst, 0, 255, NORM_MINMAX);//浮点数直接显示不出来(如果是0-1可以显示)
 50     dst.convertTo(dst, CV_8UC1);
 51     //------频域移动
 52     int cx = dst.cols;
 53     int cy = dst.rows;
 54     Mat top_lf = dst(Rect(Point(0, 0), Point(cx / 2, cy / 2)));
 55     Mat top_rt = dst(Rect(Point(cx / 2, 0), Point(cx, cy / 2)));
 56     Mat bot_lf = dst(Rect(Point(0, cy/2 ), Point(cx/2 , cy)));
 57     Mat bot_rt = dst(Rect(Point(cx/2 , cy/2 ), Point(cx, cy)));
 58     Mat mid;
 59     //top_left<<--->>bottom_right
 60     top_lf.copyTo(mid);
 61     bot_rt.copyTo(top_lf);
 62     mid.copyTo(bot_rt);
 63     //top_right<<--->>bottom_left
 64     top_rt.copyTo(mid);
 65     bot_lf.copyTo(top_rt);
 66     mid.copyTo(bot_lf);
 67     //直线检测
 68     //cvtColor(dst, dst, CV_BGR2GRAY);
 69     threshold(dst, dst, 150, 255, THRESH_BINARY_INV);
 70     //---此处不适合用houlinesP(),因为斜率在计算很麻烦
 71     /*vector<Vec4i> lines;
 72     HoughLinesP(dst, lines, 1, CV_PI / 360, 15, 3, 5);
 73     Mat LineImage = Mat::zeros(dst.size(), dst.type());
 74     for (size_t i = 0; i < lines.size(); i++)
 75     {
 76         line(LineImage, Point(lines[i][0], lines[i][1]), Point(lines[i][2], lines[i][3]), Scalar(200, 55, 205), 1, 8, 0);
 77     }*/
 78     // 霍夫变换
 79     vector<Vec2f> lines;
 80     HoughLines(dst, lines, 1, CV_PI / 180, 100, 50, 0);
 81     // 检测线个数
 82     std::cout << "lines.size:" << lines.size() << std::endl;
 83     Mat houghMat(dst.size(), CV_8UC3);
 84     houghMat.setTo(0);
 85     //for (size_t i = 0; i < lines.size(); i++)
 86     //    // 绘制检测线
 87     //{
 88     //    float rho = lines[i][0], theta = lines[i][1];
 89     //    Point pt1, pt2;
 90     //    double a = cos(theta), b = sin(theta);
 91     //    double x0 = a*rho, y0 = b*rho;
 92     //    pt1.x = cvRound(x0 + 1000 * (-b));
 93     //    pt1.y = cvRound(y0 + 1000 * (a));
 94     //    pt2.x = cvRound(x0 - 1000 * (-b));
 95     //    pt2.y = cvRound(y0 - 1000 * (a));
 96     //    line(houghMat, pt1, pt2, Scalar(0, 255, 0), 1, CV_AA);
 97     //}
 98     //cv::imshow("houghMat", houghMat);
 99     float theta = 0;
100     // 检测线角度判断
101     for (size_t i = 0; i < lines.size(); i++)
102     {
103         float  thetaTemp = lines[i][1] * 180 / CV_PI;
104         if (thetaTemp > 0 && thetaTemp < 90)
105         {
106             theta = thetaTemp;
107             break;
108         }
109     }
110     // 角度转换--具体见另一篇博客霍夫变换
111     float angelT = src.rows* tan(theta / 180 * CV_PI) / src.cols;
112     theta = atan(angelT) * 180 / CV_PI;
113     std::cout << "theta:" << theta << std::endl;
114
115     // 取图像中心
116     cv::Point2f centerPoint = cv::Point2f(wjy.cols / 2, wjy.rows / 2);
117     double scale = 1;
118     // 计算旋转矩阵
119     cv::Mat warpMat = getRotationMatrix2D(centerPoint, theta, scale);
120     // 仿射变换
121     cv::Mat resultImage(wjy.size(), wjy.type());
122     cv::warpAffine(wjy, resultImage,
123         warpMat, resultImage.size());
124     resultImage.copyTo(dst123);
125 }
参考: 贾老师opencv系列
《opencv图像处理编程实例》
http://open.163.com/movie/2013/3/K/8/M8PTB0GHI_M8RJ8VMK8.html讲解傅里叶变换的公开课
-------------------------------------------
个性签名:衣带渐宽终不悔,为伊消得人憔悴!
如果觉得这篇文章对你有小小的帮助的话,记得关注再下的公众号,同时在右下角点个“推荐”哦,博主在此感谢!


 浙公网安备 33010602011771号