Django学习笔记(11)——开发图书管理页面
一,项目题目: 开发图书管理页面
该项目主要练习Django对多个数据库进行增删改查的操作。
二,项目需求:
基础需求:75%
1. 列出图书列表、出版社列表、作者列表
2. 点击作者,会列出其出版的图书列表
3. 点击出版社,会列出旗下图书列表
4. 可以创建、修改、删除 图书、作者、出版社

升级需求:10%
1. 点击修改按钮,弹出模块框,模态框中展示该书的信息且信息可以修改,
2. 书名不可重复,不可修改
3. 修改图书信息时,使用ajax请求发送信息
三,编码规范需求:
编码规范需求:15%
1. 代码规范遵守pep8 (https://python.org/dev/peps/pep-0008/)
2. 函数有相应的注释
3. 程序有文档说明文件(README.md参考:https://github.com/csrftoken/vueDrfDemo)
4. 程序的说明文档必须包含的内容:程序的开发环境(django版本)、程序的实现的功能、程序的启动方式、登录用户信息、程序的运行效果
5. 程序设计的流程图:
(可以参考:https://www.processon.com/view/link/589eb841e4b0999184934329)
四,项目思路
首先做这个项目之前,推荐看一下我之前的博客:Django学习笔记(7):单表操作和多表操作,甚至有必要练习一遍。
其次,前期的基本操作,我在这里不再累赘,如果不会的话,可以参考我之前的博客:Django学习笔记(10)——Book单表的增删改查页面,当然,要是单表操作的增删改查都不会,我觉得先练习一遍没有坏处。
最后这里写一下此项目的思路。此项目就是对多表操作的再巩固。
4.1 创建模型
我们先来设定概念,字段和关系
作者模型            :   姓名  年龄


作者详细模型      :   生日   手机号码   家庭住址等等


出版商模型          :   出版商名称   所在城市   email


书籍模型            :   书名  出版日期


用户信息模型       :用户名  密码
(登录注册的用户信息)


(作者模型  和 作者详细模型     一对一关系        one - to - one)

(一本书可能会有多个作者, 一个作者也可以写多本书  )
(   作者  和 书籍                    多对多的关系  many - to - many)

(一本书只应该由一个出版商出版)
(    出版商和书籍                  一对多关联关系  one - to  - many)
代码如下:
from django.db import models

# Create your models here.

# 出版社类
class Publish(models.Model):
    id = models.AutoField(primary_key=True)
    name = models.CharField(max_length=32)

    def __str__(self):
        return self.name

# 书类
class Book(models.Model):
    id = models.AutoField(primary_key=True)
    title = models.CharField(max_length=32)
    publishDate = models.DateField()
    price = models.DecimalField(max_digits=8, decimal_places=2)

    # 书只能关联一个出版社,外键通常建立在多的那一边
    publish = models.ForeignKey(to='Publish', on_delete=models.CASCADE)

  # 多对多,作者和书是多对多的关系
    books = models.ManyToManyField(to='Book', related_name='authors')

    def __str__(self):
        return self.title

# 作者类
class Author(models.Model):
    nid = models.AutoField(primary_key=True)
    name = models.CharField(max_length=32)
    age = models.IntegerField()
    # 作者和作者详细信息 是一对一的关系
    authordetail = models.OneToOneField(to='AuthorDetail', null=True,
on_delete=models.CASCADE)


# 作者详细信息
class AuthorDetail(models.Model):
    nid = models.AutoField(primary_key=True)
    birthday = models.DateField()
    telephone = models.BigIntegerField()
    addr = models.CharField(max_length=64)
最后运行下面代码,生成数据表:
python manage.py  makemigrations


python manage.py migrate
我们可以添加数据,我添加的数据如下:
insert into user1_authordetail values(1, '2019-11-12', '12345', 'boston');
insert into user1_authordetail values(2, '2014-11-12', '12312', 'houston');
insert into user1_authordetail values(3, '2013-11-12', '12432', 'ripcity');

insert into user1_author values(1, 'james', 34, 1);
insert into user1_author values(2, 'durant', 31, 2);
insert into user1_author values(3, 'curry', 30, 3);

insert into user1_publish values(1, '机械出版社');
insert into user1_publish values(2, '草堂出版社');
insert into user1_publish values(3, '人民出版社');
4.2 APP下的URL具体内容整理
1,注册
    /register/

2,登录
    /login/

3,注销
    /logout/

4,图书列表
    /book_list/
    /add_book/
    /update_book/101/
    /del_book/

5,出版社列表
    /publisher_list/
    /add_publisher/
    /update_publisher/101/
    # 通过出版社,修改该书,之后返回出版社页面
    /update_book/101/202/publisher/
    /del_publisher/
    # 通过出版社,查看该出版社的图书列表
    /book_list/101/publisher/
    # 通过出版社,增加该出版社的某本书
    /add_book/101/publisher/
    # 通过出版社,删除该出版社的某本书
    /del_book/101/publisher/

6,作者列表
    /author_list/
    /add_author/
    /update_author/101/
    #通过作者,修改该书,之后返回作者页面
    /update_book/101/21/author
    /del_author
    # 通过作者,查看该作者的图书列表
    /book_list/101/author/
    # 通过作者,增加该作者的某本书
    /add_book/101/author/
    # 通过作者,删除该作者的某本书
    /del_book/101/author/
这里我们以book单表的增删改查页面为例,然后增加连表操作,因为作者模型和作者详细模型是一对一关系,而且书籍和作者是多对多的关系。我们这里以书籍,作者,作者详细信息和出版社四张表的关系为例。
4.3 多表的查看操作
查看操作比较简单,首先在view视图函数中获取所有book数据,将其显示在页面中,代码如下:
book_list = Book.objects.all()
通过上面代码获取数据,拿到数据后,渲染给前端,前端通过for循环的方式,取出数据。目的就是通过Book这个数据表里面的字段拿到对应的数据。
前端代码中,我们使用Bootstrap加入简单的样式,然后通过for循环拿出数据,将其显示在前端页面上。
注意1:这里Book表中,拿出的publishDate数据我们可以改成自己想要显示的模型。
这里我们可以使用变量的过滤器(filter)。将数据显示成 “xxxx-xx-xx”,代码如下:
{{ book.publishDate|date:'Y-m-d' }}
注意2:这里的Book表中,因为一本书可能对应多个作者,所以我们在前端显示的时候,想要给每个作者后面添加一个逗号(,),好看一下,但是最后一个不显示逗号(,)。我们可以使用一个for循环,将其循环显示:
{% for author in book.authors.all %}
       {% if forloop.last %}
             <span>{{ author.name }}</span>
        {% else %}
               <span>{{ author.name }}</span>,
        {% endif %}
{% endfor %}
其他就没什么难点,这里将books的HTML代码显示如下:
<!DOCTYPE html>
<html lang="en">
<head>
<meta charset="UTF-8">
<title>Title</title>
<link rel="stylesheet" href="/static/bootstrap-3.3.7/dist/css/bootstrap.min.css">
</head>
<body>
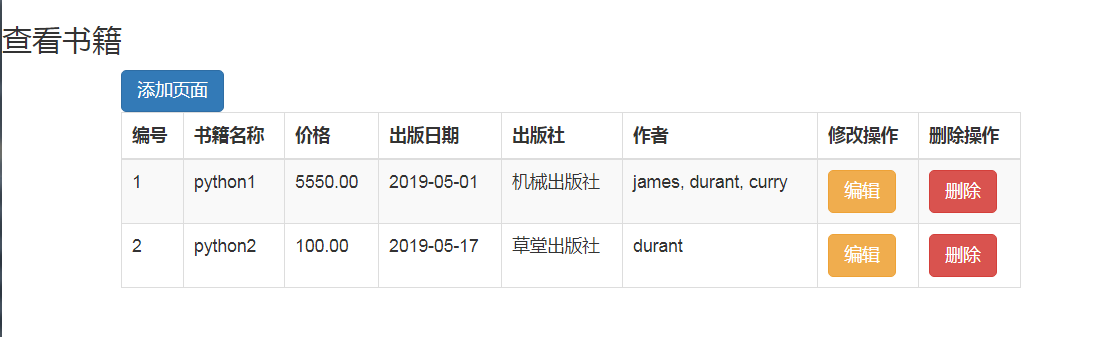
<h3>查看书籍</h3>
<div class="container">
<div class="row">
<div class=" col-md-6 col-md-offset-3">
<a href="" class="form-group btn btn-primary">添加页面</a>
<table class="table table-bordered table-hover table-striped">
<thead>
<tr>
<th>编号</th>
<th>书籍名称</th>
<th>价格</th>
<th>出版日期</th>
<th>出版社</th>
<th>作者</th>
<th>修改操作</th>
<th>删除操作</th>
</tr>
</thead>
<tbody>
{% for book in book_list %}
<tr>
<td>{{ forloop.counter }}</td>
<td>{{ book.title }}</td>
<td>{{ book.price }}</td>
<td>{{ book.publishDate|date:'Y-m-d' }}</td>
<td>{{ book.publish.name }}</td>
<td>{% for author in book.authors.all %}
{% if forloop.last %}
<span>{{ author.name }}</span>
{% else %}
<span>{{ author.name }}</span>,
{% endif %}
{% endfor %}
</td>
</tr>
{% endfor %}
</tbody>
</table>
</div>
</div>
</div>
</body>
</html>
4.4 多表的增加操作
添加操作的话,我们可以从前端写起,我们获取数据的各个变量,将其写在form表单里面,然后传到后台,如果是post的数据,我们可以将其获取到,然后添加到数据库中。
但是首先,我们需要获取出版社的信息和作者的信息,因为出版社和Book是一对多的关系,作者和Book是多对多的关系,所以这里不是单纯的添加,而是需要选择。获取Publish和Author信息的代码如下:
    publish_list = Publish.objects.all()

    author_list = Author.objects.all()
然后,将信息展示在前端,从前端获取的数据通过post传到后台,进而写入数据库。
    if request.method == 'POST':
        title = request.POST.get('title')
        price = request.POST.get('price')
        pub_date = request.POST.get('pub_date')
        publish_id = request.POST.get('publish_id')
        # checkbox  多选的话,取值方式如下
        authors_id_list = request.POST.getlist('authors_id_list')

        # 添加到数据库中,前面是数据库的名字 =后面是上面变量的名字
        book_obj = Book.objects.create(title=title, price=price, publishDate=pub_date,
                            publish_id=publish_id)

        book_obj.authors.add(*authors_id_list)
        return HttpResponse("OK")
注意1:由于一本书可以对应多个作者,所以我们获取的作者数据可能是多个,那么我们不能直接get数据,这里使用 gstlist获取多选数据。
authors_id_list = request.POST.getlist('authors_id_list')
注意2:由于作者和书是多对多的关系,所以我们添加数据,不止给Book表里添加,还将会添加Book和Authors表的关系,这里使用.add() 添加。代码如下:
book_obj.authors.add(*authors_id_list)
最后这里展示一下添加数据的HTML代码,(同样这里使用Bootstrap渲染了页面):
<!DOCTYPE html>
<html lang="en">
<head>
<meta charset="UTF-8">
<title>Title</title>
<link rel="stylesheet" href="/static/bootstrap-3.3.7/dist/css/bootstrap.css">
</head>
<body>
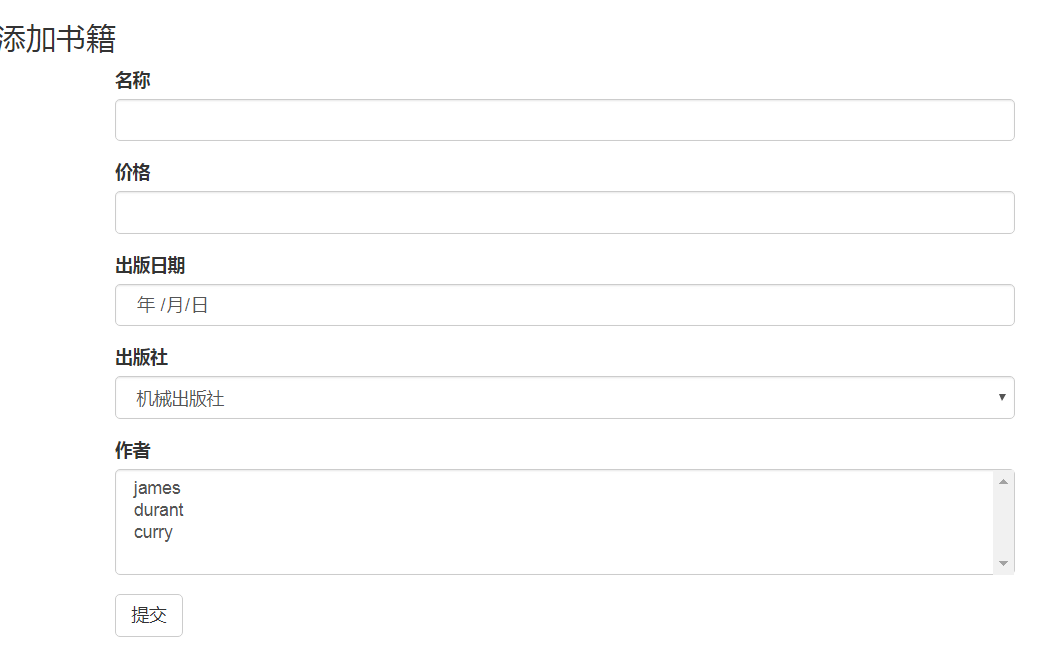
<h3>添加书籍</h3>
<div class="container">
<div class="row">
<div class="col-md-6 col-md-offset-3">
<form action="" method="post">
{% csrf_token %}
<div class="form-group">
<label for="">名称</label>
<input type="text" name="title" class="form-control">
</div>
<div class="form-group">
<label for="">价格</label>
<input type="text" name="price" class="form-control">
</div>
<div class="form-group">
<label for="">出版日期</label>
<input type="date" name="pub_date" class="form-control">
</div>
<div class="form-group">
<label for="">出版社</label>
<select name="publish_id" id="" class="form-control">
{% for publish in publish_list %}
<option value="{{ publish.pk }}">{{ publish.name }}</option>
{% endfor %}
</select>
</div>
<div class="form-group">
<label for="">作者</label>
<select name="authors_id_list" multiple class="form-control">
{% for author in author_list %}
<option value="{{ author.pk }}">{{ author.name }}</option>
{% endfor %}
</select>
</div>
<input type="submit" class="btn btn-default">
</form>
</div>
</div>
</div>
</body>
</html>
4.5 多表的编辑操作和删除操作
这里将编辑操作和删除操作放在一起写,肯定有其道理的。因为编辑操作和删除操作,只需要在查看书籍的HTML上添加两个按钮,也就是编辑按钮和删除按钮。
 <table class="table table-bordered table-hover table-striped">
               <thead>
                    <tr>

                            ......

                        <th>修改操作</th>
                        <th>删除操作</th>
                    </tr>
               </thead>
               <tbody>
                    {% for book in book_list %}
                    <tr>

                       ......

                        <td>
                            <a href="{{ book.pk }}/change" class="btn btn-warning">编辑</a>
                        </td>
                        <td>
                            <a href="{{ book.pk }}/delete" class="btn btn-danger">删除</a>
                        </td>
                    </tr>
                    {% endfor %}
               </tbody>
           </table>
4.5.1 编辑功能的制作
首先,我们需要拿到需要编辑的ID,然后在数据库中找到对应的ID字段,最后对内容进行修改。
   edit_book_obj = Book.objects.filter(pk=edit_id).first()
    publish_list = Publish.objects.all()
    author_list = Author.objects.all()
这里再重复一次,因为Book和Publish是一对多的关系,Book和author是多对多的关系,所以同时需要将publish和author的数据取出来,同时进行update。
def change_books(request,edit_id):
    edit_book_obj = Book.objects.filter(pk=edit_id).first()
    publish_list = Publish.objects.all()
    author_list = Author.objects.all()

    if request.method == 'POST':
        title = request.POST.get('title')
        price = request.POST.get('price')
        pub_date = request.POST.get('pub_date')
        publish_id = request.POST.get('publish_id')
        # checkbox  多选的话,取值方式如下
        authors_id_list = request.POST.getlist('authors_id_list')

        # 添加到数据库中,前面是数据库的名字 =后面是上面变量的名字
        book_obj = Book.objects.filter(pk=edit_id).update(title=title, price=price, publishDate=pub_date,
                                       publish_id=publish_id)
        # 先把更新过的数据清空掉,然后再添加信息
        # edit_book_obj.authors.clear()
        # edit_book_obj.authors.add(*authors_id_list)
        # set方法 可以取代上面的两行代码。
        edit_book_obj.authors.set(authors_id_list)

        return redirect('/user1/books/')

    return render(request, 'user1/editbook.html', locals())
除了之前需要注意的问题之外,这里我们还需要注意两点。
注意1:我们将数据update之后,我们需要展示的编辑之后的Book页面,所以这里使用redirect,返回到book表中:
return redirect('/user1/books/')
注意2:我们添加author表的数据,所以我们不能拿到更新之后的信息,这里需要更新之前的信息,所以我们需要把更新过的数据清空掉,然后再添加数据。这里有两种方法:
        # 先把更新过的数据清空掉,然后再添加信息

#  方法一
        edit_book_obj.authors.clear()
        edit_book_obj.authors.add(*authors_id_list)

# 方法二
        # set方法 可以取代上面的两行代码。
        edit_book_obj.authors.set(authors_id_list)
最后展示完整的编辑视图函数:
def change_books(request,edit_id):
    edit_book_obj = Book.objects.filter(pk=edit_id).first()
    publish_list = Publish.objects.all()
    author_list = Author.objects.all()

    if request.method == 'POST':
        title = request.POST.get('title')
        price = request.POST.get('price')
        pub_date = request.POST.get('pub_date')
        publish_id = request.POST.get('publish_id')
        # checkbox  多选的话,取值方式如下
        authors_id_list = request.POST.getlist('authors_id_list')

        # 添加到数据库中,前面是数据库的名字 =后面是上面变量的名字
        book_obj = Book.objects.filter(pk=edit_id).update(title=title, price=price,
publishDate=pub_date,
                                       publish_id=publish_id)
        # 先把更新过的数据清空掉,然后再添加信息
        # edit_book_obj.authors.clear()
        # edit_book_obj.authors.add(*authors_id_list)
        # set方法 可以取代上面的两行代码。
        edit_book_obj.authors.set(authors_id_list)

        return redirect('/user1/books/')

    return render(request, 'user1/editbook.html', locals())
4.5.2 删除功能的制作
删除就非常简单了,我们只需要通过查找需要编译的ID,然后在数据库找到对应ID字段,删除ID字段对应的数据即可。最后返回Book表就行。
这里展示删除视图的完整代码:
def delete_books(request,delete_id):
    Book.objects.filter(pk=delete_id).delete()

    return redirect('/user1/books/')
五,注意事项
1,ORM表关系
一对一(author authordetail)
删除author表时,应该删除authordetail表,关联的author就被删除了!
一对多(book publisher)
删除出版社下面的某本书,拿到书的id,删除这本书
多对多(book author)
清楚绑定关系,不是删除书
1.1 打印ORM转换过程中SQL的代码
如果不了解其关系,可以在控制台打印其SQL语句,也就是打印ORM转换过程中的SQL,我们可以在Settings中配置一下:
LOGGING = {
    'version': 1,
    'disable_existing_loggers': False,
    'handlers': {
        'console':{
            'level':'DEBUG',
            'class':'logging.StreamHandler',
        },
    },
    'loggers': {
        'django.db.backends': {
            'handlers': ['console'],
            'propagate': True,
            'level':'DEBUG',
        },
    }
}
1.2 related_name的应用
在反向查询的时候,如果定义了related_name,则使用 related_name替换表名,例如:
publish = ForeignKey(Blog, related_name='bookList')
练习:
# 练习: 查询人民出版社出版过的所有书籍的名字与价格(一对多)

# 反向查询 不再按表名:book,而是related_name:bookList


    queryResult=Publish.objects
              .filter(name="人民出版社")
              .values_list("bookList__title","bookList__price")
2,引入Bootstrap文件
2.1 配置搜索目录
在项目的根目录下新建一个static目录,然后打开项目的settings文件,在最下面添加配置,用于指定静态文件的搜索目录:
STATIC_URL = '/static/'

STATICFILES_DIRS = [
    os.path.join(BASE_DIR, 'static'),
]
2.2 下载Bootstrap文件
找到Bootstrap官网:点击我
然后下载Bootstrap,将其解压,然后放到static下面即可。
2.3 使用Bootstrap文件
注意:Bootstrap的所有JavaScript插件都依赖jQuery,所以必须将jQuery放在前面,不然bootstrap永远引入失败。
<!-- jQuery (Bootstrap 的所有 JavaScript 插件都依赖 jQuery,所以必须放在前边) -->
<script src="/static/JS/jquery-3.2.1.min.js"></script>

<!-- 加载 Bootstrap 的所有 JavaScript 插件。你也可以根据需要只加载单个插件。 -->
<script src="/static/bootstrap-3.3.7/js/bootstrap.min.js"></script>
3,locals()函数的使用技巧
对于添加函数,我们发现了其return的时候,赋值操作如下:
return render(request, 'user1/addbook.html', {'publish_list': publish_list,
 'author_list': author_list})
我们会发现,如果临时变量和临时模板有很多的时候,输起来就非常麻烦,所以为了代码看起来更加简洁,我们可以使用Python的内建函数 locals(),它返回的字典对所有局部变量的名称和值进行映射。因此上面的代码可以重构如下:
return render(request, 'user1/addbook.html', locals())
在上面的代码中,我们没有手工指定其字典形式,而是传入了locals()的值,他包括了函数执行的一切变量。
六,笔记
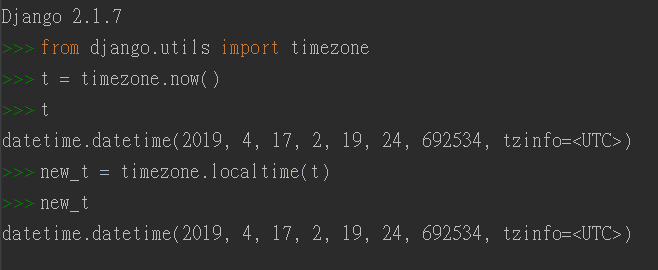
1,Django中timezone和Python中datatime的区别与联系
- 进入django数据库中的时候一定是timezone aware的时间,如果要生成时间,要通过replace timezone设置为本地失去。
- 数据库中的时间都是UTC时间
1.1 Django中的timezone
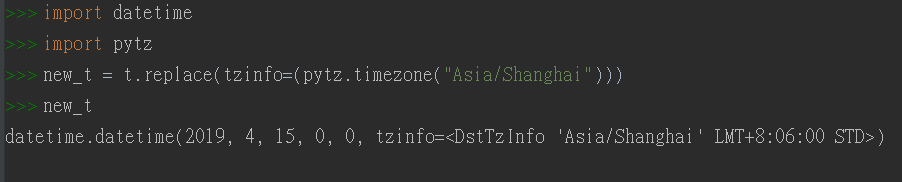
1.2 Python中的datetime
2,def __str__(self): 是什么意思?
Python3.x中使用的是__str__ 函数 ,而Python2.x中使用的是__unicode__函数。
推荐定义Model的时候,写一个__str__函数,它的作用是美化打印出来的结果,使我们更方便查看。
从最基本的说起,首先举个例子:
class Test1:
    def __init__(self, name, age):
        self.name = name
        self.age = age

class Test2:
    def __init__(self, name, age):
        self.name = name
        self.age = age

    def __str__(self):
        return "Name: " + self.name

res1 = Test1('james', 32)
print(res1)
res2 = Test2('durant', 30)
print(res2)
'''
<__main__.Test1 object at 0x00000000025700B8>
Name: durant
'''
我们可以看到:如果没有__str__方法,打印出来的是<__main__.Test1 object at 0x00000000025700B8>格式,而有__str_-方法,打印出来是按照__str__定义的格式来打印,打印结果是Name: durant。
看看文档

那么具体到Django中,在Models中定义这个__str__方法,最直接的感受就是你访问admin所看到的的内容是否友好。
下面举个例子:
class Question(models.Model):
    question_text = models.CharField('question text', max_length=200)
    pub_date = models.DateTimeField('date published')

    class Meta:
        verbose_name = 'question'
        verbose_name_plural = verbose_name
        ordering = ['-id']

    def __str__(self):
        return self.question_text
上面的models来自Django的官方教程(本人没有实践,只是拿过来做个笔记而已),在上面的models中,我定义了一个名为Question的models,此时访问Django的后台admin,看到的内容是这样的:
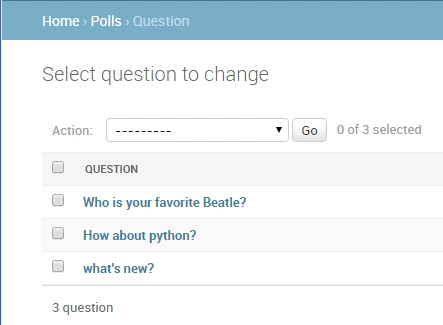
可以发现,Question看到的内容就是我们上面返回的self.question_text(如果返回的是其他形式,则结果是其他形式),那么如果此时将上述代码注释掉,也就是变成下面这样:
class Question(models.Model):
    question_text = models.CharField('question text', max_length=200)
    pub_date = models.DateTimeField('date published')

    class Meta:
        verbose_name = 'question'
        verbose_name_plural = verbose_name
        ordering = ['-id']
再去看看后台admin里面查看Question,则变成这样:
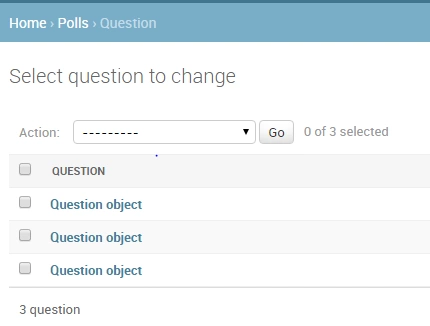
我们定义的问题,看到的内容全部变成了Question object,这样的表达方式,对人来说,是相当的不友好,所以这就是定义一个__str__函数的必要性。
3,使用类视图:减少重复代码
当视图里面代码相似的时候,就显得有点冗余。因为他们都具有类似的业务逻辑,实现类似的功能:通过从URL传递过来的参数去数据库查询数据,加载一个模板,利用刚才的数据渲染模板,返回这个模板,由于这个过程是如此的常见,Django很善解人意的帮助我们想办法偷懒,于是提供了一种快捷方式,名为“类视图”。
现在我们可以试试将原来代码改为使用类视图的方式,整个过程分三步走:
- 修改URLconf设置
- 删除一些旧的无用的视图
- 采用基于类视图的新视图
3.1 改良路由配置系统URLconf
URL配置(URLConf)就像是Django所支撑网站的目录。它的本质是URL与要为该URL调用的视图函数之间的映射表;你就是以这种方式告诉Django,对于客户端发来的某个URL调用哪一段逻辑代码对应执行。
比如下面代码:
from django.conf.urls import url
from . import views

app_name = 'polls'
urlpatterns = [
    url(r'^$', views.IndexView.as_view(), name='index'),
    url(r'^(?P<pk>[0-9]+)/$', views.DetailView.as_view(), name='detail'),
    url(r'^(?P<pk>[0-9]+)/results/$', views.ResultsView.as_view(), name='results'),
    url(r'^(?P<question_id>[0-9]+)/vote/$', views.vote, name='vote'),
]
请注意:在上面的第2,3条目中将原来的question_id 改成了pk。若要从URL中捕获一个值,只需要在它的周围放置一对圆括号,不需要添加一个前导的反斜杠,因为每个URL都有。比如应该是^articles 而不是 ^/articles。
注意:每个正则表达式前面的 r 是可选的额但是建议加上,他告诉Python这个字符串是“原始的”——字符串中任何字符都不应该转义。
七,结果展示
1,数据库建好的表展示
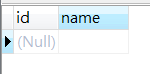
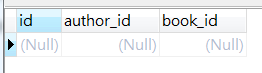
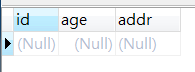
1.1 插入数据之前,表格展示如下:
此次项目创建的所有的表格展示如下:

author表
author_books表
authordetail表
book表

publisher表
userinfo表
2,前端页面展示如下:
Book表:
编辑页面:

添加页面:
八,代码
8.1 简易版本的增伤改查Book表
models.py
from django.db import models

# Create your models here.

# 出版社类
class Publish(models.Model):
    id = models.AutoField(primary_key=True)
    name = models.CharField(max_length=32)

    def __str__(self):
        return self.name

# 书类
class Book(models.Model):
    id = models.AutoField(primary_key=True)
    title = models.CharField(max_length=32)
    publishDate = models.DateField()
    price = models.DecimalField(max_digits=8, decimal_places=2)

    # 书只能关联一个出版社,外键通常建立在多的那一边
    publish = models.ForeignKey(to='Publish', on_delete=models.CASCADE)

    def __str__(self):
        return self.title

# 作者类
class Author(models.Model):
    nid = models.AutoField(primary_key=True)
    name = models.CharField(max_length=32)
    age = models.IntegerField()
    # 作者和作者详细信息 是一对一的关系
    authordetail = models.OneToOneField(to='AuthorDetail', null=True, on_delete=models.CASCADE)

    # 多对多,作者和书是多对多的关系
    books = models.ManyToManyField(to='Book', related_name='authors')

# 作者详细信息
class AuthorDetail(models.Model):
    nid = models.AutoField(primary_key=True)
    birthday = models.DateField()
    telephone = models.BigIntegerField()
    addr = models.CharField(max_length=64)
views.py
from django.shortcuts import render, HttpResponse,redirect

# Create your views here.
from user1.models import *

def add_book(request):
    if request.method == 'POST':
        title = request.POST.get('title')
        price = request.POST.get('price')
        pub_date = request.POST.get('pub_date')
        publish_id = request.POST.get('publish_id')
        # checkbox  多选的话,取值方式如下
        authors_id_list = request.POST.getlist('authors_id_list')

        # 添加到数据库中,前面是数据库的名字 =后面是上面变量的名字
        book_obj = Book.objects.create(title=title, price=price, publishDate=pub_date,
                            publish_id=publish_id)
        # print(authors_id_list)   #['2', '3']
        book_obj.authors.add(*authors_id_list)
        return HttpResponse("OK")

    publish_list = Publish.objects.all()
    print(publish_list)
    author_list = Author.objects.all()
    return render(request, 'user1/addbook.html', {'publish_list': publish_list, 'author_list': author_list})

def books(request):
    book_list = Book.objects.all()

    return render(request, 'user1/books.html',{'book_list': book_list})

def change_books(request,edit_id):
    edit_book_obj = Book.objects.filter(pk=edit_id).first()
    publish_list = Publish.objects.all()
    author_list = Author.objects.all()

    if request.method == 'POST':
        title = request.POST.get('title')
        price = request.POST.get('price')
        pub_date = request.POST.get('pub_date')
        publish_id = request.POST.get('publish_id')
        # checkbox  多选的话,取值方式如下
        authors_id_list = request.POST.getlist('authors_id_list')

        # 添加到数据库中,前面是数据库的名字 =后面是上面变量的名字
        book_obj = Book.objects.filter(pk=edit_id).update(title=title, price=price, publishDate=pub_date,
                                       publish_id=publish_id)
        # 先把更新过的数据清空掉,然后再添加信息
        # edit_book_obj.authors.clear()
        # edit_book_obj.authors.add(*authors_id_list)
        # set方法 可以取代上面的两行代码。
        edit_book_obj.authors.set(authors_id_list)

        return redirect('/user1/books/')

    return render(request, 'user1/editbook.html', {'edit_book_obj': edit_book_obj,
                                                   'publish_list': publish_list,
                                                   'author_list': author_list})

def delete_books(request,delete_id):
    Book.objects.filter(pk=delete_id).delete()

    return redirect('/user1/books/')
urls.py
from django.contrib import admin
from django.urls import path, include

urlpatterns = [
    path('admin/', admin.site.urls),
    path('user1/', include('user1.urls')),
]
user1/urls.py
from django.contrib import admin
from django.urls import path, include

from user1 import views

urlpatterns = [
    path('add/', views.add_book),
    path('books/', views.books),
    path('books/<int:edit_id>/change', views.change_books),
    path('books/<int:delete_id>/delete', views.delete_books),
]
8.2 完整项目的代码
请移步小编的GitHub:传送门

 浙公网安备 33010602011771号