
DHCP服务部署
DHCP服务部署
一. 简介
动态主机设置协议(英语:Dynamic Host Configuration Protocol,缩写:DHCP)是一个用于局域网的网络协议,位于OSI模型的应用层,使用UDP协议工作。
二. 用途及功能
• 用于内部网或网络服务供应商自动分配IP地址给用户
• 用于内部网管理员作为对所有计算机作中央管理的手段
• 可分配网卡的IP地址,子网掩码,网络地址,广播地址,默认网关,DNS,引导文件,TFTP(pxe kickstart无人值守时用)
三. 原理+示意图
1. 原理
DHCP客户端第一次登陆时,由于没有IP,它会以UDP的67端口广播发送Discover(源0.0.0.0 目标 255.255.255.255),一秒内没有应答会以1,3,5,7,9+1-2000ms的延迟重发Discovery包,DHCP服务器收到请求后,以UDP的68端口发起offer包(源DHCP服务器IP 目标0.0.0.0, 包中包含IP,子网掩码,租期等信息 # Discover中包含Client的MAC地址)。
DHCP服务器通过ICMP协议测试准备分发的IP是否被占用,Client发送Request包(源0.0.0.0 目标255.255.255.255包中包含Client的MAC地址,接受租约的IP地址,提供租约的DHCP服务器地址),DHCP发起ACK回包(原地址 DHCP服务器地址 目标地址0.0.0.0 包中包含这一IP地址的合法租用以及其他的配置信息)。
租约问题:用到50%的时候会向服务器发起续约请求,如果服务器未响应,用到75%时,再次请求续约,如果仍未响应,则用到100%后,再次广播发送Discover包。
Client获取IP成功后,如果网卡断了,再次连接时,IP若被占用,则重新发起Discover包,否则将原来的IP地址继续使用。
2. 示意图

四. 实战搭建
相关文件
服务名 : dhcpd dhcrelay
主配置文件 /etc/dhcp/dhcpd.conf
模板文件 /usr/share/doc/dhcp-*/dhcpd.conf.simple
中继配置文件 /etc/sysconfig/dhcrelay
端口 udp 67 68
配置基础DHCP服务器
1. 实验环境
| 机器 | master | slave1 | slave2 |
|---|---|---|---|
| 作用 | DHCP服务端 | 客户端 | 客户端 |
| IP地址 | 192.168.32.80 | 192.168.32.81 | 192.168.32.82 |
2. 步骤
(1). master机器配置yum源,安装dhcp包
[root@master ~]# yum install -y dhcp
(2). 复制模板文件并且覆盖原有配置文件
[root@master ~]# cp -a /usr/share/doc/dhcp-4.1.1/dhcpd.conf.sample /etc/dhcp/dhcpd.conf
(3). 修改配置文件并重启dhcp服务
[root@master ~]# vim /etc/dhcp/dhcpd.conf
    subnet 192.168.32.0 netmask 255.255.255.0 {     # subnet指定一个网段 netmask 指定子网掩码
    range 192.168.32.20 192.168.32.30;                      # range指定自动分配的ip子网为20-30段
    option domain-name-servers 114.114.114.114,8.8.8.8;  # 指定dns服务器
    option routers 192.168.32.1;                                 # 指定网关
    default-lease-time 600;                                         # 默认租约时间
    max-lease-time 7200;                                            # 最大租约时间
}
[root@master ~]# service dhcpd restart
关闭 dhcpd: [确定]
正在启动 dhcpd: [确定]
(4). 修改slave1、slave2网卡配置文件
[root@slave1 ~]# vim /etc/sysconfig/network-scripts/ifcfg-eth0
    DEVICE=eth0
    TYPE=Ethernet
    UUID=021f0b15-fc52-4e9f-912f-4bf79963fab5
    ONBOOT=yes
    NM_CONTROLLED=yes
    BOOTPROTO=dhcp
    HWADDR=00:0C:29:B1:18:8D
    DEFROUTE=yes
    IPV4_FAILURE_FATAL=yes
    IPV6INIT=no
    NAME="System eth0"
slave2同理,将BOOTPROTO改成dhcp
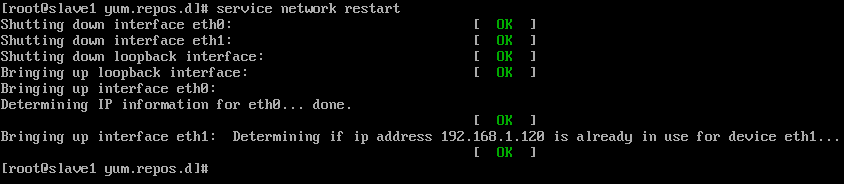
slave1 结果如下:
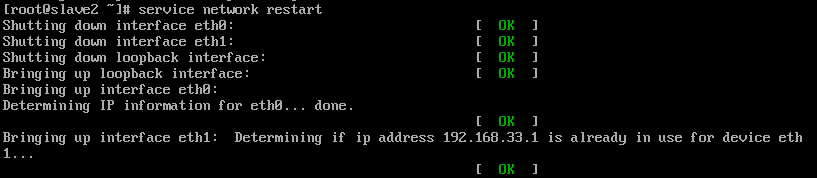
slave2结果如下:
配置DHCP保留地址
(1). 修改master的dhcp配置文件
[root@master ~]# vim /etc/dhcp/dhcpd.conf
    host fantasia {
      hardware ethernet 00:0C:29:6D:13:A4;
      fixed-address 192.168.32.22;
    }
    host newhost {
      hardware ethernet 00:0C:29:B1:18:8D;
      fixed-address 192.168.32.23;
    }
(2). 客户机重启网络查看mac和ip对应关系
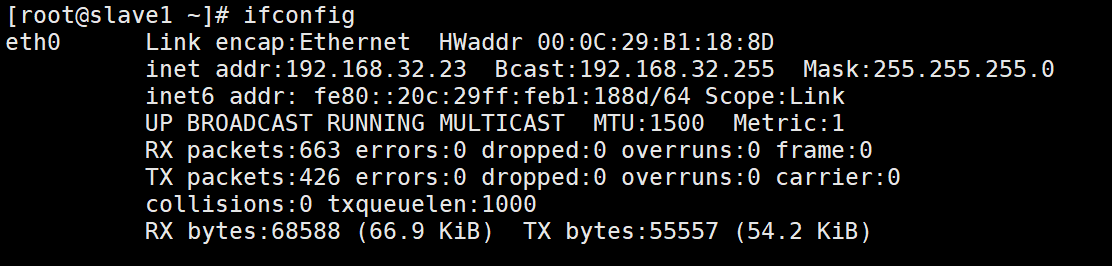
slave1:
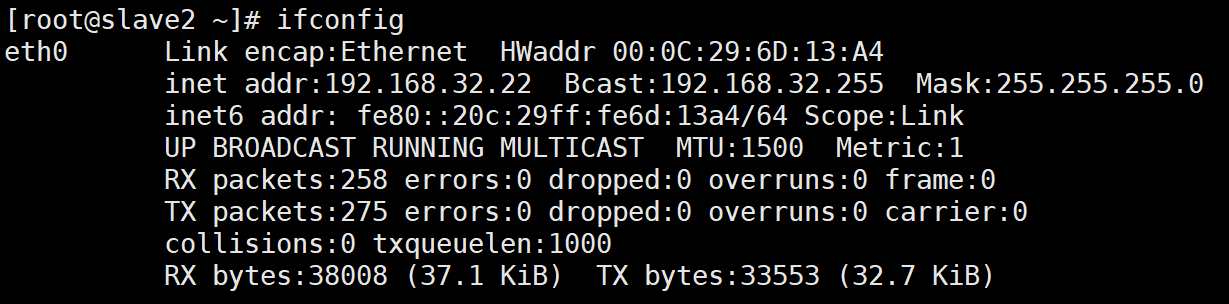
slave2:
配置DHCP超级作用域
1. 定义超级作用域
解决DHCP单个作用域中IP地址不足的情况,比如公司中有300台机器需要配置dhcp自动获取ip,而一个C类IP只有251个可用地址(抛去网关,头尾,dhcp服务器IP),此时需要配置dhcp超级作用域以分配IP不足问题。
2. 配置超级作用域
[root@master ~]# vim /etc/dhcp/dhcpd.conf
    # dhcpd.conf
    #
    # Sample configuration file for ISC dhcpd
    #

    # option definitions common to all supported networks...
    option domain-name "example.org";
    option domain-name-servers ns1.example.org, ns2.example.org;

    default-lease-time 600;
    max-lease-time 7200;

    # Use this to enble / disable dynamic dns updates globally.
    #ddns-update-style none;

    # If this DHCP server is the official DHCP server for the local
    # network, the authoritative directive should be uncommented.
    #authoritative;

    # Use this to send dhcp log messages to a different log file (you also
    # have to hack syslog.conf to complete the redirection).
    log-facility local7;

    # No service will be given on this subnet, but declaring it helps the
    # DHCP server to understand the network topology.


    # Hosts which require special configuration options can be listed in
    # host statements.   If no address is specified, the address will be
    # allocated dynamically (if possible), but the host-specific information
    # will still come from the host declaration.

    host passacaglia {
      hardware ethernet 0:0:c0:5d:bd:95;
      filename "vmunix.passacaglia";
      server-name "toccata.fugue.com";
    }

    # Fixed IP addresses can also be specified for hosts.   These addresses
    # should not also be listed as being available for dynamic assignment.
    # Hosts for which fixed IP addresses have been specified can boot using
    # BOOTP or DHCP.   Hosts for which no fixed address is specified can only
    # be booted with DHCP, unless there is an address range on the subnet
    # to which a BOOTP client is connected which has the dynamic-bootp flag
    # set.

    # You can declare a class of clients and then do address allocation
    # based on that.   The example below shows a case where all clients
    # in a certain class get addresses on the 10.17.224/24 subnet, and all
    # other clients get addresses on the 10.0.29/24 subnet.

    class "foo" {
      match if substring (option vendor-class-identifier, 0, 4) = "SUNW";
    }
    --------------------------------------------------------------------------
    shared-network 224-29 {
    subnet 192.168.32.0 netmask 255.255.255.0 {
      range 192.168.32.20 192.168.32.20;
      option domain-name-servers 114.114.114.114,8.8.8.8;
      option routers 192.168.32.1;
      default-lease-time 600;
      max-lease-time 7200;
    }
    subnet 192.168.33.0 netmask 255.255.255.0 {
      range 192.168.33.20 192.168.33.20;
      option domain-name-servers 114.114.114.114,8.8.8.8;
      option routers 192.168.33.1;
      default-lease-time 600;
      max-lease-time 7200;
    }
    }
    ---------------------------------------------------------------------------
slave1回显如下:

slave2回显如下:
注意!! 此时 slave1和slave2机器是ping不通的,因为网段不同,所以将采用单臂路由的方式让其通信-------dhcp中继。
配置DHCP中继
1. 实验环境
表格里未填写的代表自动获取,“--”代表不需要配置
| 机器 | master | slave1 | slave2 | slave3 |
|---|---|---|---|---|
| 网卡配置 | vm1 | vm1 | vm1 vm2 | vm2 |
| 作用 | DHCP服务器 | DHCP客户端 | DHCP 中继 | DHCP中继转发客户端 |
| IP地址 | 192.168.32.80 | vm1 192.168.32.1 vm2 192.168.33.1 |
||
| 网关 | 192.168.32.1 | -- |
2. 实验步骤
(1). 配置master机器网卡
[root@master ~]# vim /etc/sysconfig/network-scripts/ifcfg-eth0
    DEVICE=eth0
    HWADDR=00:0C:29:63:EA:94
    TYPE=Ethernet
    UUID=70f2ac2f-2ed4-4f12-887c-f545bf45df8f
    ONBOOT=yes
    NM_CONTROLLED=yes
    BOOTPROTO=static
    IPADDR=192.168.32.80
    NETMASK=255.255.255.0
    GATEWAY=192.168.32.1
(2). 重启网卡
[root@master ~]# service network restart
正在关闭接口 eth0: [确定]
关闭环回接口: [确定]
弹出环回接口: [确定]
弹出界面 eth0: Determining if ip address 192.168.32.80 is already in use for device eth0...
[确定]
[root@master ~]# route -n
Kernel IP routing table
Destination Gateway Genmask Flags Metric Ref Use Iface
192.168.32.0 0.0.0.0 255.255.255.0 U 0 0 0 eth0
169.254.0.0 0.0.0.0 255.255.0.0 U 1002 0 0 eth0
0.0.0.0 192.168.32.1 0.0.0.0 UG 0 0 0 eth0
(3). 修改配置文件
    # dhcpd.conf
    #
    # Sample configuration file for ISC dhcpd
    #

    # option definitions common to all supported networks...
    option domain-name "example.org";
    option domain-name-servers ns1.example.org, ns2.example.org;

    default-lease-time 600;
    max-lease-time 7200;


    # Use this to send dhcp log messages to a different log file (you also
    # have to hack syslog.conf to complete the redirection).
    log-facility local7;

      subnet 192.168.32.0 netmask 255.255.255.0 {
      range 192.168.32.20 192.168.32.200;
      option domain-name-servers 114.114.114.114,8.8.8.8;
      option routers 192.168.32.1;
      default-lease-time 600;
      max-lease-time 7200;
    }
    subnet 192.168.33.0 netmask 255.255.255.0 {
      range 192.168.33.30 192.168.33.200;
      option domain-name-servers 114.114.114.114,8.8.8.8;
      option routers 192.168.33.1;
      default-lease-time 600;
      max-lease-time 7200;
    }

    host passacaglia {
      hardware ethernet 0:0:c0:5d:bd:95;
      filename "vmunix.passacaglia";
      server-name "toccata.fugue.com";
    }
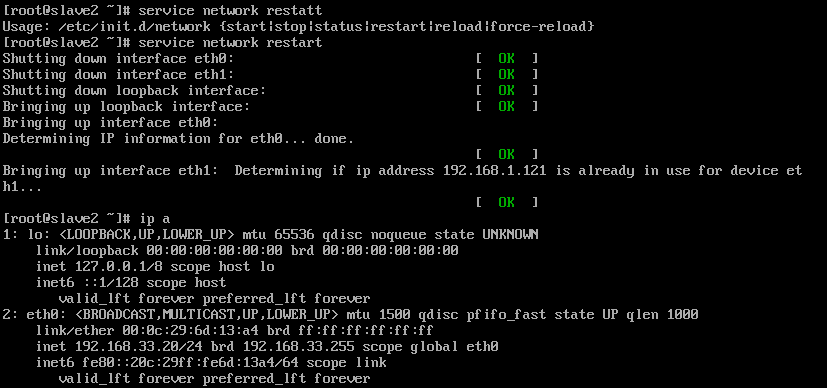
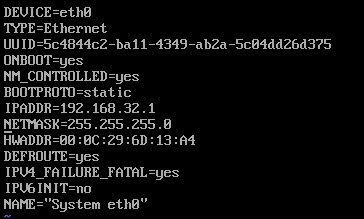
(4). 修改slave2中继器网卡配置文件eth0:
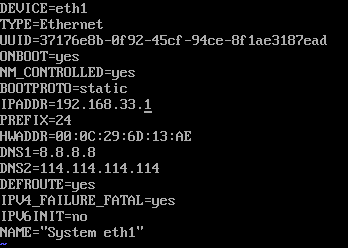
(5). 修改slave2的eth1网卡配置文件
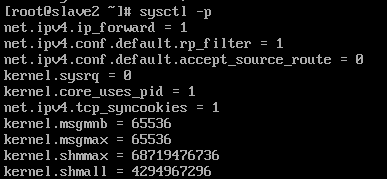
(6). slave2开启路由转发
vim /etc/sysctl.conf
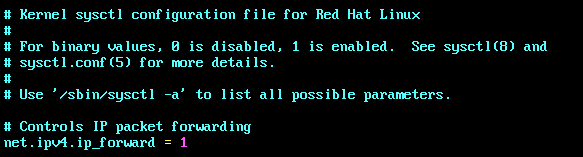
sysctl -p 生效
(7). 安装dhcrelay
[root@slave2 ~]# yum install -y dhcp
(8). 修改中继配置文件
[root@slave2 ~]# vim /etc/sysconfig/dhcrelay
    # Command line options here
    DHCRELAYARGS=""
    # DHCPv4 only
    INTERFACES="eth0 eth1"
    # DHCPv4 only
    DHCPSERVERS="192.168.32.80"
(9). 重启中继服务
[root@slave2 ~]# /etc/init.d/dhcrelay restart
正在启动 dhcrelay: [确定]
(10). slave1和slave3重启网卡(网卡配置文件别忘改成dhcp)
[root@slave1 ~]# service network restart
正在关闭接口 eth0: [确定]
正在关闭接口 eth1: [确定]
关闭环回接口: [确定]
弹出环回接口: [确定]
弹出界面 eth0:
正在决定 eth0 的 IP 信息...完成。
[root@slave1 ~]# ifconfig
eth0 Link encap:Ethernet HWaddr 00:0C:29:B1:18:8D
inet addr:192.168.32.20 Bcast:192.168.32.255 Mask:255.255.255.0
inet6 addr: fe80::20c:29ff:feb1:188d/64 Scope:Link
UP BROADCAST RUNNING MULTICAST MTU:1500 Metric:1
RX packets:1755 errors:0 dropped:0 overruns:0 frame:0
TX packets:818 errors:0 dropped:0 overruns:0 carrier:0
collisions:0 txqueuelen:1000
RX bytes:189969 (185.5 KiB) TX bytes:104084 (101.6 KiB)
[root@slave3 ~]# systemctl restart network
[root@slave3 ~]# ifconfig
ens33: flags=4163<UP,BROADCAST,RUNNING,MULTICAST> mtu 1500
inet 192.168.33.30 netmask 255.255.255.0 broadcast 192.168.33.255
inet6 fe80::8fd:c838:d2f4:15ce prefixlen 64 scopeid 0x20
ether 00:0c:29:82:a8:c9 txqueuelen 1000 (Ethernet)
RX packets 239 bytes 25362 (24.7 KiB)
RX errors 0 dropped 0 overruns 0 frame 0
TX packets 227 bytes 27096 (26.4 KiB)
TX errors 0 dropped 0 overruns 0 carrier 0 collisions 0
(11). ping查看是否通信
[root@slave1 ~]# ping 192.168.33.30 -c 1
PING 192.168.33.30 (192.168.33.30) 56(84) bytes of data.
64 bytes from 192.168.33.30: icmp_seq=1 ttl=128 time=0.645 ms
--- 192.168.33.30 ping statistics ---
1 packets transmitted, 1 received, 0% packet loss, time 0ms
rtt min/avg/max/mdev = 0.645/0.645/0.645/0.000 ms
[root@slave3 yum.repos.d]# ping 192.168.32.20 -c 1
PING 192.168.32.20 (192.168.32.20) 56(84) bytes of data.
64 bytes from 192.168.32.20: icmp_seq=1 ttl=63 time=0.645 ms
--- 192.168.32.20 ping statistics ---
1 packets transmitted, 1 received, 0% packet loss, time 0ms
rtt min/avg/max/mdev = 0.645/0.645/0.645/0.000 ms
五. 小结
在中继dhcp配置的过程中可能存在的问题
    描述:
        dhcp中继分配完的主机只能ping通单向主机
    解决办法:
        route -n查看路由表,发现配置双网卡,nat模式的网关占用了dhcp分配的网关,导致所有的数据包通过nat模式的网关口出去。最后将nat模式的网卡网关删除,重启网卡即可恢复正常。

 浙公网安备 33010602011771号