
elasticsearch集群部署以及head插件安装
环境准备
elasticsearch是Java程序写的因此必须装jdk,否则使用不了。
[root@openstack ~]# java -version
openjdk version "1.8.0_131"
OpenJDK Runtime Environment (build 1.8.0_131-b12)
OpenJDK 64-Bit Server VM (build 25.131-b12, mixed mode)
| IP地址 | 主机名 | 系统 | 软件版本 |
| 192.168.209.6 | CFCA | rhel7.4 | elasticsearch-6.0.0/elasticsearch-head |
| 192.168.209.7 | openstack | rhel7.4 | elasticsearch-6.0.0/elasticsearch-head |
[root@openstack ~]# cd /usr/local/
[root@openstack local]# tar zxvf elasticsearch-6.0.0.tar.gz
[root@openstack local]# cd elasticsearch-6.0.0/
[root@openstack elasticsearch-6.0.0]# ll
总用量 224
drwxr-xr-x. 2 elasticsearch elasticsearch 4096 4月 1 21:56 bin #脚本
drwxr-xr-x. 2 elasticsearch elasticsearch 75 4月 2 13:48 config #配置文件
drwxr-xr-x. 2 elasticsearch elasticsearch 4096 11月 11 2017 lib
-rw-r--r--. 1 elasticsearch elasticsearch 11358 11月 11 2017 LICENSE.txt
drwxr-xr-x. 14 elasticsearch elasticsearch 251 11月 11 2017 modules
-rw-r--r--. 1 elasticsearch elasticsearch 193097 11月 11 2017 NOTICE.txt
drwxr-xr-x. 2 elasticsearch elasticsearch 6 11月 11 2017 plugins
-rw-r--r--. 1 elasticsearch elasticsearch 9326 11月 11 2017 README.textile
[root@openstack elasticsearch-6.0.0]# cd config/
[root@openstack config]# grep '^[a-z]' elasticsearch.yml 修改后的配置文件
cluster.name: my-application 集群名称
node.name: node-1 节点名称
path.data: /elk/data 数据存放路径
path.logs: /elk/logs 日志路径
bootstrap.memory_lock: true 内存锁定
network.host: 0.0.0.0
http.port: 9200
discovery.zen.ping.unicast.hosts: ["192.168.209.6", "192.168.209.7"] 若是单节点的话此项配置注释掉
[root@openstack ~]# mkdir -p /elk/data/ /elk/logs/
[root@openstack ~]# useradd elasticsearch
[root@openstack ~]# chown -R elasticsearch:elasticsearch /elk/
[root@openstack ~]# chown -R elasticsearch:elasticsearch /usr/local/elasticsearch-6.0.0
[root@openstack ~]# su - elasticsearch
[elasticsearch@openstack ~]$ cd /usr/local/elasticsearch-6.0.0/
[elasticsearch@openstack bin]$ ./elasticsearch -d 后台启动,此时启动不了,需要修改一下配置
[root@openstack ~]# vim /etc/security/limits.conf 重启参数才能生效
* hard nofile 65536
* soft nofile 65536
* soft memlock unlimited
* hard memlock unlimited
[root@openstack ~]# vim /etc/sysctl.conf
vm.max_map_count=262144
[root@openstack ~]# sysctl -p 参数生效
切换用户之后重新启动,查看进程和监听端口
[root@openstack ~]# ps -ef|grep java 查看进程
elastic+ 6750 1 1 12:29 pts/2 00:02:30 /bin/java -Xms1g -Xmx1g -XX:+UseConcMarkSweepGC -XX:CMSInitiatingOccupancyFraction=75 -XX:+UseCMSInitiatingOccupancyOnly -XX:+AlwaysPreTouch -server -Xss1m -Djava.awt.headless=true -Dfile.encoding=UTF-8 -Djna.nosys=true -XX:-OmitStackTraceInFastThrow -Dio.netty.noUnsafe=true -Dio.netty.noKeySetOptimization=true -Dio.netty.recycler.maxCapacityPerThread=0 -Dlog4j.shutdownHookEnabled=false -Dlog4j2.disable.jmx=true -XX:+HeapDumpOnOutOfMemoryError -Des.path.home=/usr/local/elasticsearch-6.0.0 -Des.path.conf=/usr/local/elasticsearch-6.0.0/config -cp /usr/local/elasticsearch-6.0.0/lib/* org.elasticsearch.bootstrap.Elasticsearch -d
[root@openstack ~]# netstat -tlunp|grep java 查看端口
tcp6 0 0 :::9200 :::* LISTEN 6750/java
tcp6 0 0 :::9300 :::* LISTEN 6750/java
[root@openstack ~]# curl 192.168.209.7:9200 查看信息
{
"name" : "node-1",
"cluster_name" : "my-application",
"cluster_uuid" : "Z3TOUu0jTUiCSHsuFJsv_g",
"version" : {
"number" : "6.0.0",
"build_hash" : "8f0685b",
"build_date" : "2017-11-10T18:41:22.859Z",
"build_snapshot" : false,
"lucene_version" : "7.0.1",
"minimum_wire_compatibility_version" : "5.6.0",
"minimum_index_compatibility_version" : "5.0.0"
},
"tagline" : "You Know, for Search"
}
另外一台机器也一样的配置,只是节点的名称的不一样。
安装head插件:
GitHub地址:https://github.com/mobz/elasticsearch-head
[root@openstack ~]# cd /usr/local/src/
[root@openstack src]# git clone git://github.com/mobz/elasticsearch-head.git
[root@openstack src]# ll
总用量 4
drwxr-xr-x. 7 root root 4096 4月 1 22:58 elasticsearch-head
[root@openstack src]# cd elasticsearch-head/
[root@openstack elasticsearch-head]# yum -y install npm
[root@openstack elasticsearch-head]# npm install grunt -save
[root@openstack elasticsearch-head]# ll -d node_modules/grunt #必须确认生成该文件
drwxr-xr-x. 5 root root 117 4月 1 23:28 node_modules/grunt
[root@openstack elasticsearch-head]# npm install #执行安装
[root@openstack elasticsearch-head]# npm run start & #后台启动
[root@openstack src]# vim /usr/local/elasticsearch-6.0.0/config/elasticsearch.yml 修改如下elasticsearch配置文件,并且重启该服务
http.cors.enabled: true
http.cors.allow-origin: "*"
查看一下进程和端口:
[root@openstack src]# netstat -tlunp|grep grunt
tcp 0 0 0.0.0.0:9100 0.0.0.0:* LISTEN 8911/grunt
[root@openstack src]# ps -ef|grep npm
root 8901 8749 0 15:42 pts/1 00:00:03 npm
可以在页面访问: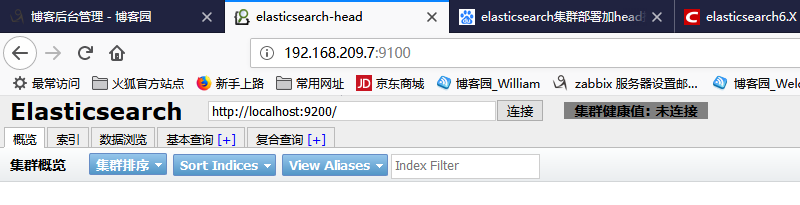
输入地址后就可以查看集群的信息了,带星号的是master
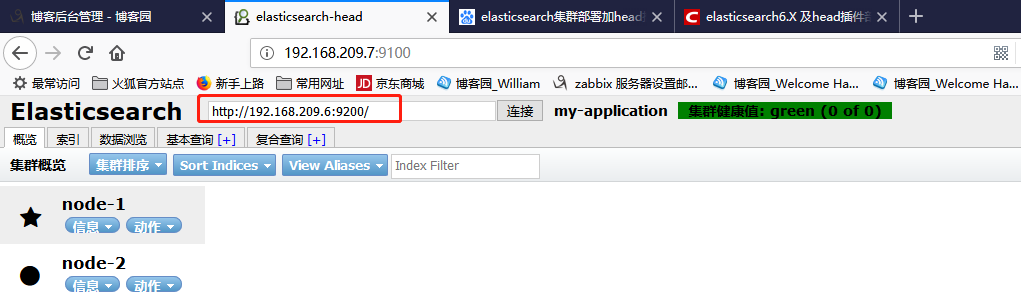
至此集群搭建完成,head插件也安装成功了。

 浙公网安备 33010602011771号