element-ui自定义主题颜色,解决elementUI本地导入图标不显示的问题
1.实现element-ui自定义主题颜色
1.1 首先确保你的项目中有element-ui并且可以使用scss,scss安装教程:https://www.cnblogs.com/wiliam/p/12027469.html
1.2 封装改变颜色的color组件,这里直接贴完整代码:


<template>
    <el-color-picker
      v-model="theme"
      class="theme-picker"
      size="small"
      popper-class="theme-picker-dropdown"
      :predefine="['#409EFF', '#1890ff', '#304156','#212121','#11a983', '#13c2c2', '#6959CD', '#f5222d', ]"
    />
</template>

<script>
import { mapGetters, mapActions } from "vuex";
const version = require("element-ui/package.json").version; // element-ui version from node_modules
const ORIGINAL_THEME = "#409EFF"; // default color
export default {
  data() {
    return {
      chalk: "", // content of theme-chalk css
      theme: ORIGINAL_THEME
    };
  },
  watch: {
    theme(val, oldVal) {
      this.colorNameAction(val);
      this.updateTheme(val, oldVal);
    }
  },
  computed: {
    ...mapGetters(["colorName"])
  },
  methods: {
    ...mapActions(["colorNameAction"]),
    updateTheme(val, oldVal) {
      if (typeof val !== "string") return;
      const themeCluster = this.getThemeCluster(val.replace("#", ""));
      const originalCluster = this.getThemeCluster(oldVal.replace("#", ""));
      // console.log(themeCluster, originalCluster);
      const getHandler = (variable, id) => {
        return () => {
          const originalCluster = this.getThemeCluster(
            ORIGINAL_THEME.replace("#", "")
          );
          const newStyle = this.updateStyle(
            this[variable],
            originalCluster,
            themeCluster
          );

          let styleTag = document.getElementById(id);
          if (!styleTag) {
            styleTag = document.createElement("style");
            styleTag.setAttribute("id", id);
            document.head.appendChild(styleTag);
          }
          styleTag.innerText = newStyle;
        };
      };

      const chalkHandler = getHandler("chalk", "chalk-style");

      if (!this.chalk) {
        const url = `https://unpkg.com/element-ui@${version}/lib/theme-chalk/index.css`;
        this.getCSSString(url, chalkHandler, "chalk");
      } else {
        chalkHandler();
      }

      const styles = [].slice
        .call(document.querySelectorAll("style"))
        .filter(style => {
          const text = style.innerText;
          return (
            new RegExp(oldVal, "i").test(text) && !/Chalk Variables/.test(text)
          );
        });
      styles.forEach(style => {
        const { innerText } = style;
        if (typeof innerText !== "string") return;
        style.innerText = this.updateStyle(
          innerText,
          originalCluster,
          themeCluster
        );
      });
    },
    updateStyle(style, oldCluster, newCluster) {
      let newStyle = style;
      oldCluster.forEach((color, index) => {
        newStyle = newStyle.replace(new RegExp(color, "ig"), newCluster[index]);
      });
      return newStyle;
    },
    getCSSString(url, callback, variable) {
      const xhr = new XMLHttpRequest();
      xhr.onreadystatechange = () => {
        if (xhr.readyState === 4 && xhr.status === 200) {
          this[variable] = xhr.responseText.replace(/@font-face{[^}]+}/, "");
          callback();
        }
      };
      xhr.open("GET", url);
      xhr.send();
    },
    getThemeCluster(theme) {
      const tintColor = (color, tint) => {
        let red = parseInt(color.slice(0, 2), 16);
        let green = parseInt(color.slice(2, 4), 16);
        let blue = parseInt(color.slice(4, 6), 16);

        if (tint === 0) {
          // when primary color is in its rgb space
          return [red, green, blue].join(",");
        } else {
          red += Math.round(tint * (255 - red));
          green += Math.round(tint * (255 - green));
          blue += Math.round(tint * (255 - blue));

          red = red.toString(16);
          green = green.toString(16);
          blue = blue.toString(16);

          return `#${red}${green}${blue}`;
        }
      };

      const shadeColor = (color, shade) => {
        let red = parseInt(color.slice(0, 2), 16);
        let green = parseInt(color.slice(2, 4), 16);
        let blue = parseInt(color.slice(4, 6), 16);

        red = Math.round((1 - shade) * red);
        green = Math.round((1 - shade) * green);
        blue = Math.round((1 - shade) * blue);

        red = red.toString(16);
        green = green.toString(16);
        blue = blue.toString(16);

        return `#${red}${green}${blue}`;
      };

      const clusters = [theme];
      for (let i = 0; i <= 9; i++) {
        clusters.push(tintColor(theme, Number((i / 10).toFixed(2))));
      }
      clusters.push(shadeColor(theme, 0.1));
      return clusters;
    }
  },
  created() {
    this.theme = this.colorName;
  }
};
</script>
<style>
.theme-picker-dropdown .el-color-dropdown__link-btn {
  display: none;
}
</style>
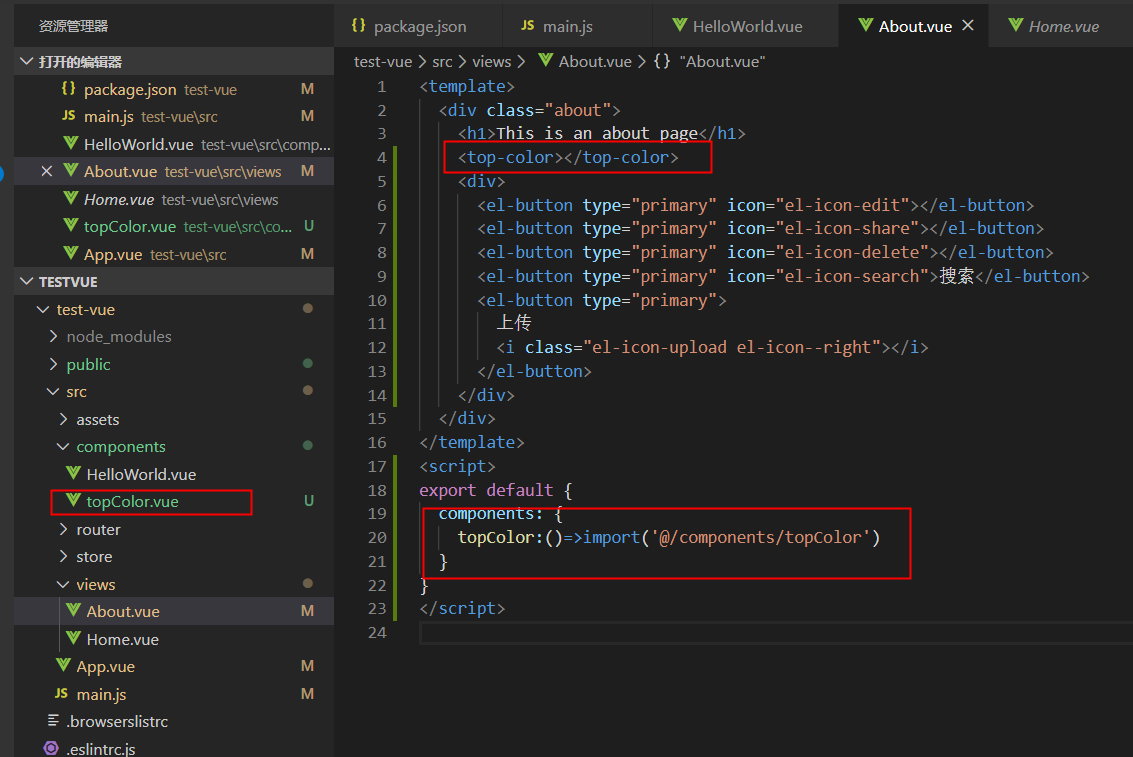
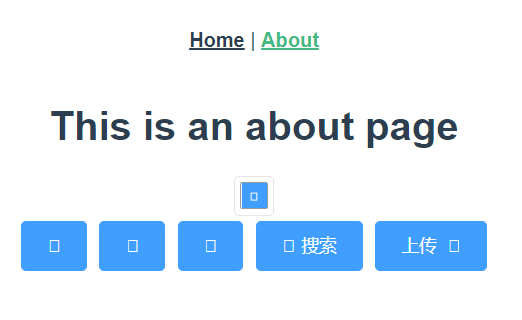
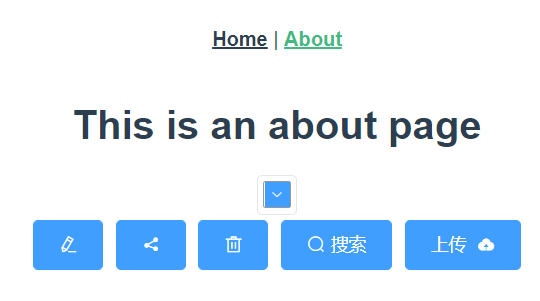
1.3 在需要的地方引入组件,就完成了,下面是vue-cli3默认搭的项目代码和效果图
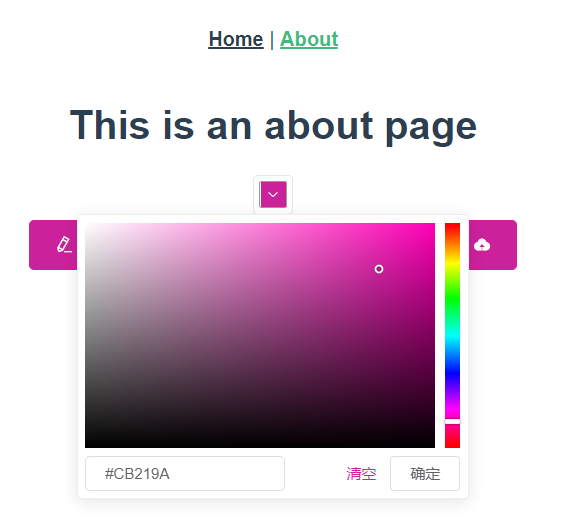
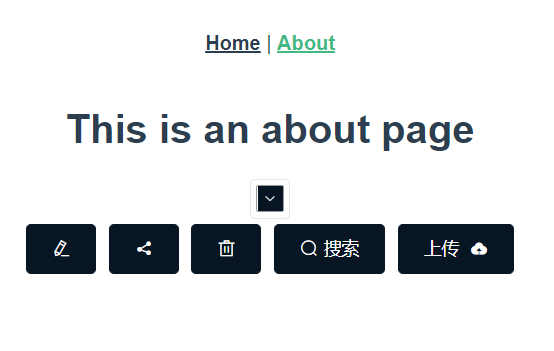
现在已经成功通过颜色选择器来选择主题颜色了,当然在实际应用中肯定要配合vuex实现存储颜色状态的功能。想学吗?评论区留言我再更新哦
2.本地或者cdn引入vue和elementUI,本地引入element-ui图标不显示的解决方法
2.1 在vue.config.js中配置:
module.exports = {
chainWebpack: (config) => {
        //忽略的打包文件
        config.externals({
            'vue': 'Vue',
            'element-ui': 'ELEMENT'
        });
    },
}
2.2 JS: 在index.html中引入vue和element的js文件(一定要先引入vue再引入element-ui,这里使用线上的,你可以下载放在本地然后引入)
 <script src="https://cdn.bootcdn.net/ajax/libs/vue/2.6.11/vue.min.js"></script>
 <script src="https://cdn.bootcdn.net/ajax/libs/element-ui/2.13.2/index.js"></script>
2.3 CSS: 此时你如果把element-ui的css文件直接放在本地然后引入会出现图标不显示的问题
2.3 在 node_modules\element-ui\lib下面找到 theme-chalk 的文件夹,然后复制出来,放在public文件夹下
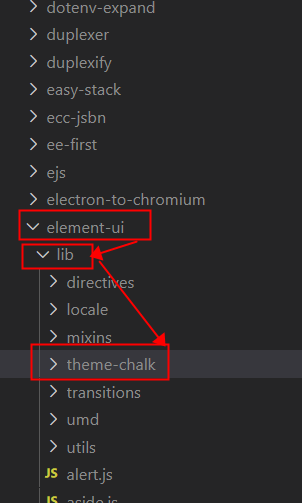
2.4 保留fonts文件夹和index.css文件,其它的css文件删除
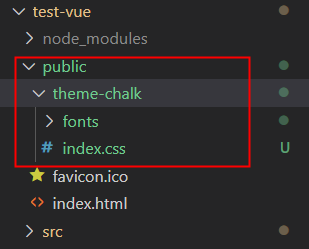
2.5 在index.html引入css,成功显示
<link href="<%= BASE_URL %>theme-chalk/index.css" rel="stylesheet">
tips:之所以直接引入不显示图标,是因为element-ui的css文件中,图标是通过下图的方式引入的,所以本地一定要有fonts文件夹才可以正确显示出来

自律使我自由

 浙公网安备 33010602011771号