VS2019配置C++ boost库
一、安装编译BOOST C++libary
1、安装Boost库
官网下载:https://www.boost.org/users/history/version_1_70_0.html
据说低于1.7.0的版本在vs2019中支持不完善,编译或运行时发生不可预料的bug
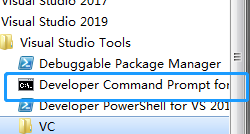
2、下载好后,使用VS tool中developer Command终端工具对解压之后的文件boostrap.bat进行编译
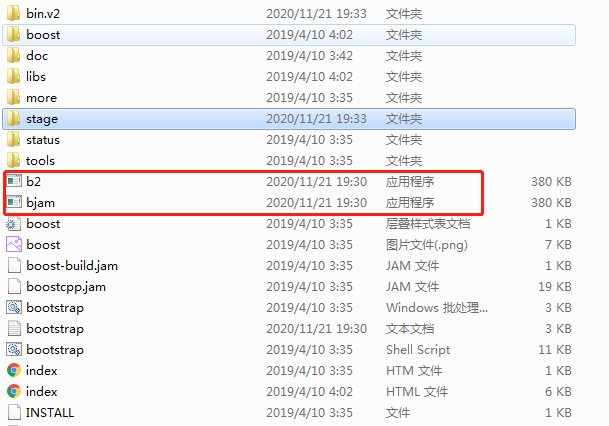
运行的很快,可以在该根目录中增加了几个文件如bjam.exe,b2.exe等文件,如图所示:
继续在命令行终端中执行
bjam.exe --toolset=msvc-14.1 architecture=x86 address-model=64 link=static --build-type=complete --with-system --with-thread --with-date_time --with-filesystem --with-serialization
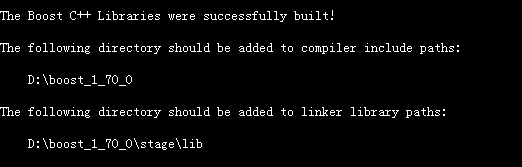
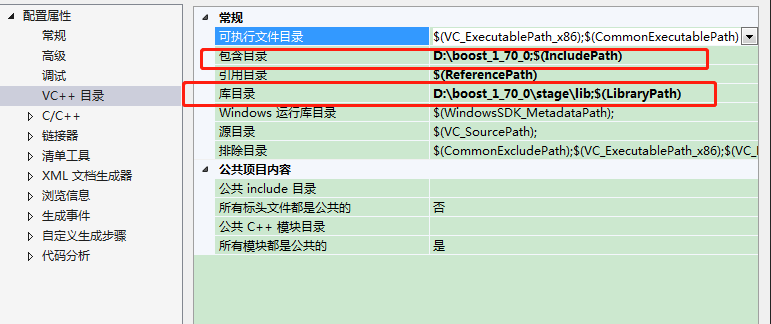
稍等片刻,编译完成之后,会提示将在使用Boost库时将两个路径添加到包含目录和库目录中
#include <boost/lexical_cast.hpp>
#include <iostream>

using namespace std;
using namespace boost;

int main()
{
	//system("chcp 65001");

	double a = lexical_cast<double>("3.1415926");
	string str = lexical_cast<string>("3.1415926");
	cout << "This is a number: " << a << endl;
	cout << "This is a string: " << str << endl;
	int b = 0;
	try {
		b = lexical_cast<int>("neo");
	}
	catch (bad_lexical_cast& e) {
		cout << e.what() << endl;
	}
	return 0;
}
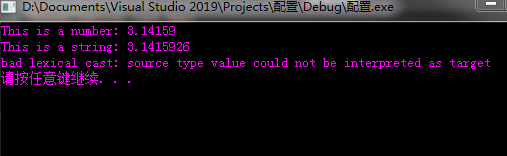
运行结果:

 浙公网安备 33010602011771号