ssh整合之六管理我们的配置文件
1.我们的ssh搭建已经搭建好了,之前是纯xml方式,而且我们的配置文件,是一个框架一个配置文件。这样的话,配置文件中的内容就会很多,这样以后修改起来也会很麻烦,因 此,我们尝试着把这些配置文件引入进来,进行一个分类管理,这样,再修改的话就会方便很多,对于我们快速查阅配置文件也有好处
2.下面我们对之前的配置文件进行改造,先来看看我们的一个大体上的结构,这里我们的hibernate的核心配置文件,即hibernate.cfg.xml,我们是直接交给了spring进行管理
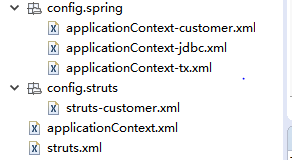
3.这里我们把spring的核心配置文件分开,这样的话,易于维护和查看,最后,我们可以在spring的核心文件中引入其他配置文件即可
config/spring/applicationContext-customer.xml
<?xml version="1.0" encoding="UTF-8"?>
<!-- spring的配置文件:导入约束 -->
<beans xmlns="http://www.springframework.org/schema/beans"
    xmlns:xsi="http://www.w3.org/2001/XMLSchema-instance"
    xmlns:context="http://www.springframework.org/schema/context"
    xmlns:aop="http://www.springframework.org/schema/aop"
    xmlns:tx="http://www.springframework.org/schema/tx"
    xsi:schemaLocation="
        http://www.springframework.org/schema/beans
        http://www.springframework.org/schema/beans/spring-beans.xsd
        http://www.springframework.org/schema/context
        http://www.springframework.org/schema/context/spring-context.xsd
        http://www.springframework.org/schema/aop
        http://www.springframework.org/schema/aop/spring-aop.xsd
        http://www.springframework.org/schema/tx
        http://www.springframework.org/schema/tx/spring-tx.xsd
        ">

    <!-- 自定义的java对象交给spring进行管理 -->
   <bean id="customerAction" scope="prototype" class="com.itheima.action.CustomerAction">
        <property name="customerService" ref="customerService"></property>
   </bean>
   <bean id="customerService" class="com.itheima.service.impl.CustomerServiceImpl">
           <property name="customerDao" ref="customerDao"></property>
   </bean>
   <bean id="customerDao" class="com.itheima.dao.impl.CustomerDaoImpl">
           <property name="hibernateTemplate" ref="hibernateTemplate"></property>
   </bean>
</beans>
config/spring/applicationContext-jdbc.xml
<?xml version="1.0" encoding="UTF-8"?>
<!-- spring的配置文件:导入约束 -->
<beans xmlns="http://www.springframework.org/schema/beans"
    xmlns:xsi="http://www.w3.org/2001/XMLSchema-instance"
    xmlns:context="http://www.springframework.org/schema/context"
    xmlns:aop="http://www.springframework.org/schema/aop"
    xmlns:tx="http://www.springframework.org/schema/tx"
    xsi:schemaLocation="
        http://www.springframework.org/schema/beans
        http://www.springframework.org/schema/beans/spring-beans.xsd
        http://www.springframework.org/schema/context
        http://www.springframework.org/schema/context/spring-context.xsd
        http://www.springframework.org/schema/aop
        http://www.springframework.org/schema/aop/spring-aop.xsd
        http://www.springframework.org/schema/tx
        http://www.springframework.org/schema/tx/spring-tx.xsd
        ">
   <!--  第三方的jar包中的java对象交给spring进行管理 -->
   <!--  创建一个hibernateTemplate对象 -->
   <bean id="hibernateTemplate" class="org.springframework.orm.hibernate5.HibernateTemplate">
         <!-- 注入sessionFactory -->
         <property name="sessionFactory" ref="sessionFactory"></property>
   </bean>
   <bean id="sessionFactory" class="org.springframework.orm.hibernate5.LocalSessionFactoryBean">
           <!-- 配置数据库连接池 -->
           <property name="dataSource" ref="dataSource"></property>
           <!-- hibernate的配置文件 -->
           <property name="hibernateProperties">
               <props>
                   <prop key="hibernate.dialect">org.hibernate.dialect.MySQLDialect</prop>
                   <prop key="hibernate.hbm2ddl.auto">update</prop>
                   <prop key="hibernate.show_sql">true</prop>
                   <prop key="hibernate.format_sql">true</prop>
               </props>
           </property>
           <!-- 映射文件 -->
           <property name="mappingLocations" value="classpath:com/itheima/entity/*.hbm.xml"></property>
   </bean>
   <bean id="dataSource" class="org.springframework.jdbc.datasource.DriverManagerDataSource">
           <property name="driverClassName" value="com.mysql.jdbc.Driver"></property>
           <property name="url" value="jdbc:mysql:///ssh_280"></property>
           <property name="username" value="root"></property>
           <property name="password" value="root"></property>
   </bean>
</beans>
config/spring/applicationContext-tx.xml
<?xml version="1.0" encoding="UTF-8"?>
<!-- spring的配置文件:导入约束 -->
<beans xmlns="http://www.springframework.org/schema/beans"
    xmlns:xsi="http://www.w3.org/2001/XMLSchema-instance"
    xmlns:context="http://www.springframework.org/schema/context"
    xmlns:aop="http://www.springframework.org/schema/aop"
    xmlns:tx="http://www.springframework.org/schema/tx"
    xsi:schemaLocation="
        http://www.springframework.org/schema/beans
        http://www.springframework.org/schema/beans/spring-beans.xsd
        http://www.springframework.org/schema/context
        http://www.springframework.org/schema/context/spring-context.xsd
        http://www.springframework.org/schema/aop
        http://www.springframework.org/schema/aop/spring-aop.xsd
        http://www.springframework.org/schema/tx
        http://www.springframework.org/schema/tx/spring-tx.xsd
        ">
    <!--配置hibernate的事务管理 -->
   <bean id="transactionManager" class="org.springframework.orm.hibernate5.HibernateTransactionManager">
           <property name="sessionFactory" ref="sessionFactory"></property>
   </bean>
   <!-- 配置事务管理通知 -->
   <tx:advice id="txAdvice">
           <tx:attributes>
               <tx:method name="*" propagation="REQUIRED" read-only="false"/>
               <tx:method name="get*" propagation="SUPPORTS" read-only="true"/>
           </tx:attributes>
   </tx:advice>
   <!-- 配置事务的AOP -->
   <aop:config>
           <aop:pointcut expression="execution(* com.itheima.service.impl.*.*(..))" id="pt"/>
           <aop:advisor advice-ref="txAdvice" pointcut-ref="pt"/>
   </aop:config>
</beans>
applicationContext.xml
<?xml version="1.0" encoding="UTF-8"?>
<!-- spring的配置文件:导入约束 -->
<beans xmlns="http://www.springframework.org/schema/beans"
    xmlns:xsi="http://www.w3.org/2001/XMLSchema-instance"
    xmlns:context="http://www.springframework.org/schema/context"
    xmlns:aop="http://www.springframework.org/schema/aop"
    xmlns:tx="http://www.springframework.org/schema/tx"
    xsi:schemaLocation="
        http://www.springframework.org/schema/beans
        http://www.springframework.org/schema/beans/spring-beans.xsd
        http://www.springframework.org/schema/context
        http://www.springframework.org/schema/context/spring-context.xsd
        http://www.springframework.org/schema/aop
        http://www.springframework.org/schema/aop/spring-aop.xsd
        http://www.springframework.org/schema/tx
        http://www.springframework.org/schema/tx/spring-tx.xsd
        ">
      <!--  引入其他的配置文件 -->
      <import resource="classpath:config/spring/applicationContext-customer.xml"/>
      <import resource="classpath:config/spring/applicationContext-jdbc.xml"/>
      <import resource="classpath:config/spring/applicationContext-tx.xml"/>
</beans>
4.我们的struts也分开管理
config/struts/struts-customer.xml
<!DOCTYPE struts PUBLIC
    "-//Apache Software Foundation//DTD Struts Configuration 2.3//EN"
    "http://struts.apache.org/dtds/struts-2.3.dtd">
<struts>
    <package name="customer" extends="struts-default" namespace="/customer">
        <action name="addCustomerUI" class="customerAction" method="addCustomerUI">
            <result name="success">/jsp/customer/add.jsp</result>
        </action>
        <action name="getAllCustomer" class="customerAction" method="getAllCustomer">
            <result name="success">/jsp/customer/list.jsp</result>
        </action>
    </package>
</struts>
struts的狠心配置文件struts.xml
<!DOCTYPE struts PUBLIC
    "-//Apache Software Foundation//DTD Struts Configuration 2.3//EN"
    "http://struts.apache.org/dtds/struts-2.3.dtd">
<struts>
    <constant name="devMode" value="true"></constant>
    <!-- 引入其他的struts的动作类配置文件 -->
    <include file="config/struts/struts-customer.xml"></include>
</struts>
这样的话,我们就把配置文件分门别类了,到时候再修改或查看时就一目了然了!

 浙公网安备 33010602011771号