
全局事件总线
1、全局事件总线
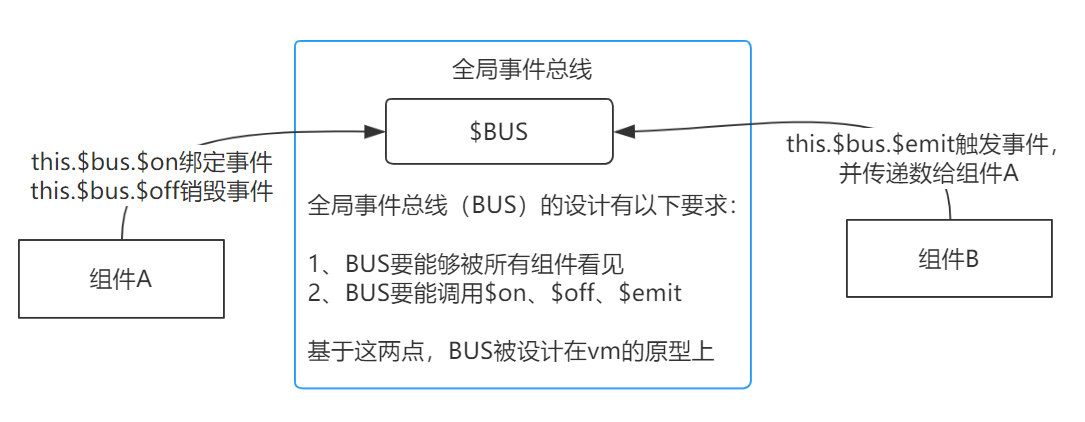
全局事件总线,并不是vue提供了这个功能,而是基于自定义事件,从代码设计上来实现任意组件间的通信。
2、安装全局事件总线
//main.js
import Vue from 'vue'
import App from './App.vue'
Vue.config.productionTip = false

//创建vm
new Vue({
    el:'#app',
    render: h => h(App),
    beforeCreate() {
        //this就是当前vm
        Vue.prototype.$bus = this //安装全局事件总线,$bus就是当前应用的vm
    },
})
3、使用事件总线
$bus绑定事件
<template>
    <div class="school">
        <h2>学校名称:{{name}}</h2>
        <h2>学校地址:{{address}}</h2>
    </div>
</template>

<script>
    export default {
        name:'School',
        data() {
            return {
                name:'幼儿园大班',
                address:'上海',
            }
        },
        mounted() {
            //给BUS绑定自定义事件hello。并用箭头函数定义回调函数,用于接收数据
            this.$bus.$on('hello',(data)=>{
                console.log('我是School组件,收到了数据',data)
            })
        },
        //组件销毁前,解绑该组件已绑定的事件
        beforeDestroy() {
            this.$bus.$off('hello')
        },
    }
</script>

<style scoped>
    .school{
        background-color: skyblue;
        padding: 5px;
    }
</style>
$bus触发事件
<template>
    <div class="student">
        <h2>学生姓名:{{name}}</h2>
        <h2>学生性别:{{sex}}</h2>
        <button @click="sendStudentName">把学生名给School组件</button>
    </div>
</template>

<script>
    export default {
        name:'Student',
        data() {
            return {
                name:'张三',
                sex:'男',
            }
        },

        methods: {
            sendStudentName(){
                //触发BUS的hello事件,向School组件传递数据
                this.$bus.$emit('hello',this.name)
            }
        },
    }
</script>

<style lang="less" scoped>
    .student{
        background-color: pink;
        padding: 5px;
        margin-top: 30px;
    }
</style>

 浙公网安备 33010602011771号