
Nginx网站服务——Nginx虚拟主机(基于域名、IP、端口)附带超详细实验步骤
一、基于域名的nginx虚拟主机
1、基于域名的nginx虚拟主机的操作步骤
1.1 为虚拟主机提供域名和IP的映射(也可以使用DNS正向解析)
echo "192.168.229.60 www.ly.com www.weq.com" >> /etc/hosts
1.2 为虚拟主机准备网页文档
mkdir -p /var/www/html/ly/
mkdir -p /var/www/html/weq/
echo "<h1>www.ly.com</h1>" > /var/www/html/ly/index.html
echo "<h1>www.weq.com</h1>" > /var/www/html/weq/index.html
1.3 修改nginx主配置文件
vim /usr/local/nginx/conf/nginx.conf

server {
        listen       80;
        server_name  www.ly.com;						#设置域名
        charset utf-8;									#设置网页字符集
        access_log  logs/ly.com.access.log;			#设置日志名
        location / {
            root   /var/www/html/ly;					#设置www.ly.com的工作目录
            index  index.html index.htm;
        }
        error_page   500 502 503 504  /50x.html;
        location = /50x.html {
            root   html;
        }
    }
    server {
        listen       80;
        server_name  www.weq.com;						#设置域名
        charset utf-8;									#设置网页字符集
        access_log  logs/weq.com.access.log;			#设置日志名
        location / {
            root   /var/www/html/weq;					#设置www.weq.com的工作目录
            index  index.html index.htm;
        }
1.4 重启nginx后进行访问测试
systemctl restart nginx
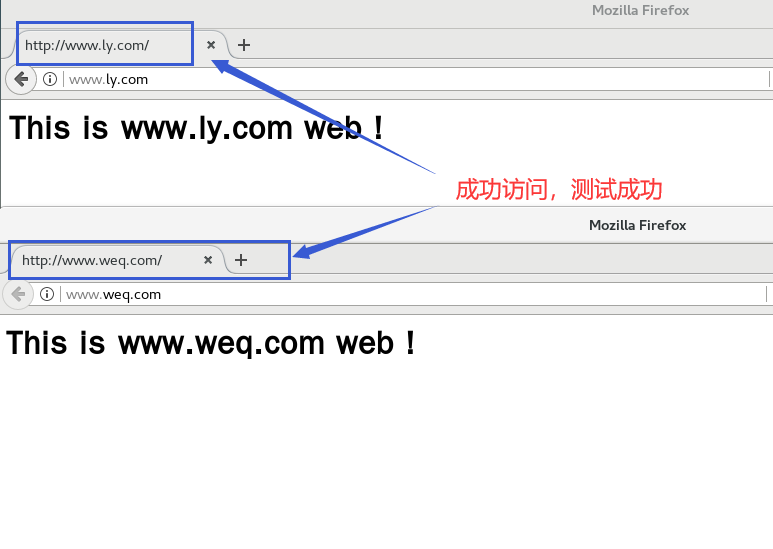
浏览器访问http://www.ly.com
浏览器访问http://www.weq.com
2、实例操作:基于域名的nginx虚拟主机
2.1 为虚拟主机提供域名解析
[root@192 ~]# vim /etc/hosts

127.0.0.1   localhost localhost.localdomain localhost4 localhost4.localdomain4
::1         localhost localhost.localdomain localhost6 localhost6.localdomain6
192.168.229.60 www.ly.com www.weq.com

2.2 为虚拟主机准备网页文档
[root@192 ~]# mkdir -p /var/www/html/ly
[root@192 ~]# mkdir -p /var/www/html/weq
[root@192 ~]# cd /var/www/html/
[root@192 html]# ls
ly  weq
[root@192 html]# echo "<h1>This is www.ly.com web!</h1>" > /var/www/html/ly/index.html
-bash: !: event not found
[root@192 html]# echo "<h1>This is www.ly.com web!</h1>" > /var/www/html/ly/index.html
[root@192 html]# echo "<h1>This is www.weq.com web!</h1>" > /var/www/html/weq/index.html

2.3 修改Nginx的配置文件
[root@cm html]# cd /usr/local/nginx/conf/
[root@cm conf]# ls
fastcgi.conf          fastcgi_params.default  mime.types          nginx.conf.bak      scgi_params.default   win-utf
fastcgi.conf.default  koi-utf                 mime.types.default  nginx.conf.default  uwsgi_params
fastcgi_params        koi-win                 nginx.conf          scgi_params         uwsgi_params.default
[root@cm conf]# cp nginx.conf.bak nginx.conf
cp:是否覆盖"nginx.conf"? yes

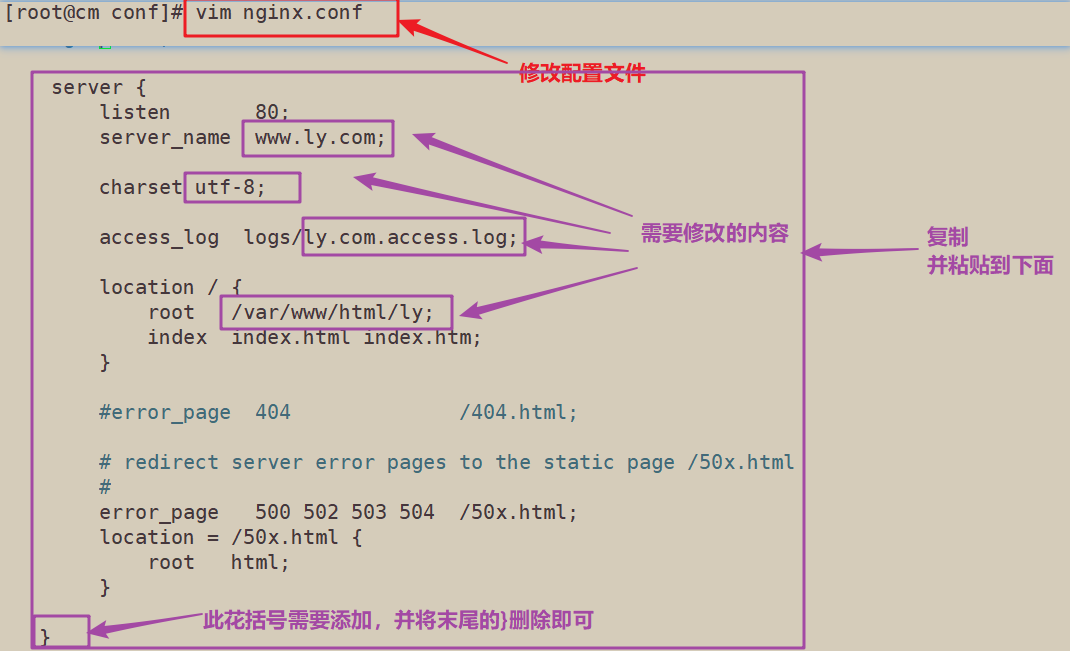
[root@cm conf]# vim nginx.conf
server {
listen 80;
server_name www.ly.com;
charset utf-8;
access_log logs/ly.com.access.log;
location / {
root /var/www/html/ly;
index index.html index.htm;
}
#error_page 404 /404.html;
# redirect server error pages to the static page /50x.html
#
error_page 500 502 503 504 /50x.html;
location = /50x.html {
root html;
}
}
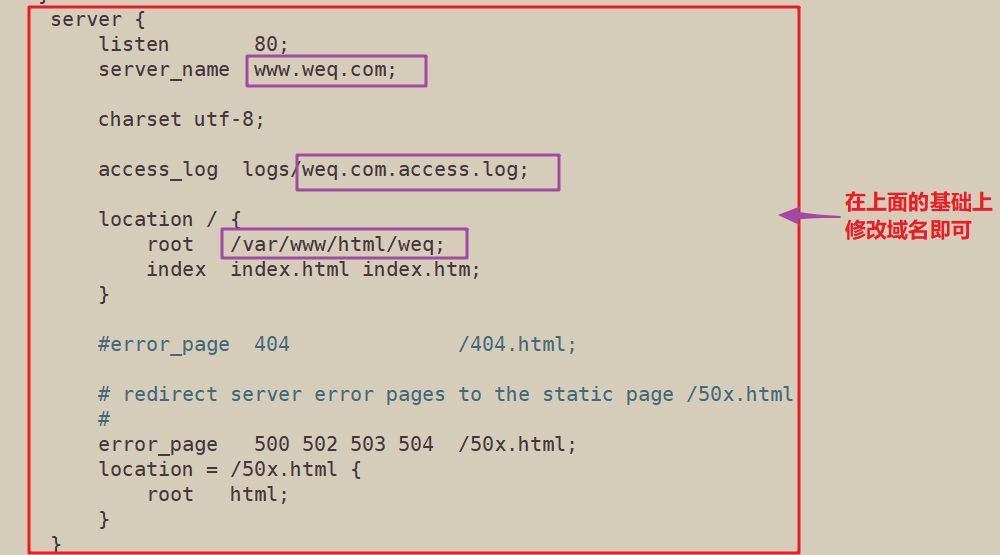
server {
listen 80;
server_name www.weq.com;
charset utf-8;
access_log logs/weq.com.access.log;
location / {
root /var/www/html/weq;
index index.html index.htm;
}
#error_page 404 /404.html;
# redirect server error pages to the static page /50x.html
#
error_page 500 502 503 504 /50x.html;
location = /50x.html {
root html;
}
}
2.4 重启服务,访问测试
[root@cm conf]# nginx -t
nginx: the configuration file /usr/local/nginx/conf/nginx.conf syntax is ok
nginx: configuration file /usr/local/nginx/conf/nginx.conf test is successful
[root@cm conf]# systemctl restart nginx

二、基于IP的nginx虚拟主机
1、基于IP的nginx虚拟主机的操作步骤
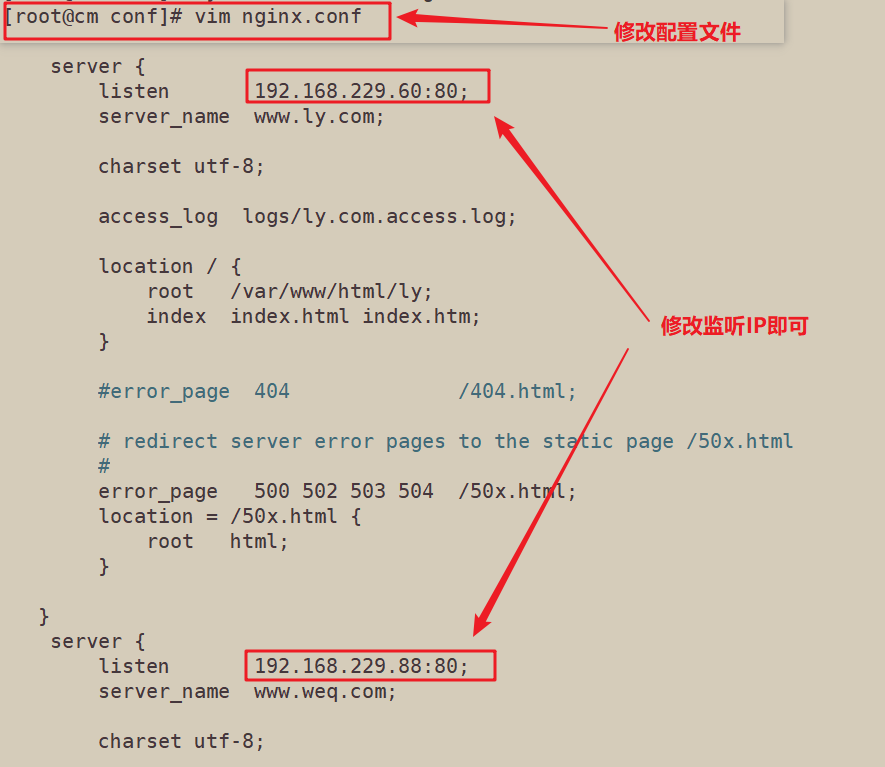
1.1 添加虚拟网卡,修改主配置文件
ifconfig ens33:1 192.168.229.88/24
vim /usr/local/nginx/conf/nginx.conf
 server {
        listen       192.168.229.60:80;				#修改监听的为ip
        server_name  www.ly.com;
        charset utf-8;
        access_log  logs/ly.com.access.log;
        location / {
            root   /var/www/html/ly;
            index  index.html index.htm;
        }
        error_page   500 502 503 504  /50x.html;
        location = /50x.html {
            root   html;
        }
    }
    server {
        listen       192.168.229.88:80;				#修改监听的为ip
        server_name  www.weq.com;
        charset utf-8;
        access_log  logs/weq.com.access.log;
        location / {
            root   /var/www/html/weq;
            index  index.html index.htm;
        }
1.2 检查配置文件,重启服务并访问测试
nginx -t
systemctl restart nginx
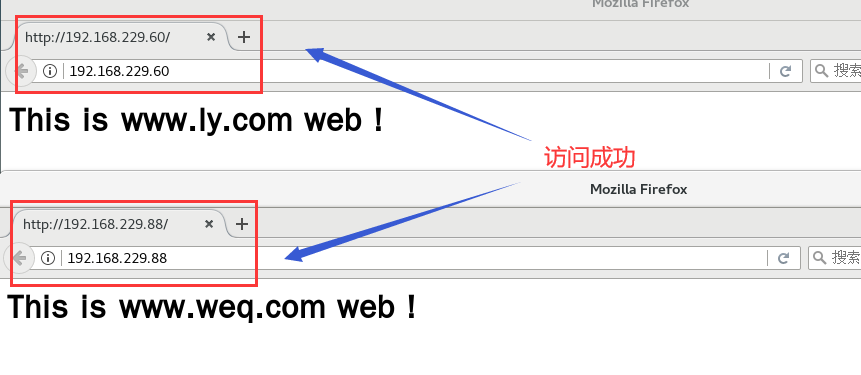
浏览器访问http://192.168.229.60:80
浏览器访问http://192.168.229.88:80
2、实例操作:基于IP的nginx虚拟主机
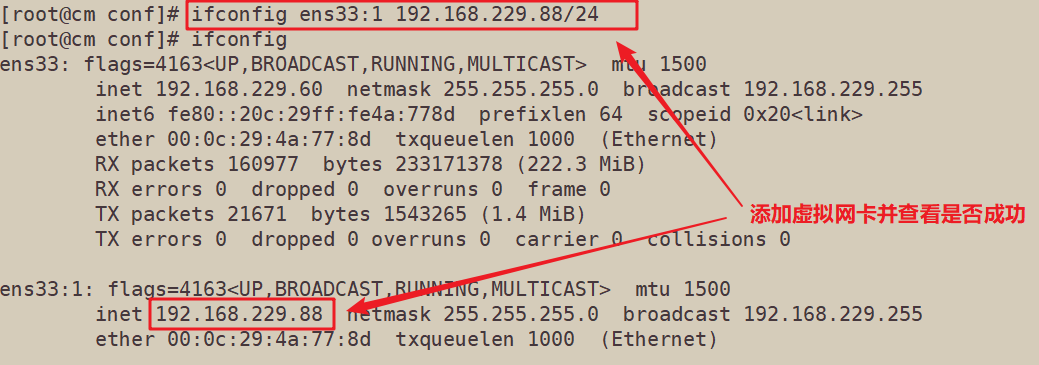
2.1 添加虚拟网卡
[root@cm conf]# ifconfig ens33:1 192.168.229.88/24
[root@cm conf]# ifconfig
ens33: flags=4163<UP,BROADCAST,RUNNING,MULTICAST>  mtu 1500
        inet 192.168.229.60  netmask 255.255.255.0  broadcast 192.168.229.255
        inet6 fe80::20c:29ff:fe4a:778d  prefixlen 64  scopeid 0x20<link>
        ether 00:0c:29:4a:77:8d  txqueuelen 1000  (Ethernet)
        RX packets 160977  bytes 233171378 (222.3 MiB)
        RX errors 0  dropped 0  overruns 0  frame 0
        TX packets 21671  bytes 1543265 (1.4 MiB)
        TX errors 0  dropped 0 overruns 0  carrier 0  collisions 0

ens33:1: flags=4163<UP,BROADCAST,RUNNING,MULTICAST>  mtu 1500
        inet 192.168.229.88  netmask 255.255.255.0  broadcast 192.168.229.255
        ether 00:0c:29:4a:77:8d  txqueuelen 1000  (Ethernet)
2.2 修改主配置文件,并重启服务
[root@cm conf]# vim nginx.conf
[root@cm conf]# nginx -t
nginx: the configuration file /usr/local/nginx/conf/nginx.conf syntax is ok
nginx: configuration file /usr/local/nginx/conf/nginx.conf test is successful
[root@cm conf]# systemctl restart nginx
2.3 浏览器访问测试
三、基于端口的nginx虚拟主机
1、基于端口的nginx虚拟主机的操作步骤
1.1 修改主配置文件
vim /usr.local/nginx/conf/nginx.conf
server {
        listen       192.168.229.60:8080;				#修改监听的为ip
        server_name  www.ly.com;
        charset utf-8;
        access_log  logs/ly.com.access.log;
        location / {
            root   /var/www/html/ly;
            index  index.html index.htm;
        }
        error_page   500 502 503 504  /50x.html;
        location = /50x.html {
            root   html;
        }
    }
    server {
        listen       192.168.229.88:888;				#修改监听的为ip
        server_name  www.weq.com;
        charset utf-8;
        access_log  logs/weq.com.access.log;
        location / {
            root   /var/www/html/weq;
            index  index.html index.htm;
        }
1.2 检查配置文件,重启服务并访问测试
nginx -t
systemctl restart nginx.service
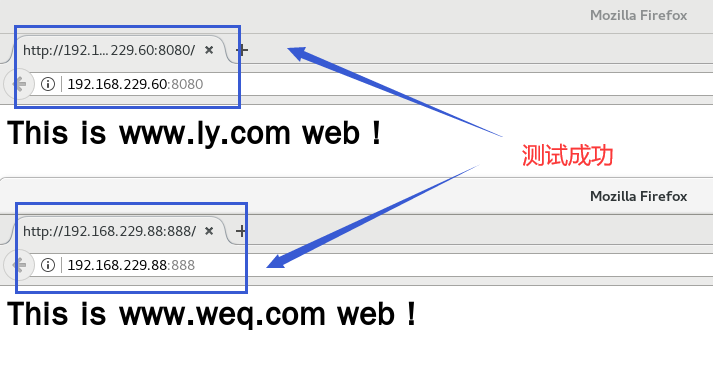
浏览器访问http://192.168.229.60:8080
浏览器访问http://192.168.229:88:888
2、实例操作:基于端口的nginx虚拟主机
2.1 修改主配置文件,并重启服务
[root@cm conf]# vim nginx.conf
[root@cm conf]# nginx -t
nginx: the configuration file /usr/local/nginx/conf/nginx.conf syntax is ok
nginx: configuration file /usr/local/nginx/conf/nginx.conf test is successful
[root@cm conf]# systemctl restart nginx


2.2 浏览器访问测试
将本人在工作学习中的一些知识记录并分享

 浙公网安备 33010602011771号