
ubuntu18 安装mysql
1、安装软件
1.1. sudo apt-get install mysql-server
1.2. apt-get install mysql-client
1.3. sudo apt-get install libmysqlclient-dev
2、设置外网访问
vim /etc/mysql/mysql.conf.d/mysqld.cnf 将bind-address改为0.0.0.0
3、查看密码并登录mysql控制台
cat /etc/mysql/debian.cnf
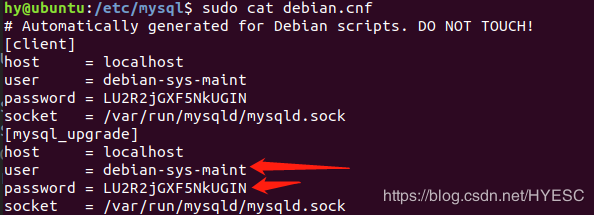
其中user和password为mysql用户名和密码
使用mysql -u用户名 -p密码 回车登录系统
4、修改user表
依次输入:
user mysql; 回车
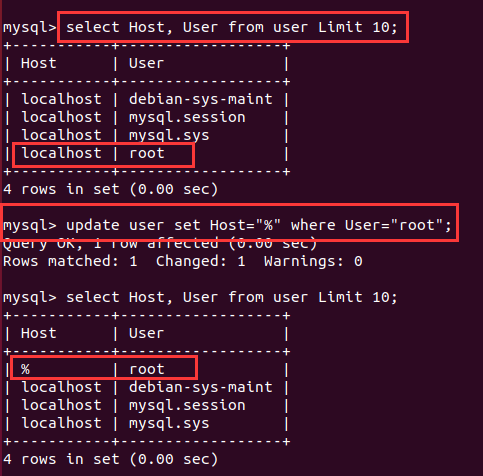
select Host, User from user; 回车
udpate user set Host='%' where User='root'; 回车
grant all privileges on *.* to 'root'@'%' identified by 'password';
update mysql.user set authentication_string=password('123456') where user='root'; (5.7以上)
flush privileges;

step 6: 授权 命令 grant all privileges on *.* to 'root'@'%' identified by 'password';
刷新:flush privileges; 查看:show grants; 查看其他用户的权限:show grants for dba@localhost;
step7:回收权限:revoke all on *.* from dba@localhost;
step8: 修改用户密码
进入mysql,使用ALTER USER 'username'@'hostname' IDENTIFIED WITH mysql_native_password BY 'password';
然后再刷新下权限: FLUSH PRIVILEGES;
exit;重新进入mysql即可。

 浙公网安备 33010602011771号