spring源码分析——堆内存中创建bean对象
bean的生命周期中首先是在内存中开辟存储空间,然后反射创建对象,创建对象后,依赖注入,设置bean的属性,初始化bean,最后
放入缓存中,返回bean对象,这里我们分析一下第一步,bean的创建
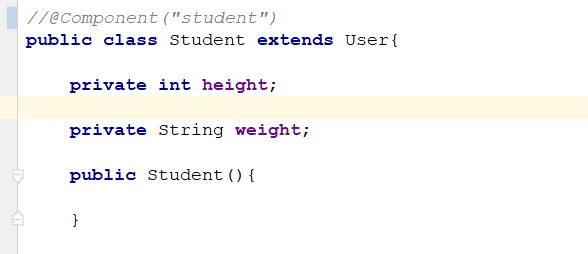
准备工作:创建一个Student类,添加注解Component
@Component("student")
public class Student extends User{

	private int height;

	private String weight;

	public Student(){

	}

	public Student(int height,String weight){
		this.height = height;
		this.weight = weight;
	}

	@Override
	public void study() {
		System.out.println("学生更要好好学习......");
	}

	@Override public String toString() {
		final StringBuffer sb = new StringBuffer("Student{");
		sb.append("height=").append(height);
		sb.append(", weight='").append(weight).append('\'');
		sb.append('}');
		return sb.toString();
	}
}
测试用例:
	public static void main(String[] args) {
		ClassPathXmlApplicationContext context = new ClassPathXmlApplicationContext("spring-context.xml");
		Student student = (Student)context.getBean("student");
		System.out.println(student);
	}
运行结果:

一:下面看一下源码中bean的创建流程,我们首先看一下无参数构造器创建bean对象
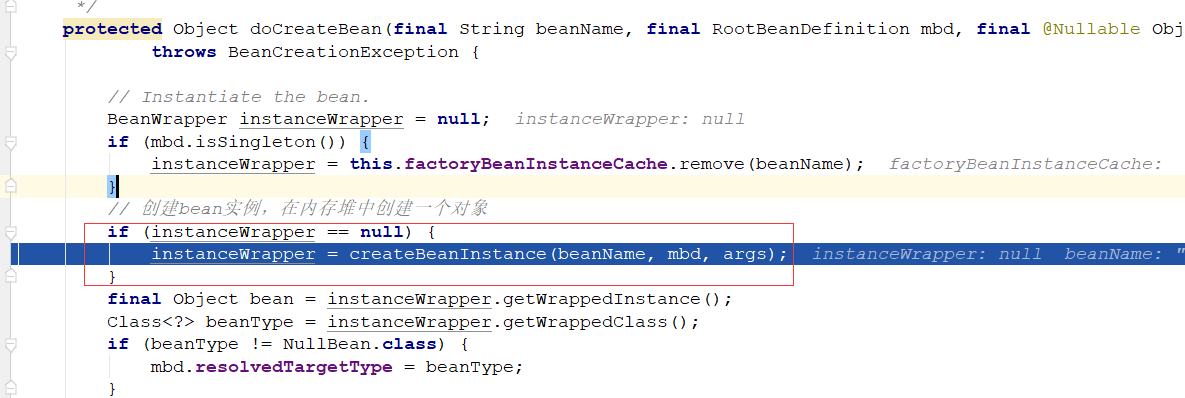
在doCreateBean方法中,createBeanInstance方法创建对象


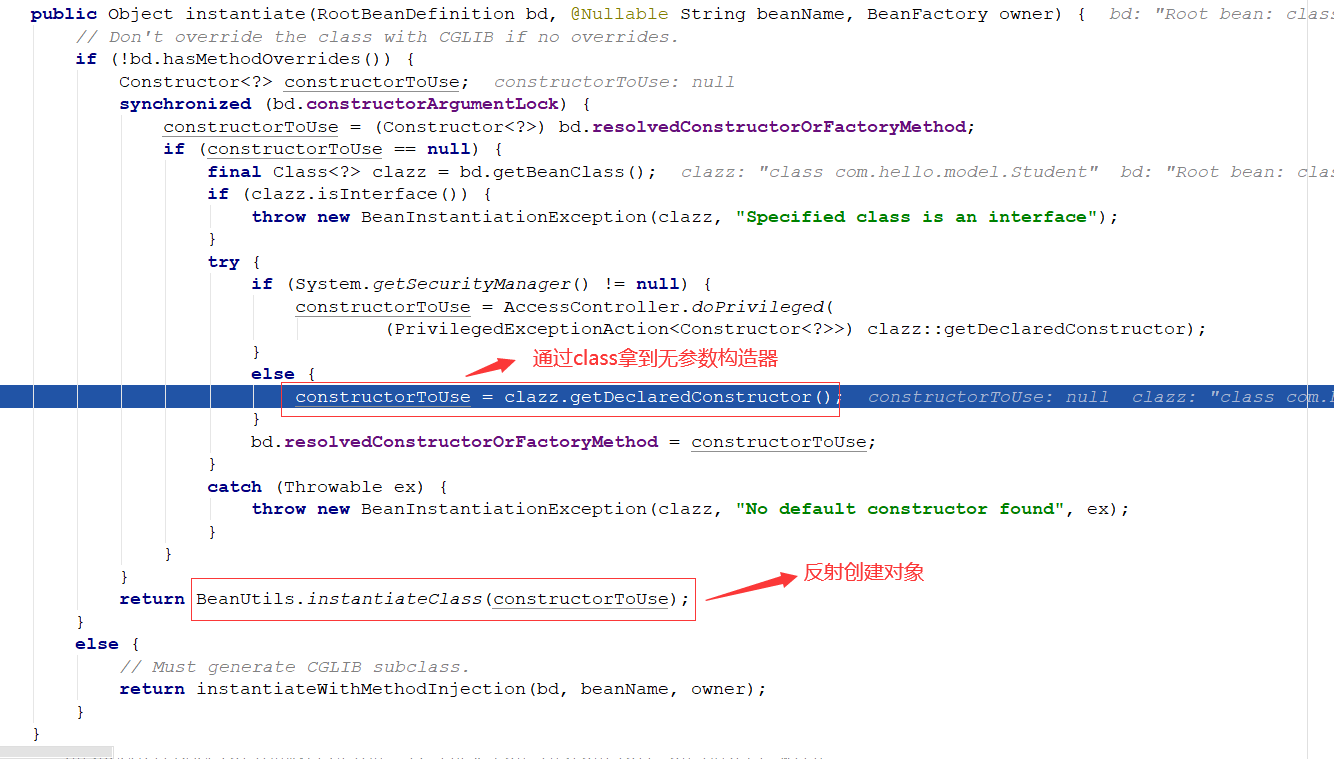
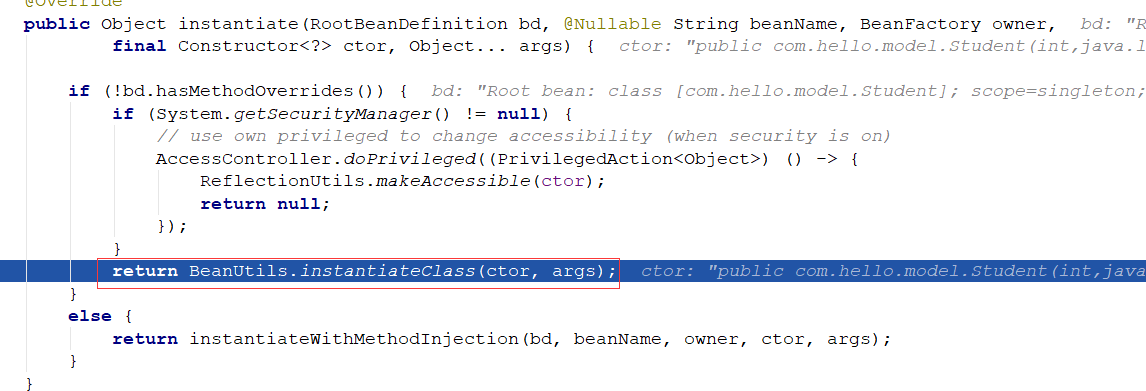
通过class类拿到无参数构造器,然后反射创建bean对象:
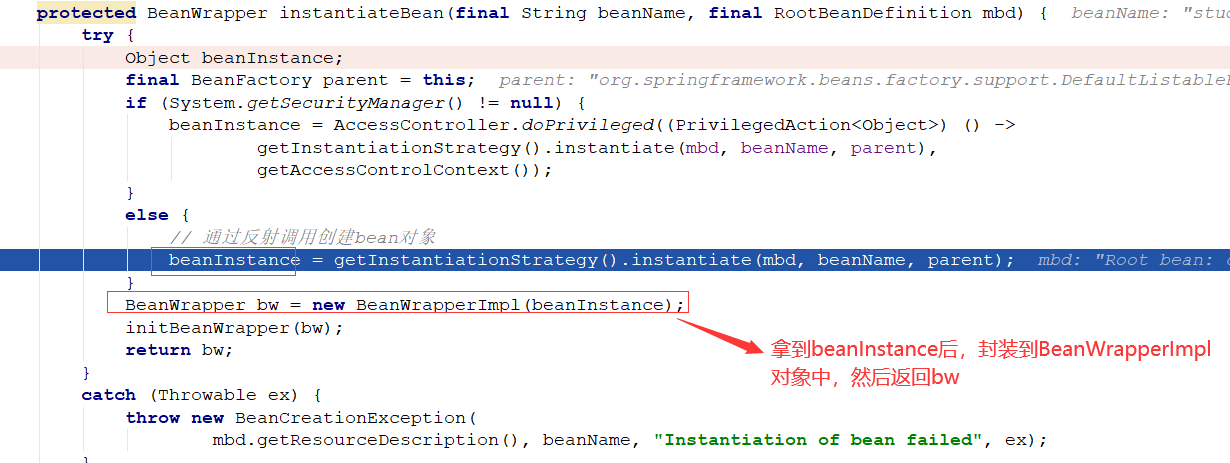
做一个封装,然后返回封装后的对象:
以上就是无参数构造器的实例化过程,下面看一下有参数构造器的实例化过程:
二:有参数构造器的实例化过程
准备工作:注释掉Component注解
通过xml配置,构造器注入参数:

运行结果:

下面从源码层面分析一下有参数构造器的实例化过程:
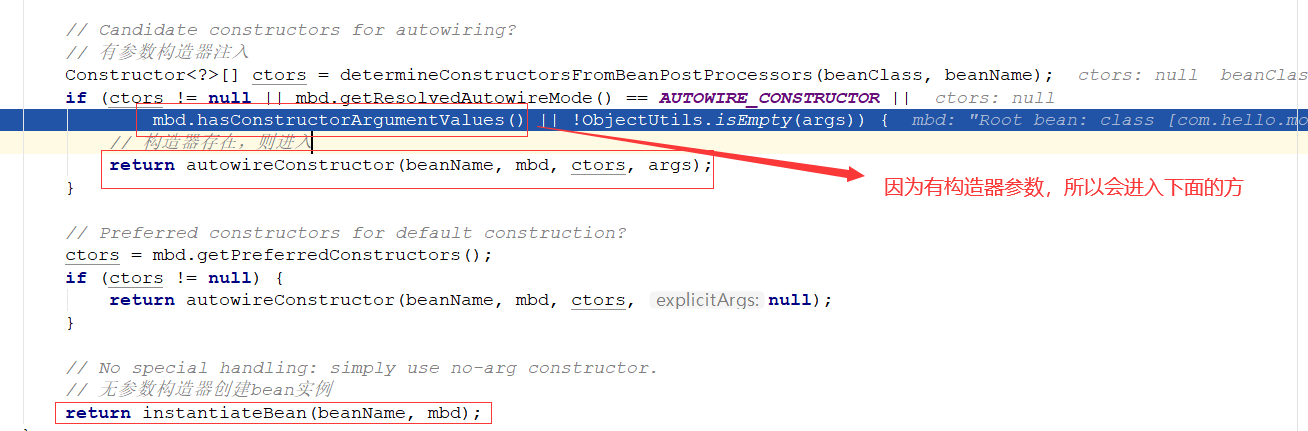
进入autowireConstructor方法:


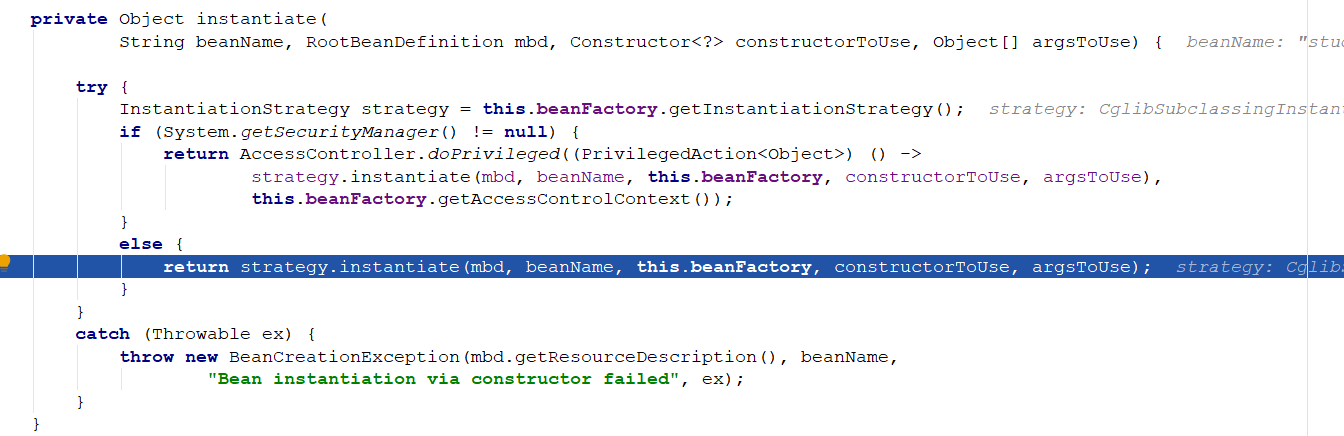
实例化后的对象封装到bw中,返回

总结:bean的实例很简单,步骤如下:
1:寻找class类,从beanDefinition上的属性
2:根据class类获取构造器,如果是有参数的获取有参构造,如果是无参数的获取无参数构造器
3:无参数构造器直接实例化对象,然后封装返回,有参数构造器需要寻找参数,然后调用构造器方法实例化对象,然后封装返回。

 浙公网安备 33010602011771号