

js可以通过fetch方法向网络发起get和post请求;springboot可以向网络提供webapi服务。这两个基本能力,就构成了mvc结构的V和C端。c端有所扩展,就有广义的M。
本例进行简单的登录模拟。
说明:
1、用t1表结构的姓名和年龄模拟登录用的用户名和密码,没挂数据库,道理都一样。
2、登录成功和失败,返回一个简单的字符串(“OK”和“NO”)。实战中,业界通用的,应该是个JWT的票据。存储在用户端,每次发起请求的时候带上它,给服务器验证用。这个内容大家可以自己补。关于js控制页面跳转(登录后),很简单,在本博“js小应用”里有提。再不明白的,网上搜搜都有,略。
3、作为服务端,这个例子着重演示了控制器如何接收用户的get和post请求,把请求参数转化为java的形参或对象。
4、本例还带了一个MyUser的服务类,用于验证用户名密码是否通过。这是服务的雏形,也是M的种子。写多了写大了,就是大的服务和广义M。
本例开发调试的时候应该注意跨域问题。调试的时候要能调通,在生产环境要注意安全(跨域的简单和安全设置)。
实现部分
服务端:
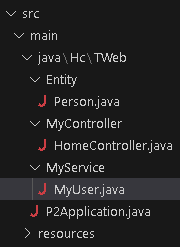
思想:一个普通的Spring Boot Web项目(带web依赖),有一个验证提交内容是否合法的服务类MyUser,有一个接受post请求提交对象的实体类Person,一个控制器HomeController负责调度。
1、生成项目(略)
2、MyUser.java
 1 package Hc.TWeb.MyService;
 2
 3 import org.springframework.stereotype.Component;
 4
 5 @Component
 6 public class MyUser {
 7     public boolean IsOk(String xm,String age)
 8     {
 9         int age1=Integer.parseInt(age);
10         if(xm.equals("zs") && age1==20)
11         {
12             return true;
13         }
14         else
15         {
16             return false;
17         }
18     }
19     public boolean IsOk1(Hc.TWeb.Entity.Person p1)
20     {
21         if(p1.xm.equals("zs") && p1.nl==20)
22         {
23             return true;
24         }
25         else
26         {
27             return false;
28         }
29     }
30 }
第5行把类注册为组件,方便自动装配。
两个方法,IsOk对两个变量做验证,IsOk1对Person类(见下面)对象做验证。
3、Person.java
package Hc.TWeb.Entity;

public class Person {
    public String xm;
    public int nl;
}
很简单,不说了。
4、HomeController.java
 1 package Hc.TWeb.MyController;
 2
 3 import org.springframework.beans.factory.annotation.Autowired;
 4 import org.springframework.web.bind.annotation.CrossOrigin;
 5 import org.springframework.web.bind.annotation.GetMapping;
 6 import org.springframework.web.bind.annotation.PostMapping;
 7 import org.springframework.web.bind.annotation.RequestBody;
 8 import org.springframework.web.bind.annotation.RequestParam;
 9 import org.springframework.web.bind.annotation.RestController;
10
11 import Hc.TWeb.MyService.MyUser;
12 import Hc.TWeb.Entity.*;
13
14 @RestController
15 @CrossOrigin
16 public class HomeController {
17     @Autowired
18     MyUser myuser;
19
20     @GetMapping("/login")
21     public String MyLogin(@RequestParam(value = "xm") String a,@RequestParam(value = "nl") String b)
22     {
23         if(myuser.IsOk(a, b))
24         {
25             return "OK";
26         }
27         else
28         {
29             return "NO";
30         }
31     }
32     @PostMapping("/login1")
33     public String MyLogin1(@RequestBody Person p)
34     {
35         if(myuser.IsOk1(p))
36         {
37             return "OK";
38         }
39         else
40         {
41             return "NO";
42         }
43     }
44 }
代码很简单,对注解进行简单说明:
第14行,说明整个类是控制器,返回复杂类型的时候,直接转换成json格式。
第15行,跨域。
第17行,myuser自动装配(不用new)
第20行和第32行,对指定请求方式(get/post)括号里的url进行拦截,执行对应方法。
第21行的注解,表示这两个参数来自url里的参数(即"?"后面的部分)。这些参数都会被识别为字符串,所以形参b的类型是String。
第33行的注解,表示对象参数p来自于请求体(post过来的内容,按属性对应,自动转换)。
以上即后端,很简单。
前端:一个页面一个js,模拟两种提交,并在浏览器控制台查看结果。
页面index.html:
<!DOCTYPE html>
<html>
    <head>
        <meta charset="utf-8" />
        <title></title>
        <script src="js/j1.js"></script>
    </head>
    <body>
        <!--form action="http://192.168.1.125:8080/login"-->
            <input type="text" id="xm"/><br />
            <input type="text" id="nl"/><br />
            <input type="button" value="提交" onclick="sub_query()"/>
        <!--/form-->
    </body>
</html>
很简单,不解释。
j1.js:
思路:取出控件,用里面的值拼成请求,发送,输出结果。
 1 function sub_query() {
 2     x = document.querySelector("#xm");
 3     y = document.querySelector("#nl");
 4     // z = "http://192.168.1.125:8080/login?xm=" + x.value + "&nl=" + y.value;
 5     // fetch(z)
 6     //     .then(r => r.text())
 7     //     .then(r => console.log(r));
 8
 9     z = "http://192.168.1.125:8080/login1";
10     mydata = JSON.stringify({
11         xm: x.value,
12         nl: parseInt(y.value)
13     });
14     //console.log(mydata);
15     //return;
16     fetch(z, {
17             method: "post",
18             headers: new Headers({
19                 'Content-Type': 'application/json'
20             }),
21             body: mydata
22         }).then(r => r.text())
23         .then(r => console.log(r));
24 }
说明:4-7行为get方式提交内容;后面为post方式提交;14、15行调试用。
调试:先启动后端,再启动前端测试。主机位置可以用ip地址。

本例做完之后,应好好体会JavaEE项目开发里各个知识点的贯穿。
(完)

 浙公网安备 33010602011771号