

zabbix通过orabbix监控oracle
orabbix简介
Orabbix是设计用来为zabbix监控Oracle的数据库的插件,它提供多层次的监控,包括可用性和服务器性能的指标。它提供了从众多Oracle实例采集的有效机制,进而提供此信息的监控和性能指标。然后,您可以利用的zabbix的报告功能为收集的所有数据,并提供分析。目前的发行版中包含了一组预先定义的模板,包括从初始部署报警和图形功能。然而,这些可以进行微调,以满足您额需求和数据/监控要求。
orabbix功能
- DB Version (i.e. Validity of package)
- Archiving (Archive log production with trend analysis)
- Event Waits (Files I/O, single block read, multi-block read, direct path read, SQLNet Messages, Control file I/O, Log Write)
- Hit Ratio (Hit Ratio on Triggers, Tables/Procedures, SQL Area, Body)
- Logical I/O (Server performance on Logical I/O of: Current Read, Consistent Read, Block Change)
- Physical I/O (Redo Writes, Datafile Writes, Datafile Reads)
- PGA
- SGA (In particular; Fixed Buffer, Java Pool, Large Pool, Log Buffer, Shared Poolm Buffer Cache)
- Shared Pool (Pool Dictionary Cache, Pool Free Memory, Library Chache, SQL Area, MISC.)
- Pin Hit Ratio (Oracle library cache pin are caused by contention with the library cache, the area used to store SQL executables for re-use)
- Sessions / Processes
- Sessions (Active Sessions, Inactive Sessions, System Sessions)
- DBSize/DBFileSize (DBSize size of database really used space and of Filesize)
环境
系统环境:CentOS Linux release 7.4.1708 (Core)
zabbix版本:3.0.28
orabbix版本:1.2.3
oracle版本:oracle 11g
orabbix的安装配置
-
DB端配置
[root@localhost ~]# su - orale
Last login: Tue Aug 27 15:27:12 CST 2019 on pts/0
# sqlplus /nolog
# conn /as sysdba
# 执行以下sql

create user zabbix identified by "zabbix" default tablespace system temporary tablespace temp profile default account unlock;
grant alter session to zabbix;
grant create session to zabbix;
grant connect to zabbix;
alter user zabbix default role all;
grant select on v_$instance to zabbix;
grant select on dba_users to zabbix;
grant select on v_$log_history to zabbix;
grant select on v_$parameter to zabbix;
grant select on sys.dba_audit_session to zabbix;
grant select on v_$lock to zabbix;
grant select on dba_registry to zabbix;
grant select on v_$librarycache to zabbix;
grant select on v_$sysstat to zabbix;
grant select on v_$parameter to zabbix;
grant select on v_$latch to zabbix;
grant select on v_$pgastat to zabbix;
grant select on v_$sgastat to zabbix;
grant select on v_$librarycache to zabbix;
grant select on v_$process to zabbix;
grant select on dba_data_files to zabbix;
grant select on dba_temp_files to zabbix;
grant select on dba_free_space to zabbix;
grant select on v_$system_event to zabbix;

Oracle 11g或以上,所以还需要添加以下命令:
exec dbms_network_acl_admin.create_acl(acl => 'resolve.xml',description =>'resolve acl', principal =>'ZABBIX', is_grant => true, privilege =>'resolve');
exec dbms_network_acl_admin.assign_acl(acl=> 'resolve.xml', host =>'*');
-
服务端配置
1.安装java环境
到官方http://www.oracle.com/technetwork/java/javase/downloads/下载jdk安装即可
2.安装orabbix
(1).下载地址:https://files.cnblogs.com/files/wangyajian/orabbix-1.2.3.zip
(2).解压orabbix
[root@localhost src]# unzip orabbix-1.2.3.zip
[root@localhost src]# mv orabbix-1.2.3 /usr/local/orabbix/
[root@localhost src]# cd /usr/local/orabbix/
(3).复制模板配置文件并修改配置文件
[root@localhost orabbix]# cp conf/config.props.sample conf/config.props
[root@localhost orabbix]# cat conf/config.props
#comma separed list of Zabbix servers
ZabbixServerList=ZabbixServer1
注:以上等号后的名字必须与下行中等号前名字保持一样。

ZabbixServer1.Address=192.168.130.181
ZabbixServer1.Port=10051
注:以上端口号为与Zabbix Server通讯的端口,我这里是将Orabbix与Zabbix装在同一台机器上的,如果不在同一台机器,那装Orabbix的机器需要先装Zabbix Agent,否则数据将无法传送到Zabbix Server。


#ZabbixServer2.Address=IP_ADDRESS_OF_ZABBIX_SERVER
#ZabbixServer2.Port=PORT_OF_ZABBIX_SERVER
注:以上本来行首是没有#号的,但我们这里没有第二个Zabbix Server,所以这里将它注销了。


#pidFile
OrabbixDaemon.PidFile=./logs/orabbix.pid
#frequency of item's refresh
OrabbixDaemon.Sleep=300
#MaxThreadNumber should be >= than the number of your databases
OrabbixDaemon.MaxThreadNumber=100

#put here your databases in a comma separated list
DatabaseList=DB1

注:
1.以上等号后的名字可以自己任意取名,但在Zabbix中添加Oracle Host时,必须用你在此设定的名字,否则无法监测。
2.以上等号后面的值修改后,在下面的数据库连接定义=处,也需要修改相应的名字;
3.这里建议使用Server Name-DBSID的方式来命名。

#Configuration of Connection pool
#if not specified Orabbis is going to use default values (hardcoded)
#Maximum number of active connection inside pool
DatabaseList.MaxActive=10
#The maximum number of milliseconds that the pool will wait
#(when there are no available connections) for a connection to be returned
#before throwing an exception, or <= 0 to wait indefinitely.
DatabaseList.MaxWait=100
DatabaseList.MaxIdle=1

#define here your connection string for each database
DB1.Url=jdbc:oracle:thin:@192.168.130.184:1521:ORCL
注:
1.以上行开始的那个值,需要与之前DatabaseList后面的值保持一样。
2.192.168.153.123为Oracle服务器的地址,1521为TNS Port,ORCL为DB SID。
查看SID方式:select NAME from V$database;
DB1.User=zabbix
DB1.Password=zabbix
注:以上为访问数据库的用户名和密码

#Those values are optionals if not specified Orabbix is going to use the general values
DB1.MaxActive=10
DB1.MaxWait=100
DB1.MaxIdle=1
DB1.QueryListFile=./conf/query.props

#DB2.Url=jdbc:oracle:thin:@server2.domain.example.com:<LISTENER_PORT>:DB2
#DB2.User=zabbix
#DB2.Password=zabbix_password
#DB2.QueryListFile=./conf/query.props

#DB3.Url=jdbc:oracle:thin:@server3.domain.example.com:<LISTENER_PORT>:DB3
#DB3.User=zabbix
#DB3.Password=zabbix_password
#DB3.QueryListFile=./conf/query.props
(4).添加启动服务
为启动脚本添加执行权限
[root@localhost orabbix]# chmod +x init.d/orabbix
[root@localhost orabbix]# chmod +x run.sh
建议使用run.sh启动服务(run.sh中的java命令需要关注,是否需要加上命令的绝对路径)
[root@localhost orabbix]# cp -a init.d/orabbix /etc/init.d/
(5).启动问题
启动服务时可能会报以下错误,需要排查一下config.props文件配置是否正确
[root@localhost orabbix]# ./run.sh
[root@localhost orabbix]# Stopping
java.lang.Exception: ERROR on main - Connections is empty
	at com.smartmarmot.orabbix.Orabbixmon.run(Orabbixmon.java:101)
	at com.smartmarmot.orabbix.bootstrap.main(bootstrap.java:50)
-
zabbix web端配置
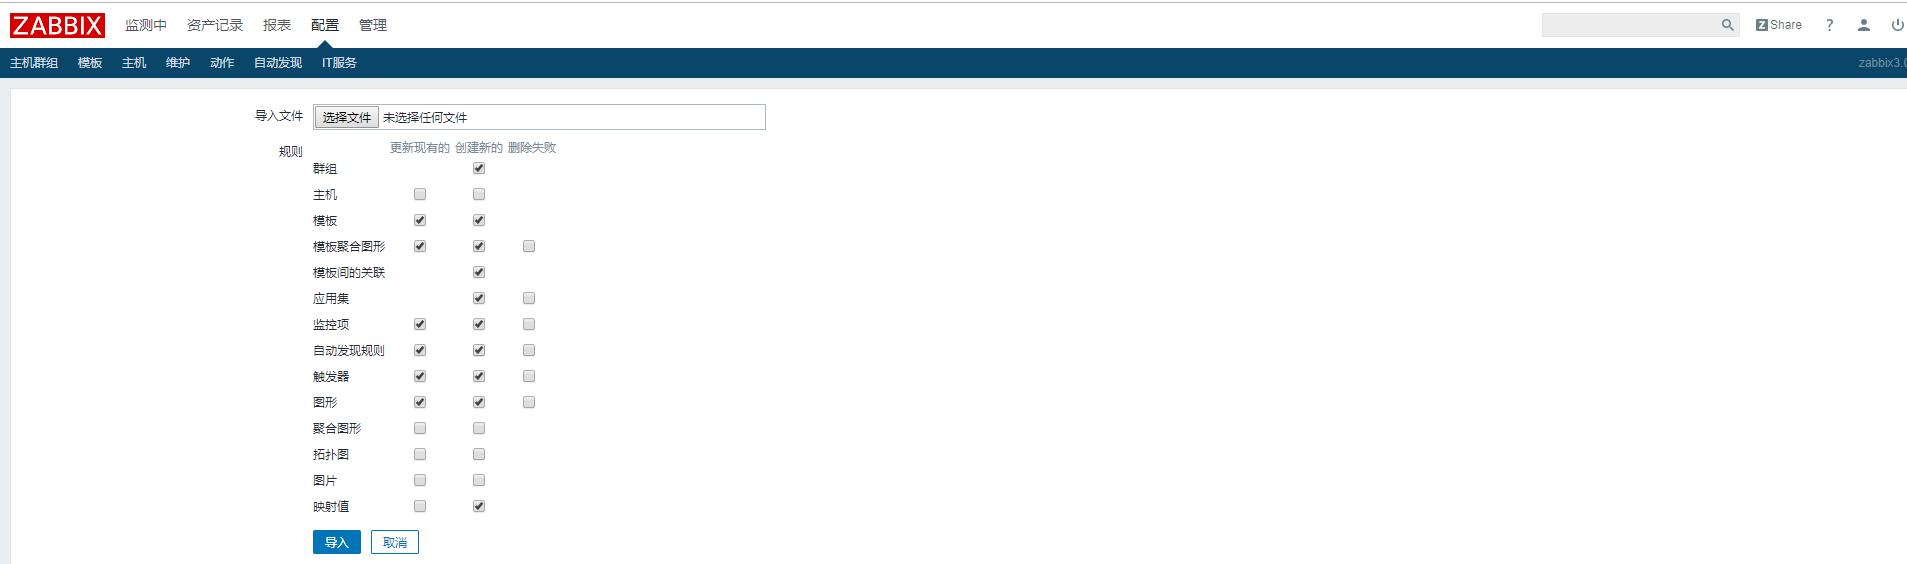
(1).导入模板
这四个模板都需要导入
[root@localhost orabbix]# ll template/
total 228
-rwxr-xr-x 1 root root 107264 Sep 28  2017 Orabbix_export_full.xml
-rwxr-xr-x 1 root root  21406 Sep 28  2017 Orabbix_export_graphs.xml
-rwxr-xr-x 1 root root  86731 Sep 28  2017 Orabbix_export_items.xml
-rwxr-xr-x 1 root root   4918 Sep 28  2017 Orabbix_export_triggers.xml
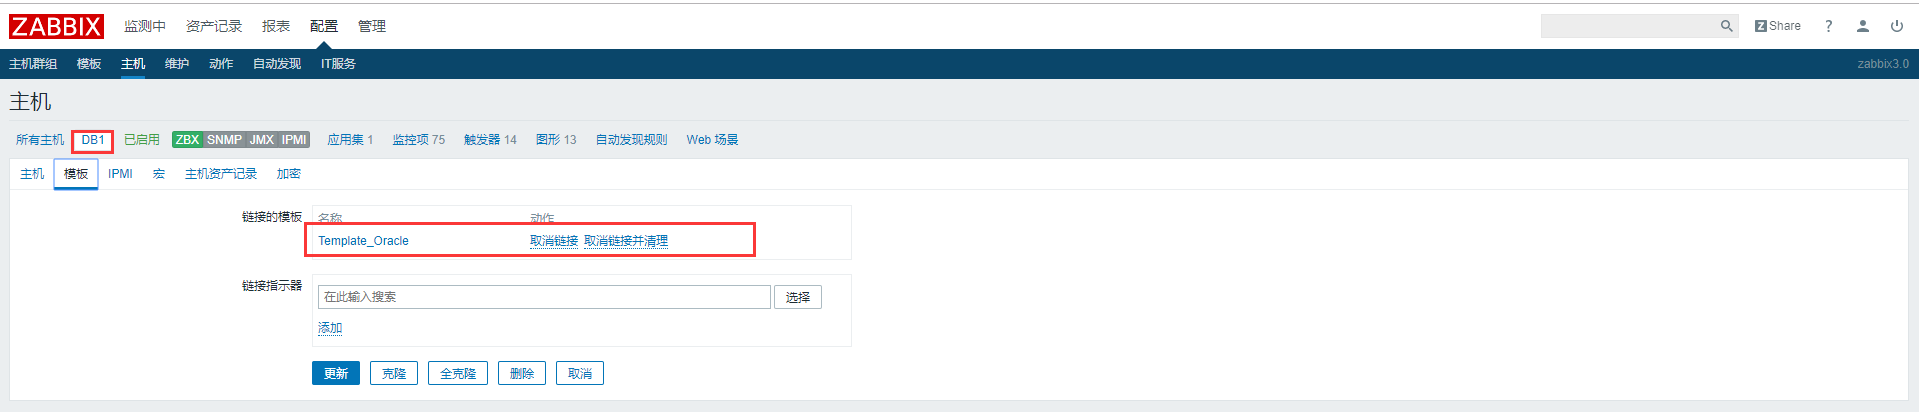
(2).添加主机
主机名必须跟config.props里面定义的名称的配置保持一致
(3).查看数据


 浙公网安备 33010602011771号