

一个简单的spring boot程序
搭建一个spring boot项目十分的方便,网上也有许多,可以参考 https://www.cnblogs.com/ityouknow/p/5662753.html 进行项目的搭建。在此我就不详细介绍了。spring boot的官方网站地址 https://spring.io。
使用idea创建的项目结构如下图,都是自动帮我们生成的:
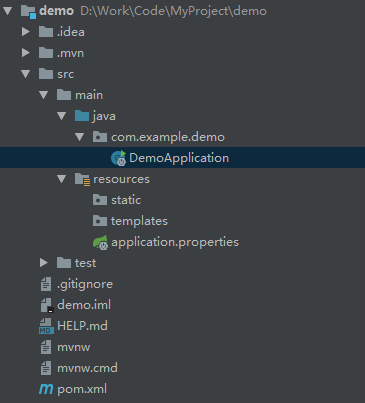
DemoApplication.java文件内容为:
package com.example.demo;

import org.springframework.boot.SpringApplication;
import org.springframework.boot.autoconfigure.SpringBootApplication;

@SpringBootApplication
public class DemoApplication {

    public static void main(String[] args) {
        SpringApplication.run(DemoApplication.class, args);
    }

}
application.properties配置文件默认为空,这是spring boot项目的专属配置文件,也有application.yml格式的。先往里面配置一下项目的启动端口:
server.port=8088
pom.xml内容为:
<?xml version="1.0" encoding="UTF-8"?>
<project xmlns="http://maven.apache.org/POM/4.0.0" xmlns:xsi="http://www.w3.org/2001/XMLSchema-instance"
         xsi:schemaLocation="http://maven.apache.org/POM/4.0.0 https://maven.apache.org/xsd/maven-4.0.0.xsd">
    <modelVersion>4.0.0</modelVersion>

    <!-- 继承 -->
    <parent>
        <groupId>org.springframework.boot</groupId>
        <artifactId>spring-boot-starter-parent</artifactId>
        <version>2.2.2.RELEASE</version>
        <relativePath/> <!-- lookup parent from repository -->
    </parent>

    <groupId>com.example</groupId>
    <artifactId>demo</artifactId>
    <version>0.0.1-SNAPSHOT</version>
    <name>demo</name>
    <description>Demo project for Spring Boot</description>

    <!-- 属性配置 -->
    <properties>
        <java.version>1.8</java.version>
    </properties>

    <dependencies>
        <!-- springboot开发web项目起步依赖 -->
        <dependency>
            <groupId>org.springframework.boot</groupId>
            <artifactId>spring-boot-starter-web</artifactId>
        </dependency>

        <!-- springboot测试的起步依赖 -->
        <dependency>
            <groupId>org.springframework.boot</groupId>
            <artifactId>spring-boot-starter-test</artifactId>
            <scope>test</scope>
            <exclusions>
                <exclusion>
                    <groupId>org.junit.vintage</groupId>
                    <artifactId>junit-vintage-engine</artifactId>
                </exclusion>
            </exclusions>
        </dependency>
    </dependencies>

    <!-- springboot提供的编译打包插件-->
    <build>
        <plugins>
            <plugin>
                <groupId>org.springframework.boot</groupId>
                <artifactId>spring-boot-maven-plugin</artifactId>
            </plugin>
        </plugins>
    </build>

</project>
然后创建一个controller文件夹,里面创建一个HelloWorldController.java文件。
package com.example.demo.controller;

import org.springframework.web.bind.annotation.RequestMapping;
import org.springframework.web.bind.annotation.RestController;

@RestController
public class HelloWorldController {

    @RequestMapping("/hello")
    public String hello(){

        return "hello world";
    }
}
最后运行main方法,启动成功后在浏览器页面输入127.0.0.1:8088/hello,进行项目访问,显示的结果如下:
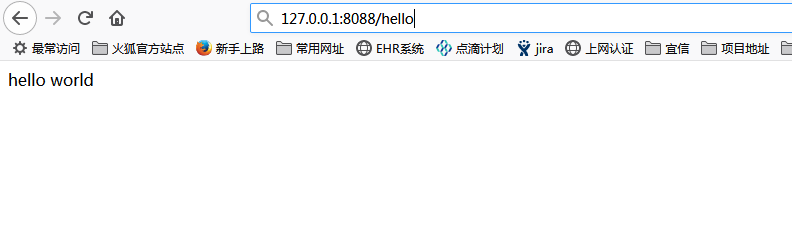
这样,一个简单的spring boot项目就成功的运行起来了,是不是非常的简单和快速。里面有几个需要注意的点:
1.spring boot项目启动之后,默认是没有项目名称的,访问的时候只需要加ip和端口,不用带项目名。当然也能通过配置添加,在application.properties中添加:
server.servlet.context-path=/demo
2.主Application类,一定要放在代码的最外层。因为SpringBoot项目的Bean装配默认规则是根据Application类所在的包位置从上往下扫描!如果放在别的位置,或者需要加载其他路径的类,可以添加@ComponentScan注解,将需要扫描的路径添加进去,可以添加多个路径。例如:@ComponentScan({"com.example.demo.controller","com.example.demo.service"})
3.如果项目需要部署在tomcat服务器上运行,则启动类需要继承SpringBootServletInitializer,并重写configure方法。如下:
package com.example.demo;

import org.springframework.boot.SpringApplication;
import org.springframework.boot.autoconfigure.SpringBootApplication;
import org.springframework.boot.builder.SpringApplicationBuilder;
import org.springframework.boot.web.servlet.support.SpringBootServletInitializer;

@SpringBootApplication
public class DemoApplication extends SpringBootServletInitializer {

    @Override
    protected SpringApplicationBuilder configure(SpringApplicationBuilder application) {
        return application.sources(DemoApplication.class);
    }

    public static void main(String[] args) {
        SpringApplication.run(DemoApplication.class, args);
    }

}
然后pom.xml文件也需要修改,需要将打包方式改为war包,
<packaging>war</packaging>
再就是内嵌tomcat的修改,一种方法是添加覆盖:
<!-- 屏蔽springboot中的tomcat容器 -->
        <dependency>
            <groupId>org.springframework.boot</groupId>
            <artifactId>spring-boot-starter-tomcat</artifactId>
            <scope>provided</scope>
        </dependency>
另外一种是移除:
<!-- springboot开发web项目起步依赖 -->
        <dependency>
            <groupId>org.springframework.boot</groupId>
            <artifactId>spring-boot-starter-web</artifactId>
            <!-- 移除 -->
            <exclusions>
                <exclusion>
                    <groupId>org.springframework.boot</groupId>
                    <artifactId>spring-boot-starter-tomcat</artifactId>
                </exclusion>
            </exclusions>
        </dependency>
因为我使用的是tomcat7的原因,所以还得需要添加两个配置:
<!-- tomcat7部署springboot2.0以上版本需要添加 -->
        <dependency>
            <groupId>javax.servlet</groupId>
            <artifactId>javax.servlet-api</artifactId>
            <version>4.0.1</version>
            <scope>provided</scope>
        </dependency>
        <dependency>
            <groupId>org.hibernate</groupId>
            <artifactId>hibernate-validator</artifactId>
            <version>5.3.6.Final</version>
        </dependency>
最后也实现了,结果如下:


 浙公网安备 33010602011771号