Solr6.5在Centos6上的安装与配置 (一)
这篇文章主要是介绍在Centos6上Solr6.5的安装与配置。
一、安装准备及各软件使用版本说明:
1、JDK8,版本jdk1.8.0_121下载地址:jdk-8u121-linux-x64.tar.gz
2、Apache Tomcat,版本8.5.13 下载地址:apache-tomcat-8.5.13.tar.gz
3、Solr,版本solr-6.5.0,下载地址:solr-6.5.0.tgz
此文使用的是centos6.6的系统。在系统根目录下建立down目录。然后依次下载上面的三个软件。下载完成后如下:
/down
├── apache-tomcat-8.5.12.tar.gz
├── jdk-8u121-linux-x64.tar.gz
└── solr-6.5.0.tgz
二、jdk安装与配置:
1、安装
cd /down
tar -zxvf jdk-8u121-linux-x64.tar.gz //解压缩jdk包
解压后jdk的路径应该为
/down/jdk1.8.0_121/
2、配置:
修改系统环境变量文件:
vi /etc/profile
向文件里面追加以下内容:
JAVA_HOME=/down/jdk1.8.0_121
JRE_HOME=/down/jdk1.8.0_121/jre
CLASS_PATH=.:$JAVA_HOME/lib/dt.jar:$JAVA_HOME/lib/tools.jar:$JRE_HOME/lib
PATH=$PATH:$JAVA_HOME/bin:$JRE_HOME/bin
export JAVA_HOME JRE_HOME CLASS_PATH PATH
使修改生效:
[root@admin local]# source /etc/profile   //使修改立即生效
[root@admin local]# echo $PATH   //查看PATH值
查看系统环境状态:
[root@localhost down]# echo $PATH
/usr/local/sbin:/usr/local/bin:/sbin:/bin:/usr/sbin:/usr/bin:/down/jdk1.8.0_121/bin:/down/jdk1.8.0_121/jre/bin:/root/bin
[root@localhost down]#
查看JAVA版本:
[root@localhost down]# java -version
java version "1.8.0_121"
Java(TM) SE Runtime Environment (build 1.8.0_121-b13)
Java HotSpot(TM) 64-Bit Server VM (build 25.121-b13, mixed mode)
[root@localhost down]#
至此jdk安装完毕。
二、Solr安装与配置:
1、解压apache-tomcat-8.5.12.tar.gz和solr-6.5.0.tgz
[root@localhost down]# tar -zxvf apache-tomcat-8.5.12.tar.gz
[root@localhost down]# tar -zxvf solr-6.5.0.tgz
解压后的目录结构:
[root@localhost down]# ls
apache-tomcat-8.5.12         jdk1.8.0_121                solr-6.5.0
apache-tomcat-8.5.12.tar.gz  jdk-8u121-linux-x64.tar.gz  solr-6.5.0.tgz
2、复制Solr文件夹中的一些文件到apache-tomcat下:
1)将 solr 压缩包中 solr\server\solr-webapp\文件夹下有个webapp文件夹,将之复制到tomcat\webapps\目录下,文件夹名改成solr(任意) ;
2)将 solr 压缩包中 solr\server\lib\ext 中的 jar 全部复制到 Tomcat\ webapps\solr\WEB-INF\lib 目录中;
3)将solr压缩包中solr/server/lib/metrics* 开头的jar全部复制到 Tomcat\ webapps\solr\WEB-INF\lib 目录中;
4)将solr压缩包中solr/server/lib/solr-dataimporthandler-* 开头的jar全部复制到 Tomcat\ webapps\solr\WEB-INF\lib 目录中;
5)在Tomcat\ webapps\solr\WEB-INF\下建立classes目录,并将solr/server/resources/log4j.properties文件复制其中;
6)在tomcat目录下建立solrhome目录(也可以放在其它目录中)
7)复制solr/server/solr/* 所有文件到tomcat/solrhome目录,用到创建solr的core时使用。
操作shell如下:
[root@localhost down]# cd /down
[root@localhost down]# cp -R /down/solr-6.5.0/server/solr-webapp/webapp /down/apache-tomcat-8.5.12/webapps/solr
[root@localhost down]# cp -R /down/solr-6.5.0/server/lib/ext/*  /down/apache-tomcat-8.5.12/webapps/solr/WEB-INF/lib/
[root@localhost down]# cp -R /down/solr-6.5.0/server/lib/metrics*.*  /down/apache-tomcat-8.5.12/webapps/solr/WEB-INF/lib/
[root@localhost down]# cp /down/solr-6.5.0/dist/solr-dataimporthandler-*  /down/apache-tomcat-8.5.12/webapps/solr/WEB-INF/lib/
[root@localhost down]# mkdir /down/apache-tomcat-8.5.12/webapps/solr/WEB-INF/classes
[root@localhost down]# cp /down/solr-6.5.0/server/resources/log4j.properties  /down/apache-tomcat-8.5.12/webapps/solr/WEB-INF/classes/
[root@localhost down]# mkdir /down/apache-tomcat-8.5.12/solrhome
[root@localhost down]# cp -R /down/solr-6.5.0/server/solr/*  /down/apache-tomcat-8.5.12/solrhome/
3、配置Solr:
编辑web.xml文件:
[root@localhost down]# vi /down/apache-tomcat-8.5.12/webapps/solr/WEB-INF/web.xml
1)配置solr下core路径,找如下配置内容(初始状态下该内容是被注释掉的):
   <env-entry>
       <env-entry-name>solr/home</env-entry-name>
       <env-entry-value>/down/apache-tomcat-8.5.12/solrhome</env-entry-value> //将路径指向我们创建的solrhome目录。
       <env-entry-type>java.lang.String</env-entry-type>
    </env-entry>
2)配置访问权限:找到如下内容,并注释掉:
<!--
  <security-constraint>
    <web-resource-collection>
      <web-resource-name>Disable TRACE</web-resource-name>
      <url-pattern>/</url-pattern>
      <http-method>TRACE</http-method>
    </web-resource-collection>
    <auth-constraint/>
  </security-constraint>
  <security-constraint>
    <web-resource-collection>
      <web-resource-name>Enable everything but TRACE</web-resource-name>
      <url-pattern>/</url-pattern>
      <http-method-omission>TRACE</http-method-omission>
    </web-resource-collection>
  </security-constraint>
-->
整个web.xml的配置文件内容如下:
<?xml version="1.0" encoding="UTF-8"?>
<!--
 Licensed to the Apache Software Foundation (ASF) under one or more
 contributor license agreements.  See the NOTICE file distributed with
 this work for additional information regarding copyright ownership.
 The ASF licenses this file to You under the Apache License, Version 2.0
 (the "License"); you may not use this file except in compliance with
 the License.  You may obtain a copy of the License at

     http://www.apache.org/licenses/LICENSE-2.0

 Unless required by applicable law or agreed to in writing, software
 distributed under the License is distributed on an "AS IS" BASIS,
 WITHOUT WARRANTIES OR CONDITIONS OF ANY KIND, either express or implied.
 See the License for the specific language governing permissions and
 limitations under the License.
-->
<web-app xmlns="http://java.sun.com/xml/ns/javaee"
         xmlns:xsi="http://www.w3.org/2001/XMLSchema-instance"
         xsi:schemaLocation="http://java.sun.com/xml/ns/javaee http://java.sun.com/xml/ns/javaee/web-app_2_5.xsd"
         version="2.5"
         metadata-complete="true"
>


  <!-- Uncomment if you are trying to use a Resin version before 3.0.19.
    Their XML implementation isn't entirely compatible with Xerces.
    Below are the implementations to use with Sun's JVM.
  <system-property javax.xml.xpath.XPathFactory=
             "com.sun.org.apache.xpath.internal.jaxp.XPathFactoryImpl"/>
  <system-property javax.xml.parsers.DocumentBuilderFactory=
             "com.sun.org.apache.xerces.internal.jaxp.DocumentBuilderFactoryImpl"/>
  <system-property javax.xml.parsers.SAXParserFactory=
             "com.sun.org.apache.xerces.internal.jaxp.SAXParserFactoryImpl"/>
   -->

  <!-- People who want to hardcode their "Solr Home" directly into the
       WAR File can set the JNDI property here...
   -->
    <env-entry>
       <env-entry-name>solr/home</env-entry-name>
       <env-entry-value>/down/apache-tomcat-8.5.12/solrhome</env-entry-value>
       <env-entry-type>java.lang.String</env-entry-type>
    </env-entry>

  <!-- Any path (name) registered in solrconfig.xml will be sent to that filter -->
  <filter>
    <filter-name>SolrRequestFilter</filter-name>
    <filter-class>org.apache.solr.servlet.SolrDispatchFilter</filter-class>
    <!--
    Exclude patterns is a list of directories that would be short circuited by the
    SolrDispatchFilter. It includes all Admin UI related static content.
    NOTE: It is NOT a pattern but only matches the start of the HTTP ServletPath.
    -->
    <init-param>
      <param-name>excludePatterns</param-name>
      <param-value>/libs/.+,/css/.+,/js/.+,/img/.+,/tpl/.+</param-value>
    </init-param>
  </filter>

  <filter-mapping>
    <!--
      NOTE: When using multicore, /admin JSP URLs with a core specified
      such as /solr/coreName/admin/stats.jsp get forwarded by a
      RequestDispatcher to /solr/admin/stats.jsp with the specified core
      put into request scope keyed as "org.apache.solr.SolrCore".

      It is unnecessary, and potentially problematic, to have the SolrDispatchFilter
      configured to also filter on forwards.  Do not configure
      this dispatcher as <dispatcher>FORWARD</dispatcher>.
    -->
    <filter-name>SolrRequestFilter</filter-name>
    <url-pattern>/*</url-pattern>
  </filter-mapping>

  <servlet>
    <servlet-name>LoadAdminUI</servlet-name>
    <servlet-class>org.apache.solr.servlet.LoadAdminUiServlet</servlet-class>
  </servlet>

  <!-- Remove in Solr 5.0 -->
  <!-- This sends SC_MOVED_PERMANENTLY (301) for resources that changed in 4.0 -->
  <servlet>
    <servlet-name>RedirectOldAdminUI</servlet-name>
    <servlet-class>org.apache.solr.servlet.RedirectServlet</servlet-class>
    <init-param>
      <param-name>destination</param-name>
      <param-value>${context}/#/</param-value>
    </init-param>
  </servlet>

  <servlet>
    <servlet-name>RedirectOldZookeeper</servlet-name>
    <servlet-class>org.apache.solr.servlet.RedirectServlet</servlet-class>
    <init-param>
      <param-name>destination</param-name>
      <param-value>${context}/admin/zookeeper</param-value>
    </init-param>
  </servlet>

  <servlet>
    <servlet-name>RedirectLogging</servlet-name>
    <servlet-class>org.apache.solr.servlet.RedirectServlet</servlet-class>
    <init-param>
      <param-name>destination</param-name>
      <param-value>${context}/#/~logging</param-value>
    </init-param>
  </servlet>

  <servlet>
    <servlet-name>SolrRestApi</servlet-name>
    <servlet-class>org.restlet.ext.servlet.ServerServlet</servlet-class>
    <init-param>
      <param-name>org.restlet.application</param-name>
      <param-value>org.apache.solr.rest.SolrSchemaRestApi</param-value>
    </init-param>
  </servlet>

  <servlet-mapping>
    <servlet-name>RedirectOldAdminUI</servlet-name>
    <url-pattern>/admin/</url-pattern>
  </servlet-mapping>
  <servlet-mapping>
    <servlet-name>RedirectOldAdminUI</servlet-name>
    <url-pattern>/admin</url-pattern>
  </servlet-mapping>
  <servlet-mapping>
    <servlet-name>RedirectOldZookeeper</servlet-name>
    <url-pattern>/zookeeper.jsp</url-pattern>
  </servlet-mapping>
  <servlet-mapping>
    <servlet-name>RedirectOldZookeeper</servlet-name>
    <url-pattern>/zookeeper</url-pattern>
  </servlet-mapping>
  <servlet-mapping>
    <servlet-name>RedirectLogging</servlet-name>
    <url-pattern>/logging</url-pattern>
  </servlet-mapping>

  <servlet-mapping>
    <servlet-name>LoadAdminUI</servlet-name>
    <url-pattern>/old.html</url-pattern>
  </servlet-mapping>

  <servlet-mapping>
    <servlet-name>LoadAdminUI</servlet-name>
    <url-pattern>/index.html</url-pattern>
  </servlet-mapping>

  <servlet-mapping>
    <servlet-name>SolrRestApi</servlet-name>
    <url-pattern>/schema/*</url-pattern>
  </servlet-mapping>

  <mime-mapping>
    <extension>.xsl</extension>
    <!-- per http://www.w3.org/TR/2006/PR-xslt20-20061121/ -->
    <mime-type>application/xslt+xml</mime-type>
  </mime-mapping>

  <welcome-file-list>
    <welcome-file>index.html</welcome-file>
  </welcome-file-list>

  <!-- Get rid of error message -->
  <!--
  <security-constraint>
    <web-resource-collection>
      <web-resource-name>Disable TRACE</web-resource-name>
      <url-pattern>/</url-pattern>
      <http-method>TRACE</http-method>
    </web-resource-collection>
    <auth-constraint/>
  </security-constraint>
  <security-constraint>
    <web-resource-collection>
      <web-resource-name>Enable everything but TRACE</web-resource-name>
      <url-pattern>/</url-pattern>
      <http-method-omission>TRACE</http-method-omission>
    </web-resource-collection>
  </security-constraint>
  -->

</web-app>
至此solr的配置工作完成.
三、运行Solr:
启动执行:/down/apache-tomcat-8.5.12/bin/startup.sh
[root@localhost down]# /down/apache-tomcat-8.5.12/bin/startup.sh
Using CATALINA_BASE:   /down/apache-tomcat-8.5.12
Using CATALINA_HOME:   /down/apache-tomcat-8.5.12
Using CATALINA_TMPDIR: /down/apache-tomcat-8.5.12/temp
Using JRE_HOME:        /down/jdk1.8.0_121/jre
Using CLASSPATH:       /usr/local/tomcat/bin/bootstrap.jar:/down/apache-tomcat-8.5.12/bin/tomcat-juli.jar
Tomcat started.
[root@localhost down]#
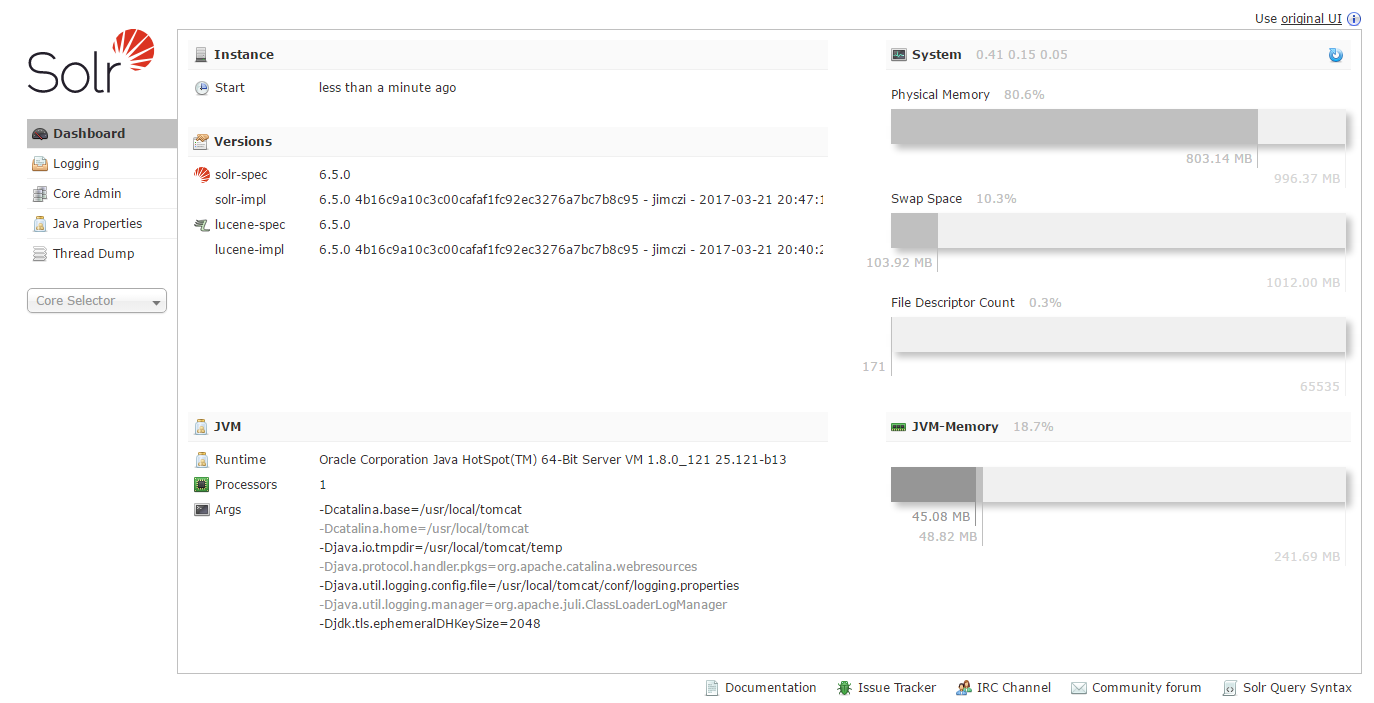
在浏览器输入http://localhost:8080/solr/index.html即可出现Solr的管理界面
关闭solr只需要关闭tomcat即可:
[root@localhost down]# /down/apache-tomcat-8.5.12/bin/shutdown.sh
至此solr的安装完毕。
下一篇将介绍创建core并加上中文分词的配置。
Solr6.5配置中文分词IKAnalyzer和拼音分词pinyinAnalyzer (二)
posted on 2017-04-02 11:21 wander112900 阅读(4529) 评论(0) 收藏 举报


 浙公网安备 33010602011771号