云原生之旅 - 11)基于 Kubernetes 动态伸缩 Jenkins Build Agents
前言
上一篇文章 云原生之旅 - 10)手把手教你安装 Jenkins on Kubernetes 我们介绍了在 Kubernetes 上安装 Jenkins,本文介绍下如何设置k8s pod作为Jenkins 构建job的 agent。
Jenkins master 和 agent 均以 pod 的形式运行在 Kubernetes 节点上。Master 运行在其中一个节点上,其配置数据 Jenkins home 使用存储卷挂载,master pod重启不会导致数据丢失。agent 运行在各个节点上,根据需求动态创建并自动释放。这样做的好处很多,比如高可用,高伸缩性,资源利用率高。
关键词:Jenkins on Kubernetes 实践,Jenkins 和 Kubernetes,在Kubernetes上安装Jenkins,Jenkins 高可用安装,Jenkins 动态伸缩构建, Kubernetes Pod as Jenkins build agent
准备
- 已搭建 Jenkins master on kubernetes 云原生之旅 - 10)手把手教你安装 Jenkins on Kubernetes
- 准备一个 Service Account,对目标 cluster 具有k8s admin权限,以便部署。
- 防火墙已开通 Jenkins 出站到Docker hub,方便 push/pull image
- 防火墙已开通 Jenkins 到 目标 cluster,以便部署。
插件安装
- Kubernetes Plugin
- Google Kubernetes Engine Plugin (我的例子是部署到 GKE cluster)
Jenkins 配置
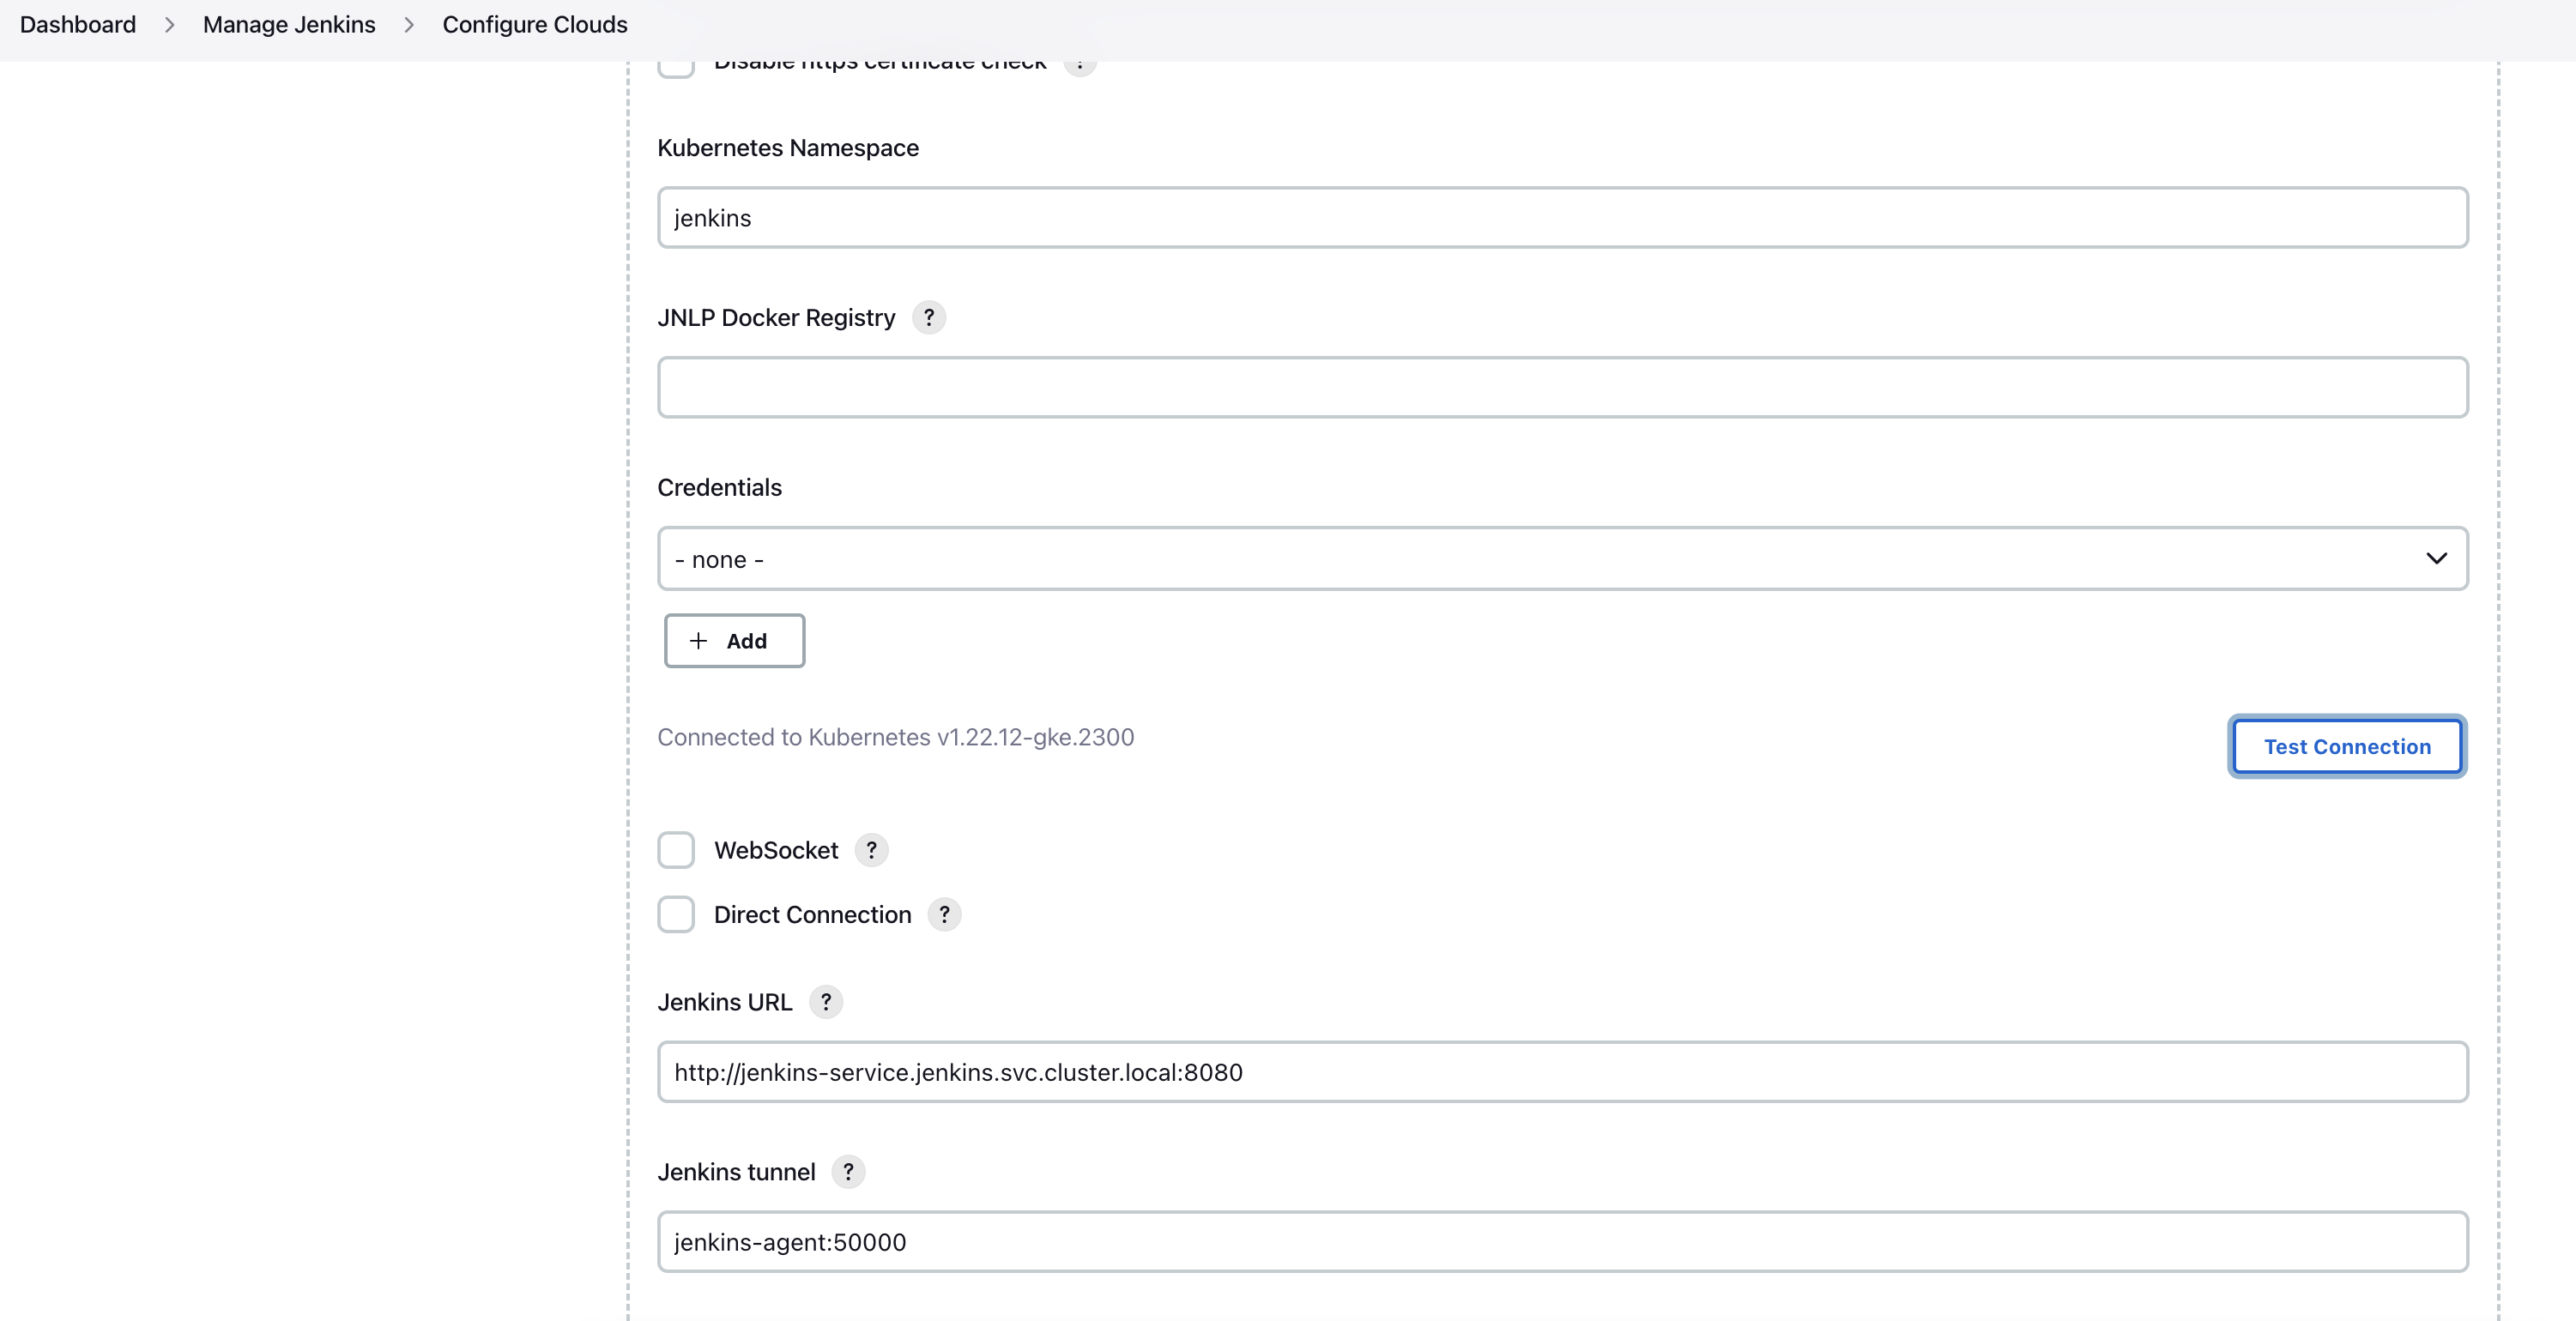
Manage Nodes and Clouds

10. Click `Add Pod Template` then `Pod Template Details`


Ensure that you remove the sleep and 9999999 default argument from the container template.
Manage Credentials
- Add `Usernames with password` for docker hub account/pwd,比如 wade_test_dockerhub
- Add `Google Service Account from private key` 比如 gcp_sa_json_key
Credentials 会在Jenkinsfile里面用到。
### 本文首发于博客园 https://www.cnblogs.com/wade-xu/p/16863955.html
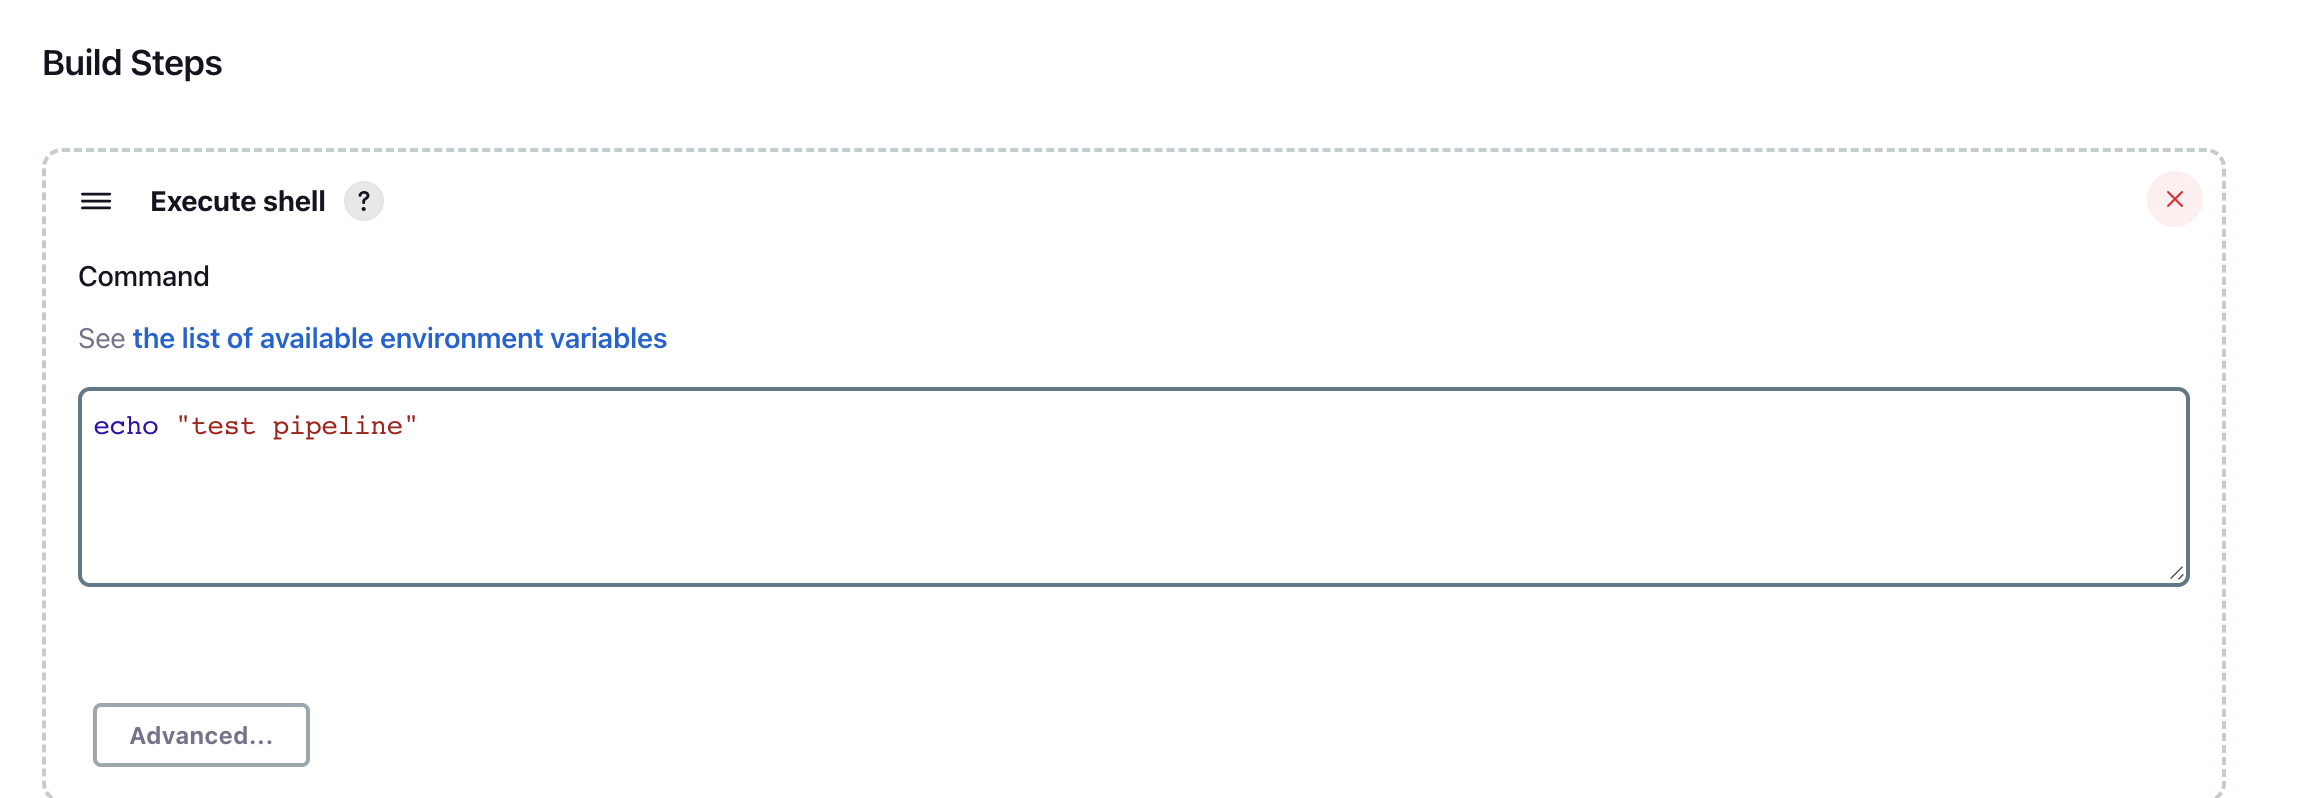
Test a freestyle project

这个label 和我们上面创建 pod template时用的label一致. 这样的话 Jenkins就知道用哪个 pod template 作为 agent container.

点Build Now
Agent jenkins-agent-l7hw9 is provisioned from template jenkins-agent

......

Building remotely on jenkins-agent-l7hw9 (kubeagent) in workspace /home/jenkins/agent/workspace/quick-test
[quick-test] $ /bin/sh -xe /tmp/jenkins17573873264046707236.sh
+ echo test pipeline
test pipeline
Finished: SUCCESS
### 本文首发于博客园 https://www.cnblogs.com/wade-xu/p/16863955.html
Jenkinsfile
CI

kind: Pod
spec:
  containers:  # list of containers that you want present for your build, you can define a default container in the Jenkinsfile
    - name: maven
      image: maven:3.5.4-jdk-8-slim
      command: ["tail", "-f", "/dev/null"]  # this or any command that is bascially a noop is required, this is so that you don't overwrite the entrypoint of the base container
      imagePullPolicy: Always # use cache or pull image for agent
      resources:  # request and limit the resources your build contaienr
        requests:
          memory: 4Gi
          cpu: 2
        limits:
          memory: 4Gi
          cpu: 2
      volumeMounts:
        - mountPath: /root/.m2 # maven .m2 cache directory
          name: maven-home
    - name: git
      image: bitnami/git:2.38.1
      imagePullPolicy: IfNotPresent
      command: ["tail", "-f", "/dev/null"]
      resources: # limit the resources your build contaienr
        limits:
          cpu: 100m
          memory: 256Mi
    - name: kubectl-kustomize
      image: line/kubectl-kustomize:1.25.3-4.5.7
      imagePullPolicy: IfNotPresent
      command: ["tail", "-f", "/dev/null"]
      resources: # limit the resources your build contaienr
        limits:
          cpu: 100m
          memory: 256Mi
    - name: docker
      image: docker:18.06.1
      command: ["tail", "-f", "/dev/null"]
      imagePullPolicy: Always
      volumeMounts:
        - name: docker
          mountPath: /var/run/docker.sock # We use the k8s host docker engine
  volumes:
    - name: docker
      hostPath:
        path: /var/run/docker.sock
    - name: maven-home
      persistentVolumeClaim:
        claimName: maven-repo-storage
在Jenkinsfile里面定义agent 使用这个yaml file
  agent {
    kubernetes {
      idleMinutes 3  // how long the pod will live after no jobs have run on it
      yamlFile './build-pod.yaml'  // path to the pod definition relative to the root of our project
      defaultContainer 'docker'  // define a default container if more than a few stages use it, otherwise default to jnlp container
    }
下面步骤是 docker login/build/tag/push
stage('Build and Push Docker Image') {
      steps {
        script {
          dir(dir_path) {
            container('docker') {
                // docker login, Using single-quotes instead of double-quotes when referencing these sensitive environment variables prevents this type of leaking.
                sh 'echo $DOCKER_HUB_CREDS_PSW | docker login -u $DOCKER_HUB_CREDS_USR --password-stdin $DOCKER_HUB_REGISTRY'
                // build image with git tag
                sh """
                docker build -t $PROJECT_IMAGE_WITH_TAG .
                docker tag $PROJECT_IMAGE_WITH_TAG $DOCKER_HUB_CREDS_USR/$PROJECT_IMAGE_WITH_TAG
                """

                // push image_tag to docker hub
                sh """
                docker push $DOCKER_HUB_CREDS_USR/$PROJECT_IMAGE_WITH_TAG
                """
            }
          }
        }
      }
    }
我这里没有选择用 docker.withRegistry
docker.withRegistry("$DOCKER_HUB_REGISTRY", "$DOCKER_HUB_CREDENTIAL") {}
因为会有不安全的log提示
WARNING! Using --password via the CLI is insecure. Use --password-stdin.
CI + Kustomize + CD
这个例子是上面的 CI 之后 加上 - 利用 Kustomize build K8S resource manifests 然后 CD 到一个 Cluster
Kustomize 可以参考 云原生之旅 - 6)不能错过的一款 Kubernetes 应用编排管理神器 Kustomize

    // assume your k8s manifests in another repo, mine is same repo, just in order to show git clone step
    stage('Checkout K8S manifests') {
      steps {
        script {
          dir(dir_path) {
            container('git') {
              if (! fileExists('learning_by_doing/README.md')) {
                sh """
                git clone https://github.com/wadexu007/learning_by_doing.git
                ls -lhrt
                """
              } else {
                  sh 'echo manifes repo already exist.'
              }
            }
          }
        }
      }
    }

    stage('Build manifests with Kustomize') {
      steps {
        script {
          dir(dir_path) {
            container('kubectl-kustomize') {
                sh """
                cd learning_by_doing/Kustomize/demo-manifests/services/demo-app/dev/
                kustomize edit set image $DOCKER_HUB_CREDS_USR/$PROJECT_IMAGE_WITH_TAG
                kustomize build > $WORKSPACE/$dir_path/deployment.yaml
                """
            }
          }
        }
      }
    }

    stage('Deploy to GKE test cluster') {
			environment{
				PROJECT_ID = 'xperiences-eng-cn-dev'
        CLUSTER_NAME = 'xpe-spark-test-gke'
        REGION = 'asia-east2'
        CREDENTIALS_ID = 'gcp_sa_json_key'
      }
      steps {
        script {
          dir(dir_path) {
            container('kubectl-kustomize') {
                sh """
                chown 1000:1000 deployment.yaml
                echo start to deploy to cluster $CLUSTER_NAME
                """
                step([
                  $class: 'KubernetesEngineBuilder',
                  projectId: env.PROJECT_ID,
                  clusterName: env.CLUSTER_NAME,
                  location: env.REGION,
                  manifestPattern: 'deployment.yaml',
                  credentialsId: env.CREDENTIALS_ID,
                  verifyDeployments: false])
                  // verifyDeployments does not work for non-default namespace
            }
          }
        }
      }
    }
Pipeline: Input Step
    stage('Wait for SRE Approval') {
      steps {
        timeout(time:72, unit:'HOURS') {
          input message: "Approved Prod deployment?", submitter: 'sre-team'
        }
      }
    }

    // deployment to multipe k8s clusters
    stage('Deploy to GKE Prod cluster') {
			environment{
				PROJECT_ID = 'sre-cn-dev'
        CREDENTIALS_ID = 'gcp_sa_json_key'
        CLUSTER_COMMON_NAME = 'demo-gke-prod'
      }
      steps {
        script {
          env.REGION = input message: 'Choose which region you want to deploy?',
                             parameters: [choice(name: 'Region',
                                                description: 'Select Region to Deloy',
                                                choices: ['europe-west1', 'us-central1'])
                                          ]
          dir(dir_path) {
            if ( env.REGION == "europe-west1" ) {
              def eu_cluster_name = env.CLUSTER_COMMON_NAME + "-eu"
              container('kubectl-kustomize') {
                  sh "echo deploy to cluster $eu_cluster_name in region: $REGION"
              }
            }
            if ( env.REGION == "us-central1" ) {
              def us_cluster_name = env.CLUSTER_COMMON_NAME + "-us"
              container('kubectl-kustomize') {
                  sh "echo deploy to cluster $us_cluster_name in region: $REGION"
              }
            }
          }
        }
      }
    }
所有例子均在我的 github repo。
### 本文首发于博客园 https://www.cnblogs.com/wade-xu/p/16863955.html
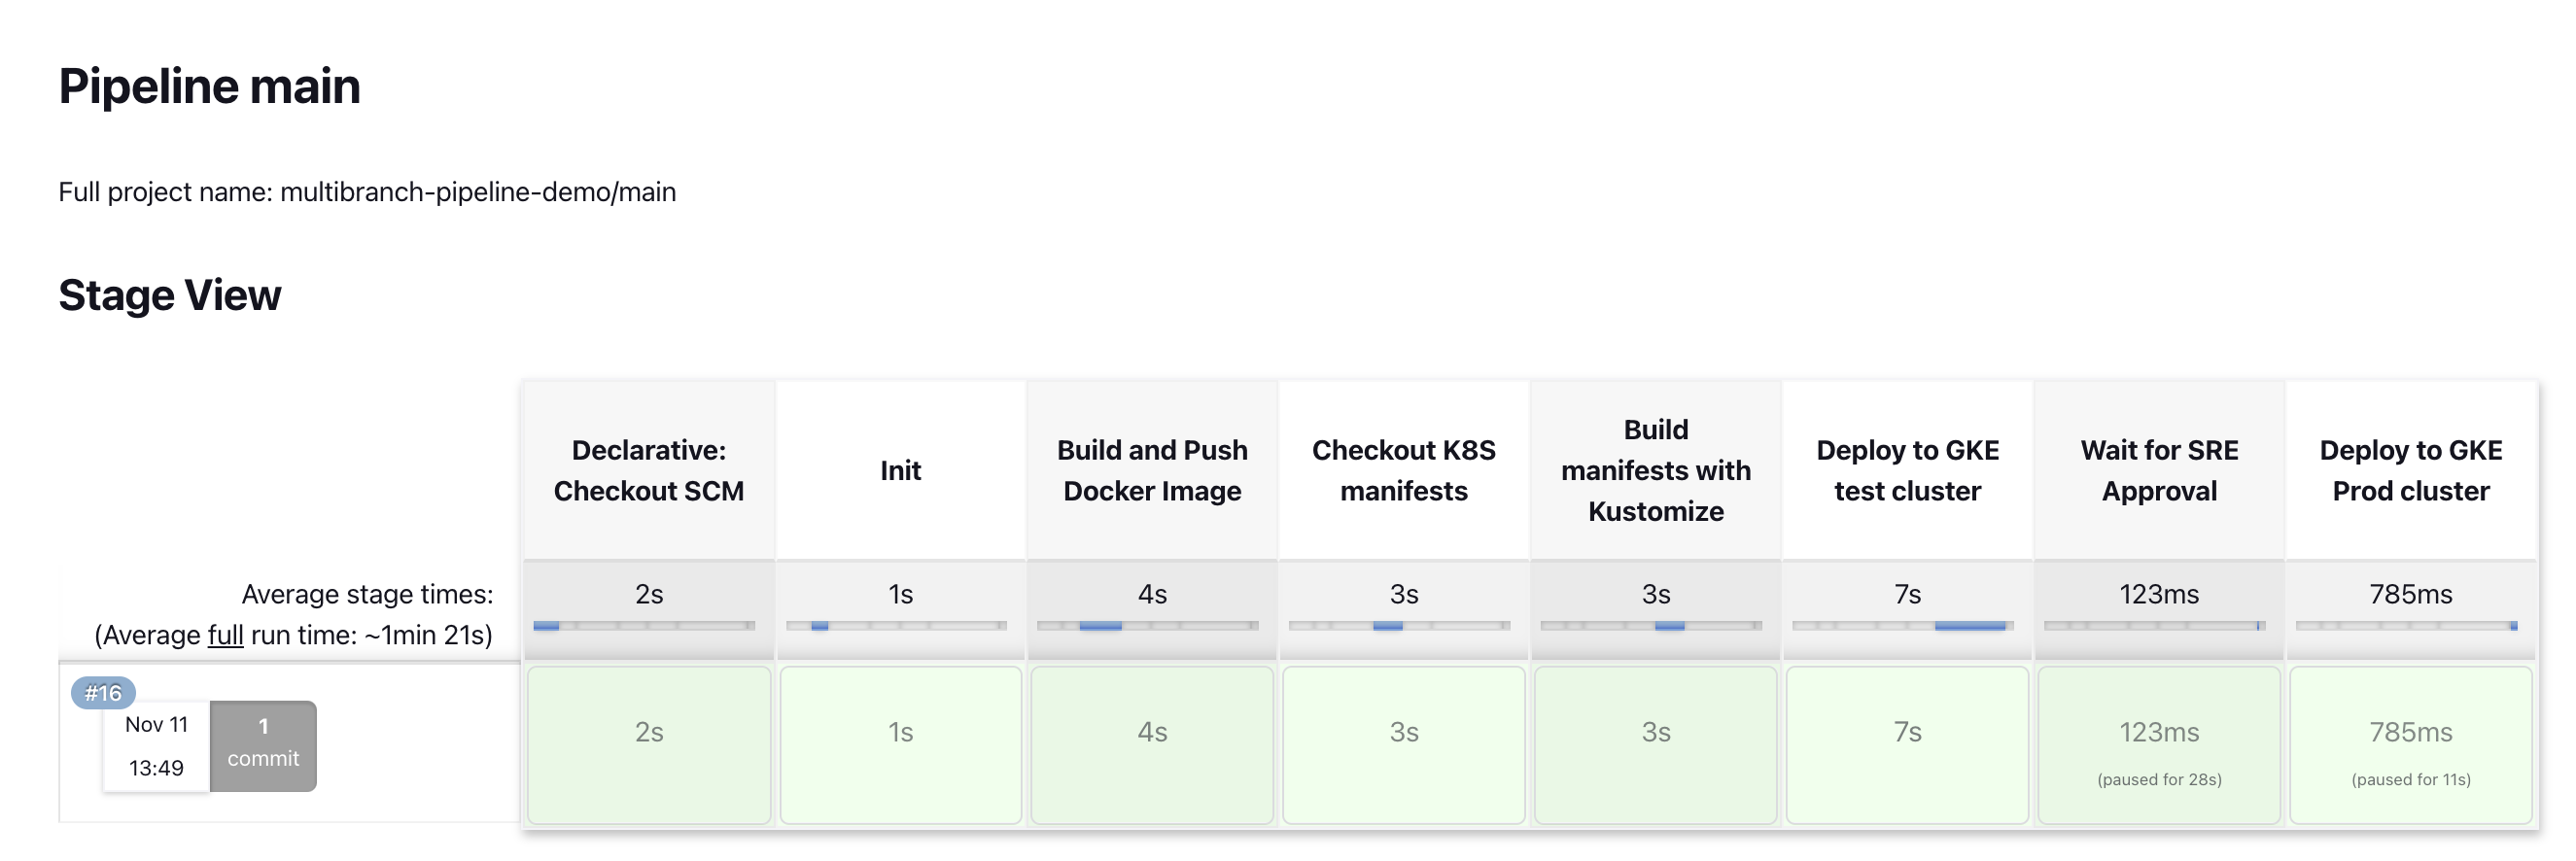
测试

总结
最佳实践
- 设置 resource requests and limits on each container in your Pod
- 如果使用maven 构建 java项目,.m2 cache目录需要 mount 出来,这样加快后面的maven build速度。
- 使用 Jenkins Shared Libraries 抽取Pipeline的共用代码
- 在容器里构建容器化应用(Run docker in docker) 我的例子是通过 mount docker.sock 利用k8s 主机 docker engine来实现的,这种方式需要 privileges mode 不安全,推荐使用Kaniko,下一篇文章会介绍。


 浙公网安备 33010602011771号