SpringCloud 2020.0.4 系列之 Config
1. 概述
老话说的好:一条路走不通,就去走另一条路,A计划执行不下去,就按B计划执行,多准备几套方案总是有用的。
好了,言归正传,今天我们来聊聊 SpringCloud 的 分布式配置中心 Config,微服务架构中,服务节点很多,如果修改一个配置,就要每个服务都改一遍,那简直就是灾难了。
因此我们就需要用到 Config 这个组件,帮我们实现修改一遍,就可以在所有相关的服务都生效。
Config 支持将配置存储在本地文件、数据库、SVN、Git 等,这里我们就以 Git 为例,聊一下 Config 的那些事儿。
闲话不多说,直接上代码。
2. Git 准备
2.1 在 GitHub 官网注册账户
官网地址:https://github.com/
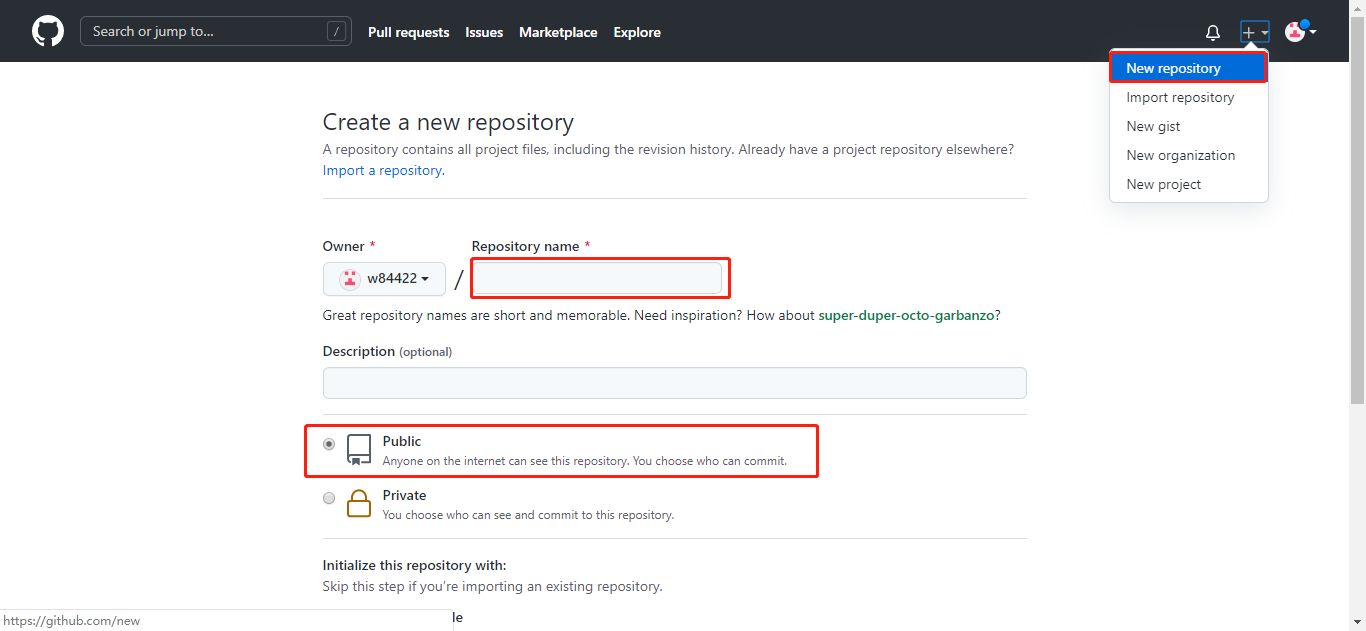
2.2 创建一个 repository
创建一个 repository,用于放置配置文件,例如:my-config-repo
2.3 在创建的 repository 新建文件
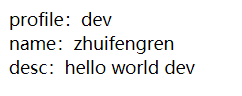
1) 新建 my-config-client-dev.yml 配置文件,内容如下:
info:
  profile: dev

name: zhuifengren
desc: hello world dev
2)新建 my-config-client-prd.yml 配置文件,内容如下:
info:
  profile: prd

name: zhangsan
desc: hello world prd
3)文件格式说明
{application}-{profile}.yml
3. Config Server 的搭建
3.1 主要依赖
        <dependency>
            <groupId>org.springframework.cloud</groupId>
            <artifactId>spring-cloud-starter-netflix-eureka-client</artifactId>
        </dependency>
        <dependency>
            <groupId>org.springframework.cloud</groupId>
            <artifactId>spring-cloud-config-server</artifactId>
        </dependency>
        <dependency>
            <groupId>org.springframework.cloud</groupId>
            <artifactId>spring-cloud-starter-bootstrap</artifactId>
            <version>3.0.2</version>
        </dependency>
3.2 在 application.yml 进行配置
server:
  port: 40000
spring:
  application:
    name: my-config-server
  cloud:
    config:
      server:
        git:
          uri: https://github.com/w84422/my-config-repo.git   # git地址
          force-pull: true  # 强制拉取资源文件
          default-label: main   # 默认拉取的分支

eureka:
  client:
    service-url:
      defaultZone: http://zhuifengren1:35000/eureka/,http://zhuifengren2:35001/eureka/    # Eureka Server的地址
3.3 启动类增加注解
@SpringBootApplication
@EnableConfigServer
@EnableDiscoveryClient
public class MyConfigServerApplication {

    public static void main(String[] args) {
        SpringApplication.run(MyConfigServerApplication.class, args);
    }
}
3.4 启动 Config Server 服务,并进行验证
1)启动服务
2)调用 http://localhost:40000/my-config-client/dev/main 接口进行验证
接口格式为:http://ConfigServer IP:端口/{application}/{profile}/{label}
label:文件在 Git 存储的分支
3)调用 http://localhost:40000/main/my-config-client-dev.yml 接口进行验证
接口格式为:http://ConfigServer IP:端口/{label}/{application}-{profile}.yml(.json,.properties)
4. Config Client 的搭建
4.1 主要依赖
        <dependency>
            <groupId>org.springframework.cloud</groupId>
            <artifactId>spring-cloud-starter-netflix-eureka-client</artifactId>
        </dependency>
        <dependency>
            <groupId>org.springframework.boot</groupId>
            <artifactId>spring-boot-starter-web</artifactId>
        </dependency>
        <dependency>
            <groupId>org.springframework.cloud</groupId>
            <artifactId>spring-cloud-starter-config</artifactId>
            <version>3.0.4</version>
        </dependency>
        <dependency>
            <groupId>org.springframework.cloud</groupId>
            <artifactId>spring-cloud-starter-bootstrap</artifactId>
            <version>3.0.2</version>
        </dependency>
4.2 在 bootstrap.yml 进行配置
server:
  port: 41000

spring:
  application:
    name: my-config-client
  cloud:
    config:
      profile: dev  # 拉取文件的profile
      label: main   # 拉取的分支
      name: my-config-client  # 指定拉取配置文件的 application,默认使用 spring.application.name 的值
      discovery:
        enabled: true
        service-id: my-config-server    # config服务的服务名称

myDesc: ${desc}

eureka:
  client:
    service-url:
      defaultZone: http://zhuifengren1:35000/eureka/,http://zhuifengren2:35001/eureka/    # Eureka Server的地址
注意:config的配置,要配置在 bootstrap.yml 中。
4.3 启动类增加注解
@SpringBootApplication
@EnableDiscoveryClient
public class MyConfigClientApplication {

    public static void main(String[] args) {
        SpringApplication.run(MyConfigClientApplication.class, args);
    }
}
4.4 增加用于实验的 Controller 类
@RestController
public class MyConfigClientController {

    @Value("${info.profile}")
    private String profile;
    @Value("${name}")
    private String name;
    @Value("${myDesc}")
    private String desc;

    @RequestMapping("/info")
    public String getInfo() {

        String info = "profile:" + profile + "<br>";
        info += "name:" + name + "<br>";
        info += "desc:" + desc;

        return info;
    }
}
4.5 启动 Config Client 服务,并进行验证
1)启动服务
2)调用 Controller 接口验证,http://localhost:41000/info
5. 使用非对称秘钥对配置属性进行加密
5.1 概述
有时,在 Git 存储一些敏感信息是不安全的,因此我们需要加密去存储他们,可以使用对称加密和非对称加密两种方式,这里来介绍一下非对称加密的方式。
5.2 JDK版本要求
需要下载 JDK 8u161 以上的版本,否则,则需要下载JCE补丁,现在应该很少使用 JDK 8u161以下的版本了,建议升级JDK。
5.3 使用 JDK 中自带的 keytool 命令生成证书
keytool -genkeypair -alias config-server -keyalg RSA -keystore c:/config-server.keystore
生成过程中的口令要牢记,后面会用到,我这里暂时都设置为 123456
5.4 拷贝生成好的证书到 Config Server 的 resources 中
5.5 在 Config Server 的 bootstrap.yml 中进行配置
encrypt:
  key-store:
    location: config-server.keystore
    alias: config-server
    password: 123456
    secret: 123456
5.6 重启 Config Server 服务
5.7 调用 Config Server 服务的接口,对文本进行加解密
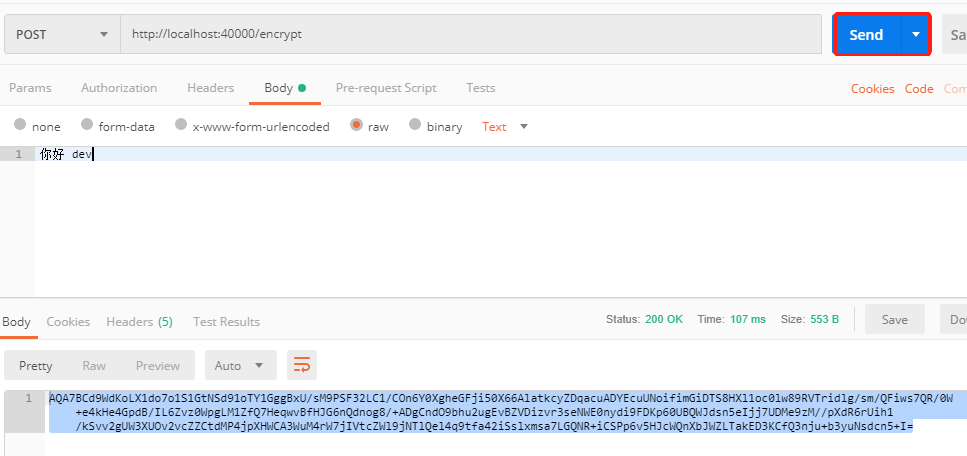
1)加密接口:POST http://localhost:40000/encrypt
加密文本,写在 body 中
2)解密接口:POST http://localhost:40000/decrypt
解密文本,写在 body 中
5.8 将文本 “你好 dev” 进行加密
5.9 将加密字符串拷贝到 Git

注意:加密字符串,在 Git 的配置文件中,要加上单引号,并在字符串开头增加 {cipher}
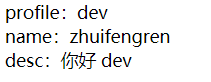
5.10 重启 Config Client,调用 Controller 接口测试
调用 Controller 接口验证,http://localhost:41000/info
6. 配置文件的动态刷新
6.1 概述
大家应该也注意到了,每次在 Git 修改配置,都要把 Config Client 重启一下,体验太不好了。
幸好,Springboot 帮我们想到并解决了这个问题,通过调用一个接口,就能实现配置文件的动态刷新。
6.2 Config Client 工程引入依赖
        <dependency>
            <groupId>org.springframework.boot</groupId>
            <artifactId>spring-boot-starter-actuator</artifactId>
        </dependency>
6.3 Config Client 工程的 bootstrap.yml 文件增加配置
management:
  endpoints:
    web:
      exposure:
        include: 'health,refresh'
  endpoint:
    health:
      show-details: always
6.4 在需要从配置中,动态取属性的类上,增加 @RefreshScope 注解
刚刚编写的实验 Controller 类,就需要增加 @RefreshScope 注解
@RefreshScope
@RestController
public class MyConfigClientController {

    @Value("${info.profile}")
    private String profile;
    @Value("${name}")
    private String name;
    @Value("${myDesc}")
    private String desc;
6.5 重启 Config Client,并调用接口进行配置动态刷新
1)重启
2)调用 http://localhost:41000/actuator/refresh 接口,进行配置的动态刷新
7. 综述
今天聊了一下 SpringCloud 的 Config 组件,希望可以对大家的工作有所帮助。
欢迎帮忙点赞、评论、转发、加关注 :)
关注追风人聊Java,每天更新Java干货。
8. 个人公众号
追风人聊Java,欢迎大家关注


 浙公网安备 33010602011771号