用户身份认证
引入依赖
<!-- 实现对 Spring MVC 的自动化配置 -->
<dependency>
<groupId>org.springframework.boot</groupId>
<artifactId>spring-boot-starter-web</artifactId>
</dependency>
<!-- 实现对 Spring Security 的自动化配置 -->
<dependency>
<groupId>org.springframework.boot</groupId>
<artifactId>spring-boot-starter-security</artifactId>
</dependency>
编写controller
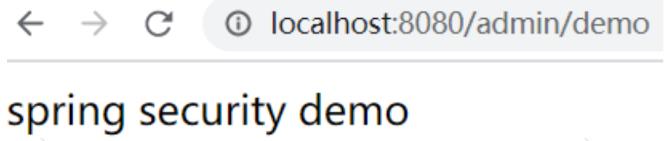
@RestController
@RequestMapping("/admin")
public class AdminController {
@GetMapping("/demo")
public String demo() {
return
"
spring security demo";
}
}
引入Spring Security之后 ,访问 API 接口时,需要首先进行登录,才能进行访问。
测试 http://localhost:8080/admin/demo ,会跳转到
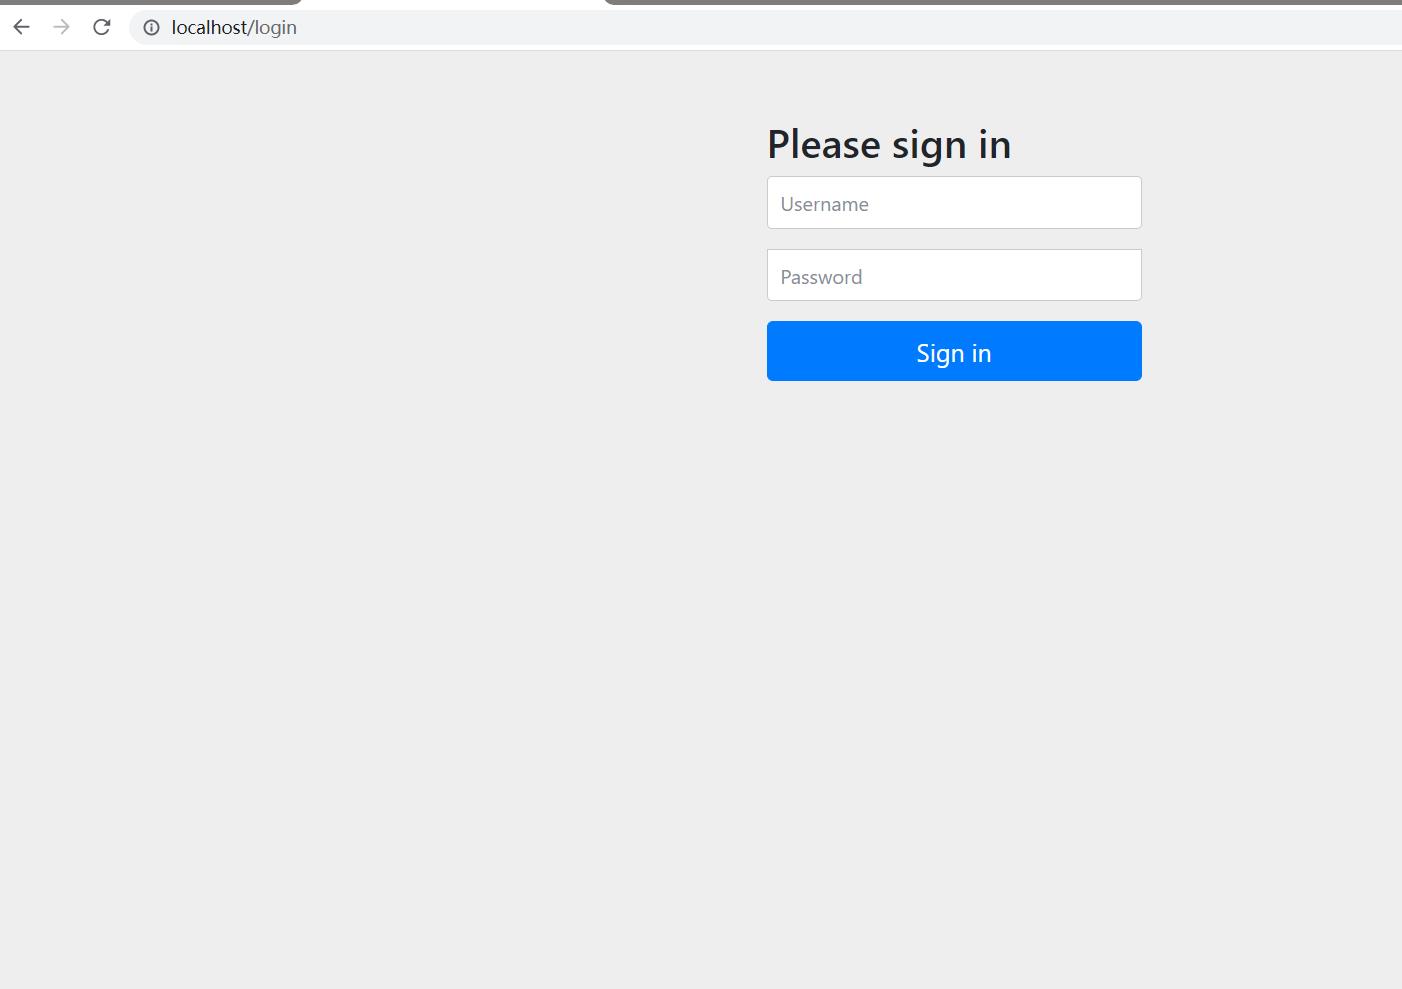
DefaultLoginPageGeneratingFilter#generateLoginPageHtml
需要登录,默认用户名:user,密码可以查看控制台日志获取
Using generated security password: 8d44418b-d224-4907-b7b5-586c05b2f282
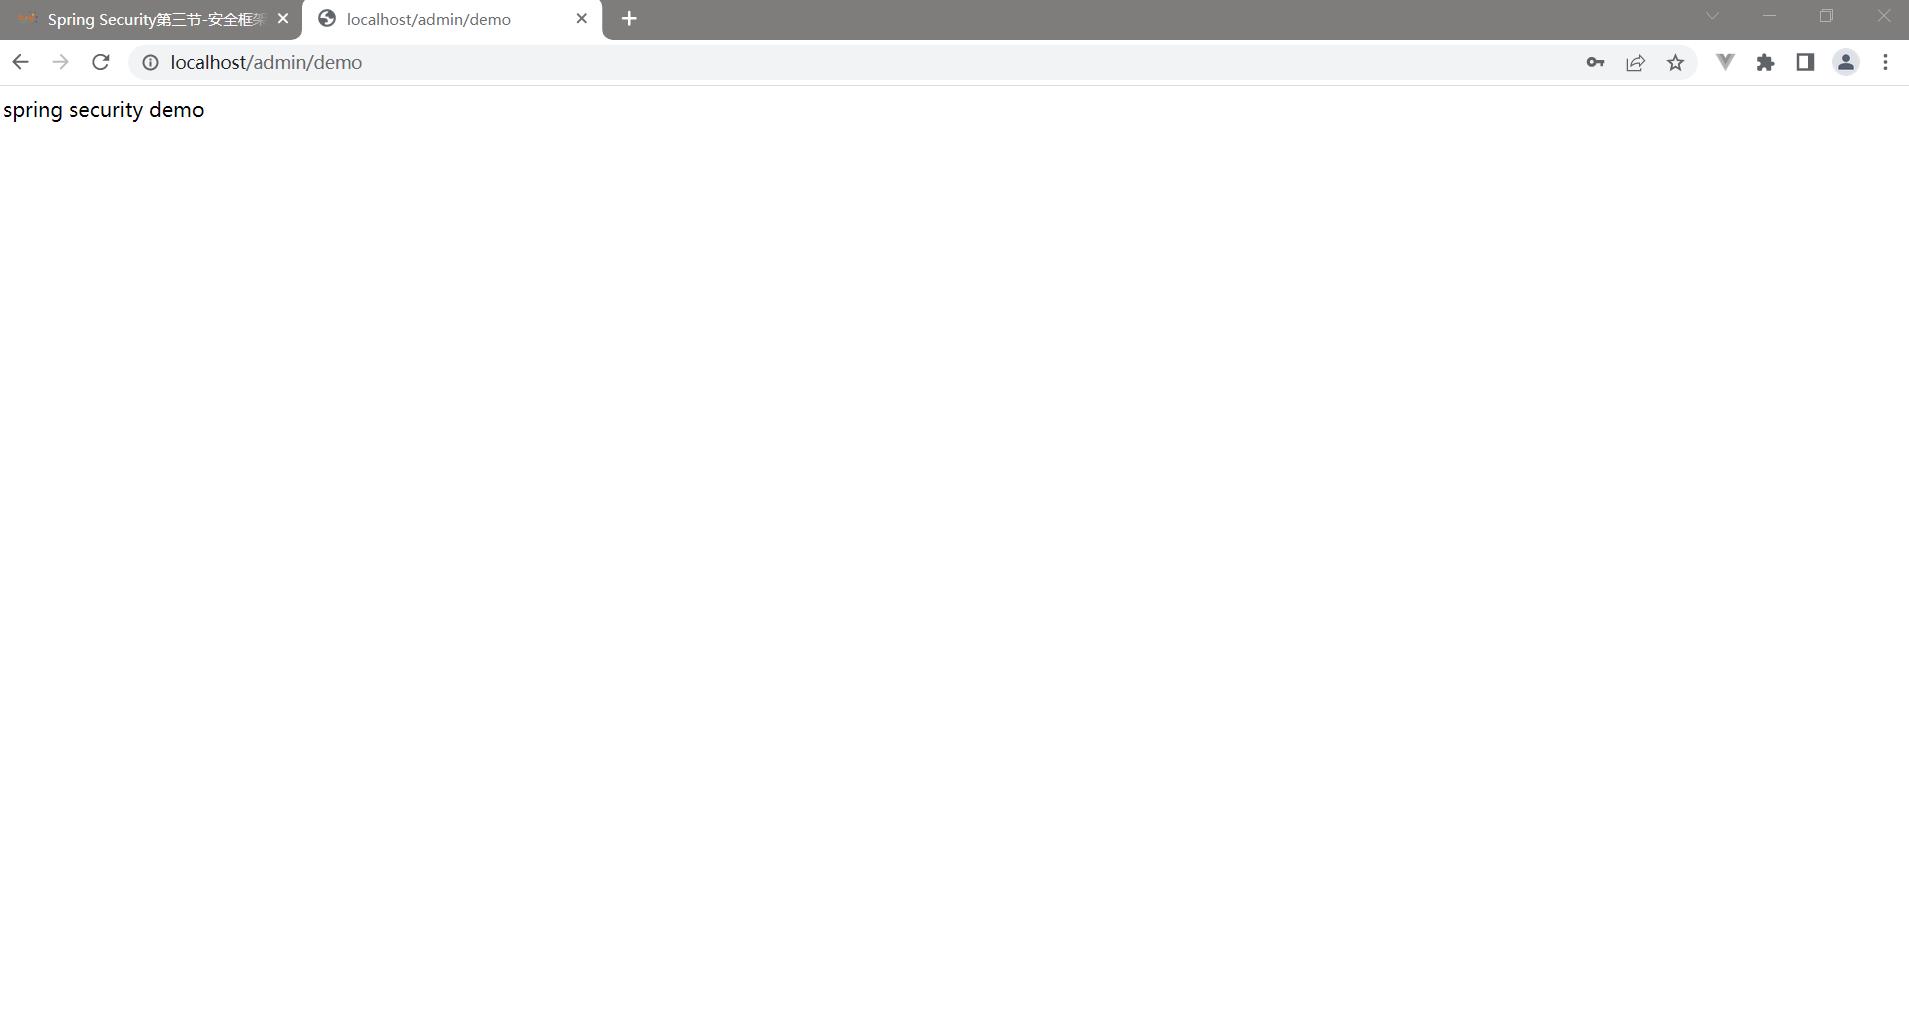
登录之后跳转到:
设置用户名密码
基于application.yaml
可以在application.yaml中自定义用户名密码:
spring:
# Spring Security 配置项,对应 SecurityProperties 配置类
security:
# 配置默认的 InMemoryUserDetailsManager 的用户账号与密码。
user:
name: fox # 账号
password: 123456 # 密码
roles: ADMIN # 拥有角色
思考: 为什么可以这样配置?

原理:
默认情况下,UserDetailsServiceAutoConfiguration自动化配置类,会创建一个内存级别的InMemoryUserDetailsManager对象,提供认证的用户信息。

添加 spring.security.user 配置项,UserDetailsServiceAutoConfiguration 会基于配置的信息在内存中创建一个用户User。

未添加 spring.security.user 配置项,UserDetailsServiceAutoConfiguration 会自动在内存中创建一个用户名为 user,密码为 UUID 随机的用户 User。
基于UserDetailsService接口
@Service
public class UserDetailsServiceImpl implements UserDetailsService {
@Override
public UserDetails loadUserByUsername(String username) throws
UsernameNotFoundException {
//String hashpw = BCrypt.hashpw("123456", BCrypt.gensalt());
UserDetails userDetails = User.withUsername("fox")
.
password("{noop}123456").authorities("admin").build();
return userDetails;
}
}

Spring security5中新增加了加密方式,并把原有的spring security的密码存储格式改了,修改后的密码
存储格式为:
如果密码不指定{id}会抛异常:
{id}encodedPassword

支持的加密方式可以通过PasswordEncoderFactories查看
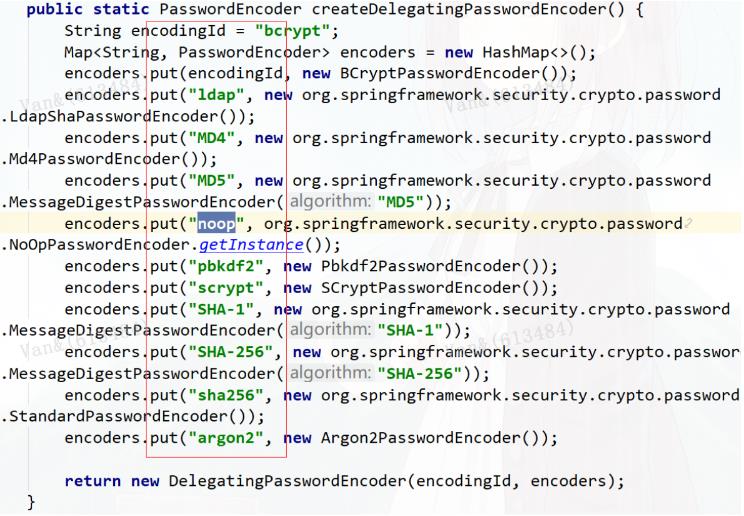
也可以通过增加PasswordEncoder配置指定加密方式
@Configuration
public class WebSecurityConfig {
@Bean
public PasswordEncoder passwordEncoder(){
return NoOpPasswordEncoder.getInstance();
}
}
@Override
public UserDetails loadUserByUsername(String username) throws
UsernameNotFoundException {
//String hashpw = BCrypt.hashpw("123456", BCrypt.gensalt());
UserDetails userDetails = User.withUsername("fox")
.
password("123456").authorities("admin").build();
return userDetails;
}
spring security官方推荐的加密方式BCrypt
@Bean
public PasswordEncoder passwordEncoder(){
//return NoOpPasswordEncoder.getInstance();
return new BCryptPasswordEncoder();
}
@Autowired
private PasswordEncoder passwordEncoder;
@Override
public UserDetails loadUserByUsername(String username) throws
UsernameNotFoundException {
//String hashpw = BCrypt.hashpw("123456", BCrypt.gensalt());
String hashpw = passwordEncoder.encode("123456");
UserDetails userDetails = User.withUsername("fox")
.
password(hashpw).authorities("admin").build();
return userDetails;
}
基于配置类WebSecurityConfigurerAdapter
创建 WebSecurityConfig配置类,继承 WebSecurityConfigurerAdapter抽象类,实现 Spring Security在 Web 场景下的自定义配置。

@Configuration
public class WebSecurityConfig extends WebSecurityConfigurerAdapter {
}
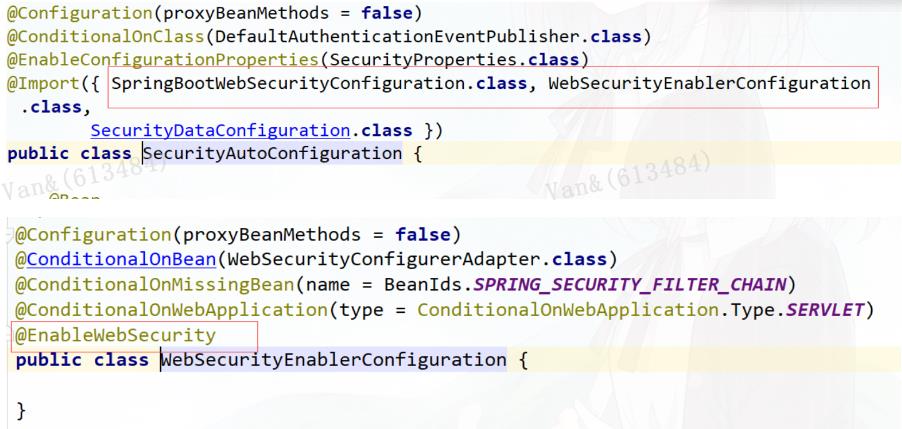
思考: 是否需要添加@EnableWebSecurity注解?

springboot项目中如果引入的是spring-boot-starter-security依赖不需要添加@EnableWebSecurity,可以参考自动配置类:

spring-boot-autoconfigure-2.3.5.RELEASE.jar!/META-INF/spring.factories 下SecurityAutoConfiguration
如果引入的是spring-security-config和spring-security-web依赖,则需要添加@EnableWebSecurity注解
重写 #configure(AuthenticationManagerBuilder auth) 方法,实现 AuthenticationManager认证管理器

@Configuration
public class WebSecurityConfig extends WebSecurityConfigurerAdapter {
@Override
protected void configure(AuthenticationManagerBuilder auth) throws Exception
{
String password = passwordEncoder().encode("123456");
auth
// 使用基于内存的 InMemoryUserDetailsManager
.
inMemoryAuthentication()
//使用 PasswordEncoder 密码编码器
//.passwordEncoder(passwordEncoder())
// 配置用户
.
withUser("fox").password(password).roles("admin")
// 配置其他用户
.
and()
.
withUser("fox2").password(password).roles("user");
}
@Bean
public PasswordEncoder passwordEncoder(){
//return NoOpPasswordEncoder.getInstance();
return new BCryptPasswordEncoder();
}
}
也可以重写WebSecurityConfigurerAdapter#userDetailsService()方法或者WebSecurityConfigurerAdapter#userDetailsServiceBean(),并通过@Bean交给spring管理
@Configuration
public class WebSecurityConfig2 extends WebSecurityConfigurerAdapter {
@Bean
@Override
protected UserDetailsService userDetailsService() {
return new UserDetailsService() {
@Override
public UserDetails loadUserByUsername(String username) throws
UsernameNotFoundException {
String pw = passwordEncoder().encode("123456");
return new User("fox", pw,
AuthorityUtils.commaSeparatedStringToAuthorityList("admin,user"));
}
};
}
@Bean
public PasswordEncoder passwordEncoder() {
//return NoOpPasswordEncoder.getInstance();
return new BCryptPasswordEncoder();
}
}
实现数据库认证
创建数据库
CREATE TABLE
`
tb_user
`
(
`
id` bigint(20) NOT NULL AUTO_INCREMENT,
`
username
`
varchar(50) NOT NULL COMMENT '用户名',
`
password` varchar(64) NOT NULL COMMENT '密码,加密存储',
`
phone` varchar(20) DEFAULT NULL COMMENT '注册手机号',
`
email` varchar(50) DEFAULT NULL COMMENT '注册邮箱',
`
created` datetime NOT NULL,
`
updated` datetime NOT NULL,
PRIMARY KEY (`id`),
UNIQUE KEY
`
username
`
(
`
username
`
) USING BTREE,
UNIQUE KEY
`
phone` (`phone`) USING BTREE,
UNIQUE KEY
`
email` (`email`) USING BTREE
) ENGINE=InnoDB AUTO_INCREMENT=38 DEFAULT CHARSET=utf8 COMMENT='用户表';
insert into
`
tb
_
user
`
(
`
id`,`username`,`password`,`phone`,`email`,`created`,`updated`) values
(37,'fox','$2a$10$9ZhDOBp.sRKat4l14ygu/.LscxrMUcDAfeVOEPiYwbcRkoB09gCmi','158xxx
xxxx
'
,
'
xxxxxxx@gmail.com','2019-04-04 23:21:27','2019-04-04 23:21:29');
CREATE TABLE
`
tb
_
role` (
`
id` bigint(20) NOT NULL AUTO_INCREMENT,
`
parent_id` bigint(20) DEFAULT NULL COMMENT '父角色',
`
name
`
varchar(64) NOT NULL COMMENT '角色名称',
`
enname
`
varchar(64) NOT NULL COMMENT '角色英文名称',
`
description` varchar(200) DEFAULT NULL COMMENT '备注',
`
created` datetime NOT NULL,
`
updated` datetime NOT NULL,
PRIMARY KEY (`id`)
) ENGINE=InnoDB AUTO_INCREMENT=38 DEFAULT CHARSET=utf8 COMMENT='角色表';
insert into
`
tb
_
role`(`id`,`parent_id`,`name`,`enname`,`description`,`created`,`updated`)
values
(37,0,'超级管理员','fox',NULL,'2019-04-04 23:22:03','2019-04-04 23:22:05');
CREATE TABLE
`
tb
_
user
_
role` (
`
id` bigint(20) NOT NULL AUTO_INCREMENT,
`
user
_
id` bigint(20) NOT NULL COMMENT '用户 ID',
`
role
_
id` bigint(20) NOT NULL COMMENT '角色 ID',
PRIMARY KEY (`id`)
) ENGINE=InnoDB AUTO_INCREMENT=38 DEFAULT CHARSET=utf8 COMMENT='用户角色表';
insert into `tb
_
user
_
role`(`id`,`user_id`,`role_id`) values
(37,37,37);
CREATE TABLE
`
tb
_
permission` (
`
id` bigint(20) NOT NULL AUTO_INCREMENT,
`
parent_id` bigint(20) DEFAULT NULL COMMENT '父权限',
`
name
`
varchar(64) NOT NULL COMMENT '权限名称',
`
enname
`
varchar(64) NOT NULL COMMENT '权限英文名称',
`
url` varchar(255) NOT NULL COMMENT '授权路径',
`
description` varchar(200) DEFAULT NULL COMMENT '备注',
`
created` datetime NOT NULL,
`
updated` datetime NOT NULL,
PRIMARY KEY (`id`)
) ENGINE=InnoDB AUTO_INCREMENT=44 DEFAULT CHARSET=utf8 COMMENT='权限表';
insert into
`
tb
_
permission`(`id`,`parent_id`,`name`,`enname`,`url`,`description`,`created`,`
updated`) values
(37,0,'系统管理','System','/',NULL,'2019-04-04 23:22:54','2019-04-04 23:22:56'),
(38,37,'用户管理','SystemUser','/users/',NULL,'2019-04-04 23:25:31','2019-04-04
23:25:33'),
(39,38,'查看用户','SystemUserView','',NULL,'2019-04-04 15:30:30','2019-04-04
15:30:43'),
(40,38,'新增用户','SystemUserInsert','',NULL,'2019-04-04 15:30:31','2019-04-04
15:30:44'),
(41,38,'编辑用户','SystemUserUpdate','',NULL,'2019-04-04 15:30:32','2019-04-04
15:30:45'),
(42,38,'删除用户','SystemUserDelete','',NULL,'2019-04-04 15:30:48','2019-04-04
15:30:45'),
(44,37,'内容管理','SystemContent','/contents/',NULL,'2019-04-06 18:23:58','2019-
04-06 18:24:00'),
(45,44,'查看内容','SystemContentView','/contents/view/**',NULL,'2019-04-06
23:49:39','2019-04-06 23:49:41'),
(46,44,'新增内容','SystemContentInsert','/contents/insert/**',NULL,'2019-04-06
23:51:00','2019-04-06 23:51:02'),
(47,44,'编辑内容','SystemContentUpdate','/contents/update/**',NULL,'2019-04-06
23:51:04','2019-04-06 23:51:06'),
(48,44,'删除内容','SystemContentDelete','/contents/delete/**',NULL,'2019-04-06
23:51:08','2019-04-06 23:51:10');
CREATE TABLE
`
tb
_
role
_
permission` (
`
id` bigint(20) NOT NULL AUTO_INCREMENT,
`
role
_
id` bigint(20) NOT NULL COMMENT '角色 ID',
`
permission_id` bigint(20) NOT NULL COMMENT '权限 ID',
PRIMARY KEY (`id`)
) ENGINE=InnoDB AUTO_INCREMENT=43 DEFAULT CHARSET=utf8 COMMENT='角色权限表';
insert into `tb
_
role
_
permission`(`id`,`role_id`,`permission_id`) values
(37,37,37),
(38,37,38),
(39,37,39),
(40,37,40),
(41,37,41),
(42,37,42),
(43,37,44),
(44,37,45),
(45,37,46),
(46,37,47),
(47,37,48);
添加依赖
<dependency>
<groupId>org.springframework.boot</groupId>
<artifactId>spring-boot-starter-jdbc</artifactId>
</dependency>
<dependency>
<groupId>mysql</groupId>
<artifactId>mysql-connector-java</artifactId>
</dependency>
<dependency>
<groupId>org.mybatis.spring.boot</groupId>
<artifactId>mybatis-spring-boot-starter</artifactId>
<version>2.0.1</version>
</dependency>
<dependency>
<groupId>org.projectlombok</groupId>
<artifactId>lombok</artifactId>
</dependency>
在application.yaml配置dataSource
spring:
datasource:
type: com.zaxxer.hikari.HikariDataSource
driver-class-name: com.mysql.cj.jdbc.Driver
url: jdbc:mysql://localhost:3306/security?
useUnicode=true&characterEncoding=utf-8&useSSL=false&serverTimezone=UTC
username: root
password: root
hikari:
minimum-idle: 5
idle-timeout: 600000
maximum-pool-size: 10
auto-commit: true
pool-name: MyHikariCP
max-lifetime: 1800000
connection-timeout: 30000
connection-test-query: SELECT 1
实现用户认证逻辑
@Service
public class UserServiceImpl implements UserService {
@Autowired
private UserMapper userMapper;
@Autowired
private PermissionMapper permissionMapper;
@Override
public User getByUsername(String username) {
return userMapper.getByUsername(username);
}
@Override
public UserDetails loadUserByUsername(String username) throws
UsernameNotFoundException {
//从mysql查询用户
User user = getByUsername(username);
List<GrantedAuthority> authorities = new ArrayList<>();
if(user!=null){
List<Permission> permissions =
permissionMapper.selectByUserId(user.getId());
//设置权限
permissions.forEach(permission -> {
if (permission!=null &&
!StringUtils.isEmpty(permission.getEnname())){
GrantedAuthority grantedAuthority = new
SimpleGrantedAuthority(permission.getEnname());
authorities.add(grantedAuthority);
}
});
// 封装成UserDetails的实现类
return new org.springframework.security.core.userdetails.User(
user.getUsername(),user.getPassword(),authorities);
}else {
throw new UsernameNotFoundException("用户名不存在");
}
}
}
配置spring security
@Configuration
public class WebSecurityConfig extends WebSecurityConfigurerAdapter {
@Autowired
private UserService userService;
@Override
protected void configure(AuthenticationManagerBuilder auth) throws Exception
{
//设置UserDetailsService的实现类
auth.userDetailsService(userService);
}
@Bean
public PasswordEncoder passwordEncoder(){
return new BCryptPasswordEncoder();
}
}
自定义登录页面
默认登录页面通过DefaultLoginPageGeneratingFilter#generateLoginPageHtml生成
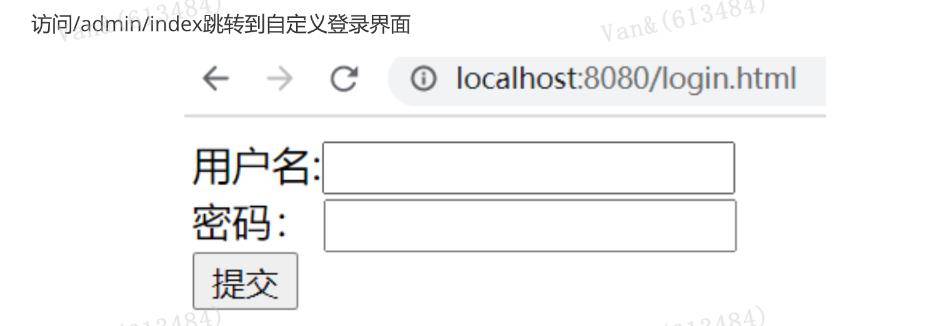
编写登录页面
<!DOCTYPE html>
<html lang="en">
<head>
<meta charset="UTF-8">
<title>Title</title>
</head>
<body>
<form action="/user/login" method="post">
用户名:<input type="text" name="username"/><br/>
密码: <input type="password" name="password"/><br/>
<input type="submit" value="提交"/>
</form>
</body>
</html>
自定义登录页面配置
@Override
protected void configure(HttpSecurity http) throws Exception {
http.formLogin() //表单提交
.
loginPage("/login.html") //自定义登录页面
.
loginProcessingUrl("/user/login") //登录访问路径,必须和表单提交接口一样
.
defaultSuccessUrl("/admin/index") //认证成功之后跳转的路径
.
and().authorizeRequests()
//设置哪些路径可以直接访问,不需要认证
.
antMatchers("/user/login","/login.html").permitAll()
.
anyRequest().authenticated() //需要认证
.
and().csrf().disable(); //关闭csrf防护
}
测试
访问/admin/demo直接返回结果,不用认证
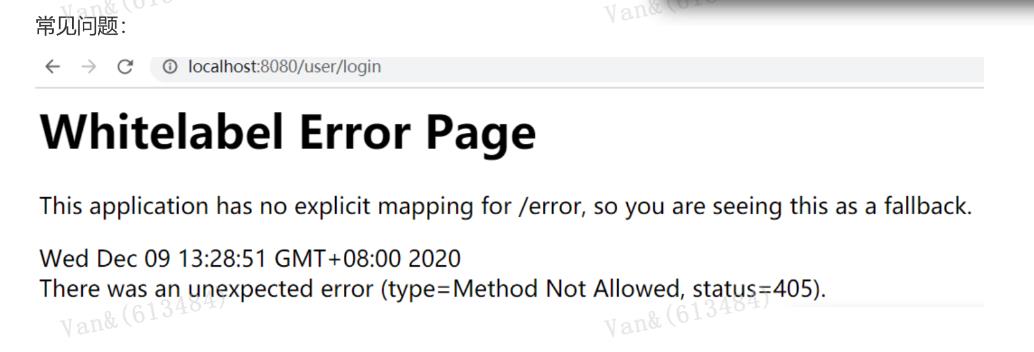
原因是登录只接受Post请求
如下,通过successForwardUrl和failureForwardUrl设置登录成功和失败后的跳转页面
@Override
protected void configure(HttpSecurity http) throws Exception {
http.formLogin() //表单提交
.
loginPage("/login.html") //自定义登录页面
.
loginProcessingUrl("/user/login") //登录访问路径,必须和表单提交接口一样
.
successForwardUrl("/main") //认证成功之后转发的路径,必须是Post请求
.
failureForwardUrl("/toerror") //认证失败之后转发的路径,必须是Post请求
.
and().authorizeRequests()
//设置哪些路径可以直接访问,不需要认证
.
antMatchers("/user/login","/login.html","/error.html").permitAll()
.
anyRequest().authenticated() //需要认证
.
and().csrf().disable(); //关闭csrf防护
}
//
@Controller
public class LoginController {
@RequestMapping("/main")
public String main() {
return
"
redirect:/main.html";
}
@RequestMapping("/toerror")
public String error() {
return
"
redirect:/error.html";
}
}
自定义用户名和密码参数名
当进行登录时会执行 UsernamePasswordAuthenticationFilter 过滤器
usernamePasrameter :账户参数名
passwordParameter :密码参数名
postOnly=true :默认情况下只允许POST请求
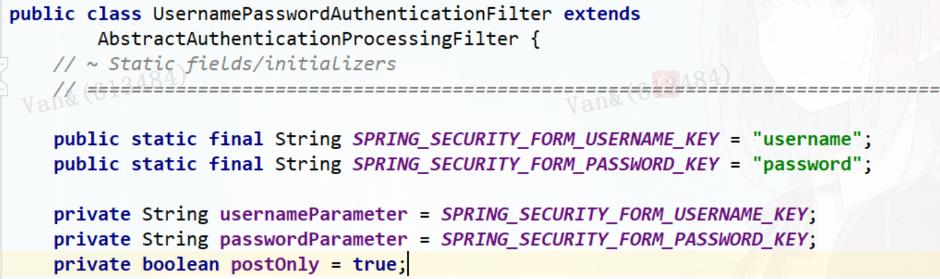
可以通过usernameParameter和passwordParameter设置,必须保证和前端表单的name值一致
http.formLogin() //表单提交
.
usernameParameter("username1212")
passwordParameter("password1212")
自定义登录成功处理器
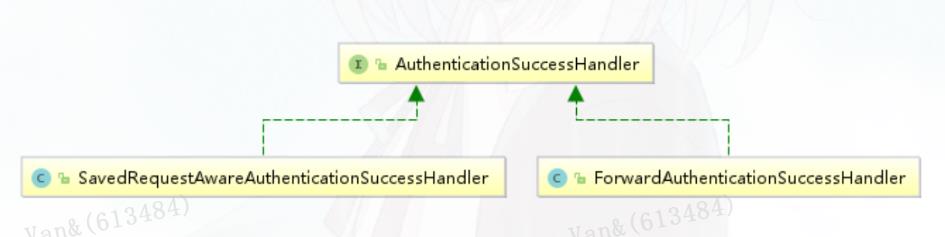
比如想实现登录成功后重定向其他页面,可以利用AuthenticationSuccessHandler接口实现自定义的认证成功控制器。

public class MyAuthenticationSuccessHandler implements
AuthenticationSuccessHandler {
private String redirectUrl;
public MyAuthenticationSuccessHandler(String redirectUrl) {
this.redirectUrl = redirectUrl;
}
@Override
public void onAuthenticationSuccess(HttpServletRequest request,
HttpServletResponse response, Authentication authentication) throws IOException,
ServletException {
response.sendRedirect(redirectUrl);
}
}
//
http.formLogin() //表单提交
.
loginPage("/login.html") //自定义登录页面
.
loginProcessingUrl("/user/login") //登录访问路径,必须和表单提交接口一样
.
successHandler(new MyAuthenticationSuccessHandler("/main.html"))
自定义登录失败处理器
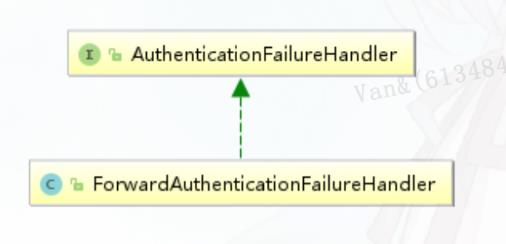
同样的,当登录认证失败后,想做一些事情,可以实现AuthenticationFailureHandler接口。
public class MyAuthenticationFailureHandler implements
AuthenticationFailureHandler {
private String redirectUrl;
public MyAuthenticationFailureHandler(String redirectUrl) {
this.redirectUrl = redirectUrl;
}
@Override
public void onAuthenticationFailure(HttpServletRequest request,
HttpServletResponse response, AuthenticationException exception) throws
IOException, ServletException {
response.sendRedirect(redirectUrl);
}
}
http.formLogin() //表单提交
.
loginPage("/login.html") //自定义登录页面
.
loginProcessingUrl("/user/login") //登录访问路径,必须和表单提交接口一样
.
successHandler(new MyAuthenticationSuccessHandler("/main.html"))
.
failureHandler(new MyAuthenticationFailureHandler("/error.html"))
会话管理(Session)
用户认证通过后,为了避免用户的每次操作都进行认证可将用户的信息保存在会话中。spring security提供会话管理,认证通过后将身份信息放入SecurityContextHolder上下文,SecurityContext与当前线
程进行绑定,方便获取用户身份。
获取用户身份信息

@GetMapping("/index")
public String index() {
String username = getUsername();
return username +
"
登录成功";
}
private String getUsername(){
// 获取当前登录的用户信息
Authentication authentication =
SecurityContextHolder.getContext().getAuthentication();
if(!authentication.isAuthenticated()){
return null;
}
Object principal = authentication.getPrincipal();
String username = null;
if (principal instanceof UserDetails) {
username =((UserDetails)principal).getUsername();
} else {
username = principal.toString();
}
return username;
}
会话控制
我们可以通过以下选项准确控制会话何时创建以及Spring Security如何与之交互:
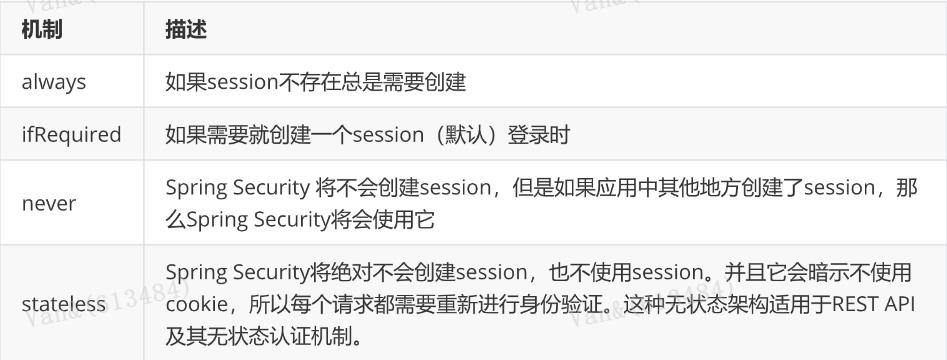
@Override
protected void configure(HttpSecurity http) throws Exception {
http.sessionManagement()
.
sessionCreationPolicy(SessionCreationPolicy.IF_REQUIRED)
}
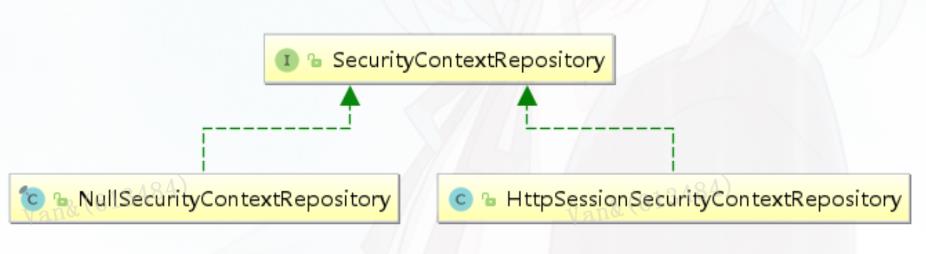
默认情况下,Spring Security会为每个登录成功的用户会新建一个Session,就是ifRequired 。在执行认证过程之前,spring security将运行SecurityContextPersistenceFilter过滤器负责存储安全请求上下
文,上下文根据策略进行存储,默认为HttpSessionSecurityContextRepository ,其使用http session作为存储器。
会话超时
可以在sevlet容器中设置Session的超时时间,如下设置Session有效期为600s; spring boot 配置文
件:
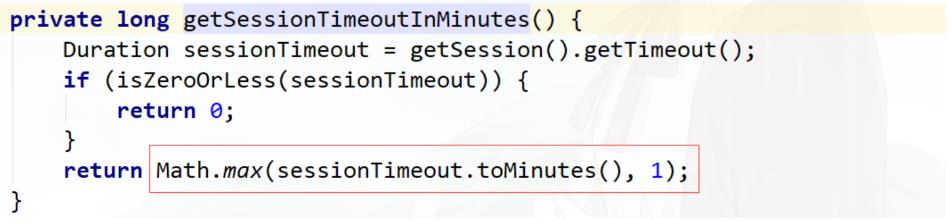
注意:session最低60s,参考源码TomcatServletWebServerFactory#configureSession:
server.servlet.session.timeout=600s
session超时之后,可以通过Spring Security 设置跳转的路径。
http.sessionManagement()
.
invalidSessionUrl("/session/invalid");
@RestController
@RequestMapping("/session")
public class SessionController {
@GetMapping("/invalid")
@ResponseStatus(code = HttpStatus.UNAUTHORIZED)
public String sessionInvalid() {
return
"
session失效";
}
}
会话并发控制
用户在这个手机登录后,他又在另一个手机登录相同账户,对于之前登录的账户 是否需要被挤兑,或者说在第二次登录时限制它登录 ,更或者像腾讯视频VIP账号一样,最多只能五个人同时登录,第六个人限制登
录。

maximumSessions:最大会话数量,设置为1表示一个用户只能有一个会话
expiredSessionStrategy:会话过期策略
http.sessionManagement()
.
invalidSessionUrl("/session/invalid")
.
maximumSessions(1)
.
expiredSessionStrategy(new MyExpiredSessionStrategy());
public class MyExpiredSessionStrategy implements
SessionInformationExpiredStrategy {
@Override
public void onExpiredSessionDetected(SessionInformationExpiredEvent event)
throws IOException, ServletException {
HttpServletResponse response = event.getResponse();
response.setContentType("application/json;charset=UTF-8");
response.getWriter().write("您已被挤兑下线!");
}
}
测试
1. 使用chrome浏览器,先登录,再访问http://localhost:8080/admin/index
2. 使用ie浏览器,再登录,再访问http://localhost:8080/admin/index
3. 使用chrome浏览器,重新访问http://localhost:8080/admin/index,会执行
expiredSessionStrategy,页面上显示”您已被挤兑下线!“
阻止用户第二次登录
sessionManagement也可以配置 maxSessionsPreventsLogin:boolean值,当达到
maximumSessions设置的最大会话个数时阻止登录。
http.sessionManagement()
.
invalidSessionUrl("/session/invalid")
.
maximumSessions(1)
.
expiredSessionStrategy(new MyExpiredSessionStrategy())
.
maxSessionsPreventsLogin(true);

实际场景中一个服务会至少有两台服务器在提供服务,在服务器前面会有一个nginx做负载均衡,用户访问nginx,nginx再决定去访问哪一台服务器。当一台服务宕机了之后,另一台服务器也可以继续提供服
务,保证服务不中断。如果我们将session保存在Web容器(比如tomcat)中,如果一个用户第一次访问被分配到服务器1上面需要登录,当某些访问突然被分配到服务器二上,因为服务器二上没有用户在服务器
一上登录的会话session信息,服务器二还会再次让用户登录,用户已经登录了还让登录就感觉不正常了。解决这个问题的思路是用户登录的会话信息不能再保存到Web服务器中,而是保存到一个单独的库
(redis、mongodb、mysql等)中,所有服务器都访问同一个库,都从同一个库来获取用户的session信息,如用户在服务器一上登录,将会话信息保存到库中,用户的下次请求被分配到服务器二,服务器二
从库中检查session是否已经存在,如果存在就不用再登录了,可以直接访问服务了。
引入spring session依赖
<dependency>
<groupId>org.springframework.session</groupId>
<artifactId>spring-session-data-redis</artifactId>
</dependency>
<dependency>
<groupId>redis.clients</groupId>
<artifactId>jedis</artifactId>
<version>3.1.0</version>
</dependency>
修改application.yaml

spring:
session:
store-type: redis
redis:
host: localhost
port: 6379
server:
port: 8080
servlet:
session:
timeout: 600
测试
启动两个服务8080,8081 ,其中一个登录后访问http://localhost:8080/admin/index,另外一个不需要登录就可以访问
安全会话cookie
我们可以使用httpOnly和secure标签来保护我们的会话cookie:
httpOnly:如果为true,那么浏览器脚本将无法访问cookie
secure:如果为true,则cookie将仅通过HTTPS连接发送
spring boot配置文件:
server.servlet.session.cookie.http-only=true
server.servlet.session.cookie.secure=true
RememberMe实现
Spring Security 中 Remember Me 为“记住我”功能,用户只需要在登录时添加 remember-me复选框,取值为true。Spring Security 会自动把用户信息存储到数据源中,以后就可以不登录进行访问。


RememberMe配置
@Autowired
public DataSource dataSource;

创建数据库
在客户端登录页面中添加 remember-me 的复选框,只要用户勾选了复选框下次就不需要进行登录了。
public PersistentTokenRepository persistentTokenRepository(){
JdbcTokenRepositoryImpl jdbcTokenRepository = new JdbcTokenRepositoryImpl();
//设置数据源
jdbcTokenRepository.setDataSource(dataSource);
return jdbcTokenRepository;
}
@Override
protected void configure(HttpSecurity http) throws Exception {
//记住我
http.rememberMe()
.
tokenRepository(persistentTokenRepository())//设置持久化仓库
.
tokenValiditySeconds(3600) //超时时间,单位s 默认两周
.
userDetailsService(userService); //设置自定义登录逻辑
}


create table persistent_logins (
username varchar(64) not null,
series varchar(64) primary key,
token varchar(64) not null,
last_used timestamp not null
)


<form action="/login" method="post">
用户名:<input type="text" name="username" /><br/>
密码:<input type="password" name="password" /><br/>
<input type="checkbox" name="remember-me" value="true"/><br/>
<input type="submit" value="登录" />
</form>
退出登录
Spring security默认实现了logout退出,用户只需要向 Spring Security 项目中发送 /logout 退出请求即可。
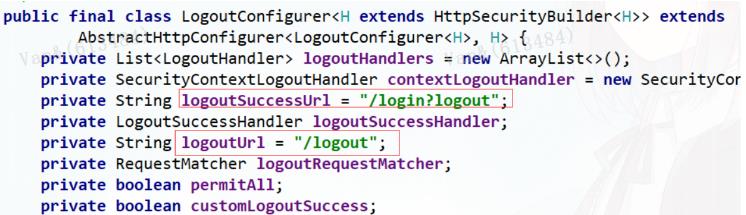
默认的退出 url 为 /logout ,退出成功后跳转到 /login?logout 。
自定义退出逻辑
如果不希望使用默认值,可以通过下面的方法进行修改。
http.logout()
.logoutUrl("/logout")
.logoutSuccessUrl("/login.html");
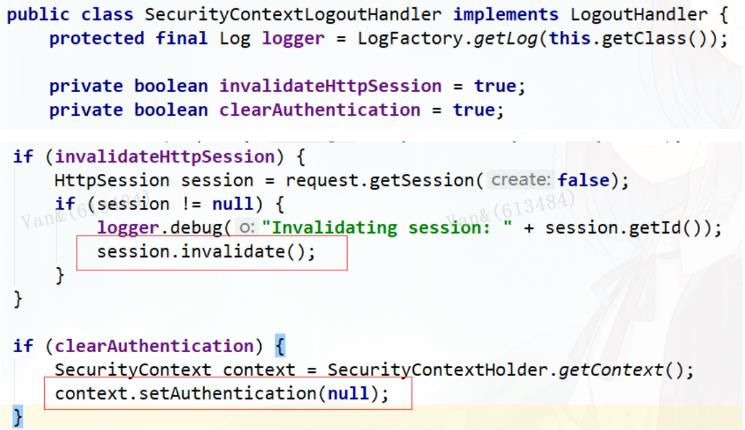
SecurityContextLogoutHandler
当退出操作出发时,将发生:
销毁HTTPSession 对象
清除认证状态
跳转到 /login.html
LogoutSuccessHandler
退出成功处理器,实现 LogoutSuccessHandler 接口 ,可以自定义退出成功处理逻辑。
CSRF
CSRF(Cross-site request forgery)跨站请求伪造,也被称为“OneClick Attack” 或者 Session Riding。
通过伪造用户请求访问受信任站点的非法请求访问。
跨域:只要网络协议,ip 地址,端口中任何一个不相同就是跨域请求。
客户端与服务进行交互时,由于 http 协议本身是无状态协议,所以引入了cookie进行记录客户端身份。
在cookie中会存放session id用来识别客户端身份的。在跨域的情况下,session id 可能被第三方恶意劫
持,通过这个 session id 向服务端发起请求时,服务端会认为这个请求是合法的,可能发生很多意想不到的事情。
防御CSRF攻击策略
验证 HTTP Referer 字段
在请求地址中添加 token 并验证
在 HTTP 头中自定义属性并验证
从 Spring Security4开始CSRF防护默认开启,默认会拦截请求,进行CSRF处理。CSRF为了保证不是其他第三方网站访问,要求访问时携带参数名为 _csrf 值为token(token 在服务端产生,在渲染请求页面时
埋入页面)的内容,如果token和服务端的token匹配成功,则正常访问。
修改login.html

<!DOCTYPE html>
<html xmlns="http://www.w3.org/1999/xhtml"
xmlns:th="http://www.thymeleaf.org">
<head>
<meta charset="UTF-8">
<title>Title</title>
</head>
<body>
<form action="/login" method="post">
<input type="hidden" th:value="${_csrf.token}" name="_csrf"
th:if="${_csrf}"/>
用户名:<input type="text" name="username"/><br/>
密码: <input type="password" name="password"/><br/>
<input type="submit" value="提交"/>
</form>
</body>
</html>
修改配置类
//关闭csrf防护
// http.csrf().disable();

 浙公网安备 33010602011771号