基于VSCode的C/C++编程语言的构建调试环境搭建指南
1.安装gcc
首先我们使用MinGW来安装gcc环境,MinGW是个精简的Windows平台C/C++、ADA及Fortran编译器,相比Cygwin而言,体积要小很多,使用较为方便。
首先前往https://sourceforge.net/projects/mingw-w64/下载

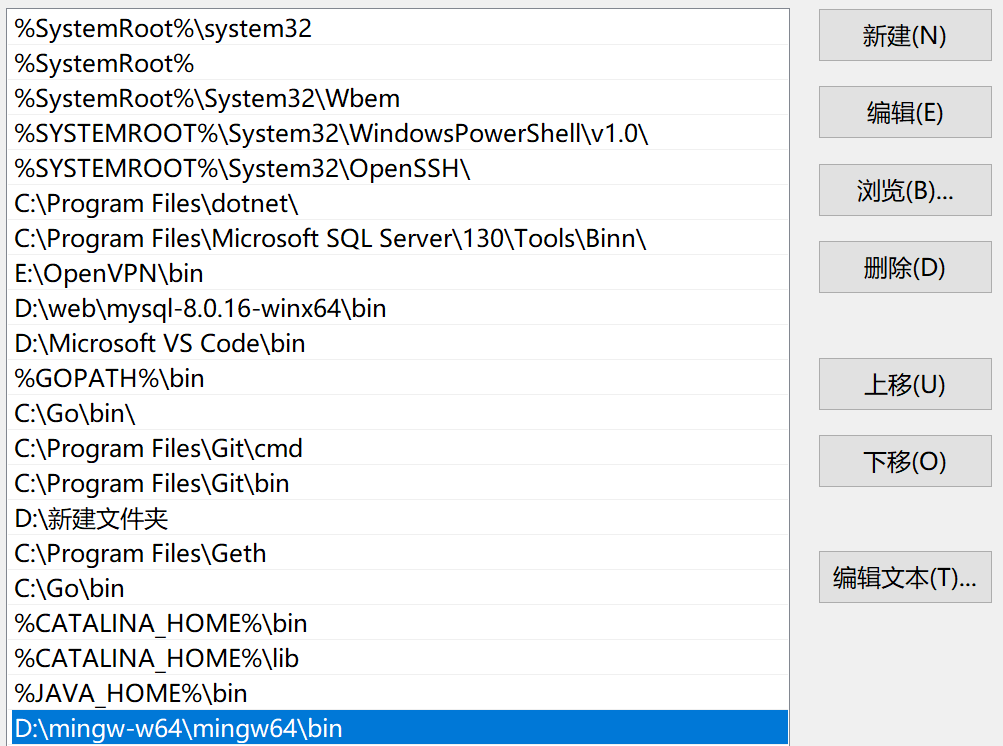
安装后将bin目录添加到环境变量,win+R输入sysdm.cpl回车,在弹出界面选择高级->环境变量。我的安装路径为D:\mingw-w64\mingw64\bin
cmd输入gcc -v即可看见以下gcc版本信息,说明安装成功!

2.安装C/C++调试器
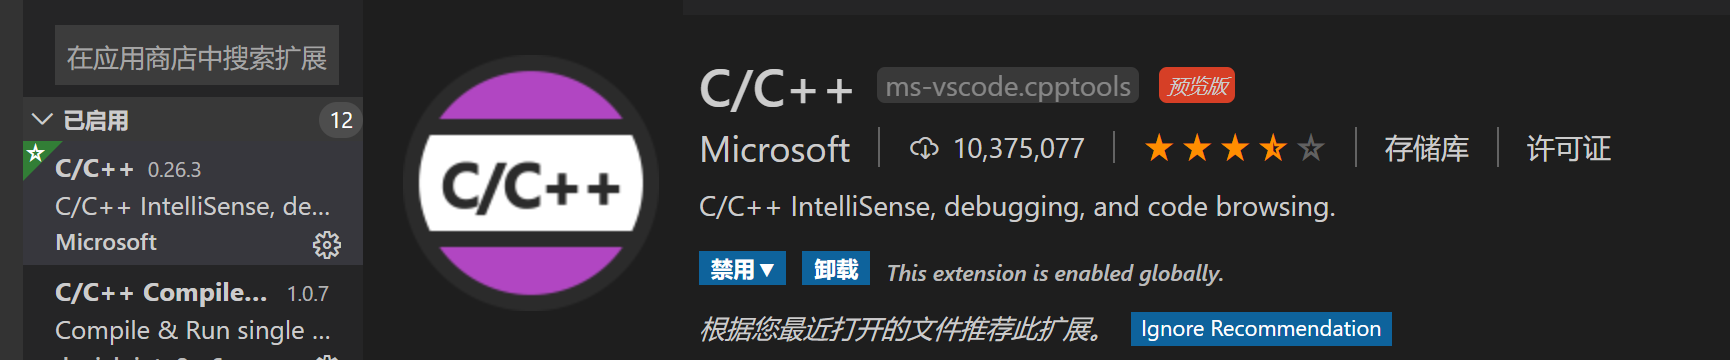
按下Ctrl+shift+X,选择C/C++,点击安装,至此,我们可以在Vscode上调试C/C++程序了
3. VSCode编译调试Helloworld
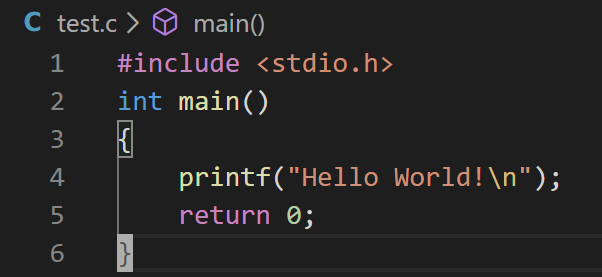
点击文件->打开文件夹,选定工程目录, 点击New File创建一个文件test.c。
然后编写Helloworld程序,准备进行调试。
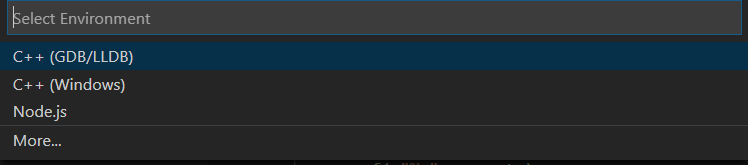
点击F5,选择C++(GDB/LLDB),
然后选择配置gcc.exe build and debug active file,文件目录新增了.vscode目录,并在此目录下自动生成了launch.json。

将miDebuggerPath改为自己mingw的bin目录下gdb.exe所在位置,配置好的launch.json文件如下
{
    // Use IntelliSense to learn about possible attributes.
    // Hover to view descriptions of existing attributes.
    // For more information, visit: https://go.microsoft.com/fwlink/?linkid=830387
    "version": "0.2.0",
    "configurations": [
        {
            "name": "gcc.exe build and debug active file",
            "type": "cppdbg",
            "request": "launch",
            "program": "${fileDirname}\\${fileBasenameNoExtension}.exe",
            "args": [],
            "stopAtEntry": false,
            "cwd": "${workspaceFolder}",
            "environment": [],
            "externalConsole": false,
            "MIMode": "gdb",
            "miDebuggerPath": "D:\\mingw-w64\\mingw64\\bin\\gdb.exe",
            "setupCommands": [
                {
                    "description": "为 gdb 启用整齐打印",
                    "text": "-enable-pretty-printing",
                    "ignoreFailures": true
                }
            ],
            "preLaunchTask": "gcc.exe build active file"
        }
    ]
}
然后点击ctrl+shift+p,输入Task,然后选择Configure Task,之后选择Create tasks.json file from template,
之后再选择Others。
配置task.json文件,配置好的task.json文件如下
{
    "version": "2.0.0",
    "tasks": [
        {
            "label": "gcc.exe build active file",
            "command": "gcc",
            "args": [
                "${fileDirname}/test.c",
                "-o",
                "${fileDirname}/test.exe",
                "-g",
                "-Wall",
            ],
            "type": "shell",
            "group": {
                "kind": "build",
                "isDefault": true
            },
            "presentation": {
                "echo": true,
                "reveal": "always",
                "focus": false,
                "panel": "shared"
            },
        }
    ]
}
在printf之前设置断点,点击F5调试生成了test.exe文件
然后按单步调试,成功打印Hello World


 浙公网安备 33010602011771号