

hive安装--远程模式
系统版本:CentOS Linux release 7.9.2009 (Core)
ps:
最小化安装
一、安装MySQL
1.下载
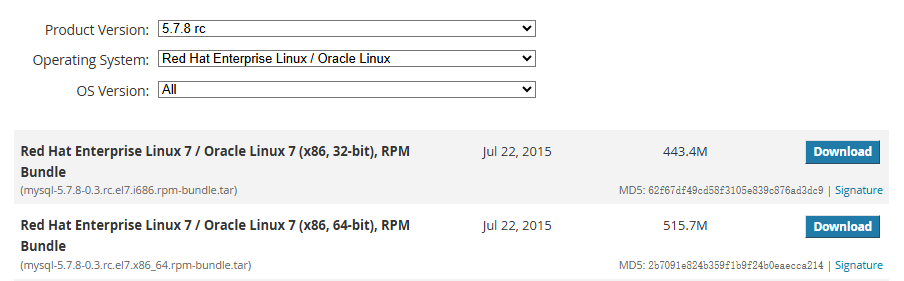
1.1安装包
官网:https://downloads.mysql.com/archives/community/
1.2驱动
官网:https://downloads.mysql.com/archives/c-j/
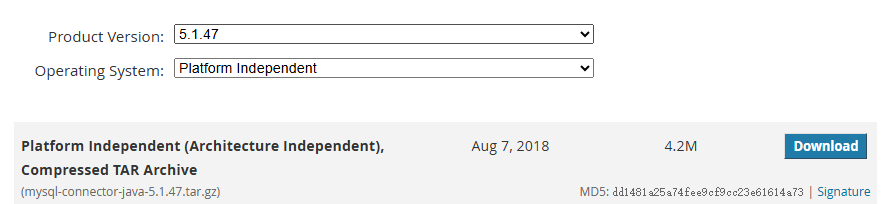
ps
mysql-connector-java-5.1.47.jar,要这个
2.安装
2.1安装依赖
2.1.1赖配置光盘yum源
mkdir /opt/packages;mouont /dev/cdrom /opt/packages
mkdir /etc/yum.repo.d.bak;mv /etc/yum.repo.d/* /etc/yum.repo.d.bak/
vi /etc/yum.repo.d/local.repo
[Local]
name=Local
baseurl=filre:///opt/packages
gpgcheck=0
enable=1
yum clean all
2.1.2安装依赖
yum -y install net-tools
yum -y install perl
ps:
其余安装方法参见:https://www.cnblogs.com/used-conduit-onion/p/18745993
2.2安装MySQL
2.2.1安装
顺序安装
rpm -i /opt/software/mysql-community-common-5.7.8-0.3.rc.el7.x86_64.rpm
rpm -i /opt/software/mysql-community-libs-5.7.8-0.3.rc.el7.x86_64.rpm
rpm -i /opt/software/mysql-community-client-5.7.8-0.3.rc.el7.x86_64.rpm
rpm -i /opt/software/mysql-community-devel-5.7.8-0.3.rc.el7.x86_64.rpm
rpm -i /opt/software/mysql-community-server-5.7.8-0.3.rc.el7.x86_64.rpm
ps:
重新安装
systemctl stop mysqld
systemctl disable mysqld.pid
rm -rf /etc/my.cnf
rm -rf /var/log/mysqld.log
rm -rf /var/run/mysqld
rpm -e mysql-community-common-5.7.8-0.3.rc.el7.x86_64 mysql-community-client-5.7.8-0.3.rc.el7.x86_64  mysql-community-server-5.7.8-0.3.rc.el7.x86_64 mysql-community-libs-5.7.8-0.3.rc.el7.x86_64  mysql-community-devel-5.7.8-0.3.rc.el7.x86_64
rm -rf /var/lib/mysql
rm -rf /var/lib/mysql/mysql
rm -rf /usr/share/mysql
2.2.2配置
echo 'default-storage-engine=innodb' >> /etc/my.cnf
echo 'innodb_file_per_table' >> /etc/my.cnf
echo 'collation-server=utf8_general_ci' >> /etc/my.cnf
echo "init-connect='SET NAMES utf8'" >> /etc/my.cnf
echo 'character-set-server=utf8' >> /etc/my.cnf
ps:
默认存储引擎:innodb
为每张表设置存储引擎为innodb
排序规则为:utf8_general_ci
为每一个新连接设置编码格式:utf8
服务器端采用编码格式:utf8
2.2.3初始化
systemctl start mysqld
systemctl enable mysqld
grep "password" /var/log/mysqld.log
mysql_secure_installation
New password: Jcg7336$

Re-enter new password: Jcg7336$

Change the password for root ? ((Press y|Y for Yes, any other key for No) : n

Remove anonymous users? (Press y|Y for Yes, any other key for No) : y

Disallow root login remotely? (Press y|Y for Yes, any other key for No) : n


Remove test database and access to it? (Press y|Y for Yes, any other key for No) : n

Reload privilege tables now? (Press y|Y for Yes, any other key for No) : y
二、安装Hive
1.下载
官网:https://archive.apache.org/dist/hive/
下载地址1:https://mirrors.huaweicloud.com/apache/hive/
ps:
阿里云镜像和中科大镜像版本不全
2.解压
tar -zxf /opt/software/apache-hive-3.1.2-bin.tar.gz -C /opt/module/
mv /opt/module/apache-hive-3.1.2-bin/ /opt/module/hive
3配置
3.1将二进制路径添加进命令行
cp /opt/module/hadoop/share/hadoop/common/lib/guava-27.0-jre.jar /opt/module/hive/lib/;rm -rf /opt/module/hive/lib/guava-19.0.jar
echo "export HIVE_HOME=/opt/module/hive" >> /etc/profile
echo 'export PATH=$PATH:$HIVE_HOME/bin' >> /etc/profile
source /etc/profile
3.2配置hive-site.xml
3.2.1服务端
<?xml version="1.0" encoding="UTF-8" standalone="no"?>
<?xml-stylesheet type="text/xsl" href="configuration.xsl"?>
<configuration>
<property>
<name>javax.jdo.option.ConnectionURL</name>
<value>jdbc:mysql://master:3306/metastore?createDatabaseIfNotExist=true&useSSL=false</value>
</property>
<property>
<name>javax.jdo.option.ConnectionDriverName</name>
<value>com.mysql.jdbc.Driver</value>
</property>
<property>
<name>javax.jdo.option.ConnectionUserName</name>
<value>root</value>
</property>
<property>
<name>javax.jdo.option.ConnectionPassword</name>
<value>Jcg7336$</value>
</property>
<property>
<name>hive.metastore.local</name>
<value>false</value>
</property>
<property>
<name>hive.metastore.uris</name>
<value>thrift://master:9082</value>
</property>
</configuration>
3.2.1客户端
<?xml version="1.0" encoding="UTF-8" standalone="no"?>
<?xml-stylesheet type="text/xsl" href="configuration.xsl"?>
<configuration>
<property>
<name>hive.metastore.local</name>
<value>false</value>
</property>
</configuration>
<name>hive.metastore.uris</name>
<value>thrift://master:9082</value>
</property>
</configuration>
3.3jar包
cp /opt/software/mysql-connector-java-5.1.47.jar /opt/module/hive/lib/
cp /opt/module/hadoop/share/hadoop/common/lib/guava-27.0-jre.jar /opt/module/hive/lib/;rm -rf /opt/module/hive/lib/guava-19.0.jar
4.初始化
start-dfs.sh;start-yarn.sh
schematool -initSchema -dbType mysql
5.启动
5.1启动服务端
(方式一)
nohup hive --service metastore &
(方式二)
nohup hive --service hiveserver2 &
5.2启动客户端
(方式一)
hive
(方式二)
booline -u jdbc:hive2://master:10000 -n root -p 123456

 浙公网安备 33010602011771号